Summer Solstice + Roasted Tofu and Peanut Noodle Salad

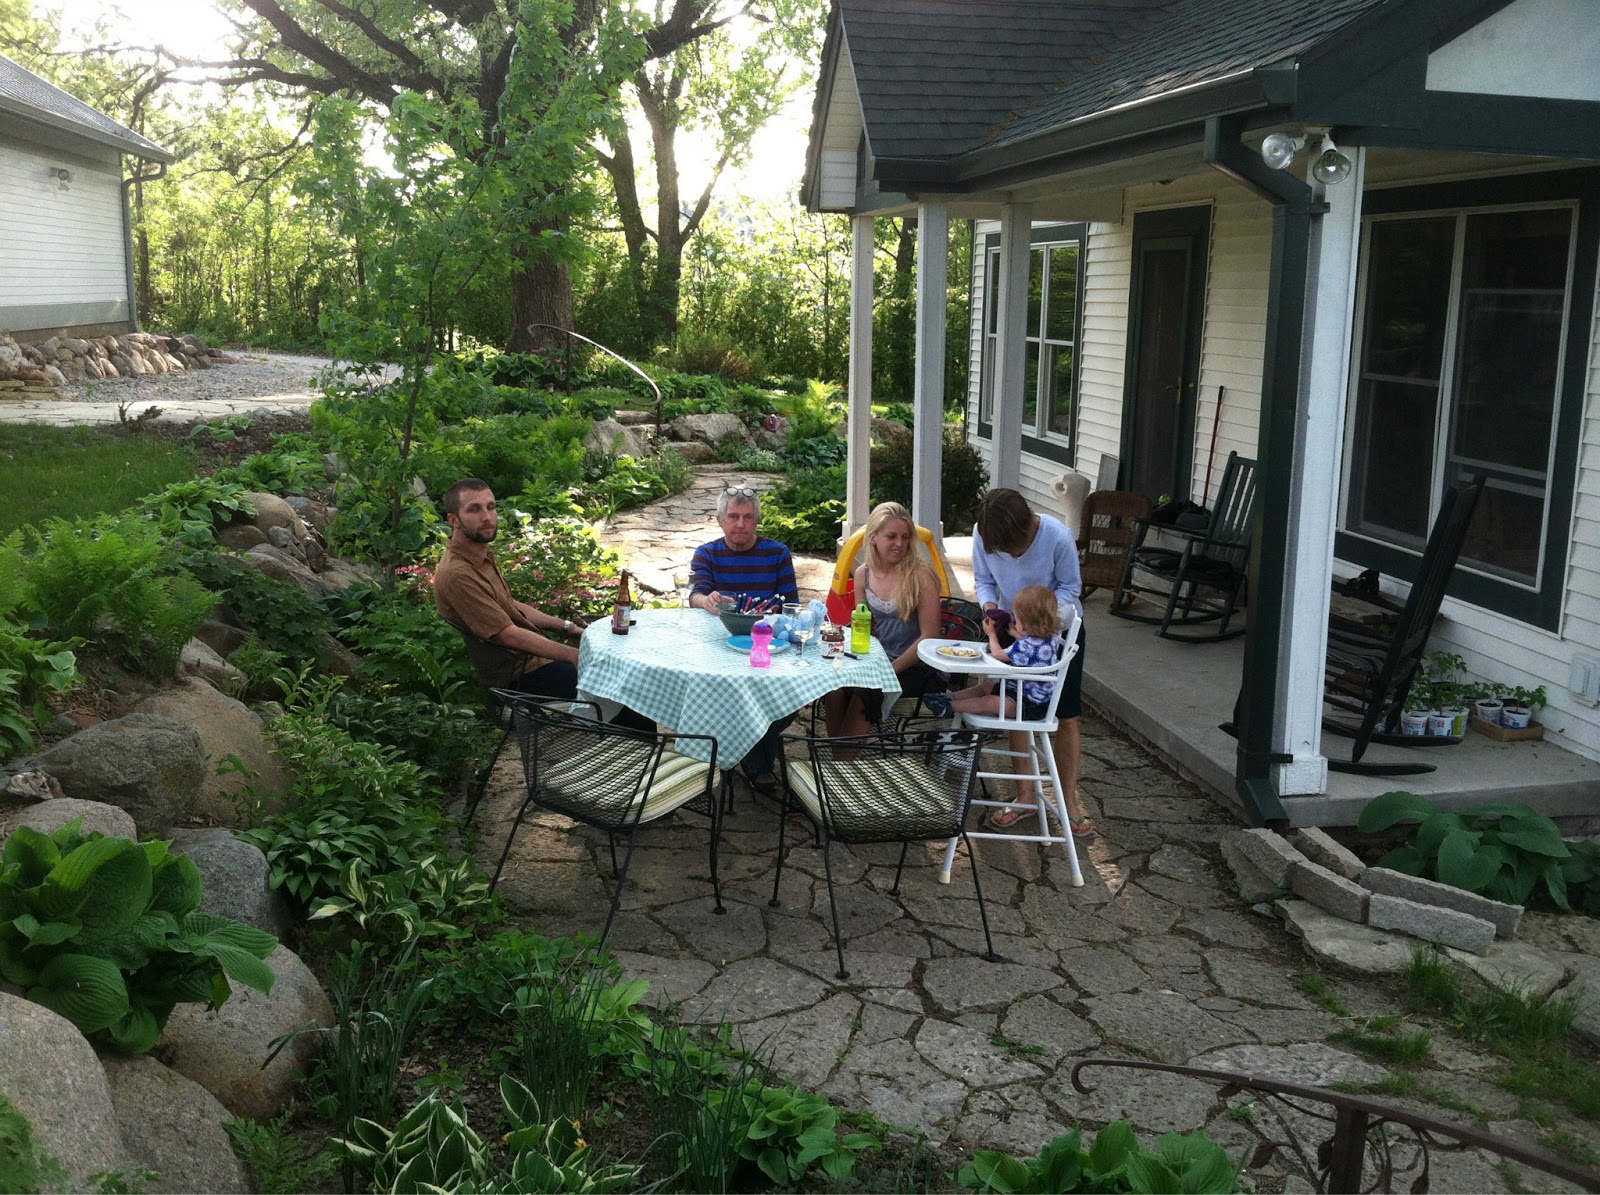
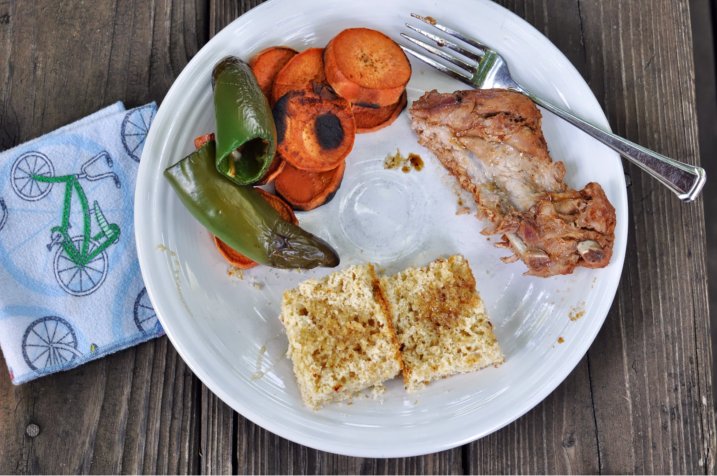
Oh yum oh yum.  This easy and cheap meal comes from one of my favorite magazines out there – Eating Well.  My mom requested that I make it for our summer solstice friend and family gathering on the 21st of June this year.  I served it cold, which was nice, since I made it ahead of time I had time to do other things in the few hours leading up to the informal gathering.

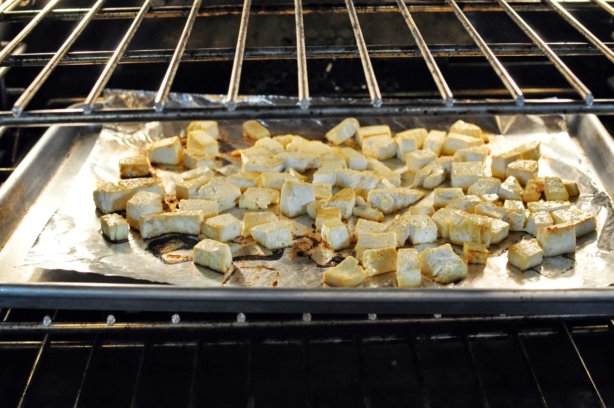
Extra-firm, cubed, roasted tofu is the only way to go, if you ask me.  I keep returning to this tried and true method.

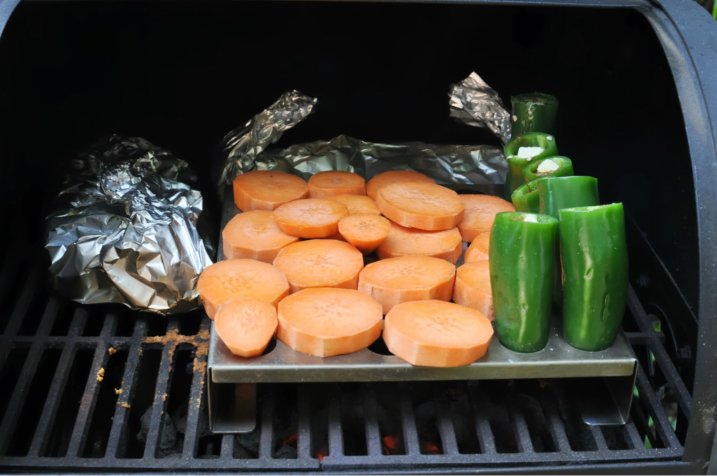
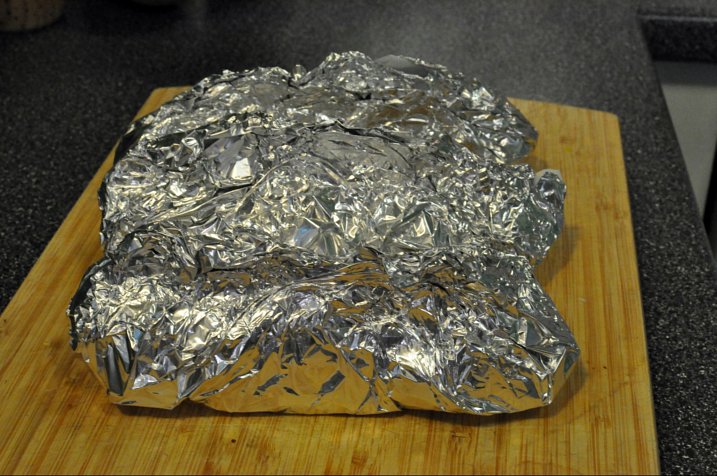
I always line with aluminum foil – this makes transferring the cooked tofu that much easier.  Simply pinch the open ends together and pick up the entire packet and dump into recipe.

Prep on this recipe is minimal.  Cook your pasta and drain.  Chop veggies and toss in marinade.  Combine together, mix well, and top with tofu and optional chopped peanuts.  Refrigerate until chilled. Serve cold. 
The bowl of noodles is still half full due to the copious amounts of watermelon, chips, salsa, nacho layered chips, and garlic green beans.  We were so full we forgot the deviled eggs and cooked shrimp that were still in the fridge.  

After large amounts of food and drink, we all headed outside to admire my mom’s raised beds and fenced in gardens.  So far, so good in terms of avoiding pests this year.  However, now I feel the need to knock on wood for her sake.  Her lettuce is gorgeous and even spells Greta!
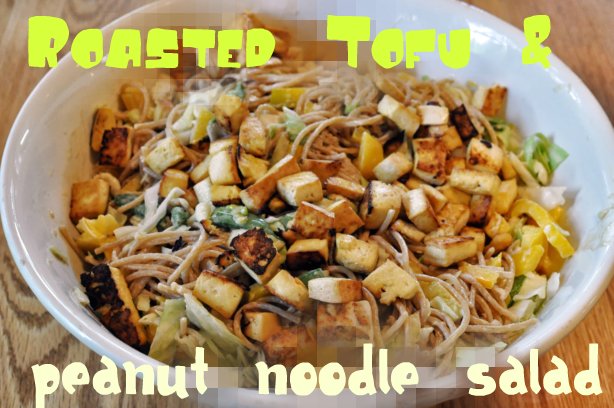
Roasted Tofu & Peanut Noodle SaladEating Well, August 2013
Serves 5, 2 cups each.
Total time: 40 minutes.

1. Position oven rack on lower third of oven; preheat to 450 degrees.  Line rimmed baking sheet with aluminum foil.  Put large pot of water on stove to boil for spaghetti.

2. Combine ¼ cup lime juice, ¼ cup low-sodium soy sauce, and 1 tablespoon canola oil in a large bowl.  Stir in 1 16-oz package of extra-firm tofu cut into ½-¾ inch chunks.  Allow to marinate at least 10 minutes, stirring frequently.

3. Transfer tofu to foil-lined pan using a slotted spoon.  Reserve the marinade.  Roast the tofu, stirring once halfway through, until golden brown, 16 to 18 minutes.

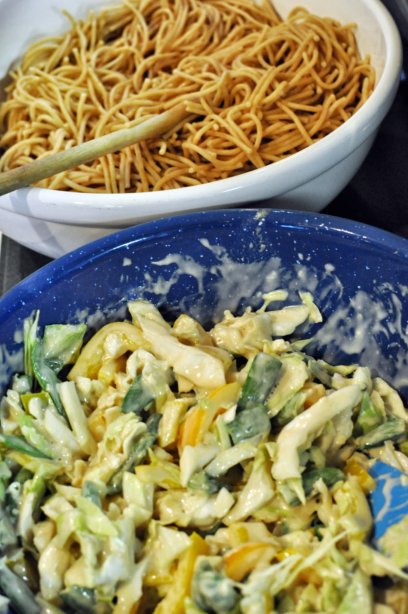
4. Meanwhile, cook 1 box of whole wheat spaghetti according to package.  Drain and set aside.  Stir in 1 tablespoon of oil to prevent sticking.

5.  Thinly slice 2 medium orange bell peppers.  Thinly slice 6 cups of napa cabbage.  Thinly slice 1 cup trimmed snow peas, or chop 1 cup peas in pod.

6. Whisk ½ cup creamy all-natural peanut butter, 3 tablespoons water, 3 cloves of minced garlic1 tablespoon minced fresh ginger, and reserved marinade in a very large bowl.  Add the drained spaghetti.  Add cabbage, bell peppers, and snow peas.  Toss to coat.  Top with roasted tofu and optional chopped peanuts.  Refrigerate until chilled and serve cold.

Per serving:
423 calories; 21 g fat (2 g saturated, 5 g mono); 0 g cholesterol; 42 g carbohydrate; 0 g added sugars; 21 g protein; 8 g fiber; 546 g sodium; 321 mg potassium.  Nutrition bonus: Vitamin C (133% daily value), Vitamin A (46% daily value), Calcium & Magnesium (26% daily value), Iron (21% daily value).

A Greensboro Goodbye + Move to Iowa

This is a lengthy post and long overdue.  But, I felt I had to put in some effort, in saying good bye to a place and a group of people who have captured my heart for the past eight years.  The goodbyes started with one last dinner at Sticks & Stones Wood Fired Pizza.  Oh how I will miss the Kiss Before I Go pizza and Hoppyum beer. My colleagues from the 8th Grade hallway helped me tearfully say goodbye.

Then it was one last lunch at Natty Greene’s.  I will miss the Charlie Tuna Ahi sandwich and all of their locally brewed beers.  By this time, my mom and friend Aaron had made it to Greensboro.    I tried a delicious smoked peach IPA.

Greta came home from daycare to find a huge truck outside her house.  She was so excited to get to sit in the driver’s seat and pretend to drive.

Relaxing got harder the fuller the truck got.  We managed to fit a dinner in at Kiosco’s and some couch time.  Greta enjoyed sitting between daddy and Aaron.

Oh boy.  The heavy stuff.  Big thanks to Eric and Aaron who filled this 26 foot bad boy.

Goodbye Greensboro home.  It was a great starter home and we learned a lot about DIY projects.

We decided to stay in a hotel the night before we left – this was the best decision yet.  For dinner we headed to Gray’s Tavern on Elm St. in downtown Greensboro.

Greta enjoyed the signs on the street more than anything else.

Next it was off to a Greensboro Grasshoppers game.  It was a perfect night for a ball game and I am so glad we got this one last treat in Greensboro.

We sat on the hill with a couple friends and enjoyed the Natty Greene’s beer and sights and sounds of the hill.

Eric scrambled and got his first ever baseball.  He was nice and gave it away to a very polite little boy who came over to congratulate him.

It was a beautiful night, so we decided to walk on to McCoul’s for another last.  McCoul’s will be missed for its fantastic rooftop patio.

And then Elliot appeared!  He drove down from Washington D.C. to help celebrate Aaron’s birthday.  I felt horrible, we made him help us move on his birthday.

Found this lovely lady dining with her family at McCoul’s.

I absolutely love what is going on in this shot.  Too much fun. 

After a sleepless night at the Biltmore (can you say scooping the loop hotel?), we headed to Bestway to pick a few last minute items.  I will miss the local NC goods and wall o’ beer.  Then we were off.

We took the route north through the mountains, first through Virginia and West Virginia.  Meanwhile, the guys and the truck headed west to Asheville, NC.

Thankfully, Greta is a car napper and a good one at that.

I love driving through windy Charleston, West Virginia.  The capitol building is easily seen from the road.

Greta go disgruntled and so I broke out my stash of stickers that I have been stockpiling since Christmas.  These just happen to be unused yearbook Jostens stickers. 

Dina made a reappearance on this trip!  Greta finally learned to say Dina and said it constantly, and is in fact, still saying it right now.

We stayed overnight in Louisville, Kentucky.  Greta, my mom, and Brownie enjoyed some non-car time in the parking lot of our hotel.

The drive out of Louisville is always so beautiful.  I keep saying I want to come back to this town for a proper stay and not just an overnight stop, as we so often have done.

Greta amazingly stayed fairly entertained in the car.  The tube of puffs were a life-saver and a gift from a friend, Julie, in Greensboro.  Thank you again!

We stopped at some beautiful rest stops and Greta did her best to be helpful.

Greta stayed cheerful and happy with books, but even that too eventually ran out.

So, out of desperation, I gave her a bag of diapers.

She unfolded and stacked them in her lap.

She moved piles of them off to the side.

She played peek with them.

She threw them.

And then, the bag was a hat.  At this point, I promptly took the bag away and brought out art materials and stickers again.

Eventually things began to level out and look more Midwest-like.

We finally made it to my parents’  house and survived the 1, 000 or so mile drive.  Greta was eager to play with her car waiting for her on the patio.

Another happy moment: reuniting with her cats.  Tsali purred and purred with seeing Greta again. Neither cat seemed to remember Brownie, and so things were a little shaky and scary for a while for the two cats.

I took a brief walk with Brownie after Greta was in bed and enjoyed the familiar sounds and sights of the Iowa landscape.

Tsali was happiest to see me though.  The guys arrived in Des Moines the following day with the truck.  We unloaded everything in two days and began the remodel process.  More on that to come soon.  

Ceramic Buttons to Melted Wine Bottles

Life hasn’t been all packing and boxes lately – I have had some time to create.  I made some fun buttons, pendants, and magnets this spring.  I am going to explore button-making further this summer and into the next school year.  I am sensing some fun projects for the kiddos to come from this.
The buttons, pendants, and beads worked their way to pinch pots with indentations in the bottom.  I filled these with shards of glass so they would melt and fill the spaces.  This of course, got me thinking about melting glass in general. 
This melting glass got me thinking about melting entire bottles.  I knew it couldn’t be that hard, I just had to watch the time and temperature of my kiln.  The green one is a wine bottle and the blue one a tequila bottle. 
Using cone 5, this was the combination of time & heat that Eric used.  This created a very flattened bottle with opening fused closed.  
I also tried used cone 5, and fired on low for 1 hour.  Then turned the temperature to medium for 1 hour, and then to high for 1.5 hours.  Watch the kiln carefully when it is on high and have some heat proof gloves handy to peek into the kiln.  As soon as the glass bottles have fallen flat, turn off the kiln and prop the lid.  Wait until the kiln is completely cool before handling bottles. 

I used cone 5, fired on low for 1 hour.  Then turned the temperature to medium for 1 hour, and then to high for 1.5 hours.  Watch the kiln carefully when it is on high and have some heat proof gloves handy to peek into the kiln.  As soon as the glass bottles have fallen flat, turn off the kiln and prop the lid.  Wait until the kiln is completely cool before handling bottles.

The white marks on the bottles above are the ash from the labels burning off.  These easily wash off with soap and water.

The Flying Circus Whirlwind Trip to Iowa

Oh my, how much can change in the span of a week.  Our house is so quiet these days, as these two doofuses are now residents of the state of Iowa.  We flew to Iowa a couple weekends ago to drop the cats off with my parents, look at houses, and for me to interview for a job. Since that trip we have sold our house, bought a house, and I have a job!

The house sold while we were in Iowa.  We found a perfect house and close on it very soon.  The job is perfect and I can’t wait to tell you more about all three of these things soon.  I feel like we won the lottery!

But, back to our trip to Iowa.  We started with a long meow-filled drive to Charlotte.  Thor, the black and white cat, meows non-stop in cars.  By the time we got to Charlotte, Greta was also meowing non-stop, but in perfect intervals between the cat.  Good choice to fly with them instead of the 17 hour drive.

Here are a few tips for flying with cats based on our experiences:

1. Make sure your cat is up to date on vaccinations.  Take him/her to the vet before flying and get certificates of health as well, just in case.

2. When going through airport security, ask for a private screening room.  This way your cat(s) can be pulled safely out of the carrier without fear of a lose kitty in the airport.  This was much better than the tip given to us by our vet of putting the cats in a pillow case and walking through with them.  When we told the TSA guys about this they looked very puzzled.

3. Put a shirt worn the previous day into the carrier.  This way your kitty will have your scent to calm them down through the stresses of travel.

4. Limit water and food intake the day of traveling.

5. Find quiet places to sit with the cat and carrier during the layover.  We stopped in a family bathroom with a small makeshift litter box to give the opportunity to use the restroom.  However, both cats were too stressed to do much of anything.

6.  Call before flying – we discovered that only 4 animals are allowed on a plane at a time, so calling in advance is a must.

7. Once you reach your destination, give your cat some time to unwind.  We left the carriers out as a home base, but showed both cats where the litter box, food, and water was located.  Expect a couple days before things return to normal.

Greta enjoyed looking at the flight safety information.  She picked up the word airplane very quickly!

Once in the Minneapolis airport, Greta settled in with some pizza and watched people.

Watching baggage trucks was almost as much fun.

We got to Des Moines without much of a hitch.  The cats were dropped off at my parents’ house and we were set to spend some quality time with Bapa.

Lots of goofing off ensued.

It was a nice warm Iowa night and so we spent some quality time playing outside.  Greta even shared with me!

I am so looking forward to more time at the grandparents’ houses.

Greta had a car waiting for her at her other Bapa’s house.  This provided hours of simply getting in and out of the car.

We enjoyed a lovely meal outdoors at my parents’ house.  Whenever my sister is around, she takes charge in the kitchen.  I keep trying to get her to join forces with me so we can do Sisters Medley on this blog.

Heaven is an Iowa evening.

Caroline made these fantastic grilled salmon packets – simply salmon filets, slices of lemon, and grapefruit balsamic vinegar, wrapped in foil and grilled until done.

Alas, we had to leave too soon.  When we left however, this silly cat was well adjusted and happy for large windows that are left open more often than in Greensboro.

Thor was settled in too, and even saw us off in the wee hours of our departure date.

Greta was a lucky girl and even got her own seat on our second flight.  She slept on Eric’s arm the entire way.

Once home, Greta immediately began asking about her ditties.  She looked for them and would not relent until we showed her the pictures on my phone of the ditties in Iowa.  I went about my way of distracting myself when bothered and arranged couple of bouquets of flowers from the garden.  The peonies and irises were just finishing up when we returned.

Today was the last day of school.  I was home with a feverish Greta, which in some ways was a blessing in disguise. I knew I’d be a weepy mess, so staying busy actually wasn’t all bad.  

Chili Coconut Cornbread + Memorial Weekend Grilling

I am way behind on this blog here lately.

It is because our house is quickly being put away into boxes. My little superhero is doing better than I expected as things get boxed up and put away.  She did discover the joys of stomping on bubble wrap.

We made time over Memorial Day Weekend to hang out on the deck and enjoy our last couple weekends in Greensboro.  We decided that grilling out for lunch on Sunday would be a good way to relax.   Greta was taking a long afternoon nap, so we got to work cooking.

I whipped up this new recipe that uses only corn flour – no wheat and coconut sugar and oil in place of refined sugar and vegetable oil.  So, I guess it sorta falls under that pesky clean eating label.

Mix together dry ingredients.  The crushed red pepper flakes add a nice zing to the island cornbread flavor.

Swap out the vegetable oil for coconut oil.  Simply warm the coconut oil briefly in the microwave for a few seconds, pour the oil into the bowl with the wet ingredients, and then use the drippings to oil the baking pan.

 Mix together all ingredients in a few swift strokes.

Pour batter and smooth into an 8″ square pan.  Bake at 375 degrees for 20 – 25 minutes or until a knife inserted comes out clean.

Serve warm with honey.  We had a few other tasty sides – stuffed jalapeno peppers, grilled sweet potatoes, and Eric made ribs.  I am not much of a rib person, so I can’t really tell you much about the ribs other than he marinated them, baked them in foil, and then grilled them.  I can however, tell you about the peppers and sweet potatoes – read on for more.

Eric has this nifty knife that cuts and then cores a jalapeno pepper in a neat little twist.

 He slice a few of these peppers and loaded them into his pepper grilling tray.

This tray is perfect for keeping your stuffed peppers upright in the grill.  We threw on some sliced sweet potatoes and sprayed them with oil.

 Eric stuffed the jalapenos with chunky salsa, sliced sharp cheddar and a sprinkling of Kosher salt.

 Grill them all to perfection.

 It all fit perfectly with his ribs.

 These are two of my favorite vegetables and they are together!  I was so excited for this meal.

Here is the whole shebang meal.  Those cute little bicycle napkins are made by my Aunt – check out her Etsy site if you’d like a set of cloth cocktail napkins for yourself.

Chili Coconut Cornbread

1. In a medium bowl, stir together 2 cups cornmeal, 1 tablespoon coconut sugar, ½ teaspoon salt, 1 teaspoon crushed red pepper, 1 tablespoon baking powder.

2. Microwave 2 tablespoons of coconut oil in a glass measuring cup, until liquid.  In a medium bowl, whisk together 2 eggs, 1 ¼ cup unsweetened coconut milk, and 2 tablespoons melted coconut oil.

3. Use leftover melted coconut oil drippings to grease an 8′ square pan.  Pour batter into pan and smooth out.  Bake in a 375 degree oven for 20 – 25 minutes or until a knife inserted in the center comes out clean.  Serve warm with honey.

DIY Felted Wool Balls

I made sets of these felted balls a few years ago as presents for friends and family members.  Put them together in sets – half in one color, half in another, with a smaller different colored felted ball and you have an indoor bocce ball set. 

Start with felted wool sweaters.  To felt sweaters, take 100% wool sweaters and wash them on hot and then dry them on hot.  Cut felted sweaters into strips and rectangles. 

Begin fashioning the rectangles and strips into lumpy spheres.  Use the strips to tie knots to hold it all in place.  It’s ok if the spheres look really lumpy and messy – we will fix that soon enough.

Once you have the approximate shape and size for your sphere, wrap the felted core in roving wool or 100% wool yarn.  Wrap until the felted core is completely covered, making sure to wrap in several different directions around the sphere.

Here are my 5 wrapped orbs. A few pockets of felted core showing are ok, however they will most likely show up in the finished product, so if you want to avoid that, wrap completely.

Carefully slip the wrapped orbs into OLD socks, push down to the toe gently.  Twist the sock closed and secure tightly with a twist tie.

Wash in hot water and a small amount of detergent.  You can also boil them in a large stockpot for 10 – 15 minutes for a quicker felt.  However, only boil like colors with like colors as the dyes tend to run and bleed in boiling water. 

Greta immediately loved these felted balls – grabbing for them while I tried to photograph them.

Greta discovered that her felted wool balls fit into her plastic cone set that is supposed to go in the sandbox.  However, it is way too much fun and so has never made it out to the sandbox and just stays in the house.  Now she likes to pair up felted balls with cones – we just have to work on avoiding the pairing of mustard & ketchup.  : )

This is a fun and easy day project that requires minimal planning, prep, time, or skill.  The nice thing about these felted balls is that if they should happen to get funky just throw them in the wash and dry them.  They are already felted, so no need to worry about shrinking any more.  Some people even add scented oil to these and turn them into natural dryer balls/sheets.

Printer’s Shelf turned Jewelry Storage

This printer’s shelf was a wedding gift from a friend and admittedly it has been hanging out in my art room for quite some time.  Having seen various ways to turn these into lovely works of art for displaying jewelry, I decided to take this in my own direction, and make it a memento of our home in North Carolina.  The only reason Eric is holding it and it is not adorning my wall is that we are in the throws of packing right now – 2 weeks and counting!
This is an easy project that any novice can complete with ease – with only 2 or 3 steps total.  Clean it up first and then drill holes into the boxes where ever you want the hooks to be placed.
Insert small metal hooks.  I put most of mine in the middle – I think I will go back and add a few more in some of the boxes so I can maximize the storage potential.

To add some funky flair to my jewelry storage, I painted the insides of the boxes using old paint colors from our house.  The orange is my current dining room, the black the chalkboard wall in the play room/art room, the blue our bathroom, and the blue-green our bedroom.  This way, in the new house, I will have a memento of our first house and its fun colors.  I only wish I had the paint from the kitchen – I love that green.

I cannot wait to hang this in our new bedroom – let the debates begin on new paint colors!

DIY Beer Flight Sampler Paddle [How-To]

In response the great interest in the first installation of the DIY Beer Sample Paddle, I have another post for you on this very same topic.  This time however, there are more detailed images and steps to explain the process.  There are no plans however, as the design seen above was drawn free-form.  Eric wrote this post, so I guess it is more of a Daddy’s Medley, this time.

I set the glasses out on the wood and marked the locations before drilling.

The holes are hand drilled, I would recommend clamping your wood down to your work surface, with a large bit the drill can catch the wood and kick it around.  If you have access to a drill press, use it.  Know what size glasses you intend to use before drilling your holes, do a test fit on scrap wood.  Be sure to check how close the glasses will sit to each other.

This is scrap poplar left over from another project.  Any type of wood will work.

Tracing to ensure a perfect fit.

The base was from a 1×4 pine plank.

Not everyone has access to all the tools out there.  If you do not have a spindle sander, a piece of sand paper taped and wrapped around a ½ inch drill bit works well enough to sand inside the hole cuts.

This method worked well for smoothing the inside of the holes.  It also made the fit for the glasses absolutely perfect.

Prepping by sanding, the surface before gluing.

Apply the glue and wipe off any extra after clamping.

Apply clamps.

The more even the pressure the better the fit.

The edges do not look perfect, as the wood was not planed.  Allow the glue to dry, and then after trimming it will look much better.

Rough sketch of a design for the finished flight paddle.  I wanted to create something more organic and free form than the previous simple plank form.

Bandsaws can use a variety of blade sizes: ⅛ to ¾, depending on the machine.  This blade is about a ¼ – a narrower blade will cut more intricate curves.  Here is a video about blade selection from Laguna Tools.

Sawing the handle.

You can see the two layers of wood here – the contrast is an interesting part of this flight paddle.

After sanding the entire piece smooth, Chelsea painted the base of the flight paddle with black lacquer.  She used a dotted motif meant to be reminiscent of the lacing created by beer in a glass.

She painted the insides of the indentations for the tasting glasses as well.  After the paint was dry, she sprayed it with a few coats of a clear sealant.  The handle works perfectly and the four glasses fit snugly in their rings.  We already had this glassware, but I recommend this set of 5 oz beer taster glasses, as well.

Now all we need are a few brews to sample.


Spiced Corn on the Cob

One thing I am really looking forward to about the move back to Iowa is sweet corn.  There is nothing like sinking your teeth into fresh sweet corn on the cob.  I mourned sweet corn during the years I had braces and could not wait for the day to have them removed – the day AFTER yearbook pictures were taken in ninth grade.  Go figure. 
Anyway, we had our first sweet corn of the season recently and I tried out three wonderful flavor mixtures the last time we made corn on the cob.  Check them out below.  
After husking the corn, see here for a secret to husking corn that I will have to try next time, place corn onto parchment paper and prepare with seasonings.  I broke my ears in half so Eric and I could try all three flavors and choose our favorite.  
For the first ear, I used a smear of margarine, a sprinkling of coconut sugar, and Cajun seasoning.  

For the second ear, I used Sriracha hot sauce and minced garlic.  

The last ear, I used a smear of margarine, a sprinkling of crushed red peppers, and a sprinkling of lime juice.  

I was pretty sure this one would be my favorite – there is just something about hot peppers and limes that get me every time!

Roll the parchment around the corn cobs and then place in aluminum foil.  Fold the edges over the points of the cob first and then pinch long flaps together to make a mohawk on your corn.  Pinch the mohawk together to ensure no loss of flavorings.

Bake in a 425 degree oven for 20 to 25 minutes.  Open foil packets and allow to cool slightly before serving.  
Pretty sure we’d put this cookbook to good use.
Eric’s favorite was the Sriracha combination, due to its spicy heat, but let’s face it, we’ll put Sriracha on anything around here.  I liked the pepper and lime corn – the lime juice made the flavors of the corn and pepper so much brighter.  The Cajun one was equally good –  I could see that flavoring served with hush puppies.