Small Kitchen Remodel

When we bought our house in the summer of 2007 we knew there were a lot things to be improved upon.  One of the hardest to live with (for me) areas was the kitchen.  It was a tight space with a strange layout and wasted space.  

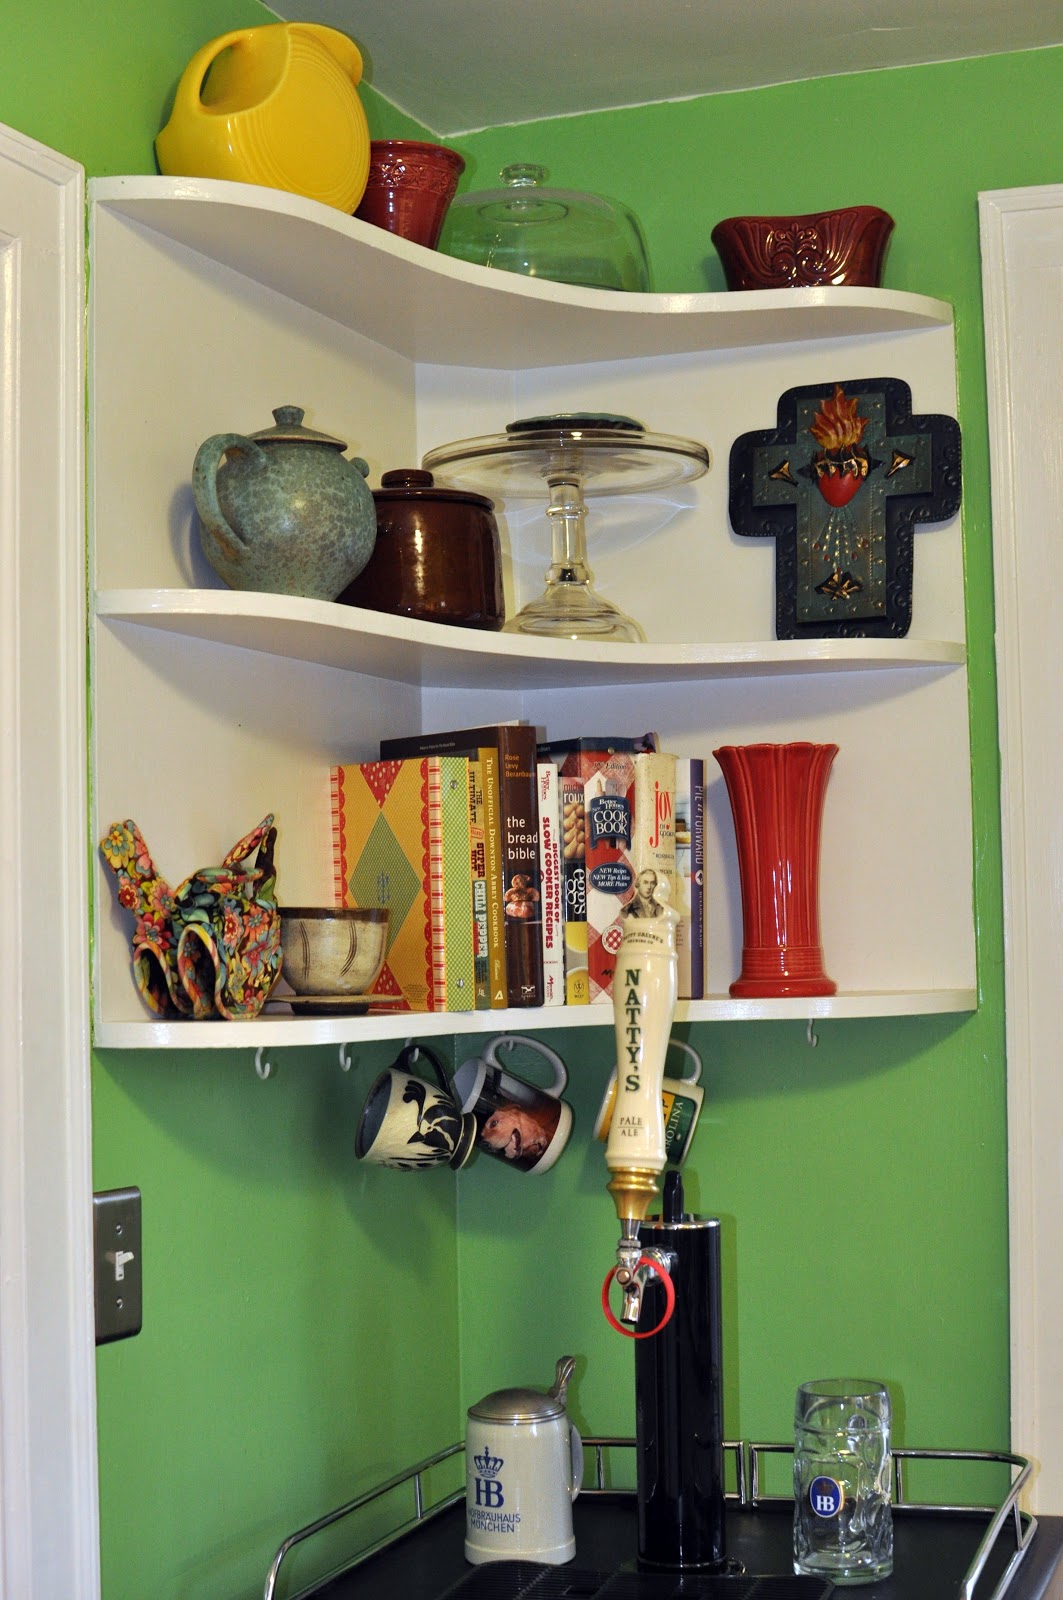
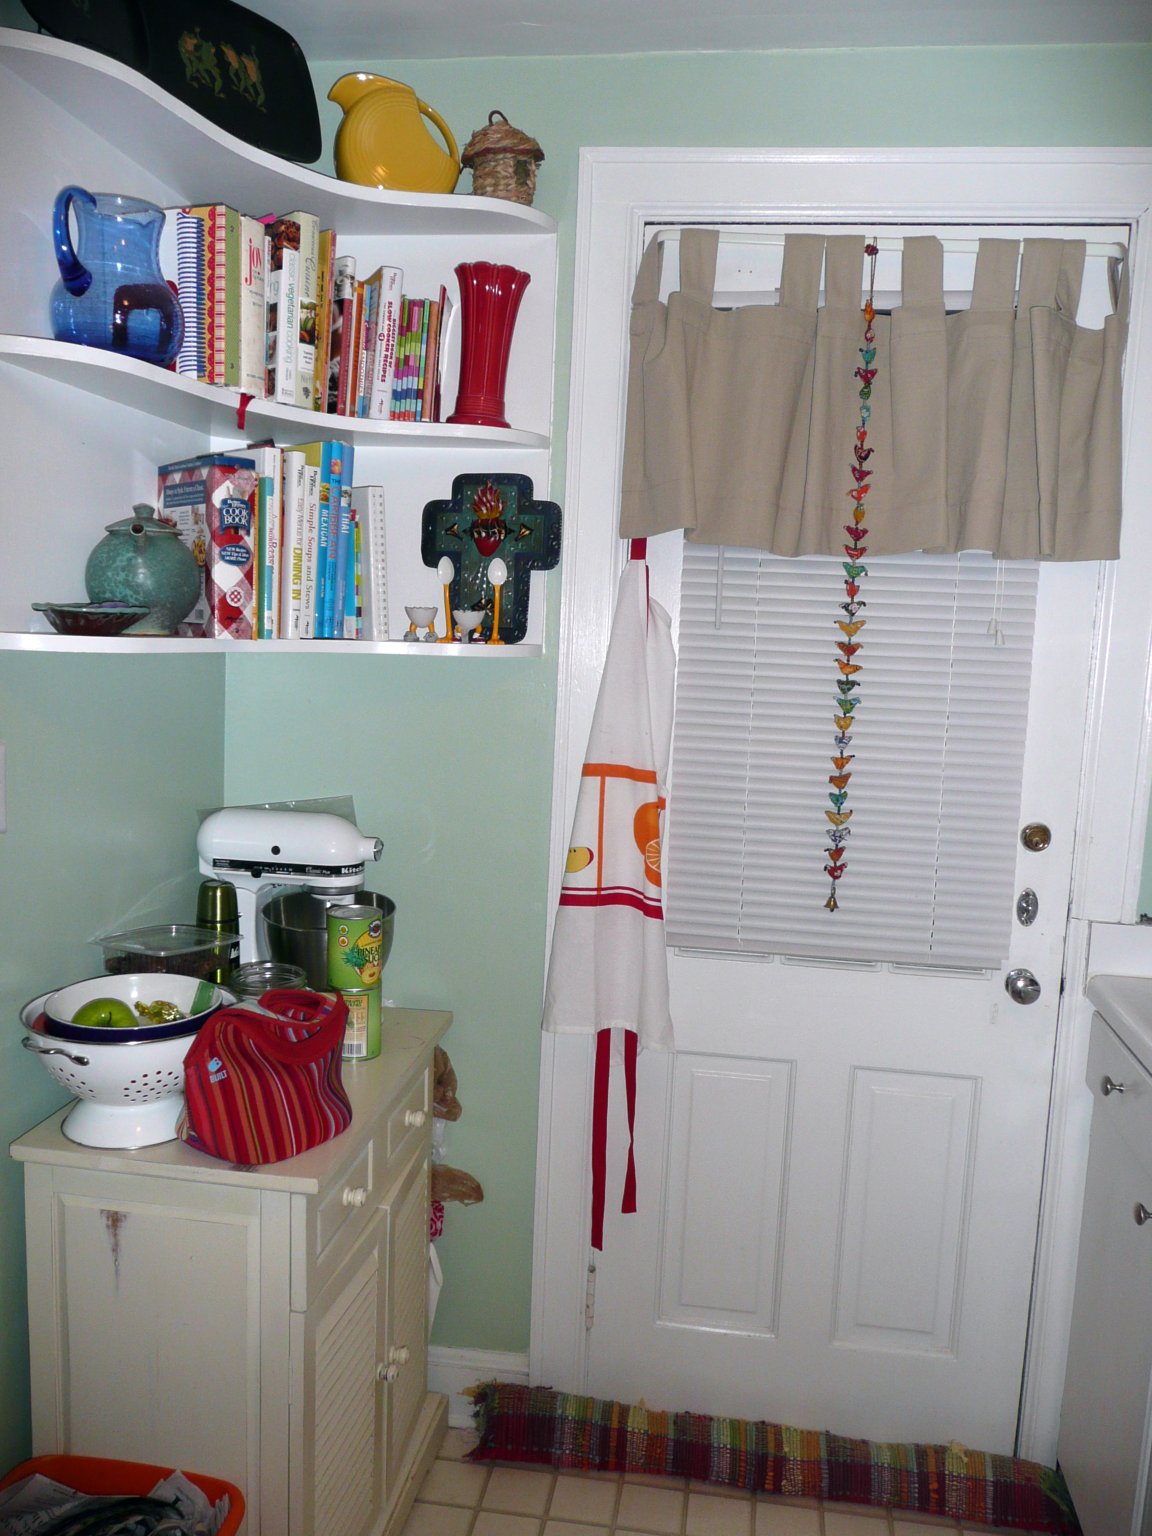
 The door here goes outside to the garage and driveway area.  The built-in shelves hold cookbooks and extra kitchen wares.  The dresser below came with the house and held flour, sugar, and extra baking items.

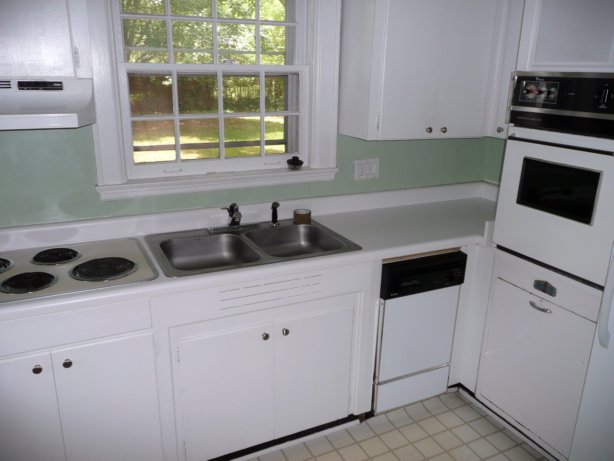
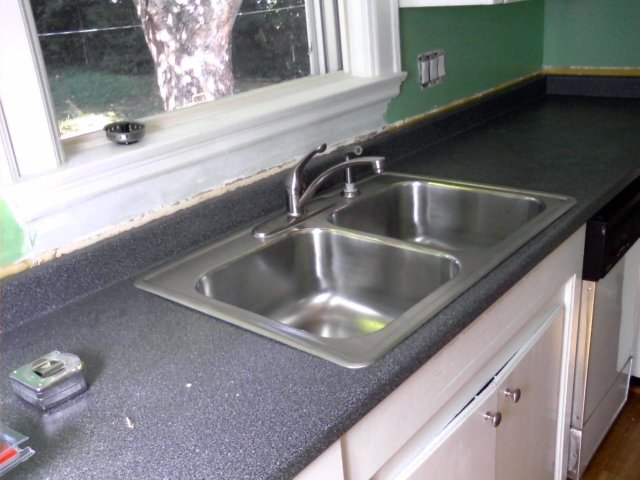
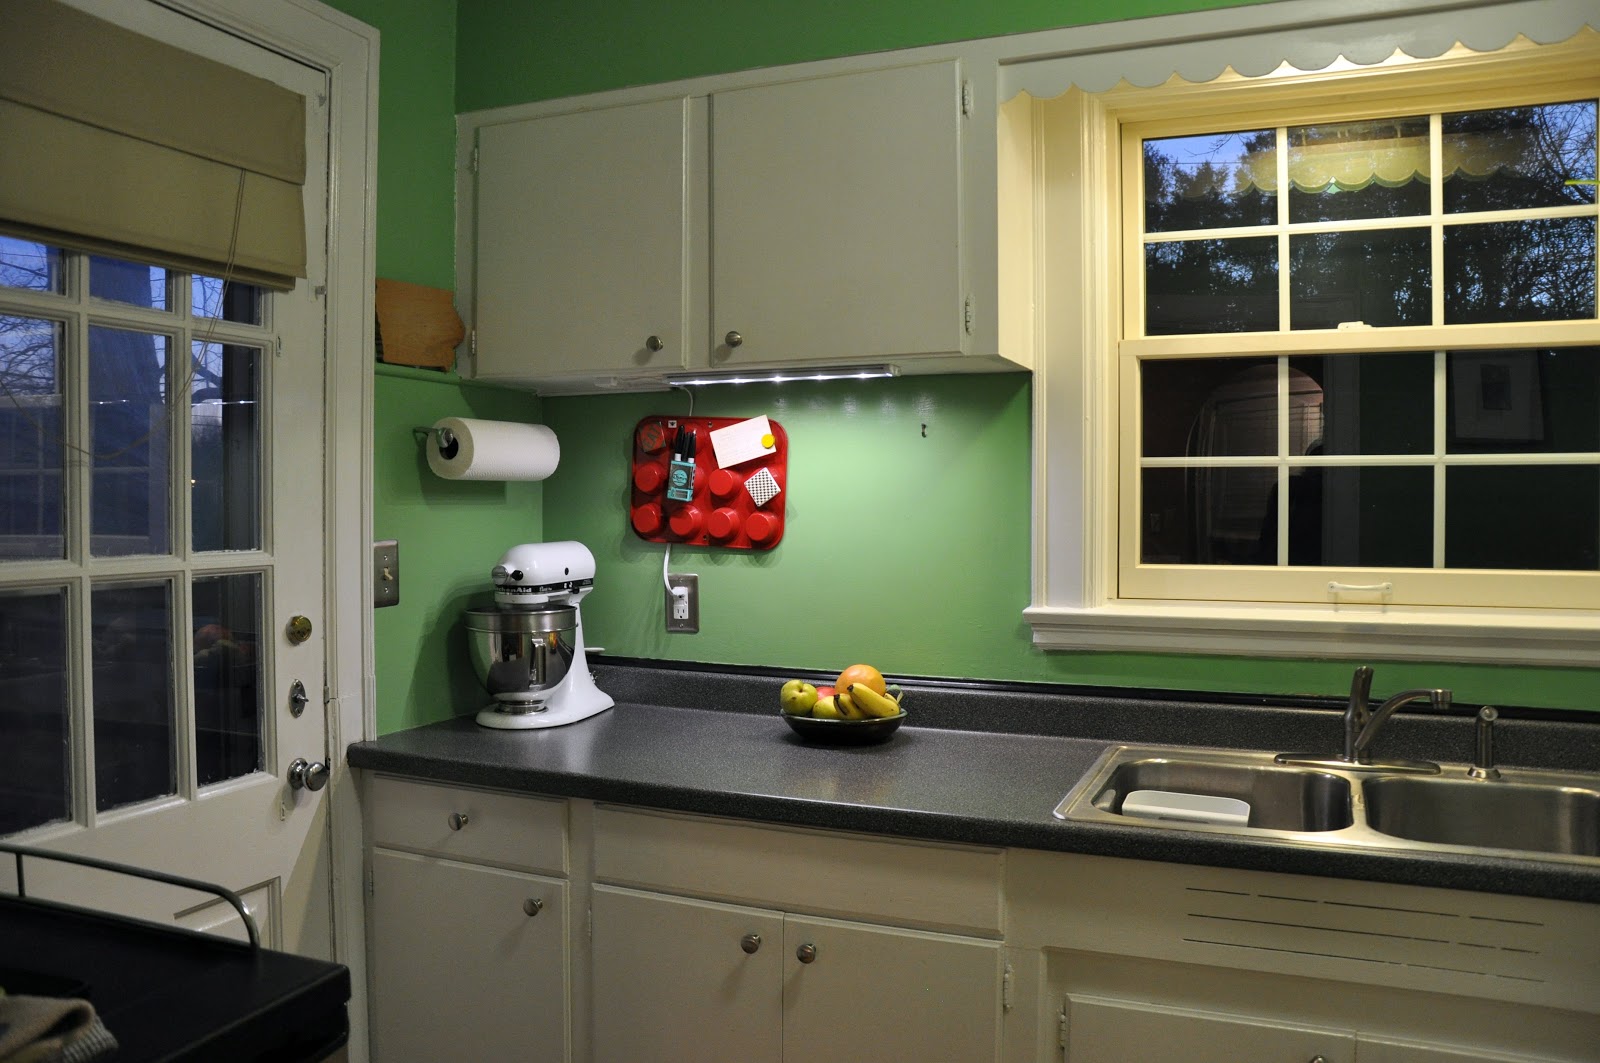
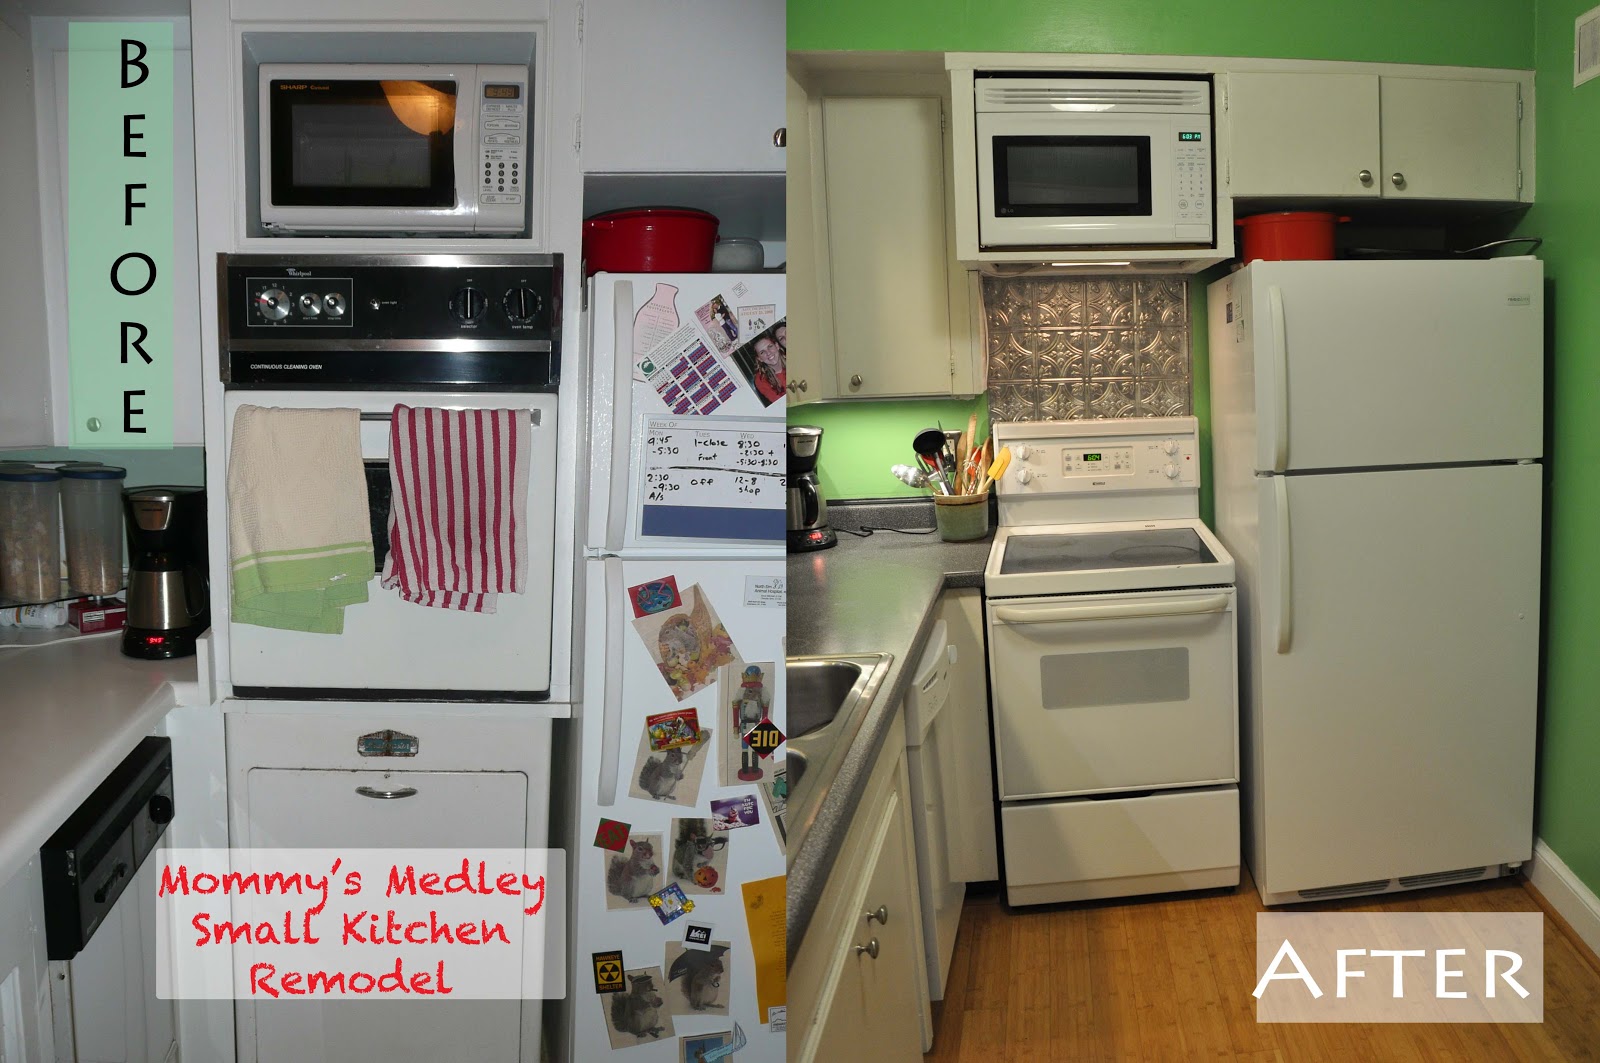
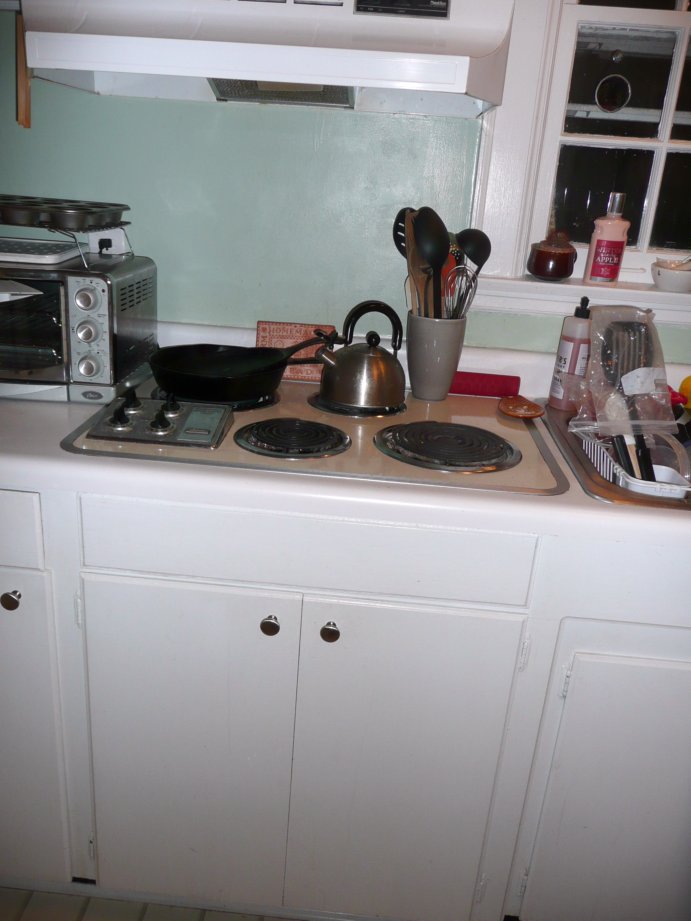
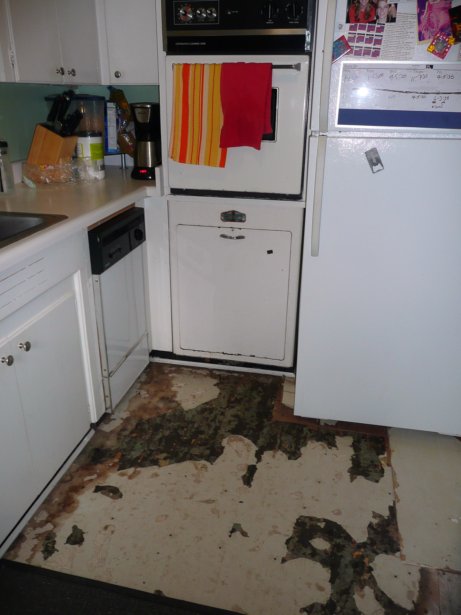
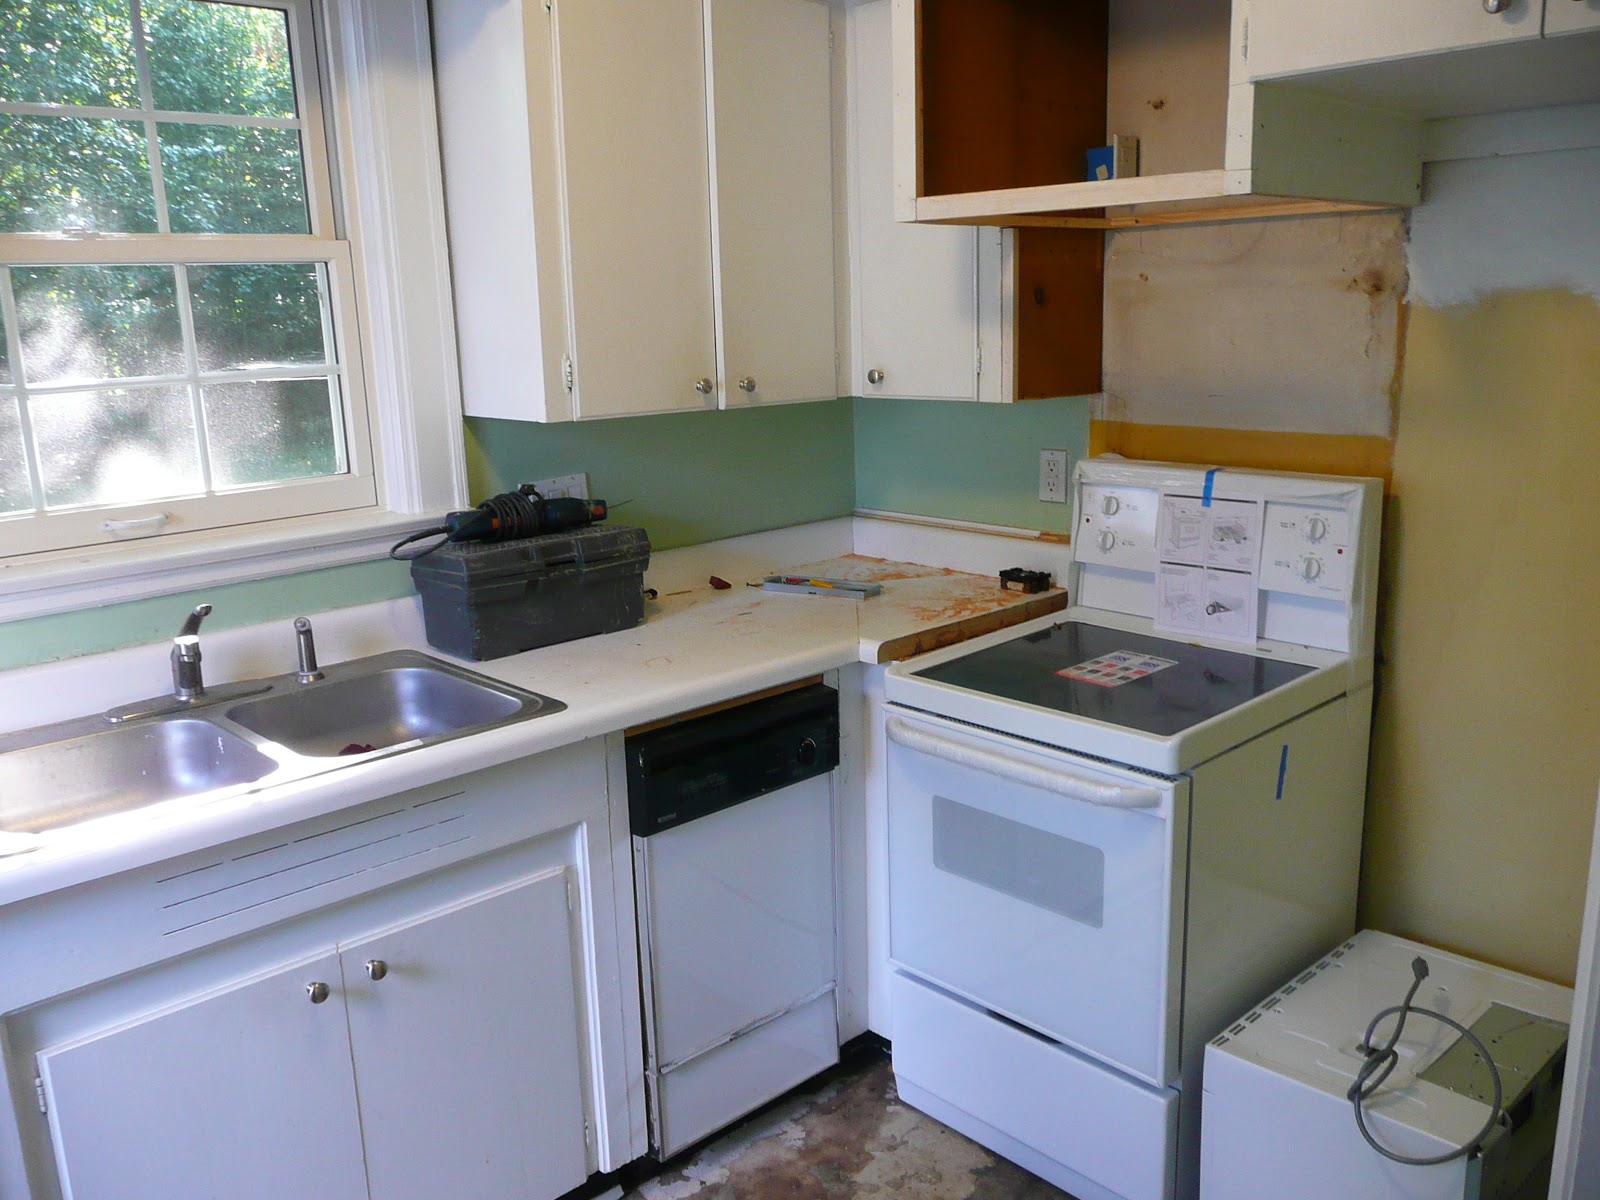
The oven is shown on the far right here with the microwave built in above it and an unused hot water heater below.  The stove is across the room on the left side with cabinet below it.  The sink was a very shallow sink with gross leaky faucets.  The white counter top had years of stains and lack of cleaning  It also had to go.  There was a lot left to be desired in this kitchen.

The little dishwasher wasn’t so bad, it didn’t take up as much room as a larger one would have.  It was just a little nasty and very very loud.  

The stove top being separate from the oven is what killed me.  Look at all that wasted counter space!  

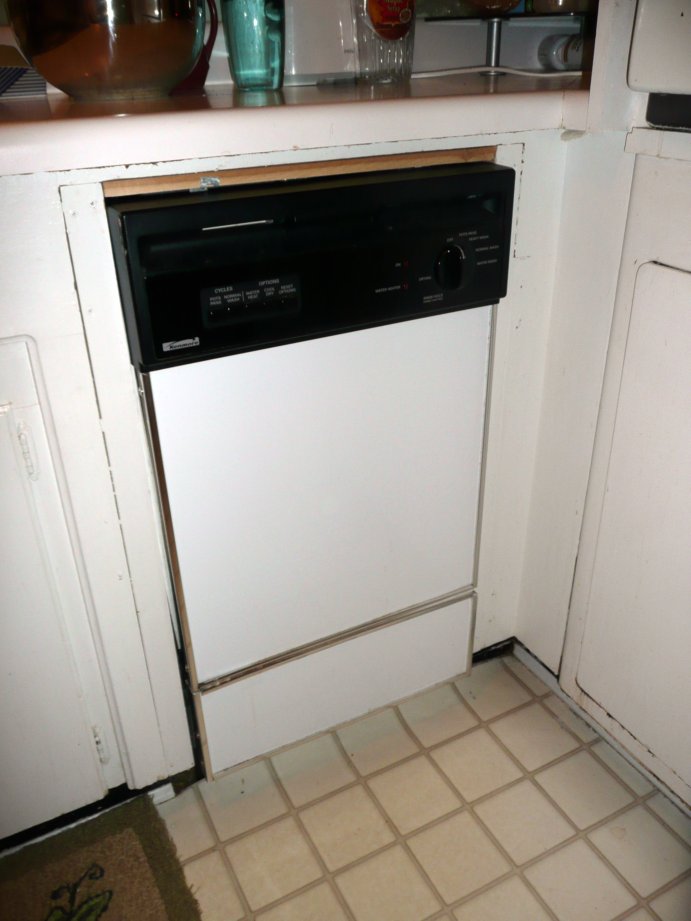
See that curling piece of linoleum flooring under the dishwasher?  In the summer of 2009, I took Eric to get Mexican food one night and after a margarita, convinced him we should cut into the floor and see if there were hardwoods underneath.  Devious, I know.

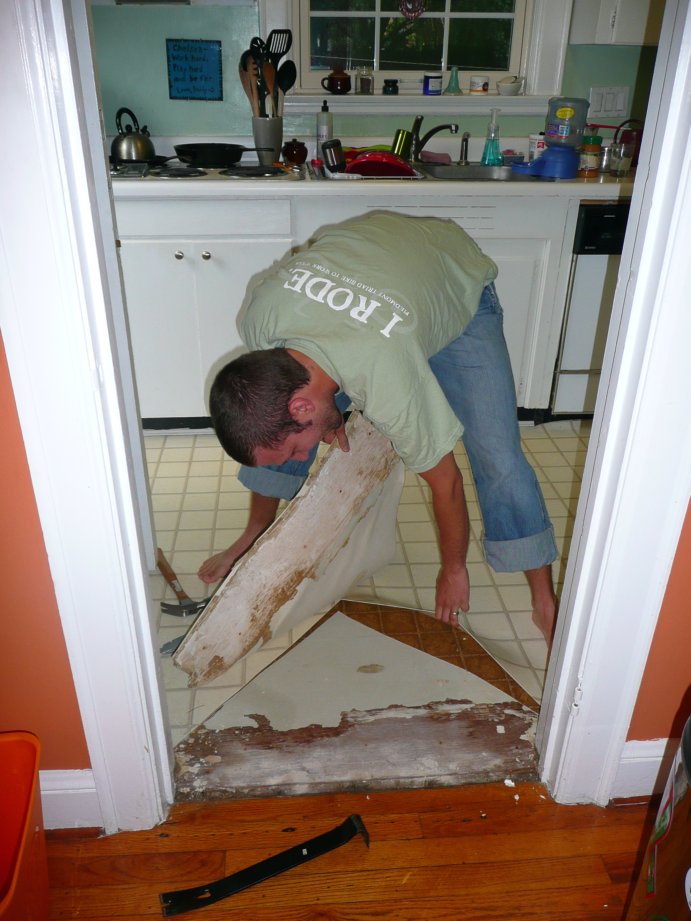
 The result?  No hardwoods, but now we were committed to at least a new kitchen floor.

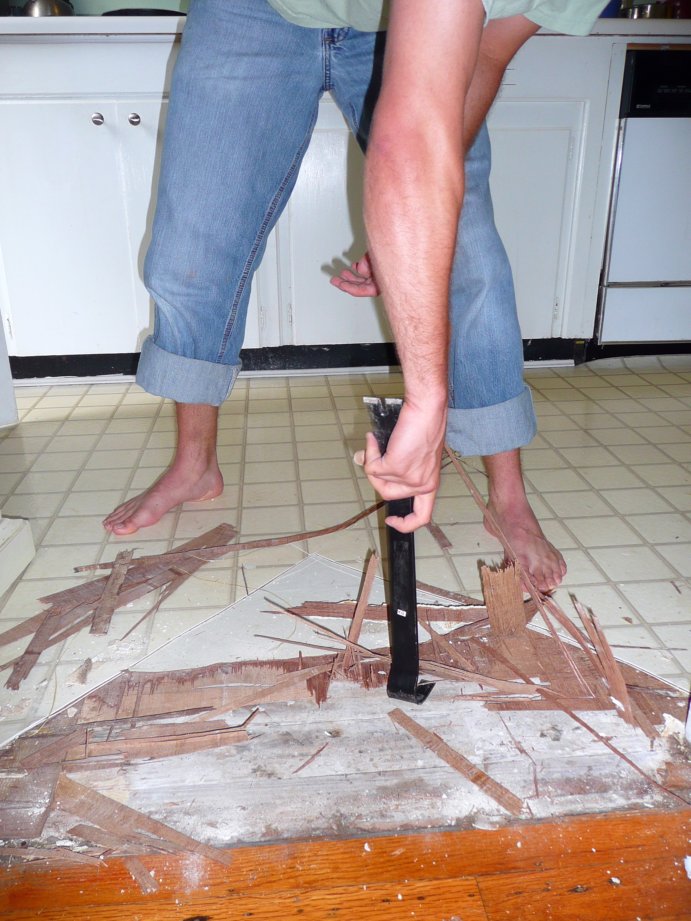
It truly was hideous.  There was no way to actually clean it enough.  Tearing out was the best option.  Ok, Eric where are your shoes?!

Much better.  Note: with any older home remodel, be cautious of rusty nails, asbestos, and any other debris.  Eye protection, masks, and adequate ventilation are highly recommended.  
We uncovered the old linoleum, the black adhesive, and pine sub floors below.  

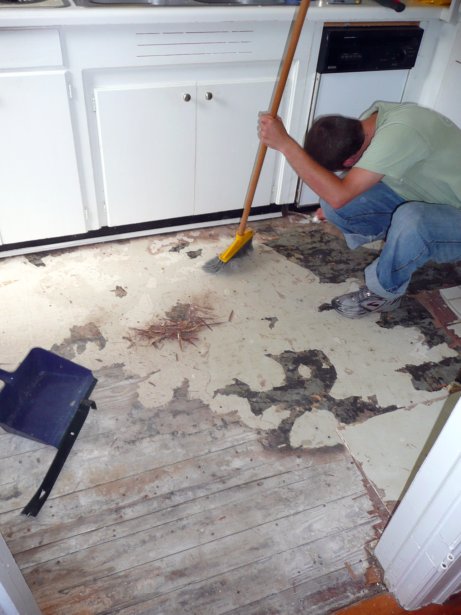
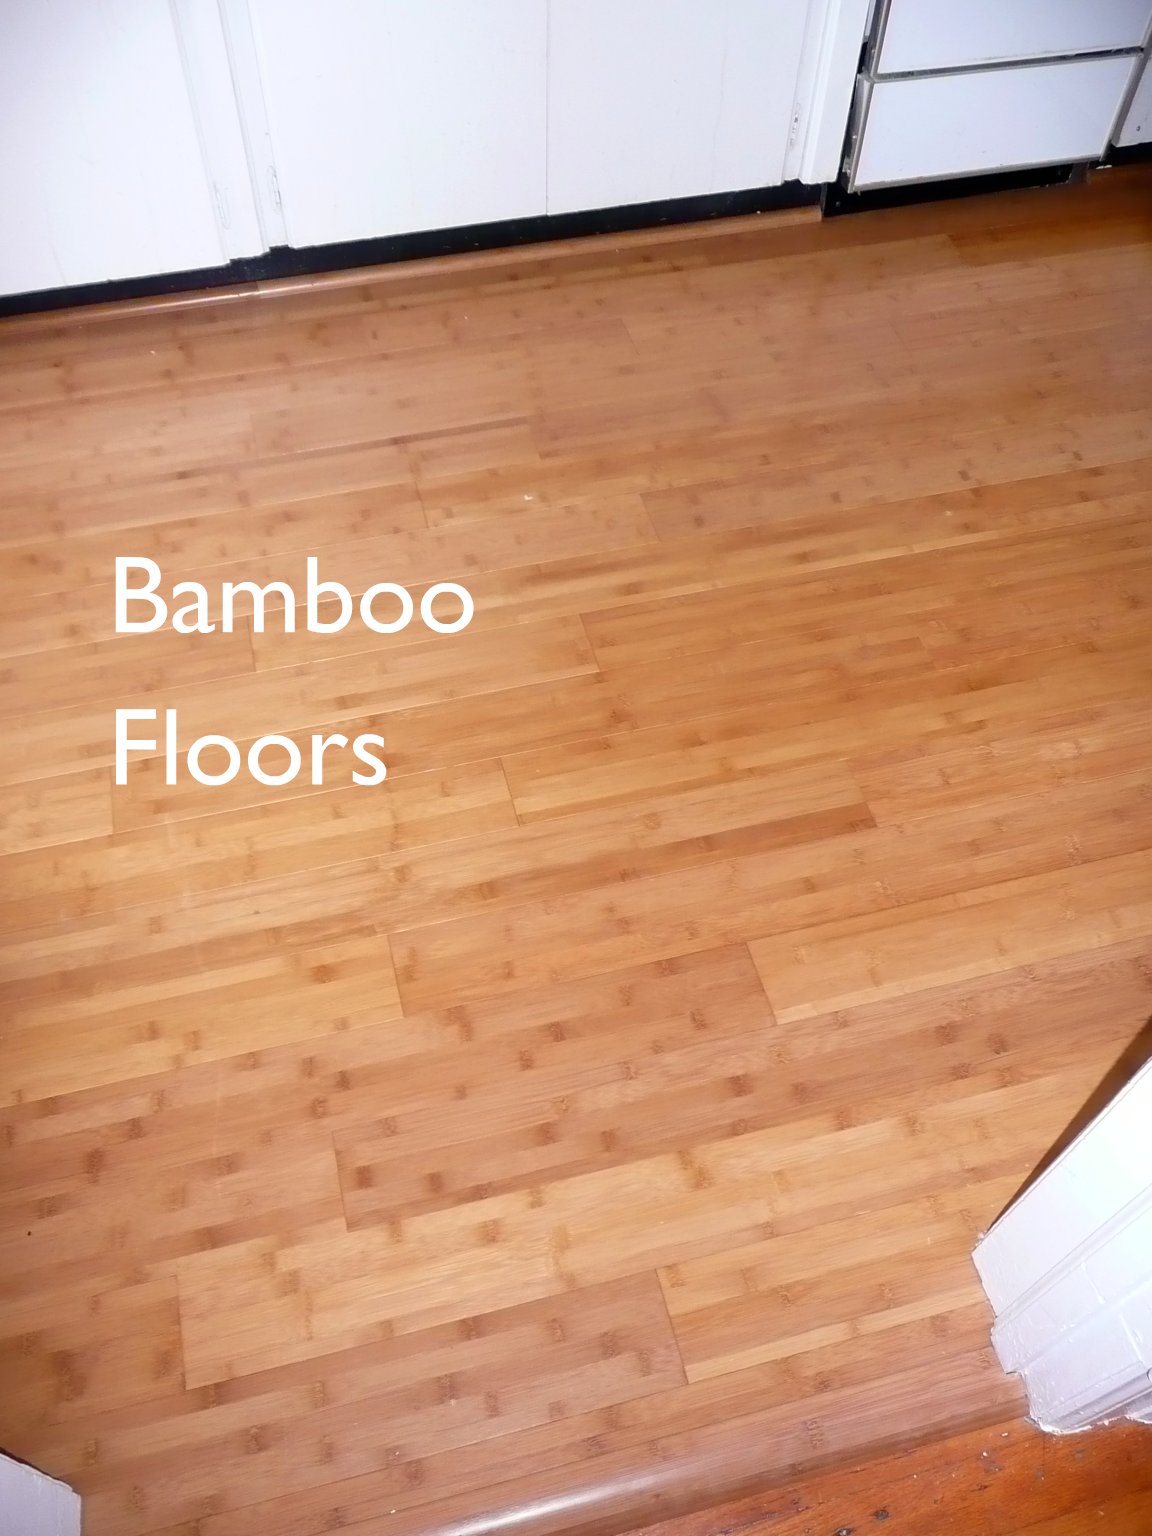
 With this started, we began to research our options for the rest of the kitchen.  We decided on bamboo flooring from Lowe’s and contacted a local neighborhood contractor to help us with the rest of the kitchen.

 The first thing to go was the unused water heater.  In its place went a nice brand new electric oven stove combination.  We opted for the smooth surface stove to continue the illusion of counter space and give us one more workspace when the stove was not in use.  We also decided to stick with the smaller appliances in order to prevent the kitchen from being too crowded with larger appliances.

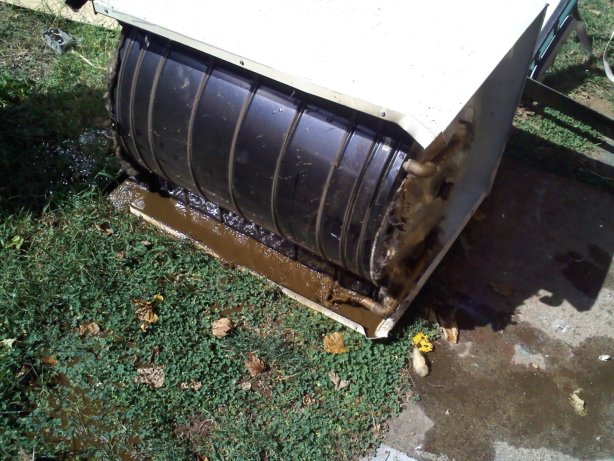
 The worst part about the hot water heater?  It still had water in it! EEWWWW!  Who on earth though that capping this sucker and leaving it with water in it must have been insane.  I still shudder thinking about that.  The horrors that remodeling an house can bring…

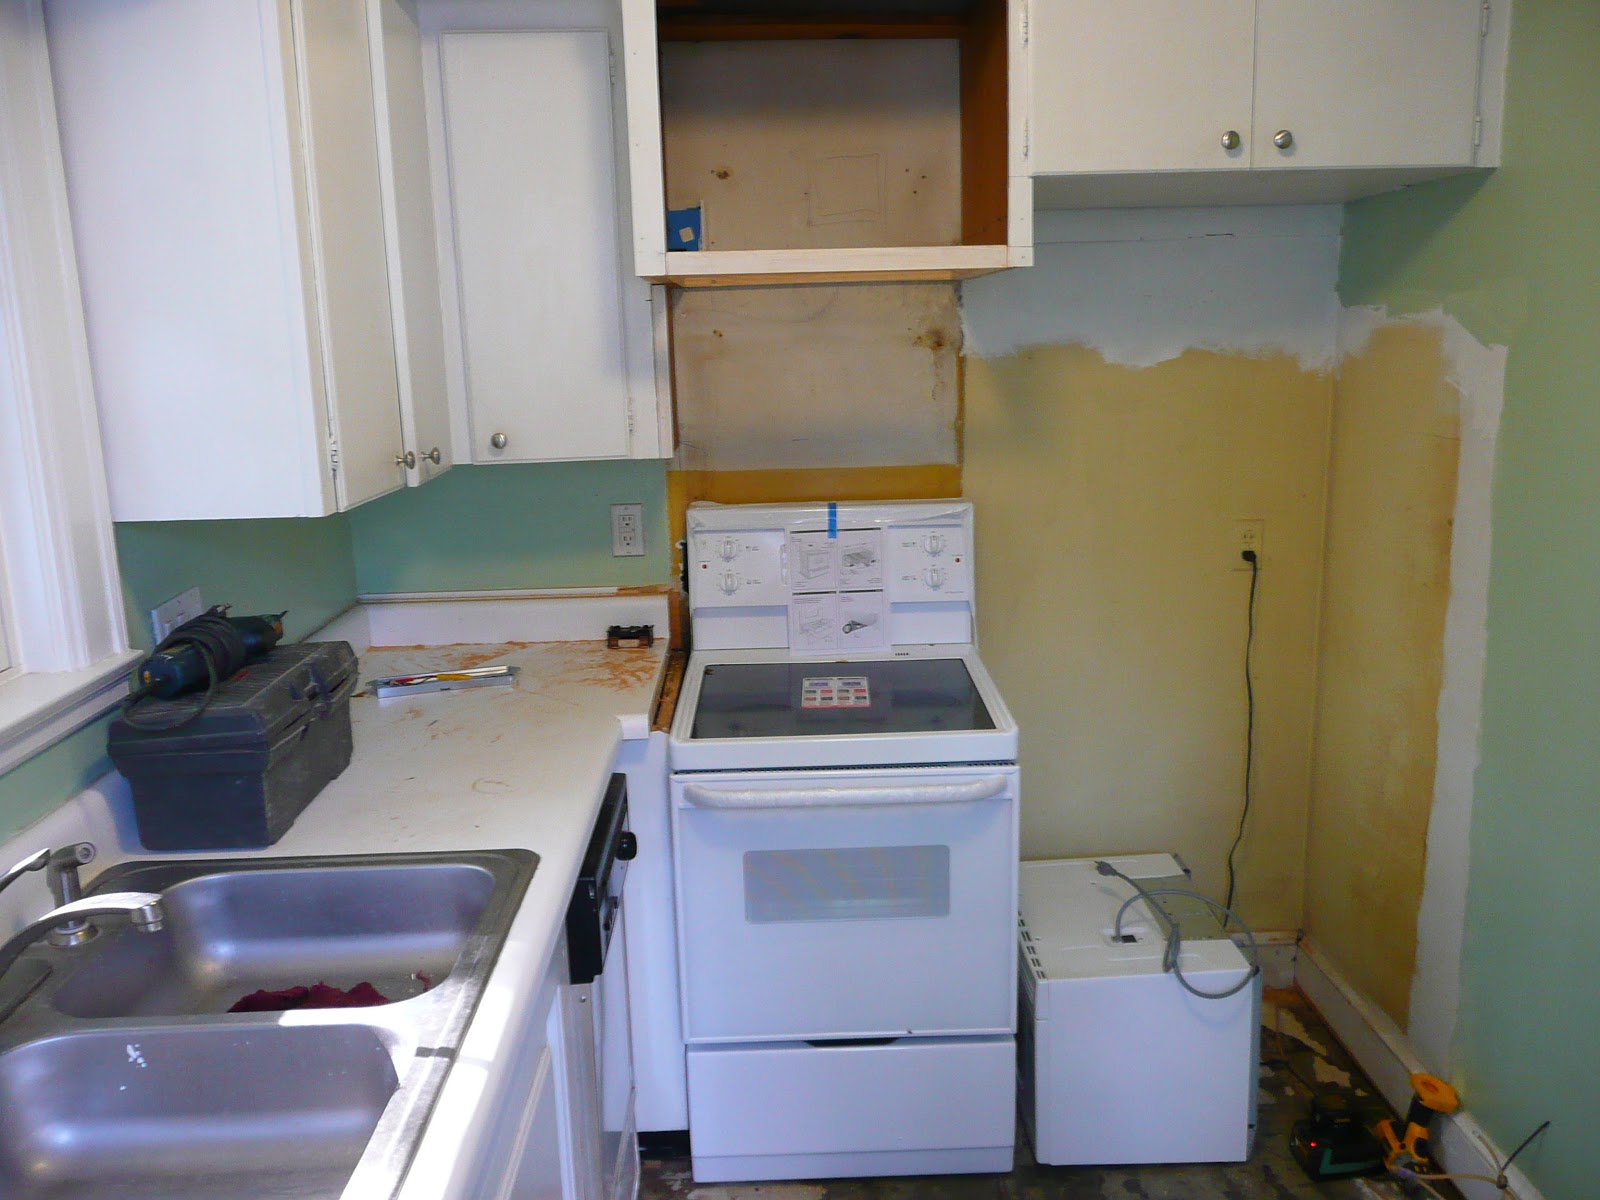
 The kitchen was already looking larger.  We ordered a new microwave that would fit perfectly above the stove, complete with a light and fan built in.  The size of our oven and microwave are 24.”

We bought a new, deeper sink complete with new faucets.  The counter top we ordered from a local place in Greensboro.  The front edge is smooth all the way around – no sharp under counter edges for us!  The extra section of counter top became an art table for me.  

We repainted the kitchen a deeper Granny Apple Green and added a silver embossed tile from Lowe’s as an accent behind the stove.  
I added black trim above the counter for a more graphic punch.  The magnetic board is a muffin pan spray-painted red.  I use it for recipes and grocery reminders.  It adds a nice contrast of red.  

This remodel gave us a lot of more space and a much nicer looking space to work with.  I added the potted plants for a touch of real green.  The pots come from Ikea.  The dishwasher and fridge were replaced shortly after the remodel was complete.  We added the under counter lighting the summer Greta was born – it was much easier to stumble around in the wee hours with dim lighting.  

Turnip, Pear & Sausage Pie

Oh yum, oh yum, oh yum.  Savory pies are one of my favorite meals ever.  I know I say that about a lot of foods, but pie crust with roasted veggies is just too much!  And once in a blue moon, I do cook chicken.  This is one of those lucky occasions, for Eric’s sake.

I combined three lovely produce for this pie: turnips, yellow onion, and pear.

I mixed them together in pie filling fashion with seasonings and vinegar instead of the usual lemon juice for a sweet pie.

Of course I turned to my trusty pie crust.  I even got to use my new marble rolling pin I received for Christmas this year.  These babies are great – I keep mine in the fridge so it’s always cold enough for rolling out pastry dough.

And because sometimes I do cook with chicken, though very rarely, I used chicken sausage.

Eric loves this stuff and was thrilled to see me add it to a pie.

This flaky crust, the roasted veggies, the savory flavor of sage mixed with the tang of vinegar.  How are you not licking your screen right now?  This pie would be just as good with the sausage omitted – still not vegan though.  I cannot do the butter-free crusts – they just aren’t as good.

Turnip Pear & Sausage Pie

1.  For the filling, peel and dice into 1-inch pieces, 2 small-medium turnips.  Dice 1 firm pear, skin left on or off.  Slice into wedges, 1/2 yellow onion.  Place in medium mixing bowl.  

2. Add 2 tablespoons flour, 1 teaspoon dried rubbed sage, 2 tablespoons balsamic vinegar, and fresh ground pepper.  Mix well.  Set aside.  

3. For the double crust, In a medium mixing bowl, cut 1/3 cup cold butter into 2-1/4 cups flour.  Use a pastry blender until the pieces are pea sized.  


4. Sprinkle 1 tablespoon ice cold water or vodka over part of the flour mixture, toss with a fork.  Push aside moistened dough, repeat using 1 tablespoon of water/vodka at a time until all flour is moistened, 8-10 tablespoons total.  Do not over moisten.  Divide dough into two balls, dough should be crumbly and semi-dry.  


5. On a lightly floured surface, use your hands to slightly flatten 1 dough ball.  Roll from center to edges into a circle about 12 inches in diameter.  Transfer to a pie plate by carefully wrapping dough around a rolling pin, being careful not to stretch the dough.   Trim extra dough.  Transfer filling to pie plate.  


6. Roll remaining dough ball into a circle about 12 inches in diameter.  Place on top of filling, press edges together, trimming extra.  Cut steam vents in the top of the dough. 


7. Cover edges in foil, or pie shield, and bake at 400 degrees for 20 to 25 minutes.  Remove foil, reduce heat to 350 degrees and bake for 35 to 45 more minutes.  Filling should be hot and bubbly and top of pie slightly golden.  


Musings

There are plenty of good things going on around here this week.  I for one, am so glad it is already Wednesday.  It seems like this house cannot make it more than 2 days without some sort of illness.  Anyone else got this going on?  Onto the things going on around here this week…

More Valentine’s Day cards are rolling out this week.  This year I decided to combine my love of collage and sewing and go for the sewn paper technique.  I have been loving it – the quickness of stitching the paper allows for a faster pace than my typical glue or glue stick method.  More of these to come later on.

Lots of yard work going on due to the extra daylight.  I love coming home to the prospect of working outside, walking, or playing with Greta for an hour or two after work.  We found this little guy in the front garden bed.  He was moving pretty slowly though so we placed him near the house.  I don’t think he made it – I found a crumpled little snake on the sidewalk a couple days later.

Greta is a bookworm.  She loves to bring her books, blanket, and Winky (her stuffed pink lamb) into her tent and read.  Usually she demands that mom or dad climb in with her – the quarters are a little cramped then.  This little bed/tent is fantastic – it zips from the outside, has an inflatable air mattress, and is perfect for travel because it folds flat into a nice little disc.

Good breakfast’s galore.  We have had some tasty breakfasts lately.  This one was my most recent favorite – cinnamon raisin french toast with cottage cheese and apricot jam on the top.  You have to try this!

If you like Goodnight Moon, check out Goodnight iPad.  You won’t be disappointed!

S’mores Brownies

Oh tomorrow’s Super Bowl will even S’more Super thanks to this easy recipe.

 This recipe calls for 1 boxed brownie mix (1 egg, 1/4 cup oil, 1/4 cup water, and 1 packet of Hershey’s chocolate syrup which was part of this particular mix), 14 graham cracker squares, and 24 marshmallows.

 Grease a pan or spray with cooking spray.  I used a 13 x 9 inch pan for thinner brownies.  Break 14 graham crackers into squares place in bottom of pan.  Depending on the size of your pan, you may need more graham crackers.

 Mix brownie mix, according to directions on box.  Spread over the tops of the grahams.

 Use a spatula to ensure even, thorough coating.

 Bake brownies according to time on package.  Take out with 2 minutes to go.  Top with 24 marshmallows.  Space evenly, about 2 inches apart, as shown.  Return to oven for last 2 minutes of baking.

Remove from oven and use spoon to press marshmallows flat.  Allow to cool in pan.  

Slice and serve.  These would be perfect birthday treats, camping dessert, or sweet treats for your next big game day party.

In other news, Eric and I have been working on house updates.  We decided to swap out the bathroom light for this one.  I won’t even show you the old one – it was that hideous.  We discovered the old wallpaper underneath though – it looks like a nice 30s print.  I would love to have seen our house when it was first built in 1939 and to have seen the first family that lived here, no doubt employed by the nearby textile mill.  Don’t worry, we will be painting over this ASAP, but I had to document it.

Enjoy your weekend!

Here’s the pan I used for this brownie recipe.  It has a lid which makes it great for transporting.

Fried Egg Sandwich + Valentine’s Cards

Valentine’s Day is approaching – time to get your craft on and make it a holiday that is more meaningful than a store-bought card and a box of chocolates.  Here is an oldie but goodie from 2009.  Coming soon: Valentine’s Day 2013 cards!

Just for the record.  All time favorite dinner: fried egg on toasted bread, with mayo, tomato, and avocado.  I got this sandwich after watching Adam Sandler make it on Spanglish.  No joke.  A local Greensboro micro brew never hurts this meal, either.

This is all I can muster tonight – I am low on blog energy this week.  More to come soon, I promise.  There are big things brewing around here.

Happy almost Friday, y’all!

Broiled Grapefruit + Chocolate Ice Cream

I wish I could come home to this as a snack every day after work.  It would be such a nice way to enjoy my afternoon.  Though, I know I would have some problems getting Greta to eat a healthier dinner with me chowing down on this dessert.  How many other moms out there are hiding in the kitchen eating something not as healthy to prevent child(ren) from wanting what you are eating instead of what you should be eating? Yeah.  Well, this dessert isn’t really all the bad.  I would share this with Greta, only thing is her palate consists of mac n cheese, yogurt, milk, bread, dried fruit, and food packets right now.

 Cut 1 grapefruit in half.  I made the mistake of cutting off all the rind.  I wish now that I had not, it was harder to eat – the rind would have given the spoon something to scoop the grapefruit flesh out.

Place grapefruit halves on a foil lined rimmed pan.  Drizzle vanilla and agave syrup on top, about 1 spoonful of each, per grapefruit half.  Allow to soak in about 10 minutes.  

Place grapefruit halves on rack just under broiler.  I used the toaster oven for this dessert.  Broil for 25 minutes.

 Do not worry – they will look blackened!

Serve with chocolate ice cream of your choice.  I served ours with chocolate dairy-free ice cream.  

The chocolate and the tart grapefruit were a perfect combination.  
Broiled Grapefruit with Chocolate Ice Cream – serves 2
1. Cut 1 grapefruit in half. Using paring knife, cut slits along membranes of fruit segments, from the center to the rind.  This will help to loosen the fruit and make it easier to eat.  Place grapefruit halves on a foil lined rimmed pan.  Drizzle 1 spoonful of vanilla and agave syrup on top, per grapefruit half.  Allow to soak in about 10 minutes.  
2. Place grapefruit halves on rack just under broiler.  Broil for 25 minutes. Serve with chocolate ice cream of your choice. 

Roasted Red Cabbage

I have been seeing roast cabbage everywhere, it seems.  I think I have a Pinterest buddy who wants to make roast cabbage and it has rubbed off on me now.  I threw this together for dinner the other night, using items in the pantry.  This is an example of how I cook – with little to no measurements.  In order to blog, I have to keep a pad of paper and a pencil next to the stove to jot down my quantities and items.  Otherwise, I would never be able to duplicate recipes.

 Start with 1 small head of red cabbage and sliced it into sections no more than 1-1/2 inches thick.  Spread the cabbage out on a rimmed baking sheet.  Spray or brush with olive oil.

These are the only ingredients I used, plus the cabbage.

Using a spoon or brush, add balsamic vinegar to each cabbage slice.  Flip cabbage to ensure even coverage of oil and vinegar.  

Sprinkle each cabbage slice with dried minced garlic.  Add fresh ground pepper.  Bake in oven at 400 degrees for 25 to 30 minutes.  
Goodness, they are so gorgeously purple and wrinkled – I just want to get out my paints and document them through artists’ eyes.  

 Our weekend flew by – we made a trip to Ikea to get a few things.  I found this amazing couch which will someday be mine.  I know there are plenty of orange haters out there, but it is my color.  I am attracted to all things orange like a moth to a porch light.

 Greta got to the self serve aisles and just wanted to run.

 Back at home, Greta was very helpful in putting together a new coffee table.  She even knew how to put screws in and that the screwdriver was the tool to use.

Sunday was the fun day – we took Greta to a UNCG basketball game.  She loved the spirit teams and the music.  We are off to a late start already this week due to freezing rain, I guess.  Hope your Monday is off to a great start!
Roasted Red Cabbage
1.  Slice 1 small head of red cabbage and sliced it into sections no more than 1-1/2 inches thick.  Spread the cabbage out on a rimmed baking sheet.  Spray or brush with olive oil.  Using a spoon or brush, add balsamic vinegar to each cabbage slice.  Flip cabbage to ensure even coverage of oil and vinegar.  
2.  Sprinkle each cabbage slice with dried minced garlic.  Add fresh ground pepper.  Bake in oven at 400 degrees for 25 to 30 minutes.  
This bowl would be perfect with this dish.  My great grandmother had a bowl with a lid that was in the form of a cabbage.  She kept candies in it for us and it was the first thing we checked on after hellos at her house as a child.  

Earl Grey & Orange Muffins

These muffins came about as a result from my weekly brainstorming about scones, tea, and English snacks in preparation for my Sunday English connection recipe in celebration of a new Downton Abbey.  Tune in Sunday evenings 9/8 central on PBS!

I love using a glass measuring cup instead of a small bowl when baking – it is easy to handle, easy to microwave, and easy to wash – just throw it in the dishwasher.  
I used Tazo tea for this recipe.  The earl grey is a lovely flavor – black tea with the orange flavor of bergamot and a touch of lavender.  
To include the tea in these muffins, I simply cut open 4 tea bags and poured them into a measuring spoon.  Then, I mixed the tea directly into the flour mixture.  

I added orange zest to bring out the bergamot flavor even more.  I used about 1/2 an orange for the zest in this recipe.

Make a well in the dry ingredients to make mixing easier.  
I like my muffins bigger so I filled only 11 cups for this recipe. 
As you can see, there are already a few missing – these were pretty popular around here this afternoon.  These lovely muffins turn a nice golden brown – they almost remind me of a lemon poppy seed but I think the flavor is more subtle and less sweet.  The muffin recipe below, from Better Homes and Gardens New Baking Book, minus the flavorings, is a perfect base for any muffin.  Just swap in other ingredients.
Blueberry muffins – add 1 cup blueberries.  
Chocolate chip muffins – add 1 cup chocolate chips.  
Lemon poppy seed – add 1 tablespoon lemon zest, 1 tablespoon poppy seeds, plus increase sugar to 1/2 cup.  
Cranberry muffins – add 1 cup coarsely chopped cranberries plus 2 extra tablespoons sugar.  

Banana muffins – reduce milk to 1/2 cup, add 3/4 cup mashed banana, and no paper liners.

Earl Grey & Orange Muffins – makes 11 – 12 muffins, adapted from Better Homes and Gardens New Baking Book

1. Grease eleven or twelve 2-1/2 inch muffin cups or line with paper liners, set aside.  In a medium mixing bowl combine 1-3/4 cups flour, 1/3 cup sugar, and 2 teaspoons baking powder.  Add 2 tablespoons early grey tea (from about 4 teabags) and 1 tablespoon orange zest.  Mix well.  Make a well in the center of the dry ingredients.

2. In another mixing bowl, or glass measuring cup, combine 1 egg, 1/4 cup melted margarine or butter, and 3/4 cup (almond) milk. Add the egg mixture all at once to the dry mixture.  Stir just until moistened – batter will be lumpy.

3.  Spoon batter into prepared muffin pan, filling each cup 2/3 full.  Bake at 400 degrees for about 20 minutes, till golden.  Cool in pan, on a rack for 5 minutes.  Remove and serve warm.

Spicy Tuna w/ Pita

Ok, this is a ‘Take it Easy Tonight, Mommy’ dinner.  Those are my favorite meals.  It is also a, ‘What do I have in the pantry, fridge and freezer meal?’  I took plain old tuna and dressed it up with some spices and citrus, added some shredded carrot, and put it in a pita pocket with spinach.  The spices in this make me want to make tuna more often – I usually don’t opt for tuna because it is on the boring side.  Spicy tuna was one of those duh moments for me – in this house we put spices on everything else, why not tuna?

While I was leisurely making tuna salad I had some Alexia Sweet Potato Fries with Chipotle baking in the oven.  These bad boys are so good.   Who wants to make sweet potato fries when you can buy these?

To top off this leisurely evening, Victory was having a beer tasting night at Bestway.  Free pint glass with a purchase!  Follow Bestway on Facebook, Twitter, or Instagram to keep up on these and other happenings at Bestway Grocery.

In other news, we were out of school 3 hours early today due to sleet.  The kicker though?  They called this last night before any sign of weather actually fell from the sky and we are expected to get maybe an inch last time I checked.  This means the grocery store bread and milk racks are empty right now.  Can anyone from the South explain to me why this is the biggest need during a snow storm?  Ah well, more time at home with my sick baby.


Spicy Tuna w/ Pita

1. Mix 1 pouch of tuna (or can) with 2 to 3 tablespoons mayo and 4 shredded baby carrots (or 1 small carrot).  Add 1 teaspoon chili powder, 1-1/2 teaspoons ground cumin, 1 teaspoon ground pepper, and 1 to 2 teaspoons lemon or lime juice.  Mix well.

2.  Spread into pita, top with fresh spinach.

Orange Beef(or less) Stir-fry

This meal is so bright, so delicious, so easy, so filling, and so not a meat dish.  I used the Gardein Beefless tips for this normally beefy stir fry.  However, this will be my last meat substitute for a while here.  I have been doing much reading on the vegan meat substitute industry and I am no longer sold that is is necessarily the best way to go meatless.  Here is one such article on the state of quinoa and how the Westerner’s taste for this grain is driving prices through the roof and destroying the nutrition of Bolivians.  I am guilty of adding to this problem and know that eating locally grown and raised foods is a much smarter option in terms of the environment, and this meal is far from locally grown!  This has been heavy on my conscience – I feel better after venting a bit.

Usually Eric makes the stir fry dishes, so I actually snagged this one from an old issue of Every Day Foods. It was nice and simple to follow.

I guess the thing that always snags me about stir fry dishes is the sauce.  How much is too much and how much is too little?  Those bottles of pre-made sauce are just too easy…   This sauce was easy though – orange juice, rice vinegar, soy sauce, and brown sugar.  Honestly, I would leave out the sugar next time, but I am not big on sugary stir-fries.

The veggies are two of my favorites – red bell peppers and broccoli.

The only hassle about this dish is worth the hassle – cook the broccoli until green but still crisp.  Remove it from the pan, cook the rest of the items, and return – this way your broccoli does not turn into a gray, mushy mess.

I added red pepper flakes and Sriracha sauce for the 5 star flavor.

 It made a large amount of food – at least 4 servings and was excellent reheated.  I ate it today for lunch while I was home again with sick Greta.  Poor girl has pneumonia now, but a trip to the doctor and the pharmacy hopefully will kick this sickness quickly.

Orange Beef Stir-fry – from Every Day Foods

1. Cook 1 cup of long-grain rice according to the package.  Set aside.  Meanwhile, in a small bowl, combine 1/4 cup orange juice, 1 tablespoon rice vinegar, 1 tablespoon soy sauce, and 1 tablespoon light-brown sugar.  Set aside.  In a medium bowl, toss 1 pound (top or bottom round steak, cut into strips, 2 inches long and 1/4 inch thick) beef (or 1 bag Gardein beefless tips) with 1 tablespoon cornstarch.  Season with red pepper flakes or ground pepper.  Set aside.

2. In a large skillet, combine 1 bunch broccoli, florets broken with 1 cup water.  Bring to boil over medium-high.  Cook partially covered until broccoli is green and crisp-tender, 4 to 6 minutes.  Transfer to another dish.  Discard water and wipe skillet dry.

3.  In same skillet, heat 1 tablespoon vegetable or wok oil over high.  When pan is very hot, add half the beef; cook until browned, 2 to 4 minutes.  Using slotted spoon, transfer to plate with broccoli.  Repeat with remaining beef but leave beef in skillet.  If using Gardein beefless tips, cook entire bag until thawed, stirring frequently, about 4 minutes.

4.  Return reserved broccoli mixture to skillet; add orange juice mixture and 1 red bell pepper, cut into strips (with seeds and ribs removed).  Continue to cook over high heat until sauce thickens, 2 to 4 minutes.  Serve over rice.

Someday when I have a bigger kitchen and more storage…