Finished Toddler Room

I can’t believe is has been a year since we moved to Des Moines from Greensboro.  What a year it has been too!  Things are finally beginning to settle for us as a family.  It is also beginning to really feel like we live in this house as the rooms come together one by one.  I hope to share a few more of these projects before baby #2 arrives.  First up is the new big girl room, AKA the purple room, according to my almost three year old.

It was only recently that my daughter’s big girl room was ready for her to move in.  She had been in another bedroom, but that room is to become the nursery for baby #2.  My toddler loves yellow and purple.  We already used a lovely pale shade of yellow, Pastel yellow, in the playroom.  I opted for her other color of choice, purple, but in a pastel shade.  I am not usually one to go for pastels, especially lavender, but this color is just wow on the walls!

Greta picked out that artwork at the recent Des Moines Pedal Art Show.  The doll crib was one that my sister and I played with when we were little girls.

The original color of this room was an odd, faded rosy pink color.  I was happy to see it updated and made more striking.  Eric painted this room while I was in Minneapolis for my sister’s baby shower and enlisted the help of a friend.  I was truly worried that he would freak out about the color and stop part way through.  I was happy to receive text messages with updates on how much he liked the color.

When I discovered that Pantone interior paint was available at Lowe’s, I knew our entire house would be done in these lovely colors.  We found perfect shades for almost every room of this house.  I still have yet to paint the upstairs bathroom and decide on a color.  Pantone is pretty fantastic – you can find a wide array of Pantone items out there!

Most of the furnishings in the room came from Ikea.  The bed, bench, rug, and button wall decor all came from Ikea in this photo.  So far, the room is sparse, which is fine by me and Greta.  She likes to put her things away and keep her room tidy – the IKEA MOLGER Bench
helps her organize books and stuffed animals.  The playroom also helps us to keep her room free of clutter, which I always am thankful for when I have to make a trip into her room in the dark.

The dresser and silver lamp are also Ikea.  Her gold framed mirror was a thrift store find and the quilt was a gift from a friend when she was born.  I’m still feeling so grateful that the floors in our upstairs were in as good of condition as they are.

The butterfly and owl watercolors work well with the violet fog color.  My mom made Greta the elephant artwork (left) with a technique called quilling.

Her collection of favorite stuffed animals, doll clothing, and favorite bedtime books are all housed in bins and crates on this bench.  It can also double as a nightstand when she eventually understands that concept.

DIY Comic Storage Bin

I have to admit, I had a small heart attack in the storage bin aisle at the store recently.  I have been trying to find ways to wrangle in all of my daughter’s things in her room and playroom.  Bins and tubs just make sense – she is already to trained to put items away at school based on the photo on the end of the bin.  Yet, I am always amazed at how much a cheaply made box from India or the Philippines really is.  So I decided to make my own (it’s a disease you know, thinking you can make everything you see).  I was happy with the final products, seen above in  my daughter’s room.  Read on for the easy DIY steps.

1. Gather supplies needed:

  • Box
  • Mod Podge
  • Scissors
  • Paint brush
  • Comics page (or any other paper you would like to cover your box in)
2. Cut box to desired size.  For my first box, I cut the top flaps off.  For my second box, I decided to try leaving the shoe box flap on.

3.  Cut size of paper you plan on gluing down first.

4. Brush Mod Podge over the area you are planning on covering first (about the size of the paper you just cut).  I worked on one side at a time so that the Mod Podge would not glue too quickly.  That paperclip, seen above, is holding a flap down, since one side was coming loose.

4. Carefully smooth cut paper over the entire area of Mod Podge.  Smooth with hands and whenever possible, wrap edges with at least 1/2 inch of paper to prevent curling and rough edges later.

5. Brush a layer of Mod Podge over paper.  Use smooth brush strokes and use just enough to cover the paper.  Thick brush strokes will dry with ridges and texture (unless that is the look you are going for).  Allow 15-20 minutes and then add a second coat.   Allow to dry completely before using.

Things I learned:

  • Due to the nature of newspaper, the finished product will have some wrinkles and bubbles.  Embrace it.
  • The open box, right, is much easier to use than the box with a lid, left.  Boxes with lids tend to stick together a bit due to Mod Podge’s slightly tacky finish.

The finished product was a hit with my toddler – she loves to read the comics, or coupons as she calls them.  Who knows why?  They are now being used to corral her favorite bedtime books and doll clothing in  her room.  More on  her finished big girl room later.

Toddler Collage Art + Strawberry Graham Yogurt Pops

Greta and I have both been busy working on collages lately.  Greta has watched me make collages countless times and I haven’t yet thought to have her make her own at home.  I know she’s made them at school, but she blew me away with her collage skills.  Little collage artist in training, I tell ya!
This particular collage was my favorite one that she made yesterday.  It was the third one in a series of four that we completed in the morning before nap time.  She was tickled at the way the holes would allow colors beneath to show through.  She quickly learned that the glue had to go on the edges and so had to slide her papers around in order to move the glue.
The large glue bottle was perfect for her little hands.  We practiced squeezing the glue out onto the paper while the bottle was just above the paper.  She enjoyed slowly squeezing out the glue and watching it pool, as it was pooling she would ask me, “Good, Mommy?” to check on the amount of her glue.  Only a couple times did I say, “Ok that’s good,” most of the time she figured out the amount of glue on her own.

Next, Greta placed her cut papers onto the glue dots.  I enjoyed watching her choose papers based on color, size, and shape.

I used the color issue of In Style magazine for all of her shapes.  Fashion magazines make the best collage magazines due to their textures, variety of color, and size of colors.  The first collage she made was full of random shapes.  For her second one, she decided she wanted mostly circles.

This is her mostly circle collage.  As she got more used to making collages, she began to request particular colors, sizes, and shapes.  Her most frequently requested were yellow circles.  As I flipped through the magazine, she would ask me to cut out certain items she liked – such as the eye.  Her final collage used overlapping pieces with small areas cut out of the middle, this is at the top of this post.

Greta has plastic scissors and we are working on her cutting technique, but in the meantime, this mommy daughter collage collaboration is a fun way to spend a morning.

We spent part of our morning on Friday making yogurt pops.  Greta helped me layer strawberry yogurt, crumbled graham crackers, and chocolate syrup to make these delicious freezer pops.  Frozen desserts are a good way to practice patience for little kitchen helpers!

Gluten Free Blackberry Orange Cake + Mother’s Day

I made this gluten-free cake, with Greta’s help, a couple weekends ago to take to dinner with Eric’s family.  It is a simple cake and the addition of yogurt makes it moist and dense.  It was a nice ending to a family meal with a just a hint of orange to the tangy blackberry.  Scroll down for the recipe.

I simply served it plain without any topping.  Though a glaze or a berry sauce as a topping would be quite good.  It makes a single layer 8 inch cake and so it went fast.  I even caught Eric toasting a slice and eating it for breakfast one morning.

For Mother’s Day weekend, we traveled to Minneapolis to see my sister and her new baby girl, Dylan.  It just kills me that the cute little newborn dress my new niece is wearing was once worn by Greta.  Greta enjoyed her time meeting her new cousin and hanging out with her aunt and uncle.  In this photo she is still holding an armload of toys that belong to her cousin – she was trying to work with Dylan on grasping toys.  We explained it would be a little while before that could happen.  In any case, I think Greta is going to be an excellent big sister and extremely helpful.  I am not even sure how many times she told my sister, “I help!”

Sunday morning we ate at a lovely cafe, The French Meadow Bakery & Cafe on Lyndale in Minneapolis.  They specialize in organic, vegan, gluten-free, and slow foods.  I had the two egg breakfast which came with sourdough toast.  Eric had the chicken chorizo Cajun hash browns, which he reported were spicy and chock full of garlic cloves.  As you can see, we had the place to ourselves on this Mother’s Day Sunday.  Although, we were there by 7 AM – we are all early early risers on trips.

After a perfect breakfast, we headed off to Lake Calhoun for a walk.

Greta and Eric practiced their soccer skills lakeside.  Greta picked up quite a few ball handling tricks right away.  Maybe we have a future futbol girl on our hands.

Other than visiting family and work we have been just laying low.  I am enjoying seeing lilacs in bloom for the first time in 9 years.  The scent is just heavenly and lilac is not a plant that grew very successfully in Greensboro.

Greta has a new-old sandbox that was once mine.  I am impressed it is still in one piece, considering the abuse it endured from my sister, friends, and myself as a kid.  Greta has been putting it to good use in the mornings before I head off to work.  I am trying to soak up as much relaxing time and one-on-one Greta time as I can with a mere 8 weeks to go until baby boy arrives.

Gluten Free Blackberry Orange Cake – serves 8. 

1. Preheat oven to 350 degrees.  Grease the bottom and sides of a 9-inch round cake pan and dust with gluten free flour, knocking out any extra.  Stir together 2 cups gluten free flour1-1/4 cups sugar1 teaspoon baking powder1/4 teaspoon baking soda, and 1/4 teaspoon salt in a large mixing bowl.  Whisk together 2 large eggs1/3 cup vegetable oil1 cup plain low-fat yogurt, and 2 teaspoons vanilla in a bowl.  Pour the yogurt mixture into the flour mixture and stir just until moistened.  Add the zest from one orange and 1 cup blackberries (fresh or defrosted), fold into batter.

2. Scrape the batter into the prepared pan and bake until the top of the cake is light and golden and a knife or toothpick inserted comes out clean, about 40 minutes. 

3. Let the cake cool for about 5 minutes in the pan.  Then, place on a wire rack too cool completely.  

4. Wrap in plastic wrap or store in cake keeper for 2 days at room temperature. 

Crayon Watercolor Resist Easter Eggs

I opted for something right up my art teacher alley for Easter egg decorating this year and went with the tried and true magic of crayon and watercolor resist.  Just as I suspected, they were a hit with my toddler!

We started with 18 hard boiled eggs, and only allowed them to cool slightly after cooking.  The heat from the still freshly cooked eggs caused the crayons to melt just a bit as we drew on them.  A folded up rag was a great way to hold the warms eggs in place while we drew.

After all the crayon was done, we cooled all the eggs off.  Then we broke out the non-toxic watercolor paints.  We used small dishes to hold our eggs in place while we painted.

Greta had plenty of help decorating her eggs while we cooked the Egg, Hash-brown, and Sausage Breakfast Casserole.

The eggs turned out beautifully.  I loved how the colors swirled and mixed together.  The wax crayons resist the watercolor paints to make equally interesting designs.  If you want brighter colors, allow the paint to dry and then add another layer.  We put them back in the fridge until the Easter bunny hid them the following morning.

WARNING: the egg whites beneath turn a funky color and I opted not to eat these.  In the future I am going to do this on blown eggs and perhaps try painting with natural dyes as well.  Also note that watercolor paint is not as permanent as dye and it therefore can rub off onto surfaces even when it is dry (in other words, don’t place them on white carpeting).

This is my easy as pie Easter centerpiece – fake eggs, paper carrots, my moss rock, and a pot of fresh bright green grass that I started from seed the week prior to Easter.  It just brightened my table and even my mood just seeing it.

After brunch, we headed outdoors to hunt for eggs.  Look at all the green!  I am loving the fact that spring is here.

Egg, Hash-brown & Sausage Breakfast Casserole

This simple 4 ingredient breakfast casserole is perfect for serving a large group or saving for leftovers.  My mother in law brought a similar one for our Christmas brunch and I’ve been thinking about it ever since.  Since I didn’t have her recipe, I winged it and was quite pleased with the results.  We had this delicious meal this morning with my side of the family for Easter brunch.  My mom even mentioned how great it would be to give as a food gift for new babies, illness, or deaths in the family.  She’s right – how nice to have something other than a lasagna!
I started off using the Lodge Cast Iron Wok I got for Eric’s birthday as the method of cooking the hash browns.  Thankfully, Eric quickly stepped in and took over.  I don’t know why I am so impatient when it comes to hash browns, but I always want to over stir them, flip them too soon, and just plain ruin them.  The wok was perfect for the job of browning hash browns – the heat stayed high enough and you could spread out the potatoes enough.

The cooked hash browns got dumped into a glass casserole dish.

I added eggs, almond milk, salt, pepper and cut up vegetarian sausage patties to the prepared hash browns.  One could easily swap our the vegetarian sausage for real sausage and the almond milk for regular dairy milk.  I used Alexia hash browns – they are fantastic and come pre-seasoned with garlic and onion.

I cooked this casserole last night, let it cool, refrigerated it, and then simply reheated in the oven while covered in foil, at 275° for about an hour.  We served this with my mom’s hot cross buns, fresh fruit, and coffee.  It was the perfect Easter morning family brunch.  Stay tuned for more on our Easter crafts, Easter eggs, and Greta’s Easter experiences.

Egg, Hash-browns & Sausage Breakfast Casserole

1. Prepare 2 bags of frozen hash browns (2 lbs), according to package.  Transfer to greased 9 x 13″ baking dish.

2.  In a large mixing bowl beat: 9 large eggs.  Combine with the eggs: 1 cup almond milk (or dairy milk), salt and pepper to taste, and 8 oz. crumbled veggie sausage (or real sausage).

3. Pour egg mixture over the hash browns and mix to combine.  Cover in foil, bake in a 350° oven for 50 – 60 minutes or until browned and egg fully cooked.  Serve warm.

S’mores Cupcakes

I dreamed up these bad boys in celebration of Eric’s birthday celebration with our families.  I made them late Saturday evening after a day-long celebration of kids’ birthdays at a friend’s house and then later at Chuck E. Cheese.  This was Greta’s first time at Chuck E. Cheese and she was not at all disappointed.  I, on the other hand, was a little anxious as she crawled around in the tunnels far above my head on her own.  I kept having nervous thoughts about what would happen if she decided she was claustrophobic or panicked – how on earth would I get her down?  Luckily, a friend of hers from school had an older sister there who helped her down when she did decide that she was not going to take the tunnel slide down.  Anyways, we both survived and after she finally tumbled into bed, I stayed up making these delicious cupcakes.  It was late and I was tired, hence the cell phone images.
To make the graham cracker base, I crushed graham crackers in a large bowl with a spoon.  I then layered them in the base of the cupcake liners.  Next time I am going to create layers of graham crackers within the cupcakes for more of the graham flavor and add chocolate chips of pieces of chocolate for an even better s’mores experience.
I poured the batter on top of the crushed graham crackers.  Even adding a layer of grahams on top of the batter could be very tasty.

After the cupcakes were finished baking, I added the marshmallows on top and returned them to the oven to soften.

For the large cupcakes, I used 2 marshmallows.

Once the marshmallows are soft, simply flatten them with a spoon.

Once they are flat, allow to cool or place them under the broiler to brown them.

We celebrated Eric’s birthday Saturday with our two families with a nice lunch and then these tasty treats.  It was a cold and down-pouring kind of day, though the two previous days were warm enough to wear tank tops and enjoy time outdoors.  Today we awoke to a snowy landscape – not the first time Eric has had a snowy birthday!  Such is spring in Iowa.

S’mores Cupcakes – makes about 2 dozen standard cupcakes, cake recipe adapted from Better Homes & Gardens

1. Allow butter and eggs to stand at room temperature for 30 minutes.  Meanwhile, prepare cupcake pan with parchment cup liners.  Add crushed graham crackers to the bottom of each cupcake liner.  In a medium bowl combine: 2 cups all-purpose flour, 3/4 cup unsweetened cocoa powder, 1 teaspoon baking soda, and 3/4 teaspoons baking powder.

2. In a large mixing bowl or mixing stand beat: 3/4 cup butter on medium to high speed for 30 seconds.  Gradually add 2 cups sugar, about 1/4 cup at a time, beating on medium speed until well combined (3 to 4 minutes).  Scrape sides of bowl; continue beating on medium speed for 2 minutes.  Add 3 eggs, 1 at a time, beating after each addition (about 1 minute total).  Beat in 2 teaspoons of vanilla. 

3. Alternately add flour mixture and 1-1/2 cups milk to butter mixture, beating on low speed after each addition just until combined.  Beat on medium to high speed for 20 seconds more.  Drop batter into prepared cupcake liners.

4. Bake in a 350 degree oven for 25 to 30 minutes, or until a wooden toothpick inserted near the center comes out clean.  Place large marshmallows on the tops of each cupcake and return to oven for 1-2 more minutes or until marshmallows are soft enough to flatten with a spoon.  To brown the tops of marshmallows, place under broiler for 30 seconds.  Allow cupcakes to cool for 5 minutes, remove from pan and allow to cool on wire racks.

Quinoa, Roasted Veggies & Sardine Toast

As I head into the third trimester, I can’t say that I have boundless energy for much aside from the essentials.  However, I have been trying to avoid simply eating the first thing I happen come across and instead, eat well-rounded meals that include lots of veggies. I know how important it is to eat a variety if healthy foods while baby boy is still in the womb. I have to start developing that palate now!

This simple veggie, grain, and fish meal was one I made earlier this week. For the veggies, I simply tossed yellow onion, carrots, and asparagus in olive oil and then roasted them in the oven at 425 for 20 minutes.
Meanwhile, I cooked some multi colored quinoa on the stove while the veggies were roasting. Side note: I’m really excited for gardening this year – my mom is going to try growing quinoa this year and I am looking forward to seeing this experiment through.

Lastly, I spread some sardines on sliced pumpernickel bread and sprinkled Parmesan cheese on top. I toasted these savory delights in the toaster oven for about 5 minutes. There you have it – an easy, quick and healthy weeknight meal.

Iowa update: my first Iowa daffodils started blooming today. It’s been getting into the high 60s with a sprinkling of days in the 70s.  I was driving the other day and kept wondering what was so different. Finally I realized the grass was relatively green!  I felt giddy with the simple thought of green grass. After the winter we’ve had, who wouldn’t be thrilled by this simple revelation?

The weather also just makes Greta so happy.  It’s impossible to get her to eat dinner or get ready for bed – she just wants to be outside all the time now. Here she’s doing her yoga in the grass because, “Mommy, it’s warm out! No coat!”
In other news, we finally made our Ikea run for Greta’s big girl bed. We successfully moved her into a new room, in preparation for baby boy. More on those two rooms at a later date.

Black Bean & Carrot Veggie Burgers

I first made these vegetarian and gluten-free burgers back in January when we had some friends over for dinner, and forgot about them until now.  I decided to make them again, according to my scribbled notes, I was pleasantly surprised at their end result.  It is a recipe I originally made up as I went – not always the best idea when company is coming over.  However, I did have some frozen veggie burgers on hand, as a back-up plan.


The second time I made these burgers, I mixed everything the night before and popped it all in the fridge overnight before cooking them.  This recipe is so easy to whip up – it will no doubt become my go-to veggie burger recipe this summer.  I can’t wait to try it on the grill!  

I used the trusty Baby Bullet to puree half the beans, half the carrot mixture, the scallions, and eggs.  If you wanted to make this recipe egg-free, you could replace the 3 eggs with 3 tablespoons ground flax seed mixed with 6 tablespoons of water, or just simply increase the amount of panko as a binder.

Cook over medium heat for 3-5 minutes per side, or till done.

They should be a nice golden-brown and firm all the way through.

This photo shows a buried veggie burger – just the way I like them – covered in mustard, spinach, and on a big crusty bun.  This just so happened to by a lunch at work one noon hour.  The orange dotted thing is one of those nifty reusable sandwich bags.

Black Bean & Carrot Veggie Burgers

1. In a small bowl combine: 2 grated carrots, 2 tablespoons lime juice, and salt and pepper to taste.

2. In a food processor or blender puree: 1/2 can of black beans, 4 tablespoons chopped scallions, 1/2 the carrot mixture, and 3 eggs.

3.  Transfer puree to a medium mixing bowl.  Combine with puree: remaining 1/2 can of black beans, 1 tablespoon chia seeds1 cup gluten-free or regular panko, and remaining carrot mixture.

4. Fry on griddle or pan over medium heat, 3-5 minutes per side or till done.  Serve with toppings and bun of choice.

Las Vegas Family Vacation

The three of us just got back from a lovely long weekend in Las Vegas visiting family.  Las Vegas may not seem like an ideal family vacation spot with a toddler and pregnant mama, but I beg to differ!
Reason #1 Las Vegas is great for family trips: direct flights and reasonable flights.  The 2.5 – 3 hour long flight is bearable and so much easier with no connecting airport battles.  Greta didn’t sleep a wink on either flight, as she was too excited to have a window seat.  Here she is rocking out to her favorite kid songs.

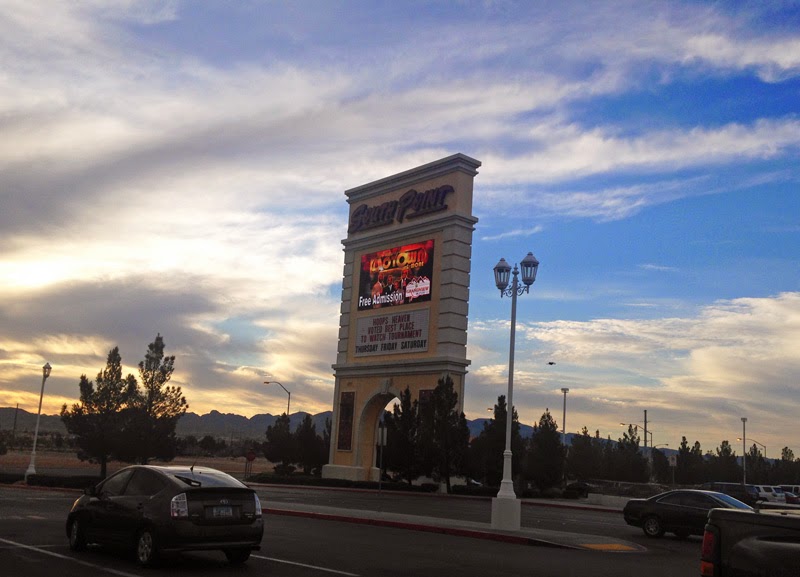
Reason #2 Las Vegas is great for family trips: plenty of hotel accommodations to choose from.  We stayed at South Point, due to its proximity to where our family lives.  It was a large hotel with plenty of restaurant options, a large March Madness viewing area, bowling lanes, a movie theater, arcade center, casino on the first floor, Seattle’s coffee shop, ice cream shop, pool, spa, and more.

How did Greta react to the casino?  See her stare at the graphics below.

A downside to our hotel was, that the casino was very smoky and was our exit to the car.  We did discover that some casinos have much nicer ventilation systems and so the smoke isn’t even noticeable.  A plus to our hotel – the casino didn’t have girls dancing at the tables like some casinos do.  There were a few scantily clad cocktail waitresses, but we managed to avoid them and hence avoid questions.

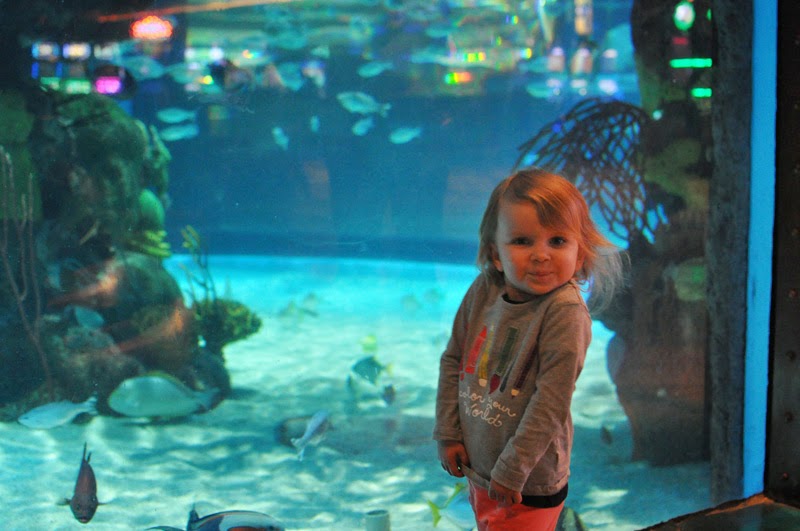
Reason #3 Las Vegas is great for family trips: plenty of free attractions.  This is Greta visiting the Silverton Casino aquarium.  This casino is connected to a Bass Pro Shop, which meant Great oohing and aahing over the taxidermy animals as well.

We consulted a few lists online as far as things to do with kids and found this list, Attractions for Kids from vegas.com, to be almost too extensive, as we knew not all of these attractions were toddler-friendly.

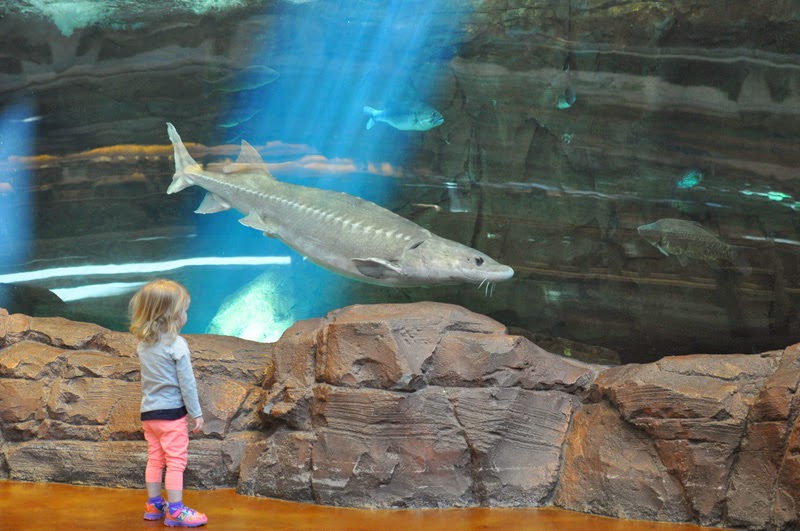
The Silverton had two tanks – a larger salt water tank (the first image) and a smaller fresh water tank.  This is Greta in front of the fresh water tank, in front of a large sturgeon.

After a morning of aquarium viewing, we headed back to the hotel for nap time.  Las Vegas hotel rooms are so quiet – we never heard any loud rowdiness during our entire trip.  After nap time, we headed downtown to the courthouse to take family photos with Eric’s uncle, the newly appointed judge and to watch the ceremony for receiving his robe.

Greta was wound up before the ceremony, but actually remained quiet for the entire two hours that the ceremony lasted!  I ended up giving her a pen, my rings, and my wallet to dismantle in order for this to happen.

After the ceremony, we attended a reception with delicious food, drinks, and a chocolate fountain for dessert.  It was late, but we made a drive down the strip for the fun of it.

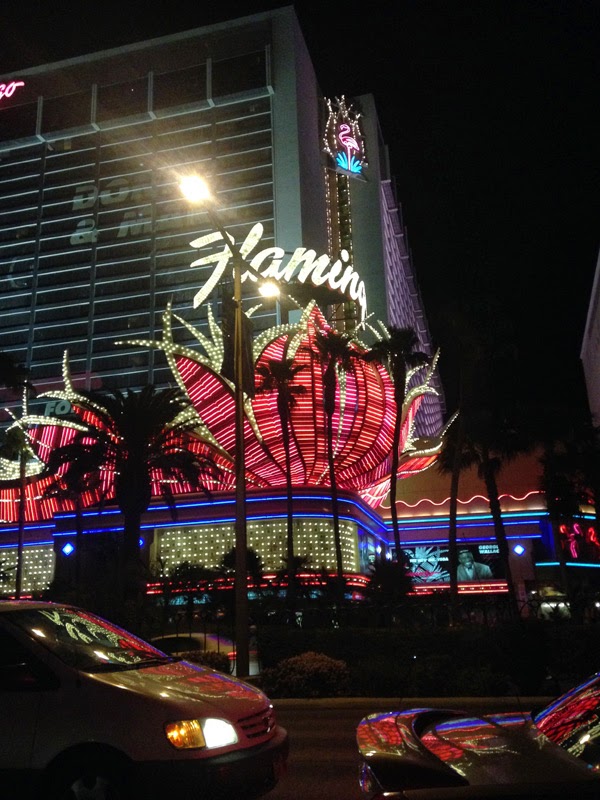
Reason #4 Las Vegas is great for family trips: you can avoid the strip, or just drive through for the fun of looking at lights.  Driving along the strip at night means avoiding the fliers for clubs, characters dressed and looking for $15 photos, and drunk throngs.  Greta enjoyed the lights and buildings almost as much as the aquariums.  Next time, we will make sure she gets to see the Bellagio fountain though, though I will most likely still enjoy it more than she will.

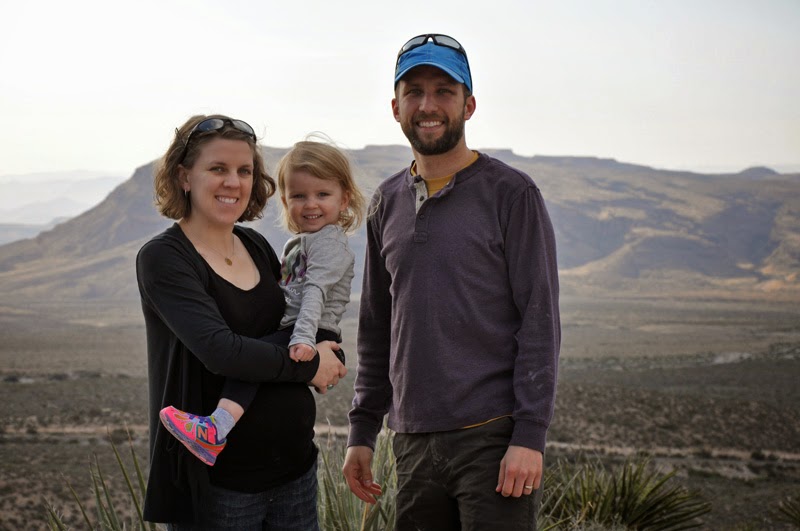
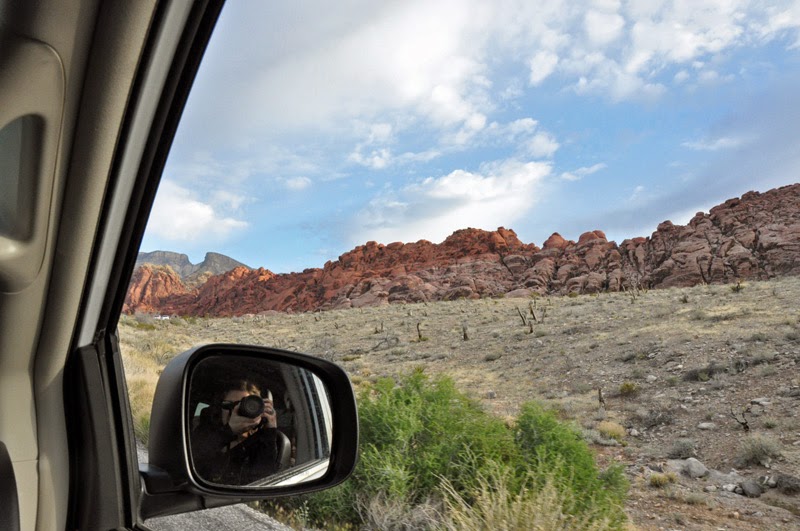
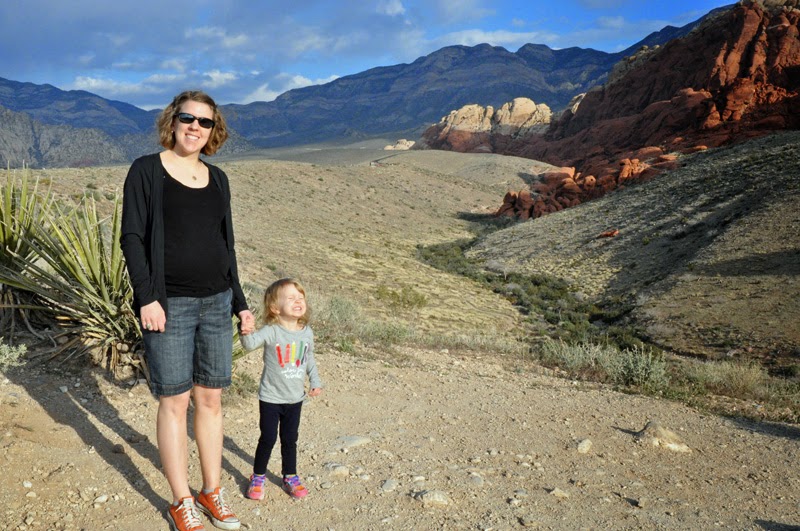
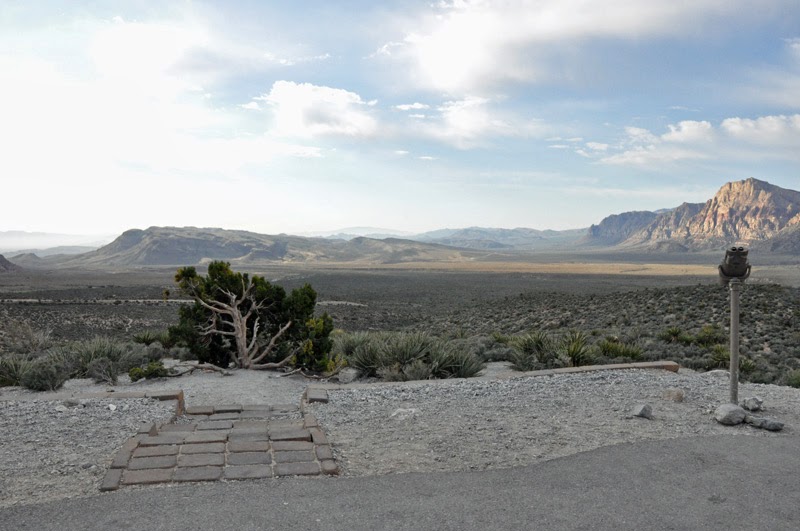
Reason #4 Las Vegas is great for family trips: plenty of things to do outside!  Most people don’t think beyond the strip when it comes to Las Vegas.  This is a shot out the window at Red Rock Canyon National Conservation Area, just 17 miles outside of the Vegas strip.  Normally it costs $7 for a single vehicle to enter the area, though there are some free dates.  Check the website for those.

We drove the 13 mile scenic road loop and got out for a short hike and photo ops.  Greta enjoyed the views of the rock formations, the sandy trails, and different plant life.

This scenic pull-out was one of our favorites.  Greta gave us an impromptu dance and we even spotted a hot air balloon off in the distance.  We didn’t make it into the visitor center, as we were took much longer walking and photographing than we anticipated.  However, I have heard and read that it is well worth the stop.

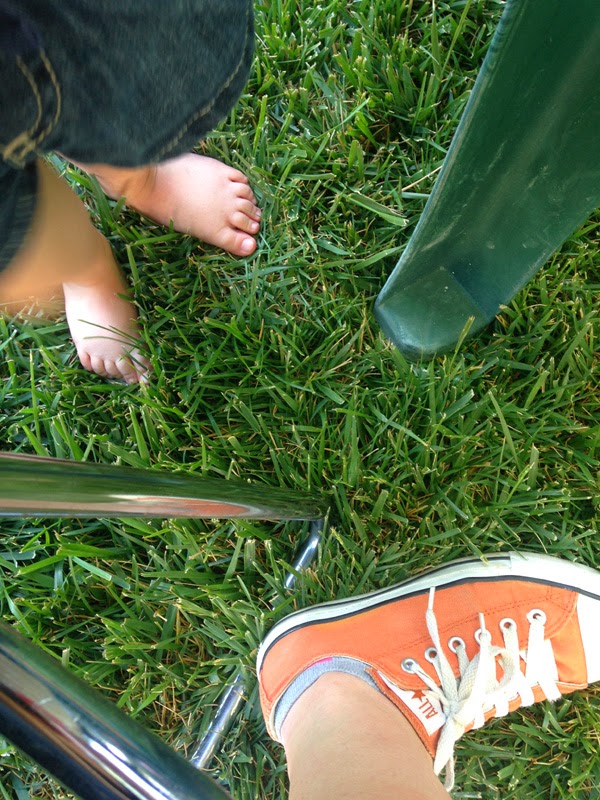
Reason #5 Las Vegas is great for family trips: beautiful spring weather when it is cold and snowing in Iowa.  Here we are relaxing in the backyard of Eric’s aunt and uncle.  It was lovely to sit in shorts and a tee shirt in the sunny 75 degree weather for a couple days.

Greta acted like she was getting away with something naughty when I told her she could take off her shoes and socks and go barefoot in the green grass.

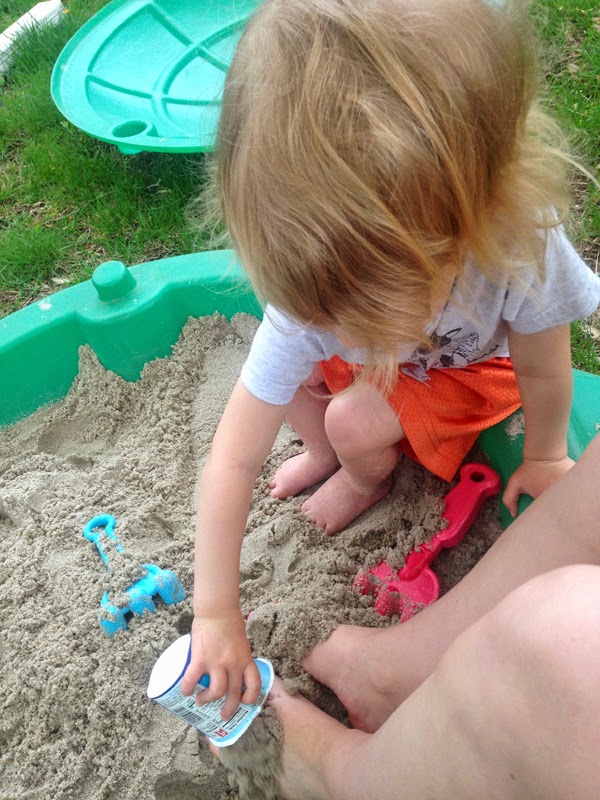
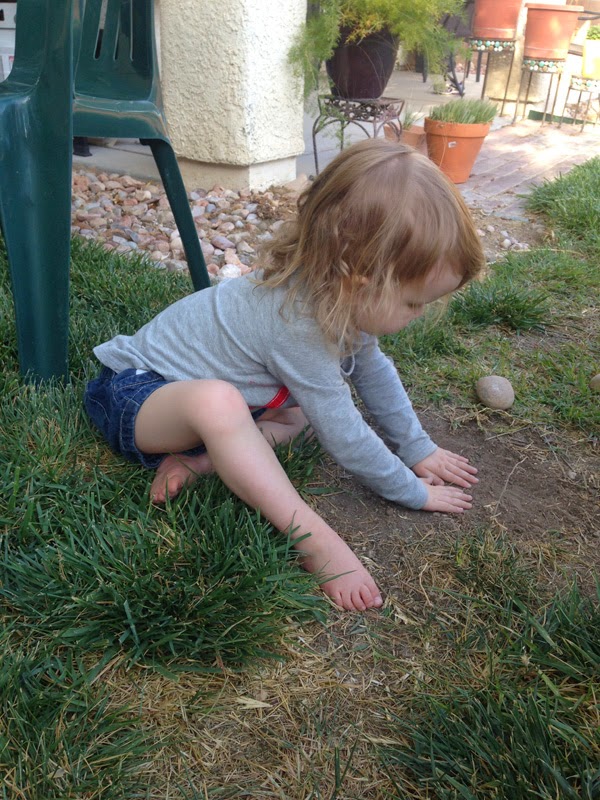
I do believe her favorite part of the trip was our last night, digging in the dirt and making pretend dirt pancakes.  This girl and her mother are ready for spring!