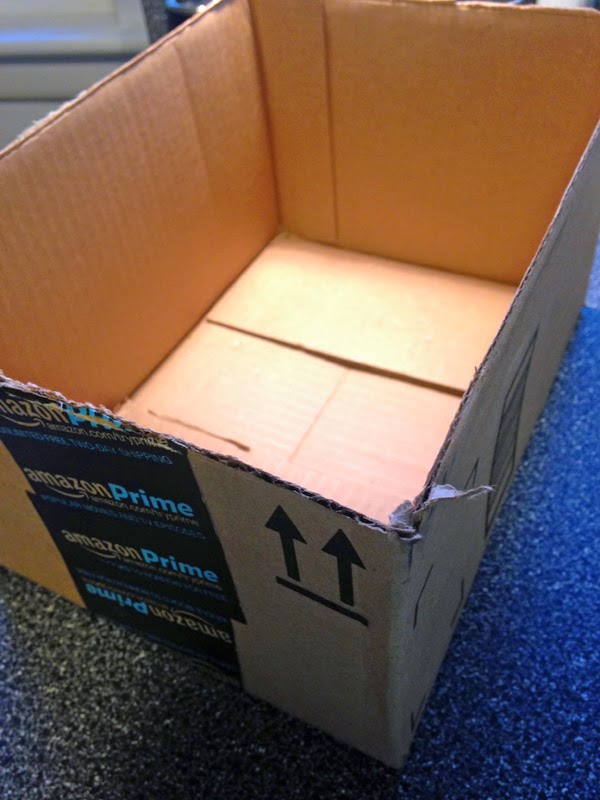
1. Gather supplies needed:
- Box
- Mod Podge
- Scissors
- Paint brush
- Comics page (or any other paper you would like to cover your box in)
3. Cut size of paper you plan on gluing down first.
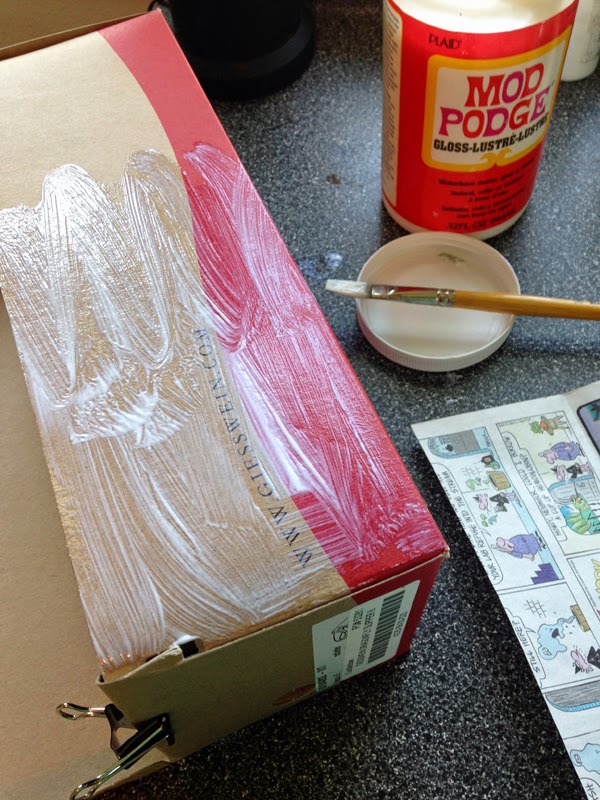
4. Brush Mod Podge over the area you are planning on covering first (about the size of the paper you just cut). I worked on one side at a time so that the Mod Podge would not glue too quickly. That paperclip, seen above, is holding a flap down, since one side was coming loose.
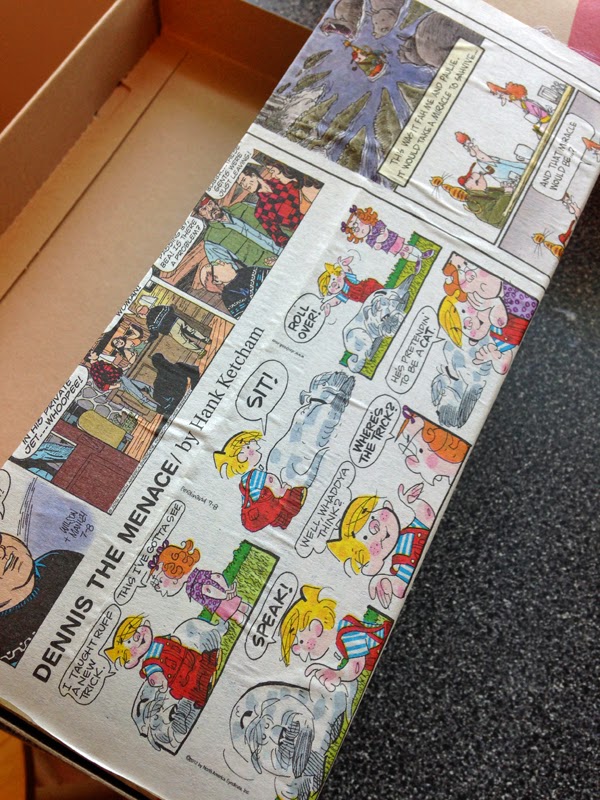
4. Carefully smooth cut paper over the entire area of Mod Podge. Smooth with hands and whenever possible, wrap edges with at least 1/2 inch of paper to prevent curling and rough edges later.
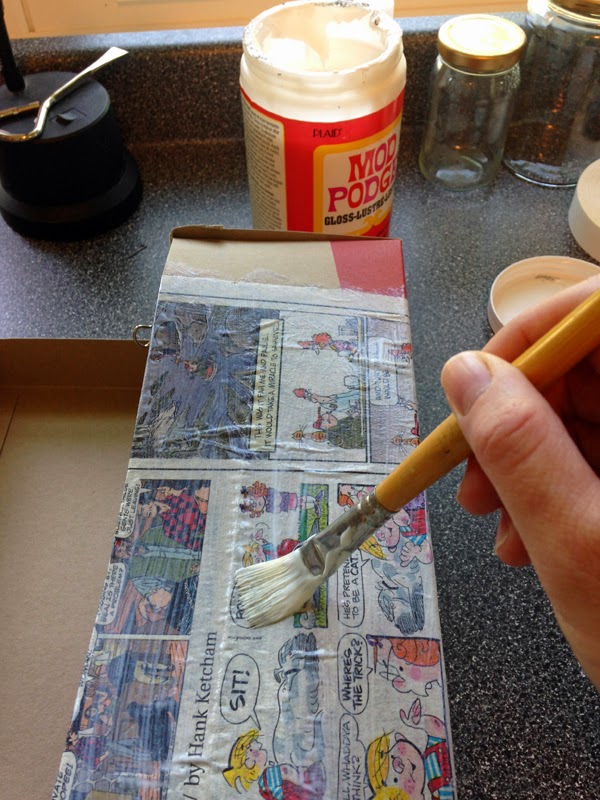
5. Brush a layer of Mod Podge over paper. Use smooth brush strokes and use just enough to cover the paper. Thick brush strokes will dry with ridges and texture (unless that is the look you are going for). Allow 15-20 minutes and then add a second coat. Allow to dry completely before using.
Things I learned:
- Due to the nature of newspaper, the finished product will have some wrinkles and bubbles. Embrace it.
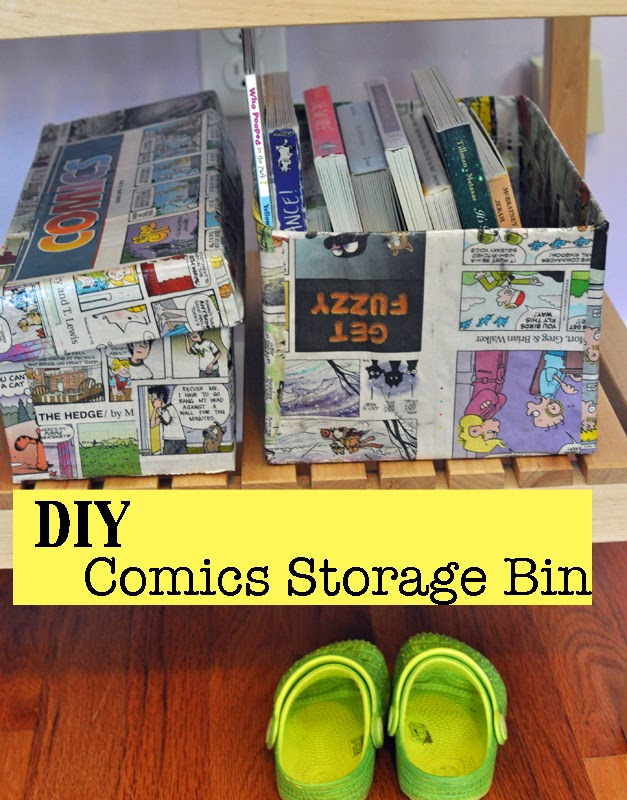
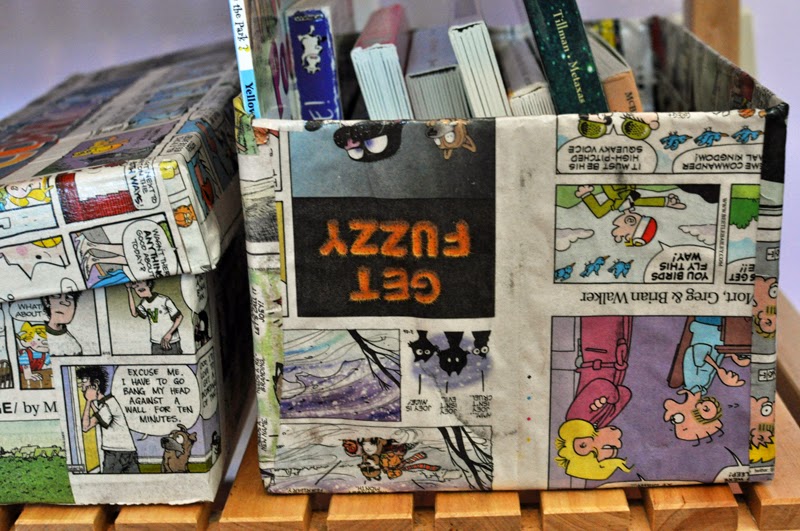
- The open box, right, is much easier to use than the box with a lid, left. Boxes with lids tend to stick together a bit due to Mod Podge’s slightly tacky finish.
The finished product was a hit with my toddler – she loves to read the comics, or coupons as she calls them. Who knows why? They are now being used to corral her favorite bedtime books and doll clothing in her room. More on her finished big girl room later.
