Fried Egg Sandwich 101

This is one of my all-time favorite meals – the egg sandwich.  I will eat it any time of day and any day of the week and the best part is dressing this simple food up with a variety of condiments, fruits, spreads, and vegetables. 

The most common way that I make a fried egg is to heat one of my cast iron skillets over medium-low heat until the handle is hot to the touch. I use just a light spray of olive oil.  Then, crack an egg into the pan and break the yolk with a turner.  If you want a sunny-side up egg, leave the yolk intact.  Cook 1-2 minutes per side, depending on your preferences.  I hate a crispy, dried edges egg, but also hate runny whites.  In other words, I stand guard over my cooking eggs, never leaving the pan.

In a pinch, a I will whisk one egg with a bit of almond milk in a bowl.  Then, microwave on high for 1:20 or till done.  Use a spatula to loosen egg and use in place of pan-cooked egg.  The egg can easily be sliced and diced to fit your needs.  This method works best for feeding hangry toddlers in the wee hours of the day, too.

Fried egg sandwich #1 – Tropics Theme.  Simply layer lettuce, slice avocado, and crushed pineapple on a slice of toasted bread.  Then, place cooked egg and melted cheese on second slice of bread.  Layer into a sandwich and enjoy.

Eric created and made this tropical infused fried egg sandwich and I was impressed with the complexity of textures and flavors in this combination.

Sandwich #2 – Spicy Avocado Fried Egg. My go-to fried egg sandwich is simple: slice avocado, a swirl of Sriracha, and a fried egg on toasted bread.

I used rye bread for this sandwich.  Never underestimate your choice of bread for a fried egg sandwich.

 
I love this and would wear it proudly.  

Sandwich #3 – Egg-in-a-Hole.  Start with a solid bread – something with a nice crust and a chewy interior is best.  We opted for dried tomato & cheddar from our favorite local bakery, Loaf.  Cut a hole in the center of the bread and either butter up with a spread, or spray the pan with olive oil.

Preheat the pan and place bread on hot pan.  Crack egg into hole in bread, cook 1-2 minutes per side, again depending on your preferences for eggs.  Sprinkle with Parmesan cheese.

Meanwhile, prepare bed of lettuce on a plate.  Transfer cooked bread & egg onto bed of lettuce and drizzle with Sriracha.  This is an easy and elegant brunch or breakfast.  Breakfast in bed for Mother’s Day anyone?

Sandwich #4 – Hard Boiled & Mustard.  Place eggs in a sauce pan, submerged completely with cold water, place pan on stove and turn on heat to high.  When water reaches boiling, turn water down to medium high and boil for 10 minutes.  Drain water, rinse and soak in ice water completely to prevent the yolks turning greenish.  Peel and slice.

Toast wheat bread slices, layer with lettuce.  Place sliced eggs on top of lettuce.  Mix in a small bowl 1-2 tablespoons of mayo with 1-2 tablespoons of stone ground mustard and a few dashes of hot sauce.  Spread mustard mixture over top of eggs.

BBQ Tempeh Pizza

Yet another, what do I have in the pantry/fridge that can be made into a meal?, recipe.

We have been loving Earth Fare’s chiptotle barbecue sauce lately – it is sweet and surprisingly warm.  This combined with onion, mushrooms, and tempeh made for a perfect fast and filling pizza.

Simply use the BBQ sauce in place of tomato sauce and sprinkle with sliced toppings.  I always use my best pizza crust ever recipe and bake the crust for about 5 minutes at 425 degrees before adding any toppings.

Bake at 425 degrees for 10 – 12 minutes or til done.

BBQ Tempeh Pizza

1. Prepare pizza crust, see below.  After rising and punching down, bake on pizza pan or stone for 5 minutes at 425 degrees.

2.  Prepare toppings.  Heat 1 tablespoon olive oil over medium heat.  Saute ½ yellow or white onion, diced, until soft. Slice 4 oz. tempeh into ½ inch slices.  Slice 4 oz of mushrooms.

3. Spread BBQ sauce over semi-baked crust.  Add onions, mushrooms, tempeh, and shredded real or fake cheese.  Bake at 425 degrees for 12 – 15 more minutes or until cheese is melted and toppings slightly browned.

Best.Pizza.Crust.Ever. – Food Network Kitchens, Making it Easy, 2004
1 cup tepid water (105 degree water)
3 tablespoons extra-virgin olive oil, plus more as needed
2 teaspoons agave syrup
1-1/2 teaspoons kosher salt (optional)
1-1/2 cups all-purpose flour, plus additional for kneading
1-1/2 cups whole wheat flour
1 packet active dry yeast
1. Mix flour and yeast in a bowl.
2. Mix warm water, olive oil, agave syrup, and salt in a bowl.  
3.  Make a well in the dry ingredients.  Add liquid ingredients and mix well.  
4.  Knead for about 5 minutes, use extra flour if the dough is really sticky.  
5.  Place in a greased bowl and let rise in a warm spot for 45 minutes.  

6.  Punch down dough and let rest for 10 minutes.  In the meantime, preheat oven to 425 degrees and prepare pizza  pan(s).  

7.  Stretch (or hand toss, if you are really talented) into desired size.  

8.  If you are making a thick crust pizza, bake the dough at 425 degrees for about 10 minutes before adding and toppings.  This will ensure you do not get the doughy, uncooked center.  

9.  While your crust is baking, prepare toppings.
10. Bake pizza in 425 degree oven for about 12 more minutes or til done, on the lowest oven rack.  

Jicama w/ Lime & Chili Dip

Meet jicama.

I have been loving this snack combination all week.  A crisp snacking tuber is paired with a creamy, tart, and peppery dip – it’s the perfect party duo, after school snack, or mid-morning work munchie.

This tasty tuber is also known as a Mexican potato.  Jicama has an interesting texture – crisp like an apple without the juice, however it is not sweet.  It is a hard flavor to describe – almost cool and cucumber-like with more of a potato taste.  The flavor is by no means strong and it makes a great snacking food.  Greta used to love jicama – I am not sure what changed her mind, but now she spits it out.

To peel, cut the top and bottom off, use a serrated steak knife to scrape edges of peel away from flesh of jicama, and then peel away with hands.  The peel should come off quite cleanly, if not, use knife to scrape away flesh.

 Slice jicama into wedges.

To make dip, combine: 1 cup of plain Greek yogurt, 1 tablespoon lime juice, and 1 tablespoon chili powder.  Mix well and dip away!  To store sliced jicama, be sure to put in covered, airtight container to prevent drying out.

Jicama is actually the tuberous root of a legume plant and grows on a vine.  When looking for jicama at the store – look for medium-sized tubers that are dry and firm.  Wet spots will indicate rot or mold and larger jicamas may lack flavor.  Jicama can be refrigerated for up to two weeks. To read more about jicama, check out this article from Wise Geek.

Lime & Chili Dip

1. In a small bowl or jar, combine 1 cup plain Greek yogurt, 1 tablespoon lime juice, and 1 tablespoon chili powder.  Mix well.

Vanilla Ice Cream

This organic ice cream is easy to make and can be dressed up into a fancy sundae with peanut butter chips, chocolate sauce, and sprinkles as above, or kept plain old classic vanilla – see last photo.

Eric found a brand new, never been used(!) ice cream maker at a thrift shop a few weeks ago and was eager to get it home and try it.  Well, life got in the way, and it was not until this past week that we broke it out.  The inaugural run for this classic ice cream maker, was only fitting – classic vanilla ice cream.

I am all about organic whenever possible, so Eric opted for the organic whole milk and cream for this recipe.  Eric did a lot of recipe reading before settling on a simple one from the Better Homes and Gardens plaid cookbook.

This recipe only calls for 4 ingredients – a variation of a sort of milk, cream, vanilla, and sugar.

Mix well.  Place in ice cream maker.

Close tightly.  Follow instructions per your ice cream maker.

Eric set ours up inside a cooler with ice – this way the salt would not kill the grass or any other plants.

After about 20 minutes of mixing, we had thick and creamy ice cream.

We froze the ice cream about 4 more hours to ensure it would not melt immediately when served.


Vanilla Ice Cream – from Better Homes and Gardens 

1. In a large bowl, combine: 4 cups half-and-half, light cream, or milk, 1-½ cups sugar, and 1 tablespoon vanilla.  Stir until sugar dissolves.  Stir in 2 cups whipping cream.

2.  Freeze ice cream mixture according to directions on ice cream maker.  Freeze for 4 hours before serving.

Ok, I admit, I have always wanted to try one of these ice cream makers.  Has anyone tried one to see if they work well?

Sewn Paper Cards

These are a few more of the sewn paper cards I have been working on lately.  I have so many projects, they are coming out of my ears – I can’t get them on paper fast enough.  The infrequent art project posts on here are only because I have too many going at once to get them finished enough to document for the blog.  Not to mention a all the other distractions in life: work, daycare prep, making meals, keeping a house clean and organized for showings, packing, and the move.

The move to Iowa has been in the back corners of my mind for months now.  We leave NC for Iowa in two months – surreal – I won’t deny that I am nervous and scared out of my mind.  Changes are, and always have been, difficult for me – I am still to this day amazed that I chose to pick up and move myself to a state I had never been to, a job I didn’t know if I would love, to place where I knew no one.  Now, after years of saying how much I want to be back in Iowa, I am realizing how much I will miss Greensboro and the state of North Carolina.  I have grown to love this place and we made it our home.

Despite my fears of the unknown, I am getting more excited though as we look at places to live in Iowa, discuss Greta’s birthday in Iowa, the new job possibilities for Eric, applying for teaching positions all over the Des Moines area, and the old friends we will get to spend more time with.  It also helps that we have two excellent people who have committed their time to helping us get back to Iowa and know that with their help I can stay upbeat.

To help me focus on the positives of this move, I made a book for Eric and me to use on nights out.  Each page has a different restaurant from the Des Moines area – in an effort to get us to try new places and maybe just maybe find my new Sticks & Stones and become a regular.  I have a few good leads on a place to call ours.

I saw this idea from Sara of the Spotted Fox, on Pinterest and knew it would be a perfect way to find new places in our new old city of Des Moines.

Discount School Supply Save on School Supplies

Spring Break 2013: North to Corolla

As always, prints, prints of photographs, and original artworks are always for sale, please inquire by e-mail or through my Etsy shop.  If you are interested in purchasing something you have seen on this blog, I will create a custom listing for you.  I also do custom commission pieces as well.  

We spent some time at the beach the morning after we stayed in Ocracoke.  Greta loved the sand, shells, birds, and dogs.  She found a plastic rake on the beach and used it to stir up trouble.  The highlight of the morning, for Greta, was when a helicopter flew over the beach close enough for us to see the passengers waving at us.

We loaded a tired Greta into the car and boarded another ferry – this time to head north to Hatteras.  This shorter ferry ride is a unique one and a free service provided by the NCDOT.

Once off the ferry, the drive north along Highway 12 is a scenic one.

This bridge was built quickly to accommodate the newest inlet, Pea Island Inlet, after the most recent hurricane season.  It doesn’t look shady or anything…

We reached Corolla by afternoon.  The live oaks are much taller and more prevalent in this region of the Outer Banks.

We stayed at the Inn at Corolla Light.  The room was very spacious with a bedroom, bathroom, and large closet at one end.  In the middle it had a ,small kitchen with a sink, microwave, refrigerator, and basic necessities.  The living room was at the other end with a sleeper couch, table and two chairs, TV, and sliding glass doors that opened up to the pool and hot tub!  There was plenty of room for Greta to spread out – she took no time at all to sit at the table and color.

The deck was just outside our room – complete with hot tub and pool that overlooked the water.

We went exploring before dinner.


This place would be a hopping place in the summer.

Can’t you just see a wedding at the end of this pier?  This place begs for another visit.

To the right of the pier was this view: the Whale Head Club and still the forest fire.


A boardwalk and gravel trail continues along the edge of the water, offering excellent birding opportunities.


beach.2

Our mornings were filled with beach trips.  This is the end of Highway 12 – a sandy road blocked off with fences to protect the wild horses the roam the area.

The Fit was not fit for sand driving.

So, we traded in 4 wheels for 2 wheels.  Nothing like a chilly, beach bike ride to start your day.

It was a dramatic morning for a ride, with plenty of sites.

Rain was looming most of the out time in Corolla – but it did not stop us from getting our fill of the area.

We checked out a trail that takes one out to the coastal marsh of the estuary.  We spotted only one wild horse only briefly – sadly some really loud visitors scared it off.


The area was beautifully quiet after the noisy crowd  moved off in search of other wild horses to scare off.  The muddy area underneath the walkway was filled with horse prints.

The first part of the trail snaked in between a maritime forest of live oaks, southern wax myrtles, and loblolly pines.


We ate dinner at the best Mexican food I have had in a long time at Agave Roja in Corolla.  I have been hunting for something that even compares with the pescado tacos I had in the heart of Mexico City at a little stand years ago.  I finally found them, on the NC coast – they were grilled with crunchy slaw, chile aioli sauce and guacamole.  Eric ordered Camarones Tacos with pineapple-haberno sauce that were to die for as well.  The black beans and rice were also fantastic.  More to come on those in a future post.

The atmosphere and artwork were equally pleasing – tasteful rope light and original paintings.


Our last day at Corolla started with a walk at the beach at dawn.


We are all a bunch of early birds and had no trouble getting down to the water to see the sun rise.


We were glad we made it – the colors were liquid golds, pinks, and violets.  How were we to know this would be the only sunlight we saw on this day?

After breakfast we made a stop at the Currituck Beach Lighthouse, but Greta was more concerned with where her shell had gone inside her pocket.


Out last stop was at the stately home of the Knights, known as the Whalehead Club.  It was built in the 1920s as a hunting and entertaining lodge for wealthy northerners.  It has been restored and tours are available.  We opted to quickly view the free basement exhibit and take Greta on her merry way, as she was crashing towards nap time.
Oh North Carolina coast – how much I will miss you when we are in land locked Iowa.  I am so grateful for this spring trip to familiar and new places.  I hope we see you again soon, Outer Banks and Atlantic Ocean.  This image is from a trip in July of 2007, and is the beach on Ocracoke Island.
 A few of my favorite reads on the Outer Banks of North Carolina are:

Cherry Hazelnut Muffins

These muffins are so tasty and low in sugar!  I have been on this baking with Stevia kick and am really liking the results.  The combination of hazelnut and cherries comes about as a search for a spring break muffin – in other words “What do I have that I can use up and it will still taste good?”

I decided to try out the Truvia Baking product.  This is a Stevia sugar mix – if you need 1 cup of sugar, you use ½ cup of this product.  My recipe needed ⅓ cup sugar, so I ended up using 2 tablespoons plus 2 teaspoons of the Truvia.  This does not make these muffins sugar-free, but very low in sugar, and yet they still have a sweet taste.

The dried cherries I had have sugar in them – drat!  It is amazing how many food items actually contain sugar once you start reading labels carefully.

Hazelnuts always remind me of chick peas.

Chop up the cherries and hazelnuts and add to the dry mixture.

I decided to try another new baking product – If You Care Unbleached Large Baking Cups.  They are unbleached and chlorine-free.  Normally, I just skip the baking cups altogether, but they are nice to have on hand, especially if you are planning on taking your muffins or cupcakes to a party or gathering.

Fill the cups ¾ full and bake at lower temperatures for larger muffins.

Eat warm – try not to eat the entire batch in one sitting.  I noticed that 1 hour after I made these babies FIVE were already gone!

Cherry Hazelnut Muffins – makes 12 muffins, adapted from Joy of Cooking

1.  Combine in a medium bowl: 1 ¾ flour, 2 teaspoons baking powder, ¼ teaspoon salt, 2 tablespoons plus 2 teaspoons Stevia, and ⅓ cup toasted wheat bran.

2. Whisk together in a small mixing bowl: 2 eggs, ¼ cup oil, ¾ cup almond milk.

3. Combine with the flour mixture: ¾ cup chopped dried cherries and ¼ cup chopped hazelnuts. Make a well in the dry ingredients and add egg mixture and combine with a few swift strokes.

4. Fill prepared muffin cups ¾ full.  Bake at 350 degrees for 25 to 30 minutes.


Spring Break 2013: Piedmont to the Coast

We got up Friday morning and headed to the Outer Banks of North Carolina – these barrier islands are a unique area to visit and have captured our hearts over the past eight years.  We did the math and I have been to the Outer Banks 8 times and Eric 7 times.  Not bad – we did well on being tourists in our own state.

Friday was a beautiful sunny day and driving conditions were perfect.  We did encounter the smoke from a large forest fire on the way to the coast.  For a while we were worried it would impact travel.

The trip takes a while but Greta was a sport – she did manage to figure out how to get her socks on her hands as means to entertain herself.

 I love this – a perfect lesson in 1-point perspective.

We were the last ones on the ferry at Cedar Island, we thought for sure we were going to miss our reservation.  Once on board, we had three hours to roam about.

Greta enjoyed running around the ferry, watching seagulls, and watching other people and their dogs.  One particular year, my father in law had a cookie stolen out of his hands by a thieving seagull.  I guarded my child on the ferry this year and made her eat in the car.

 While Greta snacked, I made time to make some art.

The rear view of a ferry is just so mesmerizing.  One year, we were followed by porpoises on our ferry ride.

Ocracoke Island at last!  Ocracoke is one of my favorite places on this planet.  It is like funky Key West meets quaint Southern charm.  The island is not as crowded as the northern parts of the Outer Banks – say Nags Head or Kitty Hawk, but clears out every evening as tourists leave on ferries.  The entire island is easily biked, the entire town is easily walked, and only accessed by ferry.  

We biked around the island a bit before dinner, trying to find my favorite restaurant the Flying Melon Cafe.  We soon discovered it was no longer my favorite restaurant and now a Mexican restaurant.  So we settled on Howard’s Pub.  The decor is like a college town pub meets fisherman vibe.  The kids menu comes served on a Frisbee.  It was ok.  No Flying Melon Cafe though.

We stayed at the Anchorage Inn & Marina which overlooks Silver Lake and Irvin Garrish Highway, or Highway 12. After Greta was in bed we watched a fantastic sunset over Silver Lake and the ferry.

The next morning, we explored the island’s neighborhoods and Ocracoke lighthouse by bicycle. 

We headed out to the beach next.  Greta was so eager to get down to the wa-wa that she was wriggling out of my arms in this photo.

After beach exploring, we headed to see the Ocracoke ponies.   Then it was on to the Hatteras ferry, and a nice scenic drive North on Highway 12 to Corolla – a brand new place for us to explore.

Cloth Diapers 101

This post is mostly in response the numerous comments and questions we receive about cloth diapering.  The inquiries seem to have ramped up here lately due to the large number of friends and family members having recently had or expecting babies.  I also always find myself answering questions to curious onlookers in public restrooms while changing Greta’s diaper.  So, here is the down and dirty on diapering in our household.
Greta is a cloth diaper baby and has been since the very beginning.  We made this choice based on the items below.
Cloth diapers cost less. Infants may use up to 10 diapers a day, and somewhere between 6, 000 to 9, 000 diapers from birth through potty-training.  Not to mention the wipes that seem to disappear into thin air – they are disposable, why not use 10??  The dollars spent on these diapers will start around $1, 380, depending on diaper brand.  Check out this great graphic on diapers costs, courtesy of FuzziBunz.   If you plan on having more than one child, the cost is even less with subsequent users as you are completely set up with diapers.
Reduce reuse and recycle.  The disposable diapers a child wears today will still be in the landfill when he or she is an adult.  Cloth diapers can be used by multiple children or even reused for other household cleaning such as dusting or washing cars.  If you have a newer washing machine, the amount of water used to wash diapers is minimal.
Comfort.  I know I would prefer soft fabric to scratchy plastic on my behind.
Convenience.  This was Eric’s number one reason behind the cost savings.  His argument was, I don’t want to be driving to the store in the middle of the night or on a holiday trying to find diapers.  As long as we plan for one diaper and 2:17 minutes to wash, plus some drying time, we always have diapers.  We have never actually ran out of clean diapers.
How did you choose your diapers?  What’s with all the styles, sizes, and types?
When Greta was itty bitty, she wore Thirsties brand diapers.  We chose these diapers because of reviews we had read, the sizing options, the ease of washing, and the fact they are made in the USA.
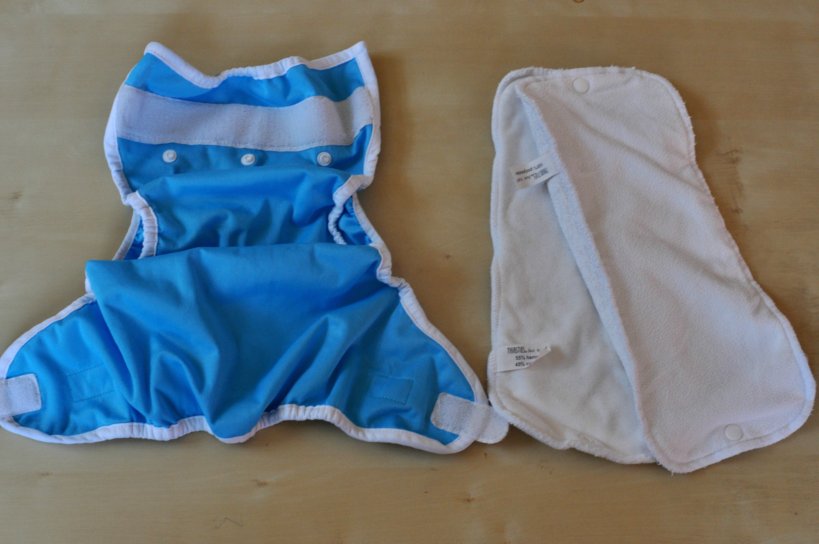
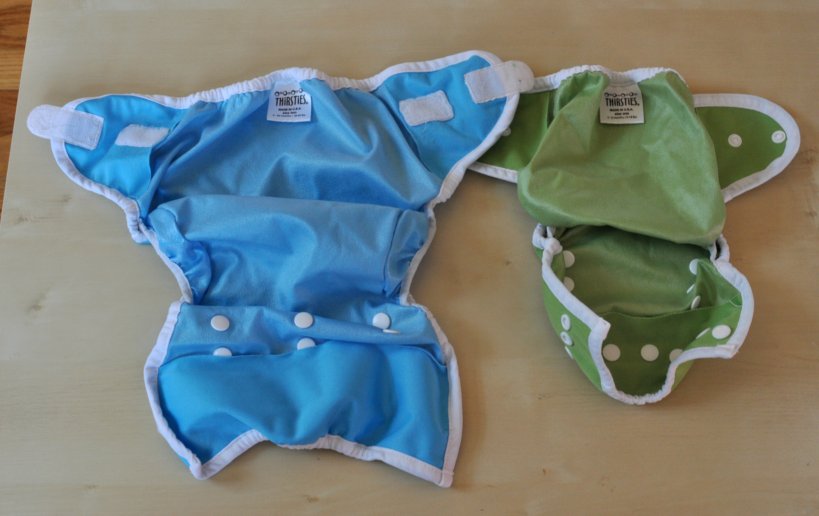
This is an example of the Thirsties diaper.  The covers we opted for had snap closures and other than one snap coming off, we had no problems with these diapers.  The snaps can also be easily replaced.  The inserts are on the right side, they consist of two layers which snap together.  They are simply laid inside the diaper cover (the inside of the this cover is facing down on the table).  This style diaper allows you to flip out the liner and reuse the cover again, or to dump the entire diaper into the diaper pail.  To me, this is what makes it a great infant diaper – its options.  When you are changing 10 plus diapers a day, options are handy.
The left diaper is the larger size – 18 – 40 pounds.  The smaller one, on the right, is for 6 – 18 pounds.  We also used the Thirsties hemp inserts to add extra protection at night without a lot of extra bulk.
Once Greta outgrew her smaller Thirsties diapers, we started shopping around for diapers to fit her through potty training.  We ultimately decided we really liked Thirsties, but wanted pocket diapers for one more layer of dryness.  We tried the larger Thirsties diaper (blue one on the left), but she seemed to be bothered by how quickly she felt wet.
Next, we tried FuzziBunz pocket diapers.  These are great diapers, but they felt small, like they would not grow with Greta.  The liners are super soft and absorbent though.
We finally settled on 
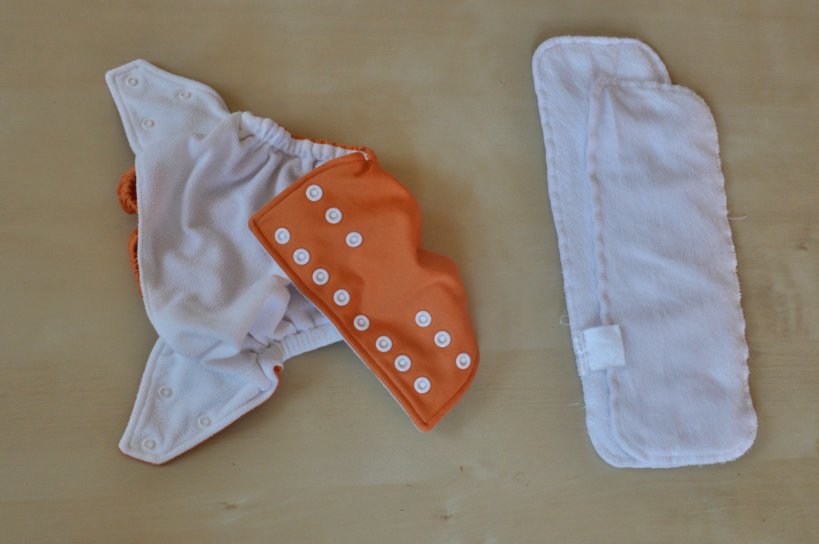
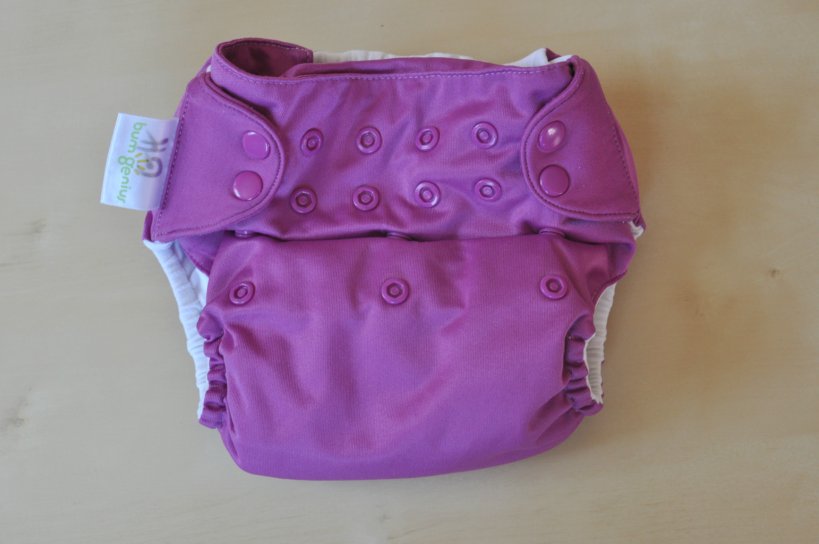
bum Genius diapers – specifically bumGenius One Size Pocket Diaper 4.0 (Snap).  We have with Velcro closure tabs, but it is worn out enough that Greta can pull it off.  The snaps are steadfast and we have had yet to have a single one break or wear out.
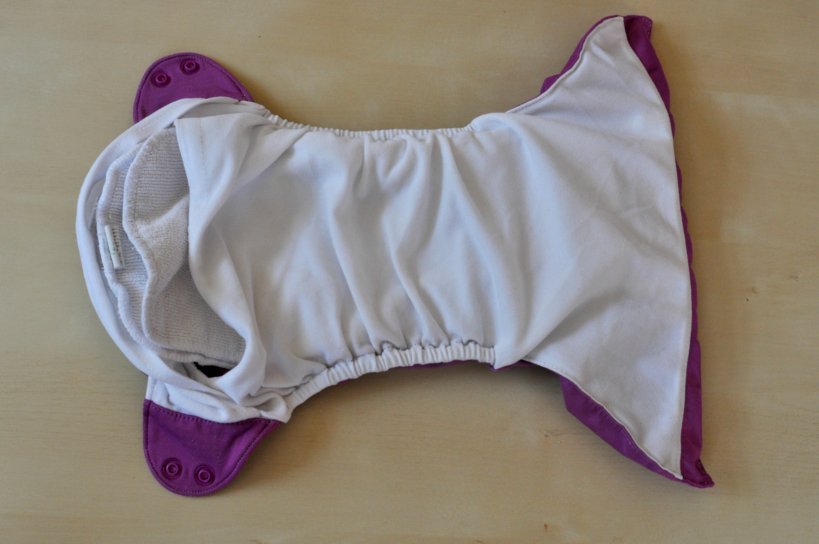
The multiple snaps allow for custom fit that grows with your child.  The image above this one shows the current setting that Greta wears her diapers on.  The diaper on the left, directly above, is shown with the pocket open.  This is where the inserts are placed.  I promise, it is easier than one would think to pull out the inserts and to keep your hands clean.
Here is the diaper with the insert placed inside the diaper.  The opening is covered by the top flap, and then the opening faces the back of your child.
How do you do cloth diapers with daycare?
We searched for daycares that allowed cloth diapers and found one that we are extremely happy with.  We send Greta to daycare with 5 stuffed cloth diapers and a 
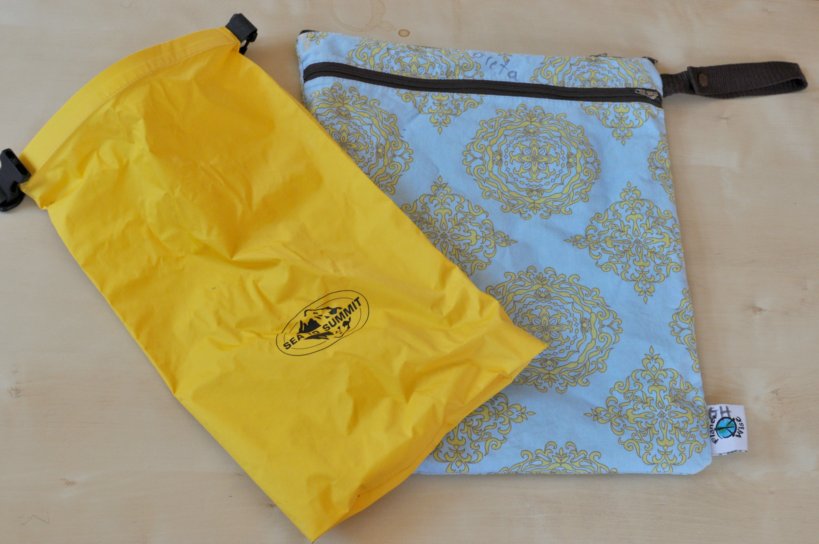
Planet Wise Wet/Dry Bag,
.
The floral design one on the right, is the one that goes to school with Greta.  This bag is made by Planet Wise, and would also work for wet swimsuits, workout clothing, shoes, etc.
The yellow bag on the left, rolls up nice and small.  This is the bag that goes with us, when we are out and about.  It fits perfectly in the diaper bag, is waterproof, rolls and snaps for a tight closure.  It also happens to be a dry bag, the kind normally used by outdoor enthusiasts.  We got ours at REI.
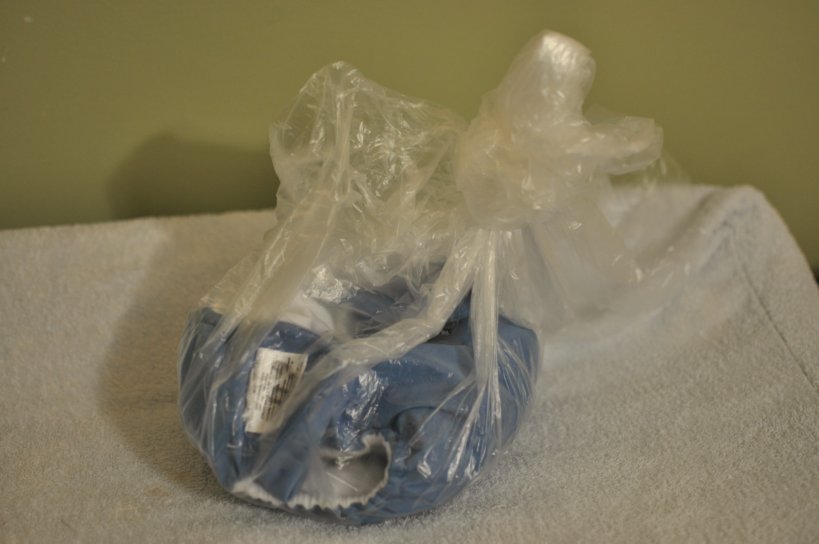
When she comes home from daycare, the wet diapers are in the zippered pouch and the b.m. diapers are bagged neatly like so.  All we do is separate the inserts from the cover, dump them into her diaper pail, and start over for the next day.  We have enough diapers that we only have to wash diapers every other day.
How do you wipe?
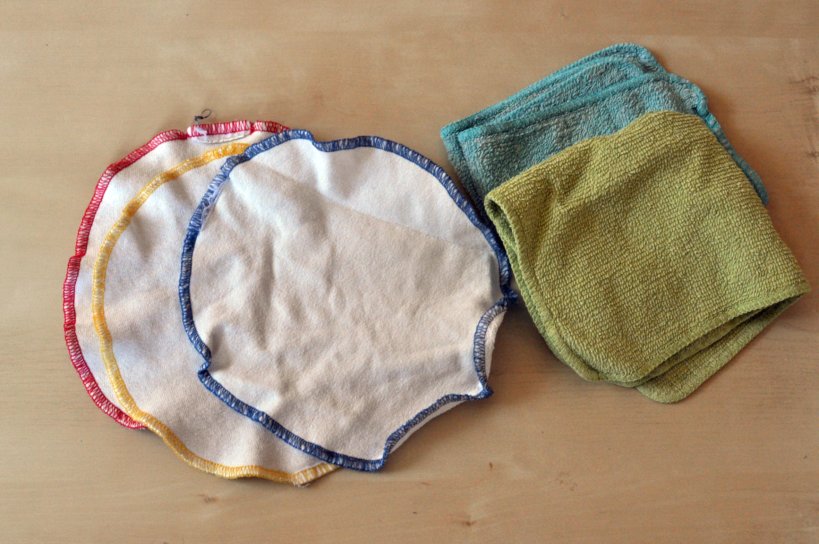
At home, we use rags for wiping.  Honestly, the cheap washcloths work the best.  We have one pack of the round hemp washcloths, left.  These are much thinner and end up being used for her face and nose more often than her rear.  From experience, give me a rag over a diaper wipe any day – there is more to keep your hands clean.
Do they smell? 
Of course they smell – some worse than others.
 
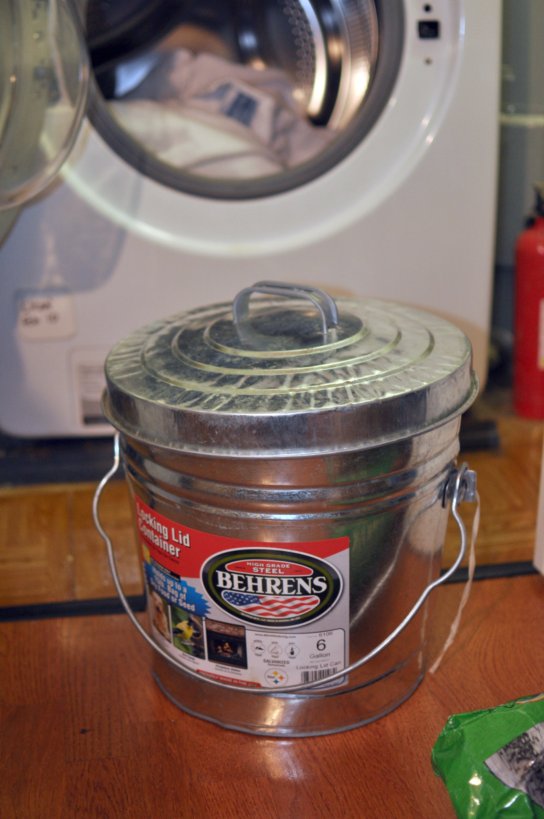
However, choosing the right pail makes a difference.  Our diaper pail came from the hardware store – it is one of those locking lid cans used to store dog food, bird seed, or grass seed.  It is meant to keep rodents out, however, it also keeps little hands out and odors in.  They are cheap and can be moved to the garage after diapering is finished.  I do recommend rinsing this bucket out frequently and it may even be worth spraying the bottom with a rust-proof coating to prevent rusting from damp diapers.
How do you wash cloth diapers?
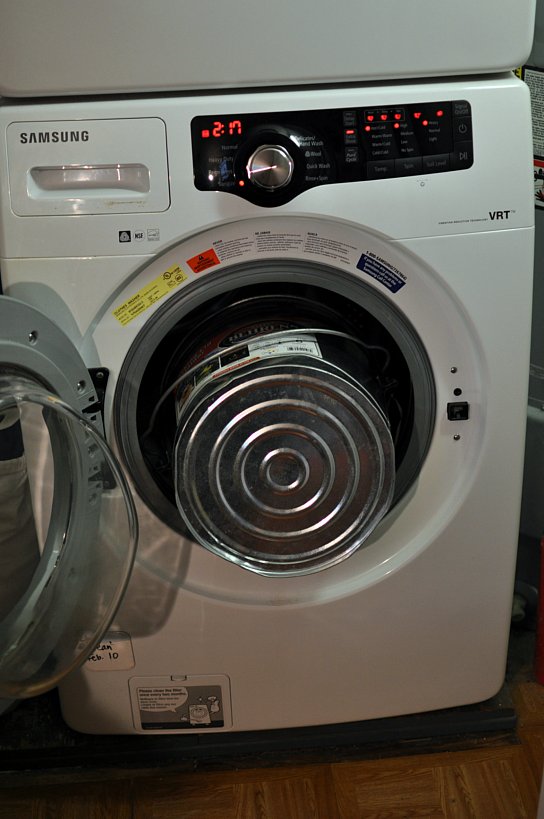
When it is diaper washing time, we just take the entire pail back to the washing machine and dump it into the machine.  This bucket fits inside the opening of our machine – no touching required.
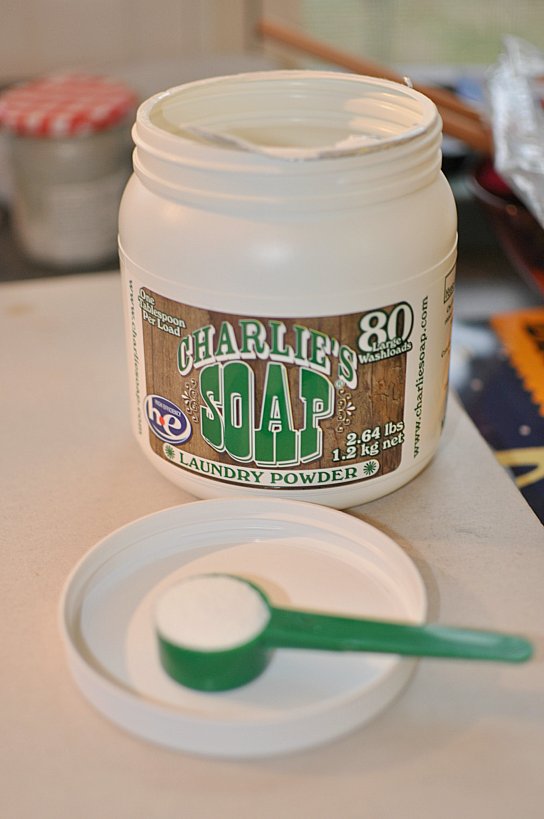
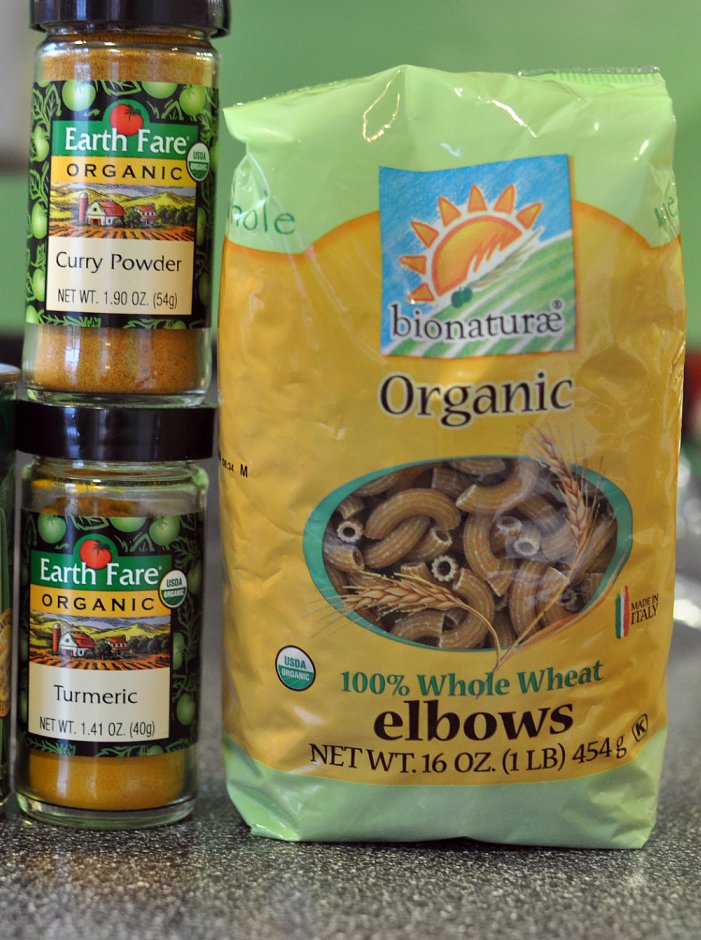
We use Charlie’s Soap Laundry Powder.  Just one tablespoon per load – actually we use ½ of a tablespoon for diaper loads – this small amount helps to avoid residue which can cause diapers to be less absorbent.  This laundry powder cleans well, is odor-free, and does not add any residue to cloth diapers, as some other brands tend to do.  I also love that it is made in North Carolina.
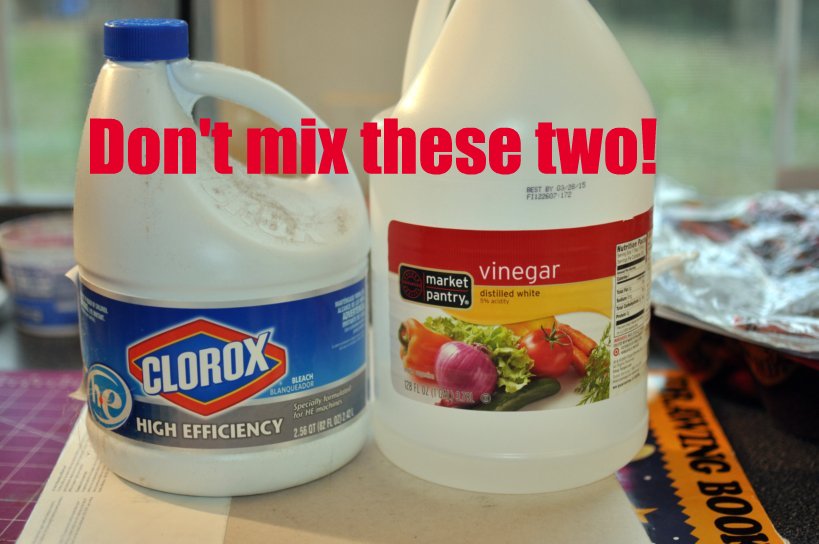
We use mostly vinegar as a rinsing agent when laundering cloth diapers.  I pour it into the fabric softener slot.  Sometimes we use bleach – especially if Greta has been sick.  However, as a reminder, these two should never be mixed together, as they produce a toxic gas, chlorine.
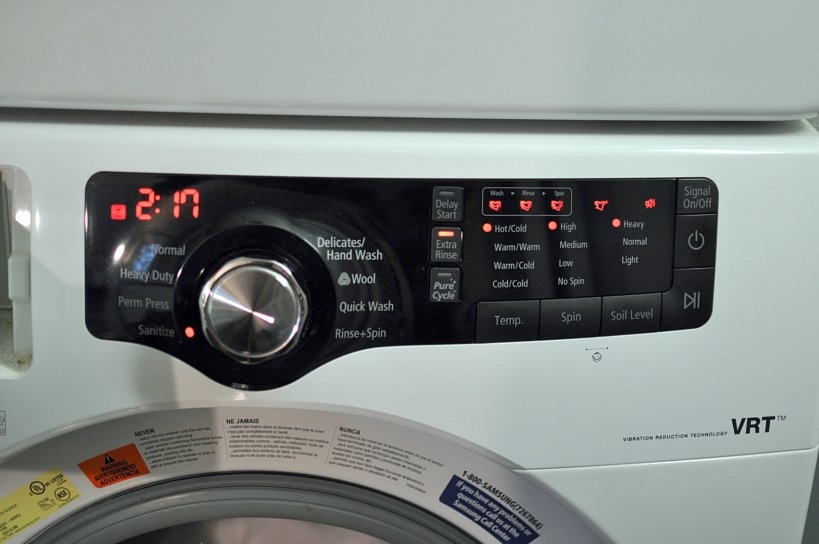
Once everything is loaded, the machine is set to sanitize wash cycle, extra rinse and heavy soil level.  This entire wash takes 2 hours and 17 minutes.
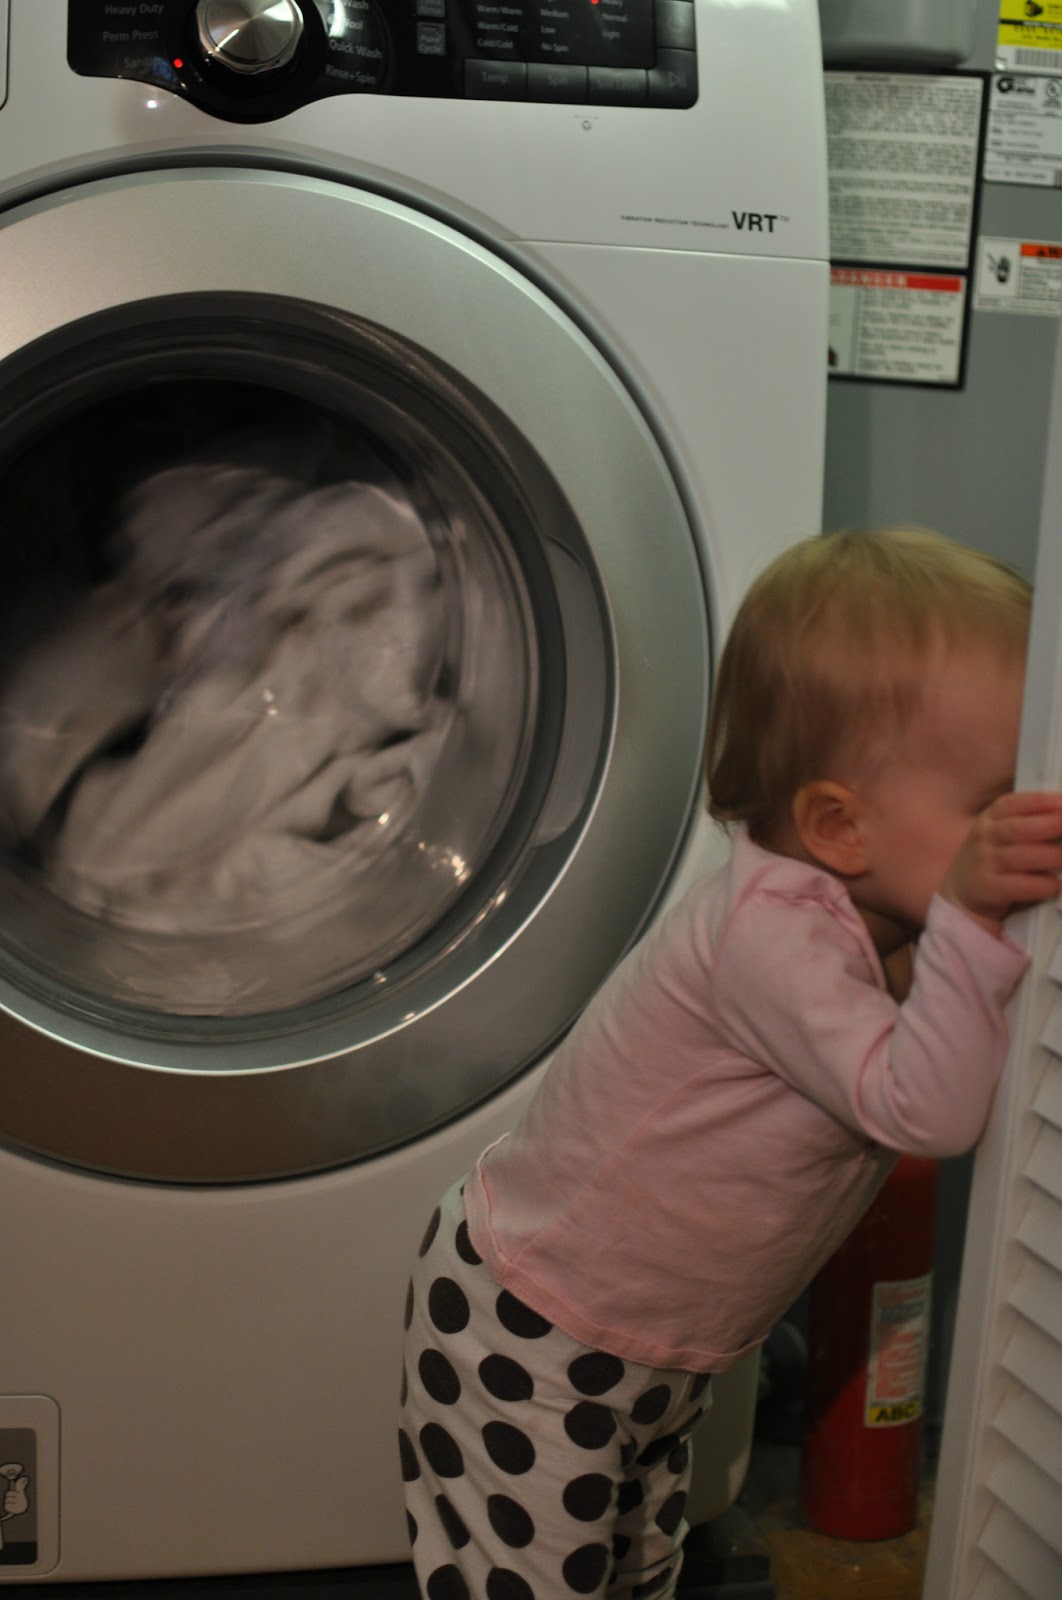
Our laundry room is in the play/art room at our house.  Sometimes Greta likes to come over and watch the diapers spin around – though she has to be kept away when the water is heating during a sanitize load, as the sides of the washer can be very hot.
How do you dry cloth diapers?
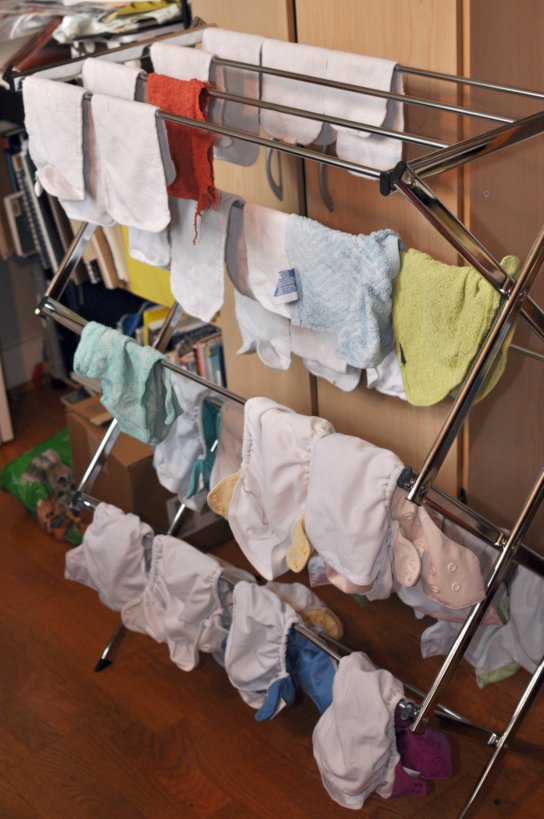
Hanging up diaper covers and inserts is the most environmentally sound way to dry diapers.  If you get a sunny day, the inserts dry in a fraction of the time.  Otherwise, if the dryer is used, we still recommend hang drying the covers.
Do you ever have to strip your cloth diapers?  
This is something that I hear people talk about in the cloth diaper world, but have never ever had to do. Supposedly this happens when diapers get smelly and less absorbent.  However, this has never happened to any of Greta’s diapers.  We do not use diaper cream with the cloth diapers and do not use detergents that will cause a build up of residue.  So choosing the right detergent and not using too much detergent are two really important factors to increasing the life of your cloth diapers.


Other FAQS
Do you use a service to clean them? 
 
We thought about it initially, but decided to try it ourselves first and see how it went.  It was always an option with us, but we found our washing machine was just fine.   
 
Did you have any kick back from your husband, friends, or family members?
 
Eric and I talked about this as soon as having children came up.  I always knew I would cloth diaper and was lucky that Eric saw the benefits.  In fact, he is into gear and figuring out how things work, so for him this was another interesting challenge to figure out.  It was at least a week (maybe 2) before I even changed a diaper and he had to teach me how to use the cloth diapers.  
 
Do you feel like it’s saved you money? 
 
We know it has saved us money.  Cloth diapers cost a lot up front – each diaper running anywhere from $8 to $14, depending on the brand.  We figured that they paid for themselves in about 4 months, and the smallest ones we used lasted about 9 months until they would no longer hold enough liquid to last through the night.  We purchased the bigger sizes that we have used for the last year and these have long been paid for as well.  
 
Where do you buy your diapers? 
 
We bought our diapers from Amazon, Target, and a local baby shop in Greensboro, called All About Baby.  We bought Thirsties Snaps, they worked well for infants.  We bought more liners than shells as you could sometimes change out a liner and keep using the shell.  This was really nice with the amount of diapering you do with a newborn.  We bought a small assortment of other brands to try, FuzziBunz, KawaiiBabby, bum Genius velcro and snaps, and size two in the Thirsties.  We ended up going with the Bum Genius snaps (toddlers can undo the velcro), the size and adjustment was just right.  The pockets aren’t bad, you just have to tug out the liner before you wash them, this is another reason we decided not to get them for an infant.  
How many diapers do you need to keep yourself stocked?  
 
We had more than 20 liners of the infant ones and did a load every day for a while.  We also had hemp inserts to make the Thirsties last through the night a little better.  We have 17 of the Bum Genius and they come with extra inserts.  We usually double up and do a three layer for night, now that she is older and drinks more liquid.   

Do you ever use disposables?
 
Sometimes we do when we travel, especially if we are not going to be with family who do not mind us washing diapers.  If we are going on trips less than 2 days we take a large paddling dry bag to store the dirties.  We usually keep a few disposables on hand, just in case we forget to wash diapers – hasn’t happened yet, or if she has really bad diaper rash – has only happened twice.  Diaper cream should not be used on cloth diapers as it can hurt the absorbency.  But like I said, she’s only had that problem twice – that is an upside to cloth diapers – no diaper rash. 

How often do you wash diapers?
 
Every other day, or when the diapers are getting low, or if the pail is stinky.  
 
How do you rinse out poop? Right in to the toilet? Do they stink?

We dump poop into the toilet.  When she was younger, and breastfed, it was different.  It looks and acts more like mustard, so you honestly can just wash as they are.  Or, if that freaks you out, flip it into the water of the toilet, shake lightly and most will go into the toilet.  You can get hoses that attach to the toilet to help with rinsing, but we have never found any sort of need for that.  Daycare allows us to use cloth diapers, but they will bag the poop diapers and then we clean them when we get home.  In between washes, the dirty diapers are stored in a metal pail we got from Lowe’s.  It supposed to be for bird seed to keep out rodents, but it locks nice and tight to prevent odors from escaping.  
 
Do you use disposable wipes or cloth wipes? 
 
It doesn’t make much sense to use disposable wipes if you are already doing all that laundry for cloth diapers.  Just throw them in the with the diapers.  Otherwise, you have a trash can and a diaper pail to trip over in the middle of the night, or you end up washing disposable wipes on accident.  Their skin is sensitive  – you don’t need to wipe for pee, just poop.  

Curried Macaroni & Cheese

This idea was born out of a conversation with Eric and a coworker during a conversation around the microwave at work at lunch (yes, I work with my husband, yes, I actually love it).  Eric was heating up macaroni & cheese when the colleague walked into the mail room.  The conversation went something along these lines:

Colleague: “Ooh that smells really good.”

Eric: “The mac n’ cheese?”

Colleague: “Is it curry mac n’ cheese?”

Eric: “No, that was the meal microwaved before mine.”

Colleague: “Curried mac n’ cheese sounds really good though.”

I have been sitting on this idea for a while now and finally decided to pull it out tonight.  Oh my goodness.  I cannot get enough curry or casserole-like pasta dishes – so this hit the spot.

I kept it simple – pasta, curry, turmeric, and made my own cheese sauce.
Sometimes I do real cheddar, sometimes the cheddar style shreds in recipes.   
The golden color of this sauce comes from the cheese but mostly the electric yellow of the turmeric and curry combination.  
Curried Macaroni & Cheese
1. Cook pasta according to package.  Reserve 1 cup of the cooking liquid.  
2. In a small saucepan, heat 2-3 tablespoons of margarine or low heat.  Add 1 cup almond milk and 2 tablespoons flour, whisk over medium to low heat until thickened and bubbly.  Add 8 oz of shredded cheese or cheese alternatives, 1 tablespoon of curry, and 1 teaspoon turmeric.  Continue to whisk until smooth.  
3. Drain pasta.  Add ¾ to 1 cup of cooking liquid to cheese mixture, stir until well-blended.  Combine cheese sauce with pasta.  Serve immediately.