Blueberry Peanut Butter Granola Bars

b.pb.granola

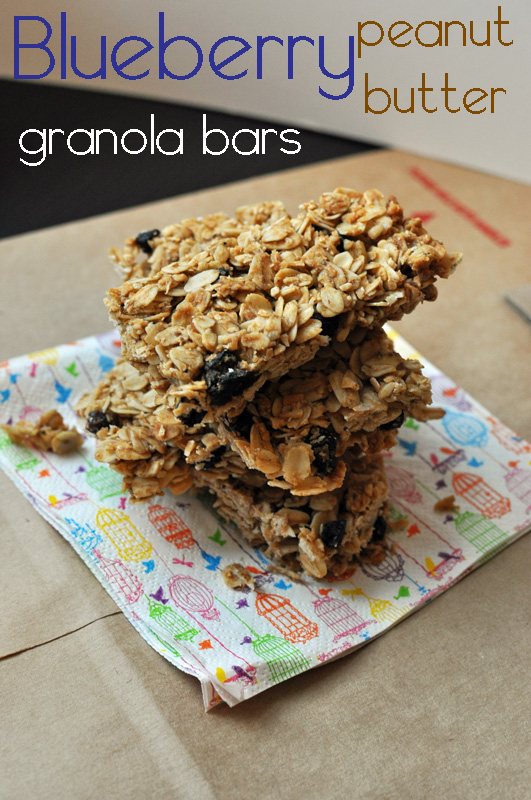
These granola bars are so good and simple to make.  I first made my own home made granola bars from a recipe in Parents magazine, and when I realized how easy it was and how much I was overpaying at the store (!) I started to figure out my own combinations.  This is my favorite one by far – it doesn’t last long around here. Read on for the easy recipe.

IMG_3342

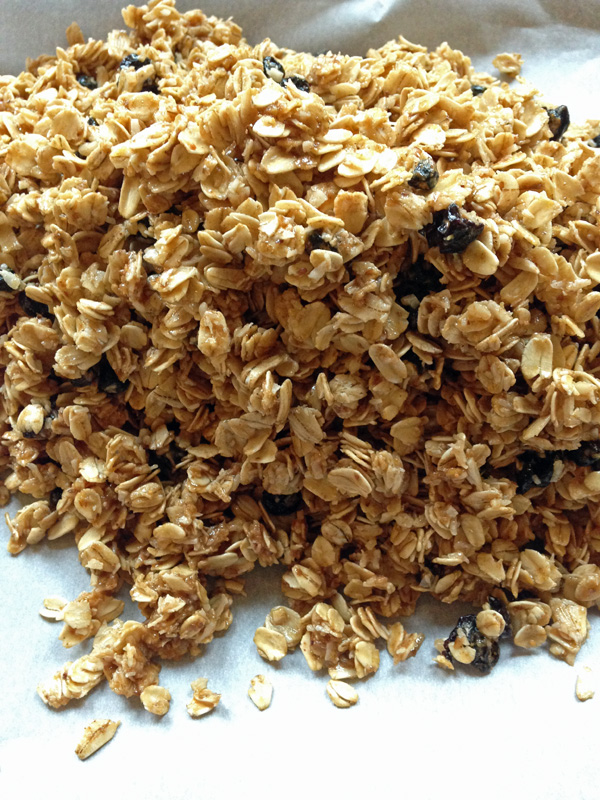
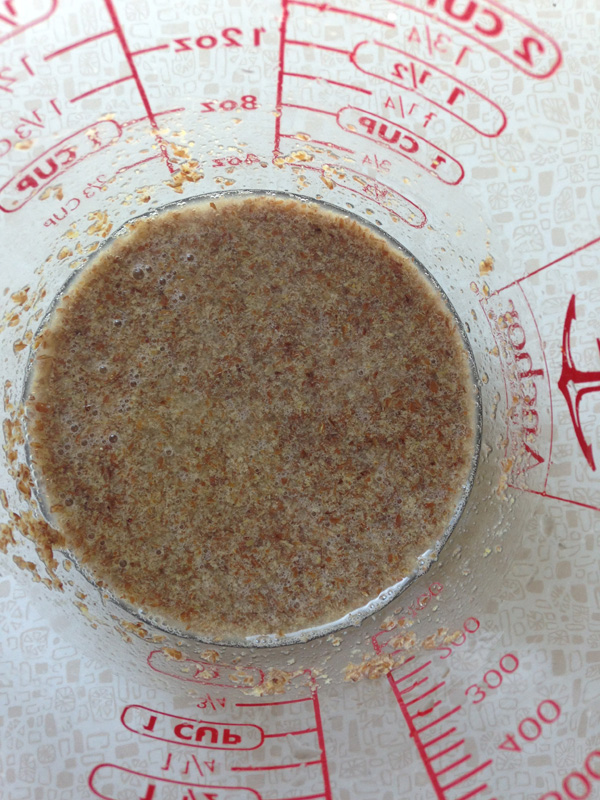
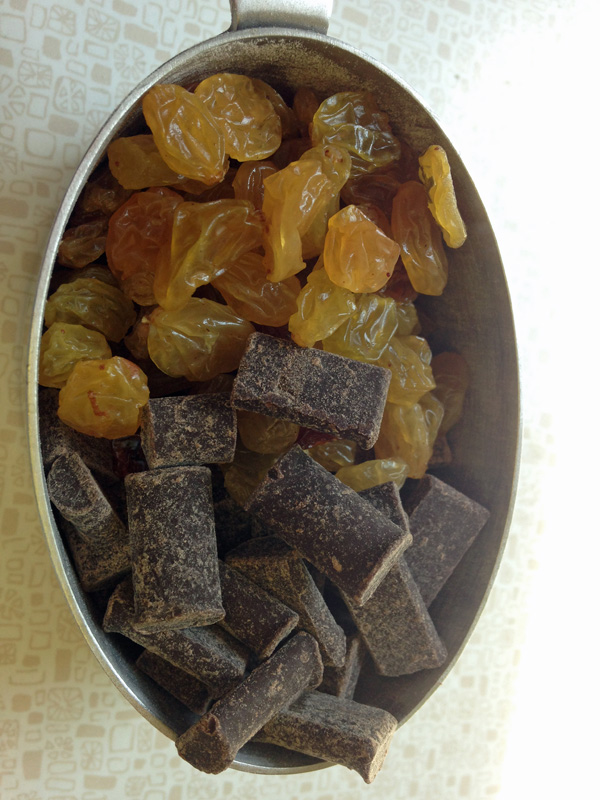
These granola bars are sweetened and held together with honey, coconut oil, and some help from ground flax meal.

IMG_3343

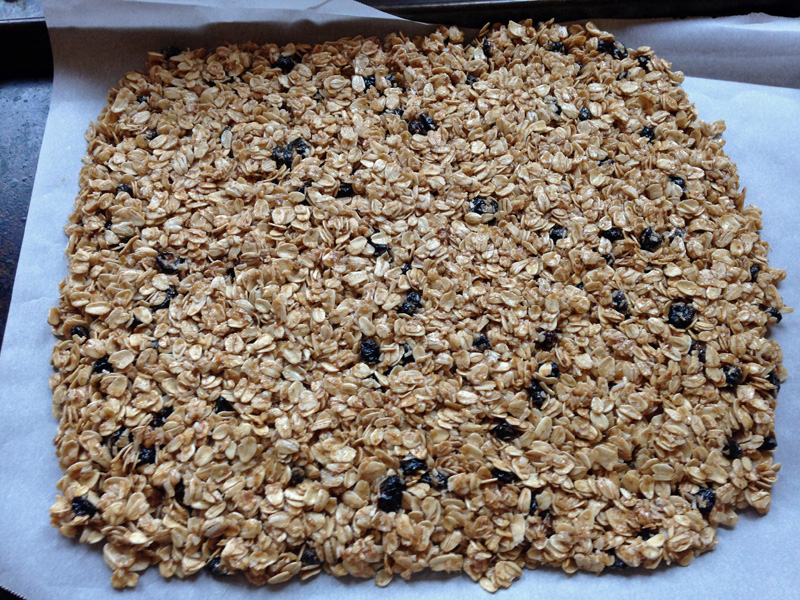
Flatten them to your desired thickness.  Thicker bars will be chewier and thinner bars crunchier.  You could also simply crumble this to make granola to mix in with yogurt or eat as cereal.

IMG_3301

In other news, we have been having ridiculously beautiful weather around here lately.  The mornings are down-right chilly and the afternoons warm enough for tees and sometimes tanks.  I am soaking this up.

IMG_3320

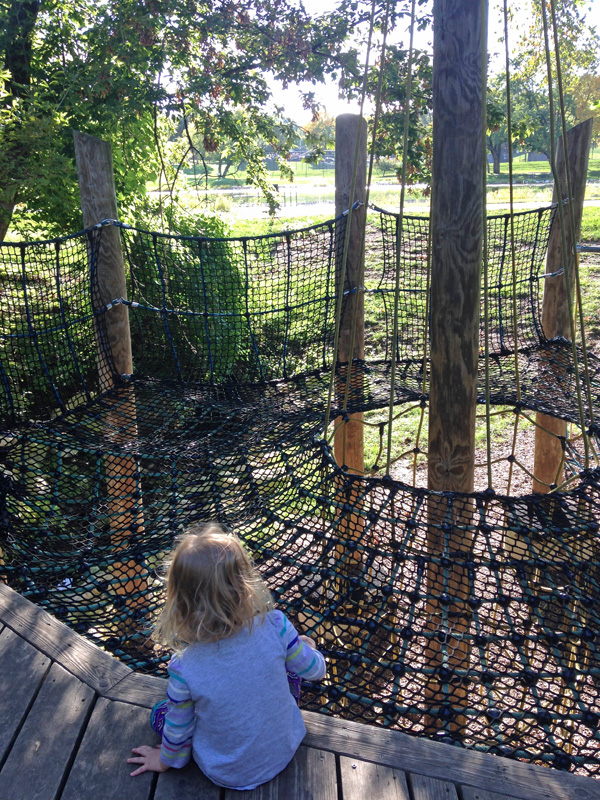
On my afternoons and one day off in the week, we have been hitting up parks.  This fantastic park is in Urbandale.  While I couldn’t get my cautious toddler to walk out on this rope contraption, I sure loved it!

IMG_3340

I’ve been getting out on walks sans children – just me and the dog briskly walking down the block is one of the most gloriously quiet moments of solitude I have ever experienced.  It is downright religious, I am not joking y’all.  Endorphins are a wonderful thing.

IMG_3313

And of course, I am enjoying the lovely weather with these two cuties.  Hard to believe that Quinton is already almost 3 months!

Blueberry Peanut Butter Granola Bars

1. In a large bowl, combine: 4 cups oats, 1/4 cup whole wheat flour, 1/2 cup unsweetened shredded coconut, 1/4 cup peanut butter powder, 1/2 cup dried blueberries, and 1 tablespoon ground flax meal.  

2. In a medium bowl combine: 1/2 cup honey, 1-1/2 teaspoons vanilla, and 1/2 cup melted coconut oil.  Combine liquids with oat mixture and stir until well combined.

3.  Pour mixture into 9 x 13″ rimmed baking sheet, lined with parchment paper.  Press into rectangle that is about 1 inch thick.  Bake at 325°F for 20-25 minutes or until golden brown.  When done, remove from oven, allow to cool, and slice into bars.  Makes about 15 – 20 bars.

Rum Spiced Applesauce

rum.spiced.applesauce

My most recent batch of canned applesauce, I made half regular, and the other half I spiked with just enough rum to create the perfect spicy fall evening dessert.  Apple sauce is an easy recipe for beginner canners – it requires no pectin, no thickening, no sugar, and no exact measuring.  I just cut, core, and peel all the apples I have and can them – whatever is left over is eaten immediately.

apples

My parents brought me a large brown grocery sack full of apples from their trees.  Homegrown apples are never flawlessly identical like the ones found in the produce section of the supermarkets – they are all uniquely and sometimes grotesquely shaped with varying hues and yes, worm holes.  These apples are perfectly crisp and ready to be eaten alone or prepared for whatever apple recipe you choose. I always look forward to apple season with eager anticipation – there’s nothing like homegrown apples!

rum

I spiced up my regular applesauce recipe from the Ball Complete Book of Home Preserving.  This book is an invaluable resource for all things canning and I highly recommend you read it front to back before tackling canning for the first time.  The Steel Drum Rum is Iowa-made, Eric picked it up on a bike ride to the Cumming Tap on the Tuesday Taco ride one night.  It is not sweet, and so pairs well with the applesauce.

headspace

My applesauce with 1/2 inch of headspace, ready to be lidded and processed.

applesauce

I made a half jar that could not be processed and so got to enjoy some of this lovely applesauce immediately.  I like it served warm – one could even add a small scoop of ice cream or whipped cream for a little extra decadence.  The best part is this is homemade and sugar free!

Rum Spiced Applesauce, adapted from Ball Blue Book of Preserving 

2-1/2 to 3-1/2 pounds of apples per quart

Water

Sugar (optional)

Wash apples, drain.  Core, peel and quarter apples  

Visually inspect jars for nicks, cracks, or any other damage or defects.  Wash in hot soapy water.  Submerge jars in enough water to cover.  Bring water to a simmer (180°F) and keep jars simmering in water until ready for use.

Choose appropriate size lids for your jars.  New lids with sealing compound must be used for each canning.  Wash two-piece caps in hot soapy water.  Rinse in hot water.  Do not use abrasive materials to clean lids.  Dry bands and set aside.  Lids must be heated for 10 minutes prior to use.  Place lids in water to cover and bring to simmer (180°F), keeping lids in simmering water until ready for use.  Overheating lids can cause damage and result in seal failure.

Cook apples until soft in a large covered sauce pot with just enough water to prevent sticking.  Whisk with metal whisk to break up apples and create a chunky texture.  If a finer applesauce texture is desired, puree using a food processor or food mill.  Optional: add 1/4 cup sugar per pound of apples or to taste.

Bring applesauce to a boil (212°F), stirring to prevent sticking.  Maintain temperature at a boil (212°F) while filling jars.  Remove jars one at a time as they are needed for filling.

Add 1/4 teaspoon ground cinnamon and 2 – 4 tablespoons spiced rum to hot jars.  Then, ladle hot sauce into hot jars, leaving 1/2-inch headspace.  Remove air bubbles.  Remove lids one at a time, as they are needed.  Wipe jar rim clean.  Adjust two-piece caps: place lid on jar with only the sealing compound touching the glass and place band over lid and screw onto jar just until resistance is met – fingertip tight.  The adjustment of the band should be firm and snug, but not as tight as you can possibly make it.

Use a jar lifter, place jar onto canner rack in canner filled with simmering water.  When canner is full, lower rack into canner.  Bring to rolling boil, and adjust heat to maintain boil, but not boil over.  Process pints and quarts for 20 minutes.

When done processing, turn off heat and allow to sit for 5 minutes.  Remove jars with jar lifter and allow to cool completely on a dish towel or cutting board.  Once fully cooled, check to be sure that the seal has formed.  Press in the center of lid to determine if it is concave.  Remove band and try to gently lift the lid with fingertips. If it does not move, the seal has properly formed.

Store applesauce for up to one year.

My New Favorite Cookies

milk.cookies

Since I am starving all the time these days and truly eating to provide for two of us, I tried to hunt down the perfect lactation cookie recipe.  I found a few that I liked but since every one was missing one or more of the key elements I wanted to include, I ended up making a hybrid recipe.  The result is a cookie that is sweet, chewy, and dense, with an almost umami flavor, filled with chewy raisins and substantial chocolate chips.  So far, I have made several batches of these delectable cookies, and intend to keep on making them long after my breast-feeding days are over.  After they cool, I freeze them in bags so I can reheat them or just eat them cold.  Read on to find out about the ingredients and scroll to the bottom for my hybrid recipe.

flax.seed

Flax seeds ground to a meal and mixed with water is one ingredient in this cookie.  Flax seed adds Omega-3 fatty acids, fiber, and lignans (plant-based Estrogen).

flax.gel

When ground flax-seed is mixed with water, it becomes thick and gel-like.  It is a great substitute for eggs if someone is vegan or allergic to eggs.  (Notice my kitchen helper in the background?)

raisins

Two more key ingredients in these cookies were golden raisins and big chocolate chunks.  I discovered took late that the golden raisins I used are preserved with sulfites, so I won’t be using those again, as Eric is sensitive to sulfites.

chocolate.chips

The chocolate chunks I used are made by Good Life.  I keep these around my kitchen for my allergy-free baking I do for numerous friends and family members.  I love the size and shape of these non-traditional chocolate chunks!

kitchen.helper

Greta was a big helper in making these cookies.  Actually, she mashed her own bowl of ingredients together while eating flour covered grapes.  I have begun to get very creative in my methods for keeping her entertained and busy with the addition of baby #2.  More on baby #2 and our current life in a later post.

Milk-Makin’ Mama Oatmeal Raisin Chocolate Chip Cookies 

1. In a small bowl combine 1/4 cup water with 2-1/2 tablespoons flax meal.  Allow to sit for about 5 minutes.

2.  In a bowl or mixing stand, cream 1 cup shortening (butter, margarine, or coconut oil) with 1-1/2 cups brown sugar.  Add flax meal mixture and 2 eggs.  Beat until combined.

3.  In a separate bowl combine 2 cups flour, 1/4 cup brewer’s yeast, 3 tablespoons wheat germ, 1 teaspoon baking soda, 1/2 teaspoon salt, and 1/2 teaspoon cream of tartar.

4. Stir the flour mixture into the sugar and shortening mixture.  Stir in 2-1/2 cups rolled oats, 1 cup golden raisins, and 1 cup chocolate chunks.

5. Drop rounded spoonfuls onto ungreased cookie sheets and bake in a 350° oven for 10-15 minutes or until cookies are golden.  Allow cookies to cool for 2 minutes before removing from cookie sheet.

Throwback Artwork

Before moving to Iowa last summer, I sorted through my massive collection of artwork done from childhood through the present.  They are not stored nor sorted very well and so, sifting through them led to some interesting discoveries.  I photographed some of my more favorite or intriguing examples.  Many were recycled, some given away, and some stored again in hopes that I may actually do something with one or two of them some day.  Enjoy this trip down artwork memory lane.  dragonflyThis dragonfly pencil drawing was done just before I started 8th grade.  I studied a real dragonfly to complete the drawing.  I was somewhat of a dragonfly junkie at the time and was reading all I could get my hands on about these magnificent creatures.

book.shelfThis drawing was done in art class in high school.  The sagging shelf of art books reminds me of my own art classroom now.  It was just a page from a sketchbook used to gather ideas for more finished pieces.

mountainsThis is another artwork from high school.  I have no clue where the idea came from, when I made it, or why I made it.  It’s what I would call a nice safe artwork and done in chalk pastels.

what.in.the.worldI made this mixed media exploration sometime in college.  It must have been freshman year due to the connected campus sheet.  This one I call, “What in the World!?” Although, when sorting through this work, I called it something a little saltier to Eric.  In fact he has a nice photo of me holding the two artworks above, captioned with, “From rainbows and mountains to WTF?”

charcoal.backThis charcoal nude was done in my college life drawing class.  I found a large sampling from that class – some of which I still really like today.  I love working in charcoal and this one encourages me to pick it up again.


Mamarazzi Watercolor Painting

Y’all, I did something that even shocks me!  I finished a painting from so long ago that I am not even sure when I started it.

mamarazzi.painting_edited-1My finished watercolor painting – Mamarazzi.  It took me far longer than 6 weeks to even touch my art table after I had my first child.  I am pretty proud of just making time for something I enjoy doing – just carving out me time is a milestone.

mama.paintingThe painting sat in this state for quite some time.  I was hesitant to finish the reflection in the glasses, not sure how to proceed, it collected dust on my art table for months and months. 

me.and.cameraI do know that I was working on it in February of 2013, which is when this photo was taken to help me with the hand pose.  I can see stacks of boxes in the background, so I know we were preparing for our cross-country move at that time.

book.quoteI have a slew of other projects just waiting to be finished. That is why this quote appealed to me so much – though I would have to add to it, ‘projects I was meaning to finish.’  This is my last week before going back to work and I have much to do – consisting mostly of soaking up time with my little ones.


The First 4 Weeks Update

QandGWelcome to the world Quinton!  He entered the world four weeks ago at a healthy 8 lbs 6 oz.  This picture is our second day at home with our new guy.

Q.GThe past four weeks have been actually very nice – I admit I was worried about quite a few things, as most moms to be tend to do.  However, things are going well for all of us and big sister Greta is adjusting well.

My advice for parents of single children, about to become multiple children: talk about babies, read about babies, watch babies, look for babies, and seek out babies as much as you can before the new sibling comes along.  We hit the library for picture books on babies, watched video clips on babycenter.com, role played with her baby dolls, read magazines about babies, asked family and friends with babies to allow questions and assistance from Greta whenever appropriate.  Let me tell you, it paid off.

dollAside from a few jealousy issues at the beginning, she has been a happy helper and eager to take on the big sister role.  Our biggest meltdowns involved the question, “Why do I have to go to bed if Quinton is still awake?”  I and finding her baby dolls in Quinton’s swing, on his changing table, in his crib, and wrapped in his blankets.  She watches me carefully and mimics everything! Luckily her cousins got her a diaper bag complete with diaper wipes, bottles, cell phone, and changing pad so she can mimic with her own things and take them with us when we are out and about.

skySpeaking of getting out, right around Quinton’s birth we had a spell of rainy weather – to the point of wondering whether Iowa was entering monsoon season as North Carolina did every fall with the onslaught of hurricane season.  Just after he was born, the clouds lifted and the weather has been beautiful for venturing out with a new baby.  So get out we have done!  Baby round two has been different of course, I learned from baby one too late that newborns are portable and there is no reason to sit on one’s bum when they sleep constantly!  Not that my three-year old would allow such a thing to happen anyway.

grays.lakeWe have been enjoying sunny walks around Gray’s Lake as a family.  I am determined to start the physical activity earlier this time around, in hopes of maintaining a better sense of well-being and to avoid feeling the stresses of starting a new school year and unpacking my classroom from a summer of remodeling with a new baby.  Plus, I am eager to get back to riding my bicycle.  It’s been far too long and watching RAGBRAI and Tour de France coverage has me chomping at the bit this year.

fairSpeaking of bits, we enjoyed the county fair as some free and very engaging entertainment.  I cannot ever remember it ever being this nice of weather when I was in 4H and showing at the fair!  The Polk County Fair takes place at the State Fair grounds every year and showcases all the hard work and dedication of 4H and FFA youth over the past year in Polk County.  Greta enjoyed watching the horses compete and the jumping event was her favorite – especially when one horse while practicing, stopped and walked around instead of jumping.  She laughed and laughed at that.

balloonsThis week the pleasantly cool weather continues.  We enjoyed a morning at the National Balloon Classic in Indianola, IA watching hot air balloons.  Flights are at 6:30 AM and 6:30 PM daily for the entire festival and the morning session is free entrance.

sushiI got out for sushi and even tried a new place!  I kept hearing about how Wasabi Chi was the best sushi in town – I finally decided to check it out when my delivery nurse said this is the only place she goes anymore for sushi.  I am pleased to report that Wasabi Chi on Douglas Avenue in Beaverdale did not disappoint.  Their lunch specials are to die for and hard to choose between – the crispy calamari mango roll, on the left, was my favorite.  I had two rolls, miso soup, and salad for $8.95!

smoreI have also been experimenting with my own simple and satisfying recipes at home.  Read: no time for elaborate cooking right now.  This heavenly dessert is simply two graham crackers, with a smear of peanut butter, topped with two marshmallows, and then microwaved for 10 seconds.  Behold: the fluffer nutter s’more.  You are welcome.


Happy almost August everyone.  Where did this summer go?

Baby Room Tour

before.baby.roomThis is what the now baby room looked like when we fist moved in to our house a year ago.  It became a dumping ground until we moved in completely, hence the odd assortment of items in the room.  This room was so blah and dark when we moved in, due to the wooden shutters that covered up the windows and a paint color that needed refreshing.

The room started off as Greta’s room and actually was about the same color as her old room in Greensboro.  I never did love the color in either room – Greensboro’s was just so close to army green and this house, though more of a sage green, was not what I really wanted in a bedroom.  I knew the color had to go eventually, but we lived with it for the better part of a year.

cribThe room is much brighter now – we went with white on 3/4 of the room and a bluish gray on the other 1/4 of the room.  I have other paint ideas that I would like to do at some point, but getting it done was the name of the game with this nursery.

We reused Greta’s old crib, got a new rocking chair, and used black out roller shades for the windows instead of the shutters.  The crib doesn’t go with my other color palette quite as much – though one could argue the green is in the complementary color scheme with the reds.  I was not about to paint an Ikea crib – just not something I was in the mood to do.

dresserThe dresser has already been shown off in a previous post.  I just love the way it turned out.  It has more than enough room for all the baby essentials and keeps all the cloth diapers easily sorted and organized!  The two large prints above the dresser are ones that I completed in an Illustrator class I took earlier this year.  I knew what colors I was leaning toward at that point and created 2 images in the general gray/black/white/red palette.

wallHis toys and books (what hasn’t been pilfered by his sister) are organized on a hand-me-down bookcase we’ve had for years that will no doubt see many more years of work.  He even got his first bike themed artwork at the Des Moines Pedal art show earlier this spring.

We kept the room sparse, just like Greta’s room.  I find it easier to navigate a sparse kids’ room in the middle of the night.  Two walls are still bare of artwork – I like to give my kids a chance to choose some of their own decor to make their room their personal space.


//

Easy Dresser Update

easy.dresser.updateThis dresser was a happy thrift store find for me – I love the Mid Century Modern look since I was a kid and have incorporated quite a bit of it into my home.  This actually matches a nightstand we have that we found in North Carolina, however it was in rougher shape and needed some updating.  So, I broke out my trusty spray paint and lo and behold, there is that red again from the previous post onthe nursery, Paper Airplane Mobile, I told you it was a theme in this room!

dresser.beforeEric is such a good sport – I can’t tell you how often he gets a text from me when I am in a second hand store that goes something like this, “This would work perfectly in _________ (insert room name here), don’t you think?”  It always is accompanied by a photo.  This just happens to be one of those photos.  I think I scored this dresser for $20.

dresserWhen I got it home it sat in the garage for a while (surprised? I’m not!).  Then, I cleaned it up, took out all the drawers, and sanded each one to remove the top layers of beat up finish.

drawer.beforeNext, I taped the sides of the drawer with paper, to protect the edges.  Though in hindsight, this was not necessary as I was neat and tidy and did not spray red everywhere.

spray.paintTo paint 6 drawers I ended up going through 2 or 3 cans of this bright red lacquer spray paint.  It left a nice smooth and durable finish that is perfect for furniture.

painted.drawersAfter several coats and some drying time, my dresser was ready to assemble and moved into the nursery.  It now houses diapers, baby clothing, and a changing table attached to the top.  This dresser is so stylish that I may steal it back from my son at some point in the future!

Paper Airplane Mobile

airplane.mobileThis nifty and very easy to make mobile is now hanging in a corner of the our completed nursery.  Hooray for a finished and lovely space for baby!  I will give you a tour of the rest of his room in due time.

red.stickTo make this mobile I simply found an interesting stick from our yard and cleaned it up a little.  I trimmed the ends to shape it, and then wiped it off in preparation for painting.  I used a high gloss red spray paint to cover the entire stick – this color is a theme throughout his room.  There are some interesting areas of black that poke through from underneath the red due to the texture of the bark.

airplanes

Then, with the help of Eric and this fun (er, challenging) book, Awesome Paper Planes, we made a few paper airplanes.  By we, I mean Eric.  I have always struggled with origami and anything that involves precision folding and following step-by-step directions.  My cranes always turn out mangled and sloppy.  I always feel bad about this lack of skill, because every year I have a student who is dying to try origami and I have yet to master the most basic projects.

mobile.closeupTo assemble the mobile, we hung the branch from a small hook installed in the ceiling.  Then, I hand sewed three lengths of thread through each airplane.  These three pieces of thread create a triangular shape – think like the stability of three legs of a stool.  The three strands help each airplane hang like it is flying.  Each airplane was then tied on to the branch.  It is soothing to watch the mobile spin slowly in a breeze and look forward to rocking my son under it.

Bourbon Apple Pie

bourbon.apple.pieA looming due date creates all sorts of projects for me – cleaning, organizing, packing hospital bags, readying the baby room, and even baking pies.  Actually, it was not a looming due date that caused me to bake these two pies, but the return of family from out of town.  Eric’s sister and her family just arrived in town to become residents of the Des Moines area, so these were welcome back pies.

pie I did try something slightly different with my tried and true apple pie recipe though – the addition of bourbon and brown sugar in the filling.  See below for the recipe.  strawberry.rhubarbThe second pie was a strawberry rhubarb pie – one of my all time favorite flavor combinations.    The strawberries do an excellent job mellowing out the tart rhubarb.  I am ever so grateful to be able to buy reasonably priced and high quality fresh rhubarb now that we are back in Iowa.  The only way to actually get decent rhubarb in North Carolina was to buy it frozen.


Dad’s Pie Crust – makes a double crust for a pie

Ingredients:
2 cups sifted all-purpose flour
1 teaspoon salt
2/3 cup shortening
3 tablespoons ice cold water
3 tablespoons cold vodka

1.  Preheat oven to 400°.  In a medium mixing bowl, use a pastry blender to cut in cold butter until pieces are coarse crumb size.

2.  Sprinkle 1 tablespoon ice cold liquid at a time; gently toss with fork.  Push moistened dough to side of bowl.  Repeat using rest of liquid.  Dough will be dry, do NOT give into temptation to make dough moister by adding more liquid.  This will make your dough tough.  Divide dough in half; form into a ball.

3.  On a lightly floured surface, use your hands to flatten ball of dough.  Roll dough from center to edges into a circle 12 inches in diameter.  Do not overwork the dough and do not allow dough to warm up.  Refrigerate while preparing filling.
4.  Carefully transfer dough to pie pan, by wrapping around a rolling pin, not allowing it to stretch.
5.  Transfer filling into pie pan.  Repeat step 3 and 4 for second ball of dough.  Gently drape second circle of dough over the filling.  Use your fingers to seal the edges of the dough.
6.  Optional: brush dough with milk and sprinkle with cinnamon and sugar.  Cover edges in foil.  Place piece of foil on bottom rack of oven.  Place pie in preheated oven, on middle shelf.  Bake for 20-25 minutes at 400°. Reduce oven to 350°, remove foil, and bake another 35-45 minutes longer or till crust is golden and filling is bubbling.
7. Let cool on wire rack.


Bourbon Apple Pie Filling

Ingredients:
3 lbs of tart apples, peeled and sliced
2 tablespoons of lemon juice
1/4 cup of brown sugar
1/8 cup flour
1 tablespoon ground cinnamon
3 tablespoons of bourbon
1. Peel and slice 3 lbs of tart apples.  Place in large mixing bowl.  Add lemon juice, brown sugar, flour, cinnamon, and bourbon.  Mix well and allow to stand for 10 minutes.