Vegan Blondie Bars

I love a solid baking or cooking challenge – veganizing and freeing of gluten are two that I do frequently.  With food allergies and diet preferences abundant in my circles, I have come to embrace this style of preparing food.

d255c98d-7b7d-4e75-90c1-68ff0816f8fa

I made these during the month of crazy-busy April.  I wrapped up a grad class, an art class, a presentation at work, and working on some other big changes all in one month.  I made time for some fun around Eric’s birthday weekend though.  We got together with some friends to grill out one evening, and I brought these lovelies along for dessert.  The swapping of a few ingredients made them no less delectable, I promise!

ingredients

To make these vegan, I swapped out butter for coconut oil and chia seeds for eggs.  I decided that while I was it, I may as well swap out the brown sugar for coconut sugar.  It made them a little less sweet tasting but kept the chewy goodness.

meal

This is the fantastic meal prepared by our friend, Ben, which preceeded the dessert.  I’m drooling just looking at this image – please start a food blog!

Qtags

Q proceeded to work on his tag – making these diagonal pink lines all over the sidewalk, steps, hose, himself… Yup, those are my wedding shoes, they are still going strong.  More on the rest of April later – I have been busy creating, just not posting/sharing busy.


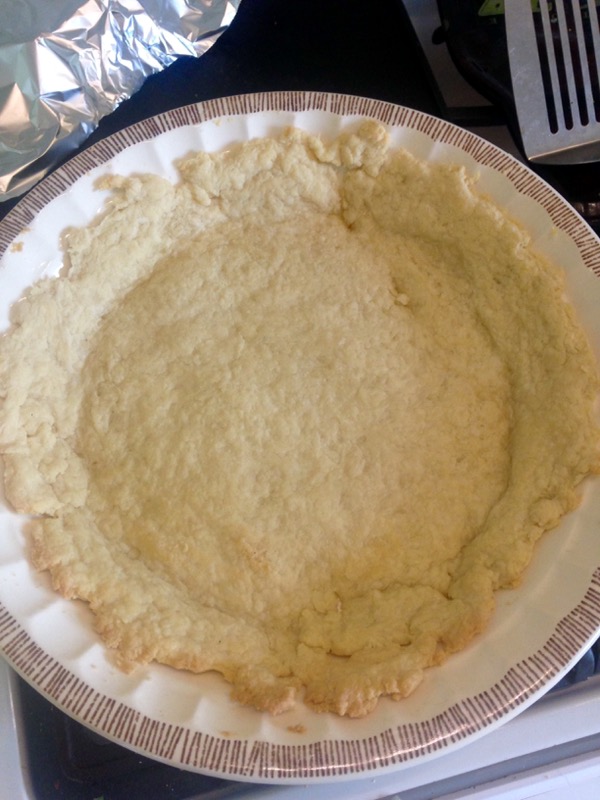
Vegan Blondie Bars – adapted from Better Homes & Gardens Cookbook

  1. In a small bowl combine: 2 tablespoons chia seed with 6 tablespoons water.  Stir and allow to sit for 30 minutes to an hour or till thickened and gel-like.
  2. Grease 13x9x2 inch baking pan with dairy-free shortening.  Microwave 2 cups coconut sugar and 2/3 cup coconut oil until oil is melted.  Stir until mixture is smooth.  Cool slightly.  Combine with chia seed and water mixture and 2 teaspoons vanilla.
  3. Stir in 2 cups all-purpose flour (or 2 cups Cup 4 Cup mix, for gluten-free option!), 1/4 teaspoon baking soda, and 1 teaspoon baking powder.  Mix in 1 cup semi-sweet, vegan chocolate chips.
  4. Spread batter into prepared pan.  Bake in a 350° oven for 25-30 minutes or till a knife inserted near the center comes out clean.  Cool slightly.  Cut into bars while still warm.

Easter Brunch 2016

Easter was a little while ago, I know.  However, I have been busy taking two classes, testing the waters for big and exciting changes coming soon.  I actually started this post just after Easter and it has been sitting as a draft since then.  I have quite a few artwork drafts sitting around right now too, waiting for my classes to end.  More on those later.

coffee.cake
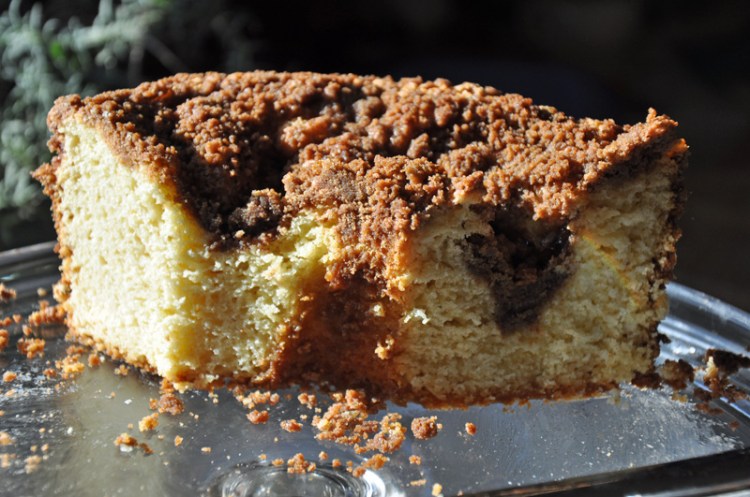
I have been raised on good coffee cake, however, it wasn’t until recently that I was given the best recipe on earth – my maternal grandmother’s recipe.  She was famous for this recipe – she worked in a diner and regular patrons would come in asking if she was working that particular day, and if so, had she made her coffee cake yet.  I have an adapted version of her recipe in this post, see below.

I love the Cup 4 Cup Gluten Free Flour for all my baking needs.  It is as close as you can get to typical gluten baking, and I have tried quite a few different kinds.

The struesel in this cake is perfect – due to mixing the sugar, cinnamon, and flour with melted butter, rather than cutting the butter in.  It creates the best and most even struesel I have had.

This Bagel, Lox, and Egg Strata  from Better Homes & Gardens, was a keeper – I will be sure to make it again soon.  We swapped out the regular bagels for gluten-free, found in the freezer section at The Fresh Market (one of my favorite stores from Greensboro that recently opened here in Des Moines!)

Notice the difference in egg color, above?  The brighter ones are from our friends’ farm, Lipes Family Farm, outside of Iowa City.  We have been buying eggs and meat from their monthly buyer’s club here in Des Moines for more than a year now.  If you are in the Des Moines Metro area, sign up for their e-mail list to join!

img_9591
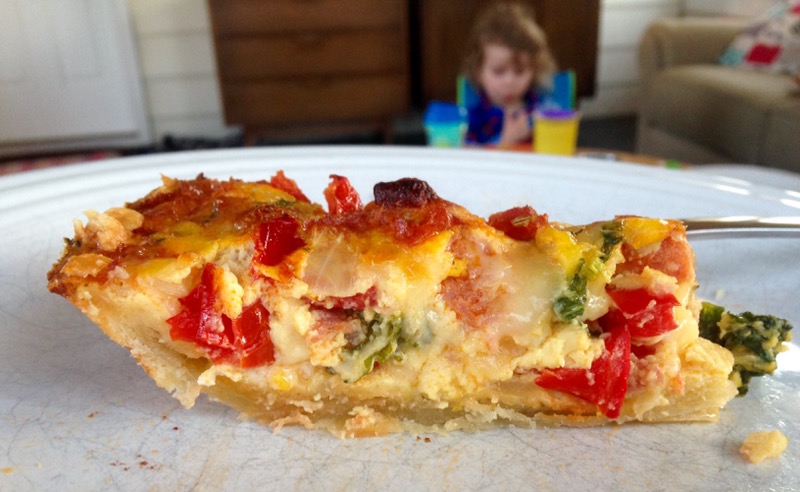
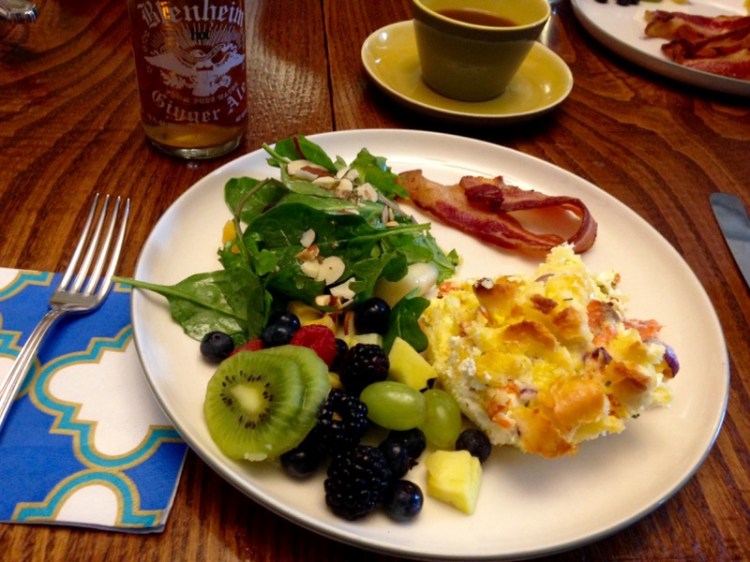
Brunch was delicious – smoked salmon, bagel, & egg casserole, fruit salad, mixed greens salad with lemon vinaigrette, and bacon from our friends at Lipes Family Farm.  Some of the best, I have been told, as I am no bacon expert!

img_9586
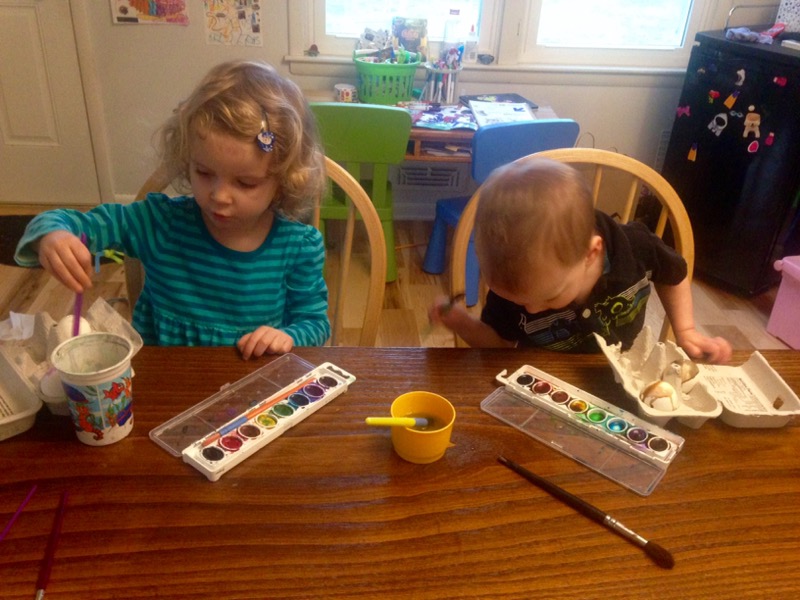
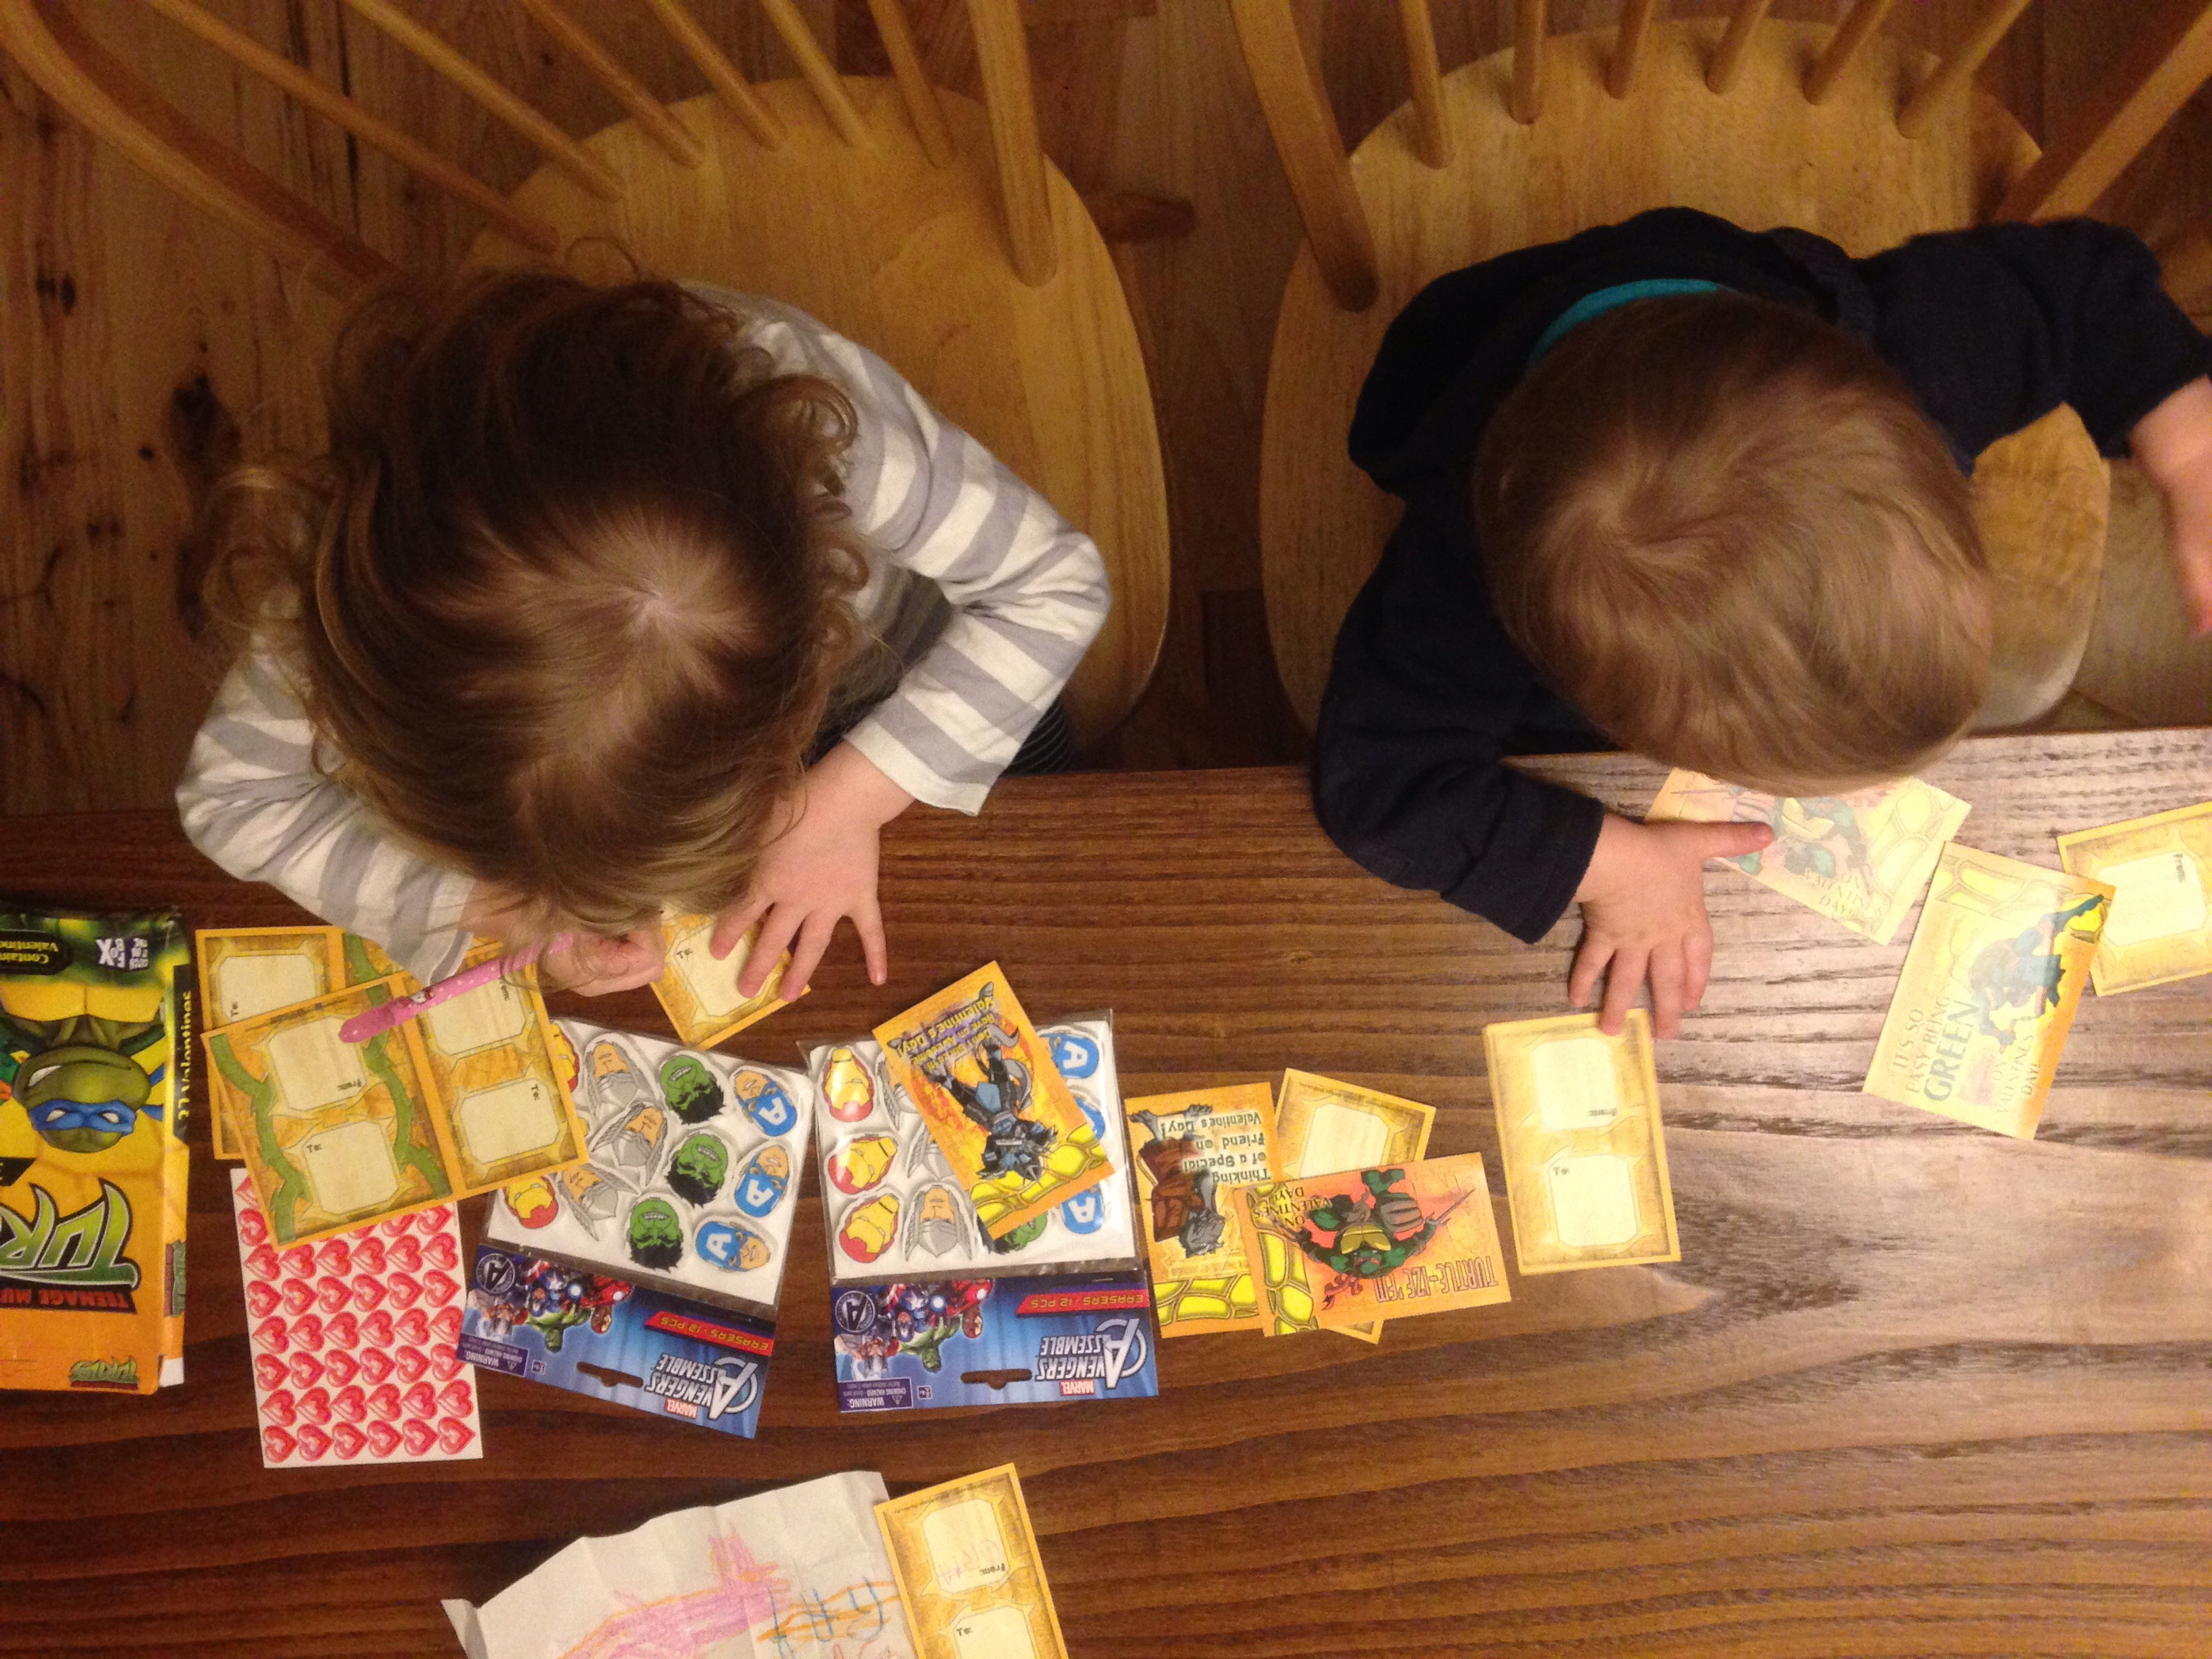
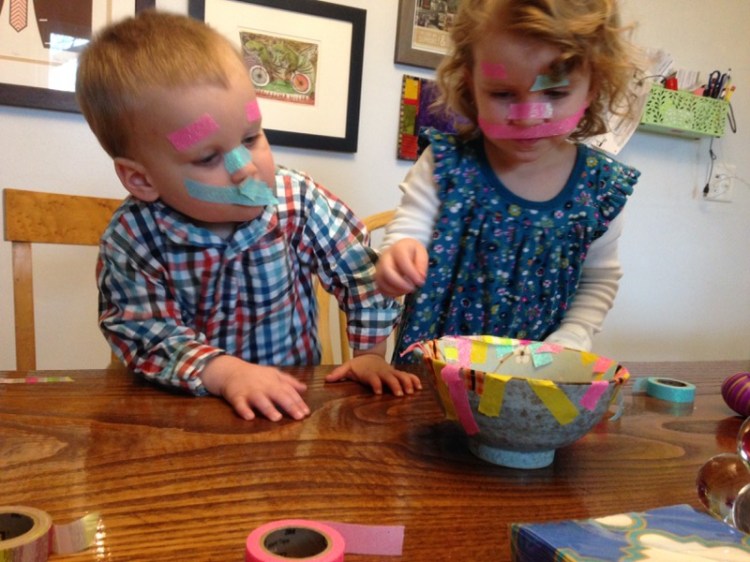
I kept the kids busy and entertained during brunch prep with assorted washi tapes.  These are the best thing for my creative  & busy kids – they can tear off whatever size they like, and stick them everywhere.  The tape peels off of all surfaces easily and it comes in glitter, patterns, and bright colors galore.  The rolls are small enough to easily fit in my purse and take along for on-the-go fun anywhere.


Gluten Free Struesel Coffee Cake

For struesel topping, combine: 1/2 cup brown sugar, 2 tablespoons Cup 4 Cup gluten free flour, 2 tablespoons cinnamon, and 2 tablespoons melted butter.

For cake, combine: 3 cups Cup 4 Cup gluten free flour, 6 teaspoons baking powder, 1/2 teaspoon salt, and  1-1/2 cups sugar. Cut in 1/2 cup butter until mixture resembles cornmeal. Blend in 1 cup milk and 2 teaspoons vanilla.  Pour batter into a greased and floured tube pan.  Sprinkle struesel topping over top.  Bake at 375° for 35-40 minutes, or till knife inserted near center comes out clean.


Natural Dyed Eggs 

eggs1
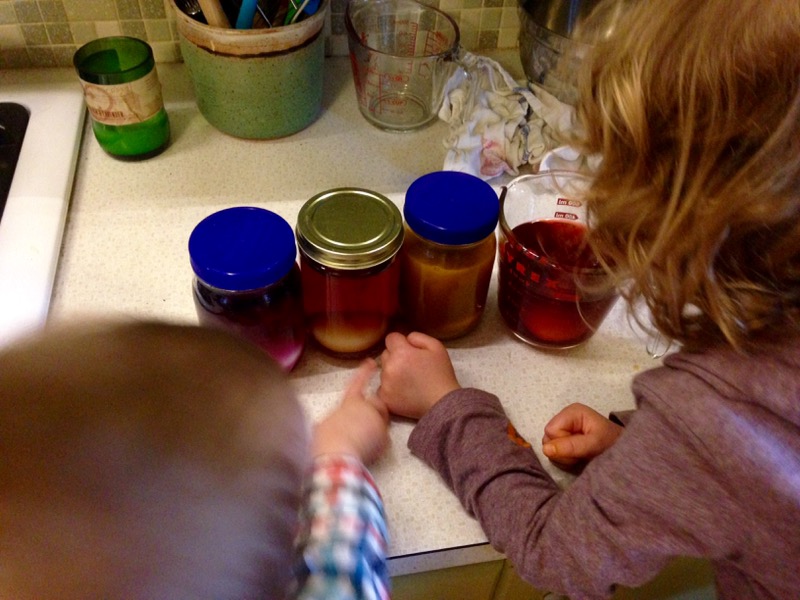
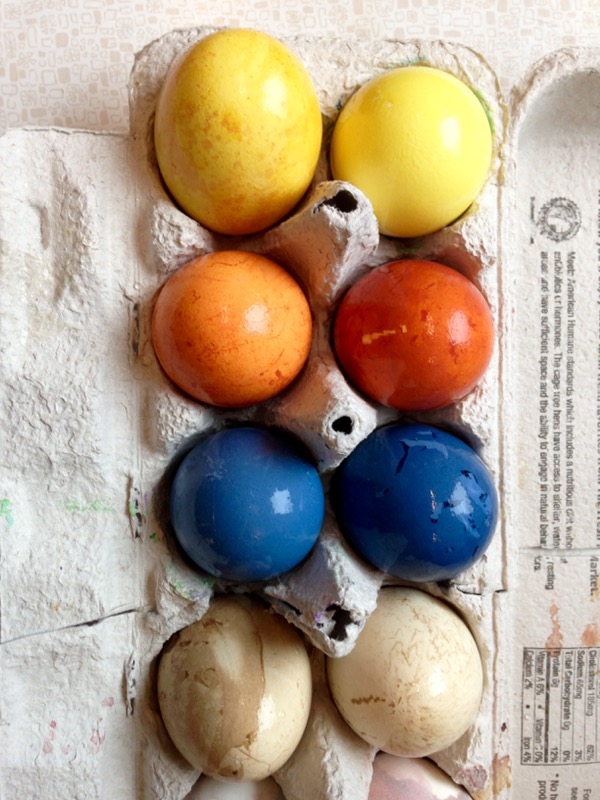
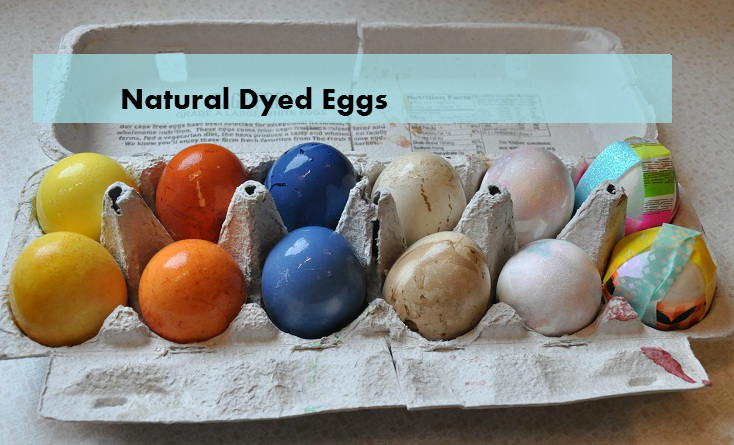
This year, for Easter, we decided to try something a little different for the egg decorating.  I ventured into natural dyes – something I had tried with success for Greta’s car cake for her 3rd birthday.  To entertain the kids, even more, I had them paint some of the eggs and add washi tape – the last 4 eggs on the right side of this image are those eggs.

 I started by boiling my ingredients in water for 30 minutes.  I used tips from The Kitchn’s post on naturally dyed eggs as a starting point.  Then, I strained all my dye through a sieve.  Above is the results of boiled purple cabbage.
 Next, I collected my dye in jars with 1-2 tablespoons vinegar.  Jars with lids seemed like the best option for storing them in the fridge, while the dye set.  We simply placed 1-2 hard-boiled eggs inside each jar to soak, I did one set overnight and one set for 8 hours.

 During all of this, the kids helped me by being eager watchers.  They also worked on watercolor painting their own eggs.
 Like I said, it was a huge hit with the kids.  They got to be observers of the changes of color over time.  We took them out every hour during the day to check the progress.

 The natural dye from top to bottom is: turmeric (yellow), yellow onion (orange), purple cabbage (blue), and red zinger tea (brownish-gray).

I am looking forward to trying more natural dyes with other materials – paper, fabric, wool…

New Series -Things With Wheels


I am really excited about this new series I have started, for a couple reasons.

1. It’s whimsical, fun, and lighthearted.  Sometimes that is just the break I need from the art ideas swirling in my head, that look a certain way, and never seem to turn out how I want (at least as of lately).

2. My kids are really excited because it is based on the things they enjoy – machines with wheels.   Nothing makes me smile more than their sheer joy.
 My son saw these and exclaimed, “TUCK!!”

More to come soon. Maybe a back hoe or a crane next??

Pizza Quiche 

pizza.quiche

This is another recipe that I concocted based on items I had in my kitchen, I did not go out and buy any of these things with this recipe in my mind.  This is my favorite kind of cooking – I feel it’s a direct extension from my collage and painting mindset.

If you have been following this blog, or have spent any time with me, you know I am a breakfast-aholic – waffles, pancakes, muffins, egg casseroles, and especially quiches.  This was one of those ideas that I just thought was so brilliant that even my adventuresome eaters would gobble up.  Ha, that’s funny…

My ah-ha moment of making quiches came about when I finally figured out to fill my favorite pie pan with water and then pour it into my stainless steel bowl that is marked with measurements.  Now, aside from a few basics I keep the same – 4-5 eggs and 1 cup of liquid  – I can mix and match my quiche recipes as I like.  The 1 quart line is the magic line to keep my quiche from overflowing.

Pizza quiche should be whatever pizza toppings are your favorite – we went with pepperoni, tomato, red bell pepper, kale, onion, and cheese.

For more on crust techniques and tricks of the trade check out previous links on pastry crusts.  I first learned about the vodka crust technique from my dad, who learned about through reading about J. Kenji Lopez-Alt’s findings, author of The Food Lab, for America’s Test Kitchen.  You can read more about it here.

I can’t wait until that kale is coming out of my yard again.

img_9471
It was so nice earlier this week – at 71° – that we ate dinner on our porch.  Today it was supposed to snow, guess that is just spring in Iowa for you.  My daughter is in the background of this photo making her *lovely* gagging-because-you-made-me-try-a-new-food face.  Even though it is just eggs and pizza toppings, both of which she loves.

Sigh.  Toddler adventures with food.


Pizza Quiche

  1. Prepare a single-crust pastry.
  2. Meanwhile, sauté 1/2 yellow onion, diced with 1 small red bell pepper, diced with seeds and ribs removed in 2 tablespoons olive oil over medium-high heat until softened.
  3. Combine in a bowl: 5 beaten eggs, 1 cup milk, 1 medium tomato, diced, 3-4 oz of chopped pepperoni, 1-2 tablespoons of pizza seasoning, 1 cup shredded cheddar cheese.  Mix in the onion mixture and 1 cup of shredded kale.
  4. Pour into prepared crust and bake at 325° for 50-55 minutes or till the center jiggles slightly and is almost set, or when a knife inserted near the center comes out clean.  If necessary, cover the edges in foil or with a pie crust shield, to prevent browning in last 20 minutes, or so, of baking.

Pastry for Single-Crust

1.  Using a pastry blender, cut in 1/3 cup butter into 1-1/4 cups flour. Pieces should be pea-sized. Sprinkle 1 tablespoon of ice-cold water over part of the flour mixture; toss with a fork.  Push moistened flour to one side of the bowl.  Repeat, using 1 tablespoon of the liquid at a time until all the flour is moistened, using 4-5 tablespoons of ice-cold liquid – water, vodka, or a mixture of the two – in all.  Form dough into a ball.

2. On a lightly floured board, use hands to slightly flatten dough.  Roll dough from center to edges into a circle about 12 inches in diameter.

3. To transfer pastry, wrap dough around a rolling pin.  Unroll into a 9-inch pie plate.  Do not stretch the dough, as this will cause shrinking.  Trim excess dough and fold over.  Do not prick dough.

4. Line with double thickness of aluminum foil.  Bake in a 450° oven for 8 minutes.  Remove foil, bake for 4 to 5 more minutes or until pastry is set and dry.  Reduce oven temperature to 325°.


DIY Wood Die Set

Eric made this lovely dice set a while back (as in, December!) and I forgot to post them until now.  It was a simple project – cut a long piece of wood into a set of five cubes, sand, and then use a Wood Burner  to make dots on the die.

They could be a fun addition to a kids’ block collection, a larger than life set of die for backyard or game night fun, or a great learning set for young, budding Yahtzee enthusiasts.  In any case, we gave them away to my sister and her husband.  Now I just need Eric to make me a set for summer die games on the porch.

porch

Speaking of the porch, we are getting closer to being done with that project.  Here’s a peek – we redid the floors, insulated the walls below the windows, and added white bead board under the windows.  We also upgraded to some more comfortable furniture.  Eric scored these orange (!) office chairs at a furniture thrift shop.  He knows me and my affinity for orange and chairs, so well.  We started this porch process last summer and hope to finish it this spring before it gets too far into porch season.  More on the porch project in the near future.

Living Room Built-ins

built-in

Just as the trees sap starts to flow as spring nears, my creative juices start flowing and my right brain warms up at the thought of spring break and the ever-nearing summer off. For me, break from work brings the joy of less-interrupted project time.

Today we got out the PANTONE Moroccan Blue paint and touched up the bands of bare walls above the windows on either side of our fireplace. These have been bothering me since we had the windows replaced a couple years ago.

I have also been working on finishing my papier-mâché jackelope from a few years back. I’m torn on the face. I think it looks cheesy (kinda creepy, too) and will most likely collage over it before I mount it on my wall.

I broke out my black Sharpies and added textural lines on the insides of the built-ins on either side of the fireplace. The results are a fun fiber-inspired design.

I also reorganized the books by color. It makes a weird order to the topics but pleasing to the eye. This is the left side all done – aside from the bottom shelf which I left alone since it is on floor level and filled with children’s books.  I will post the right side at another time.

Underground

DSC_0152
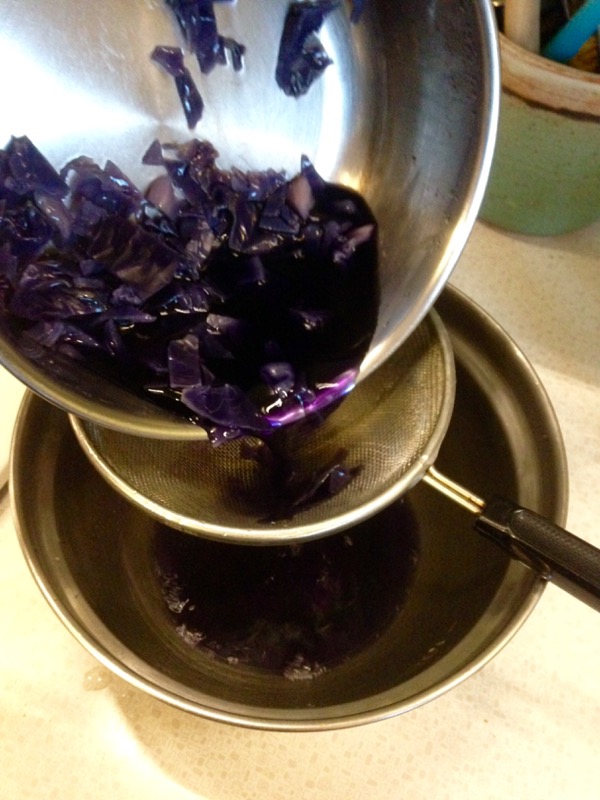
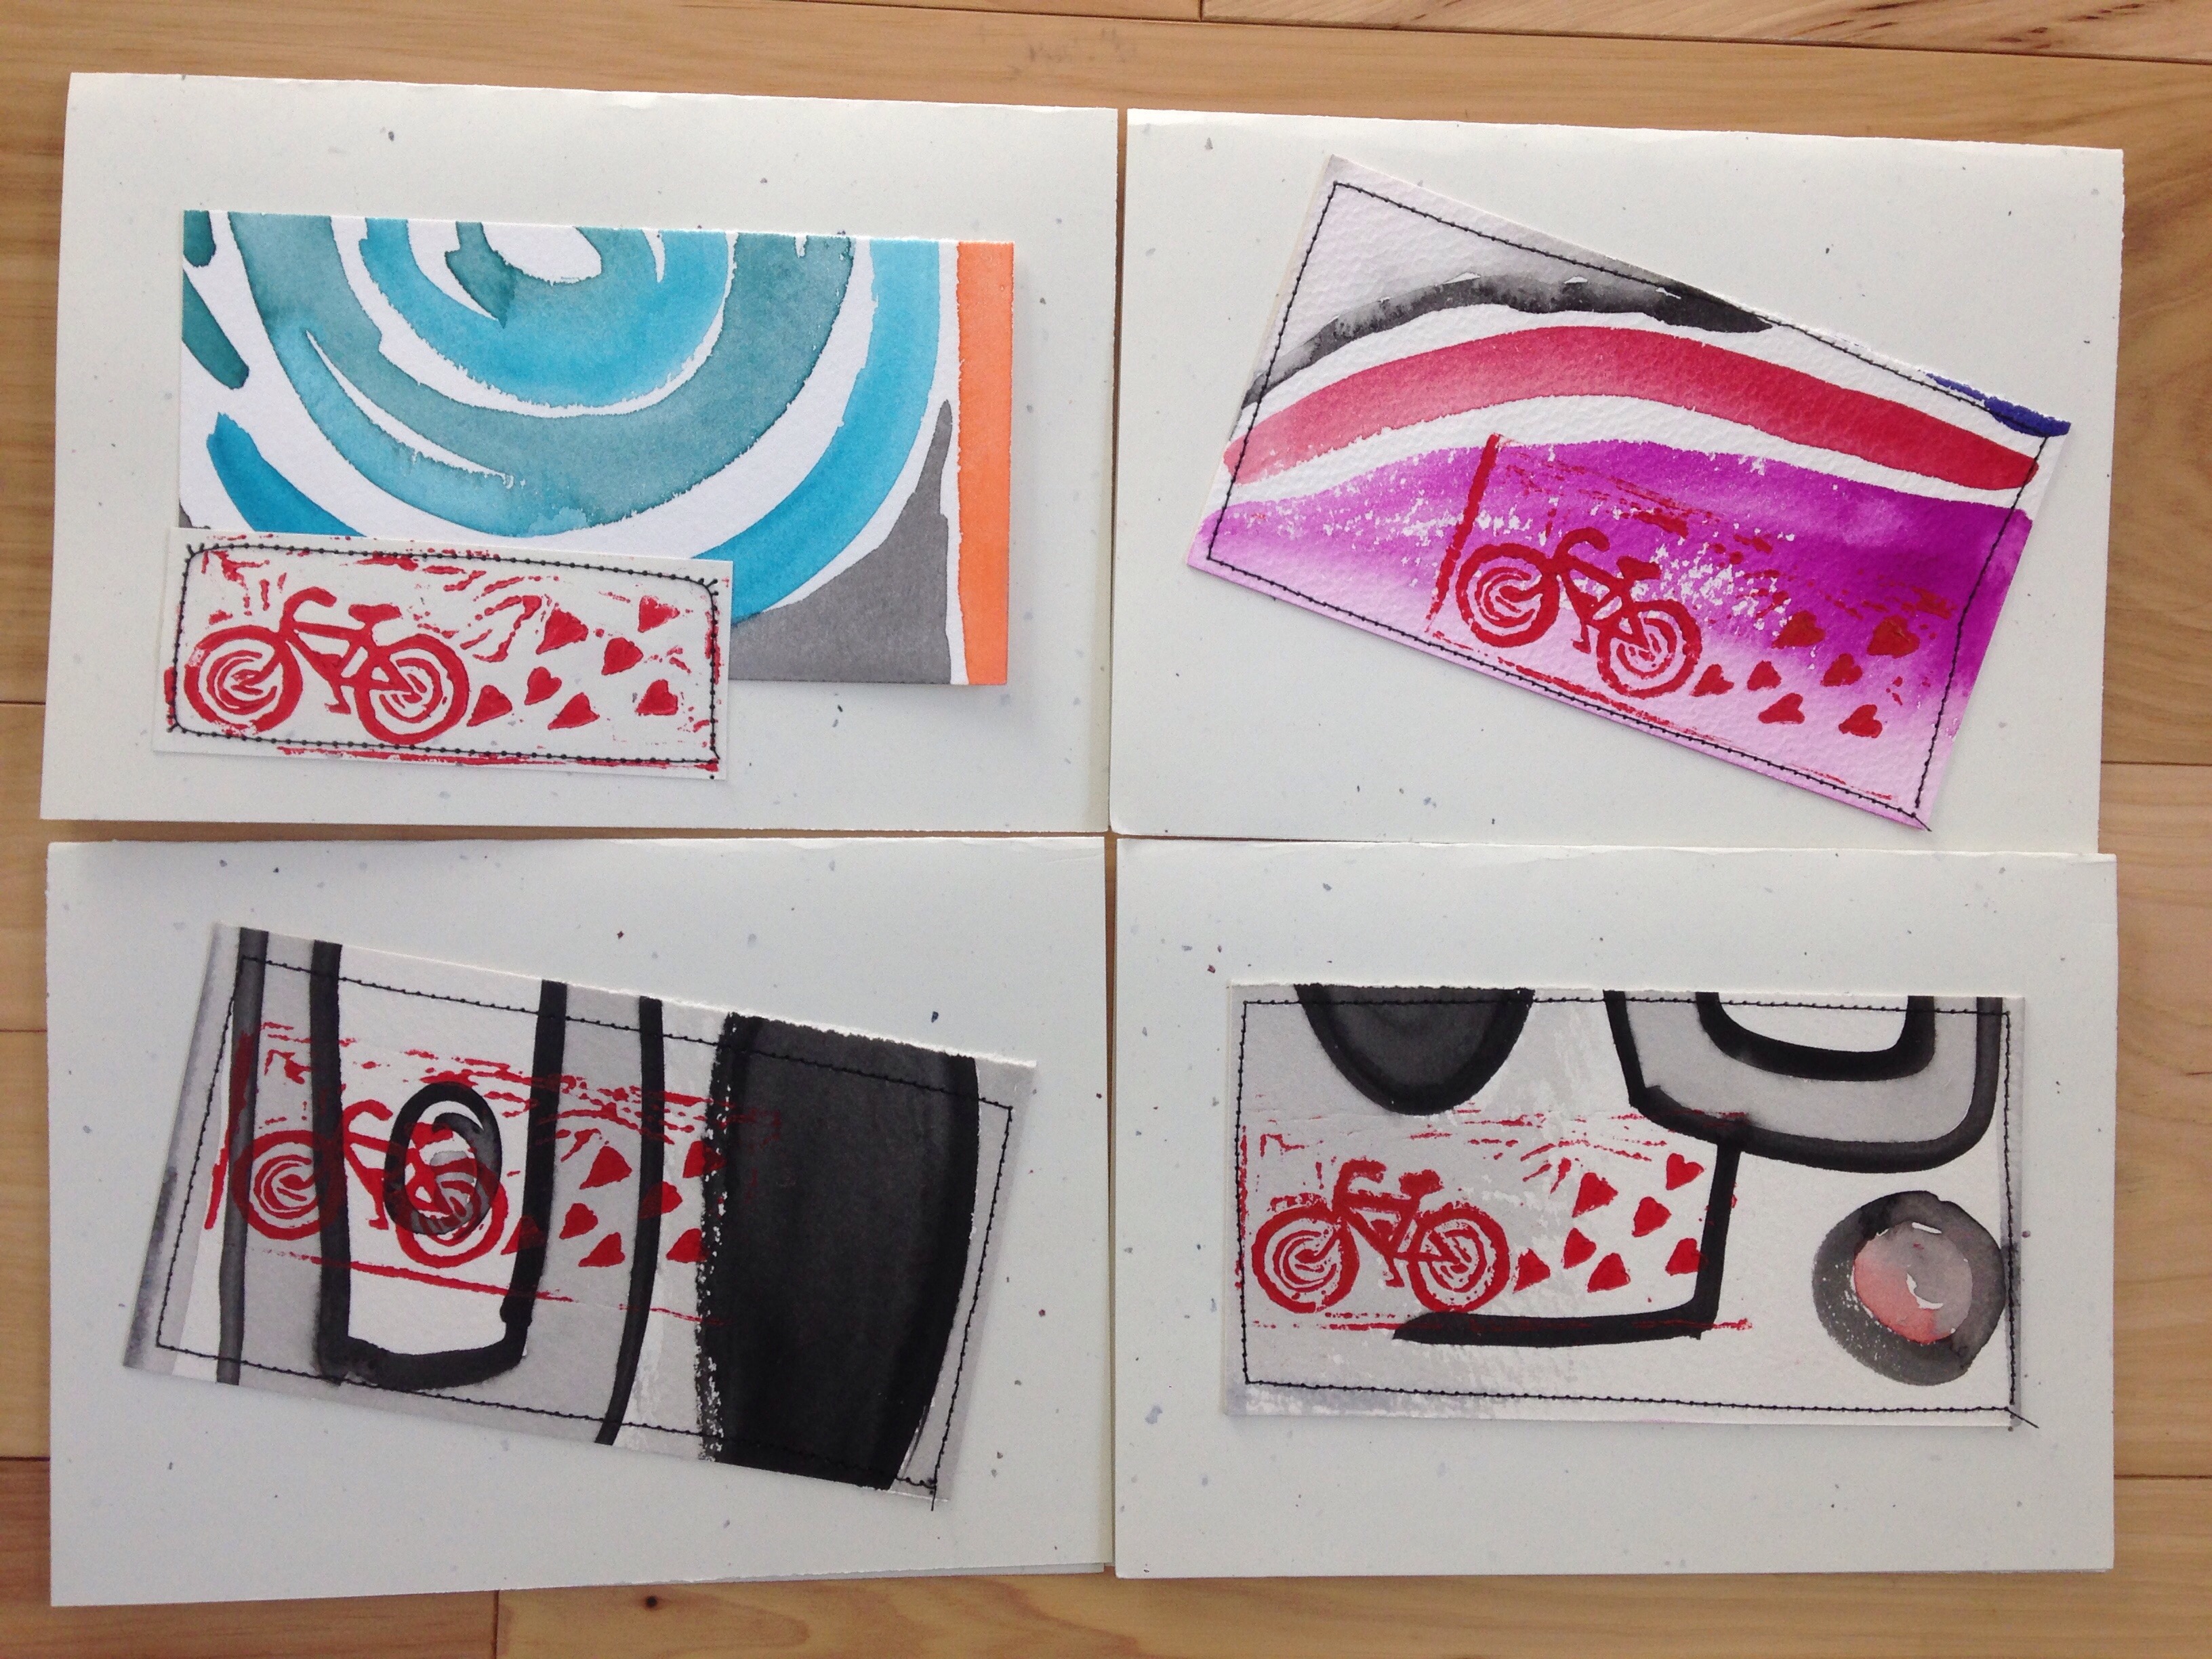
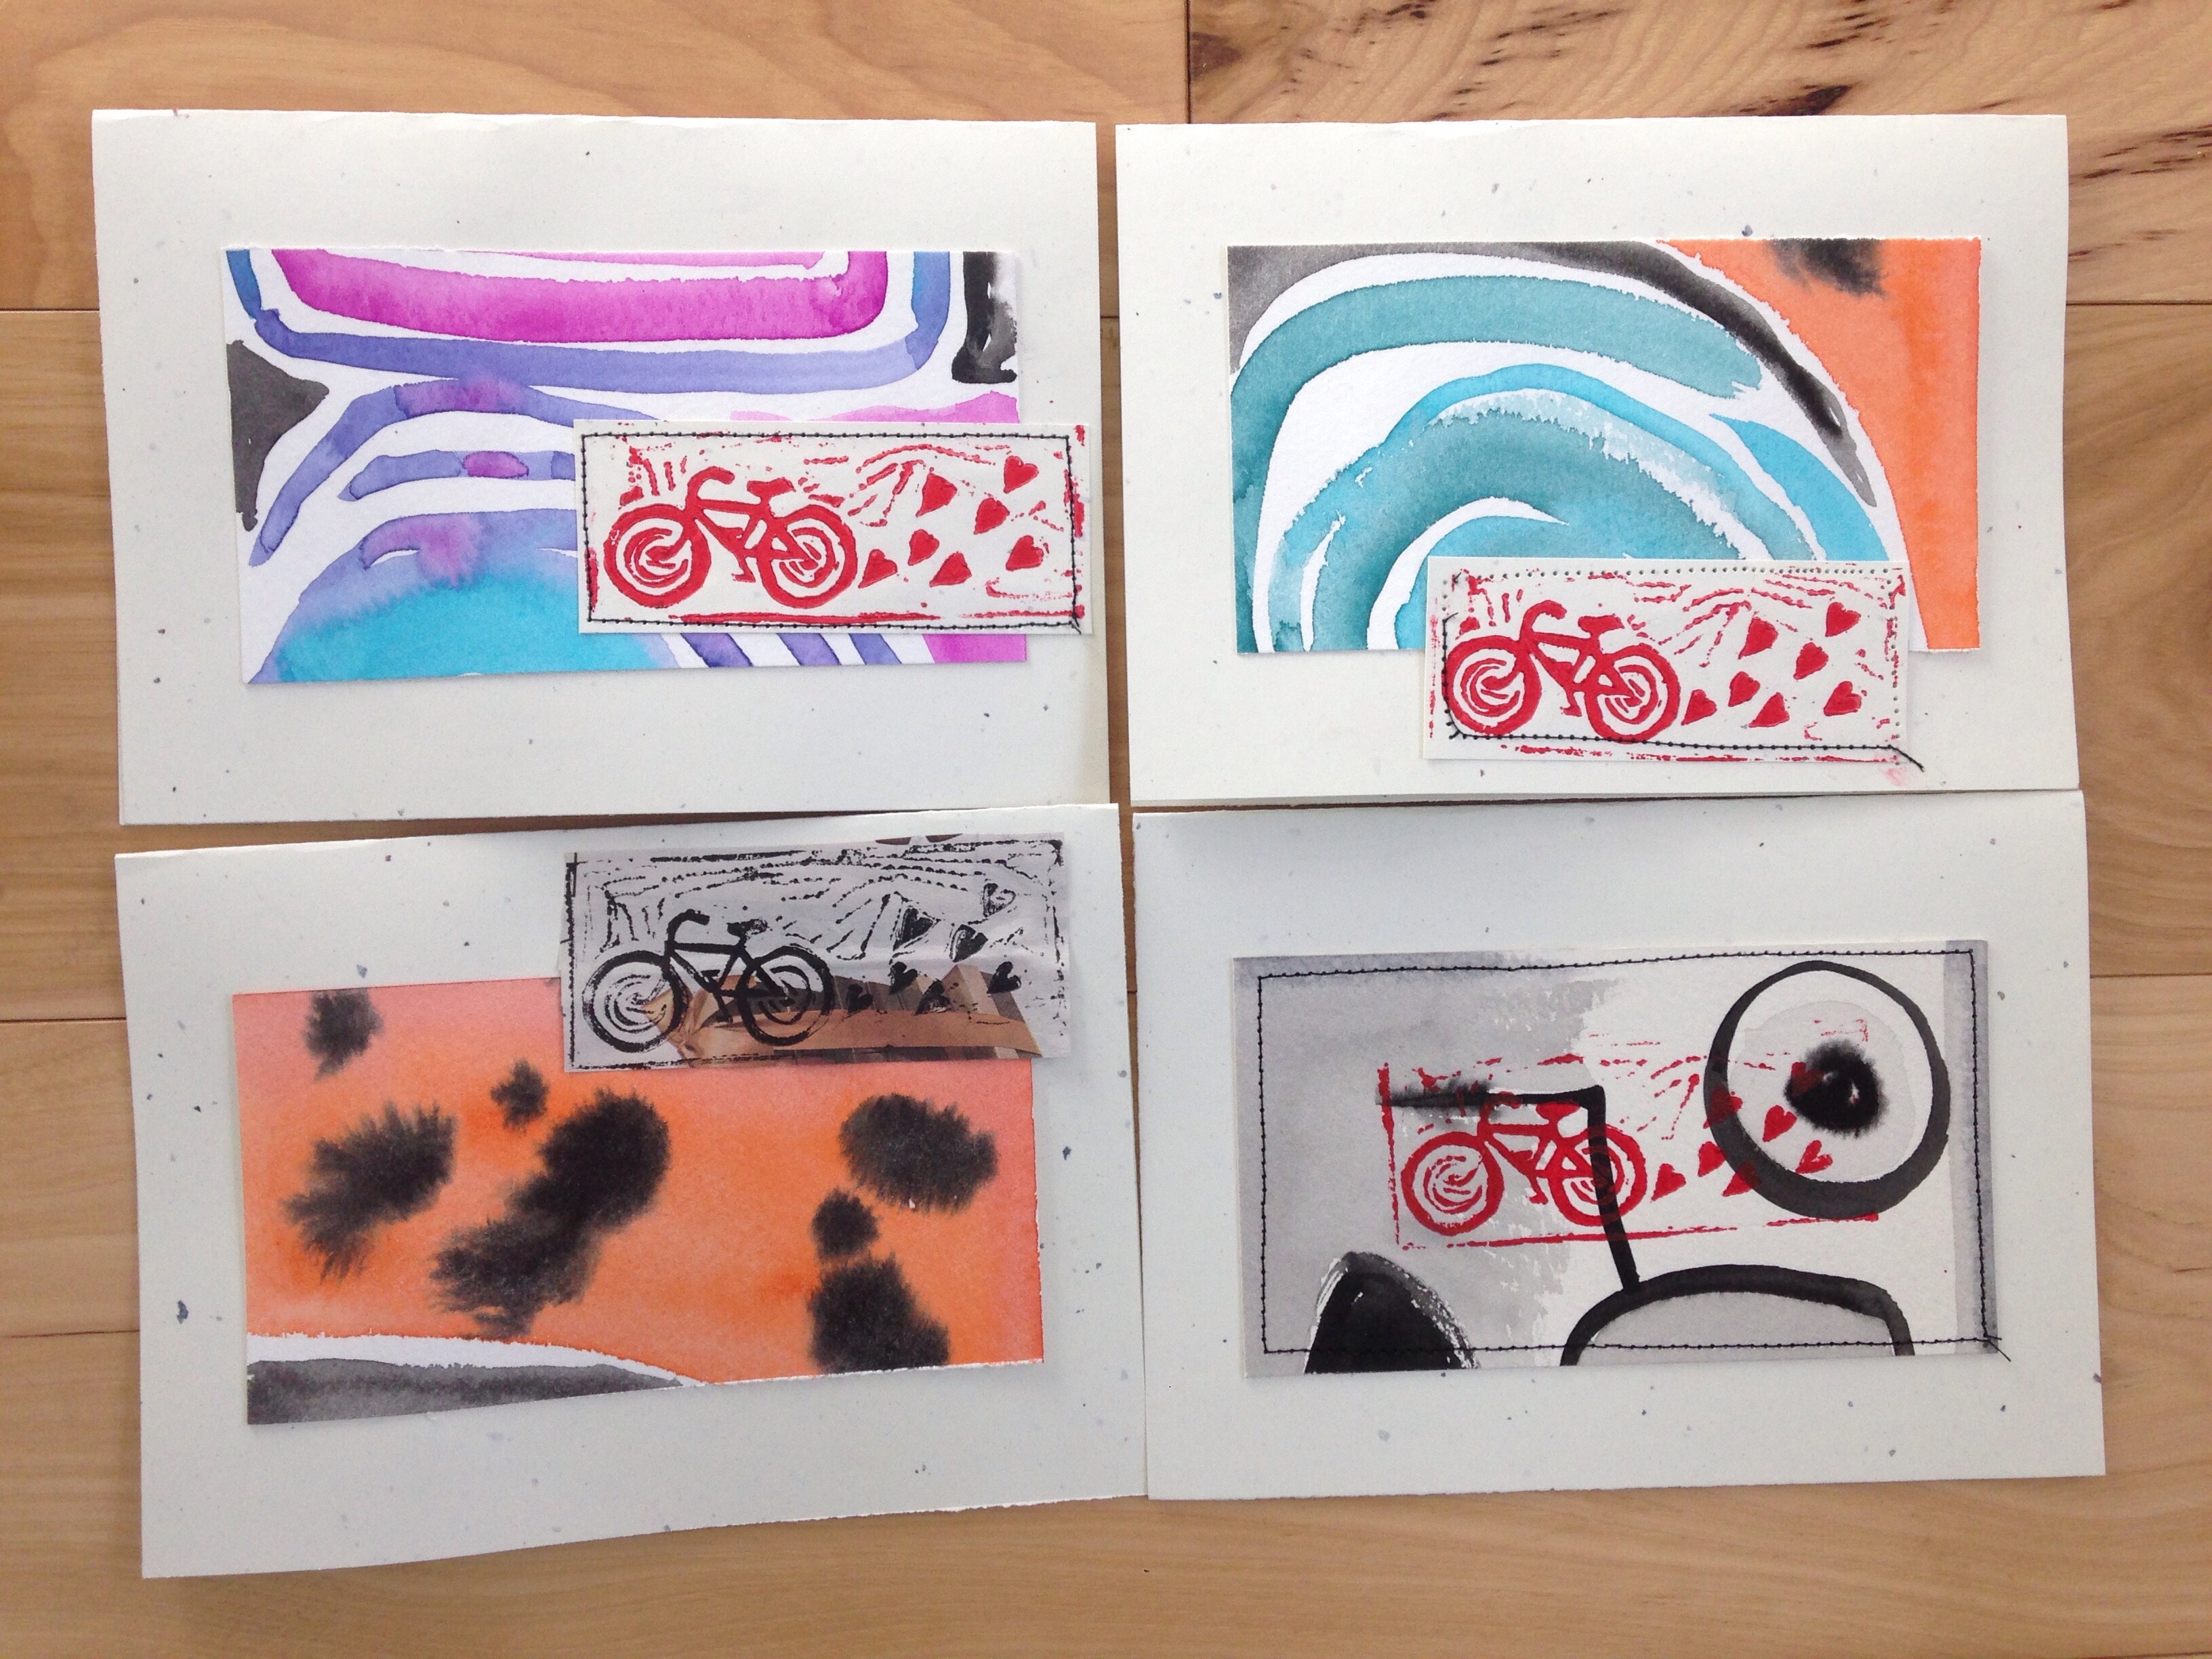
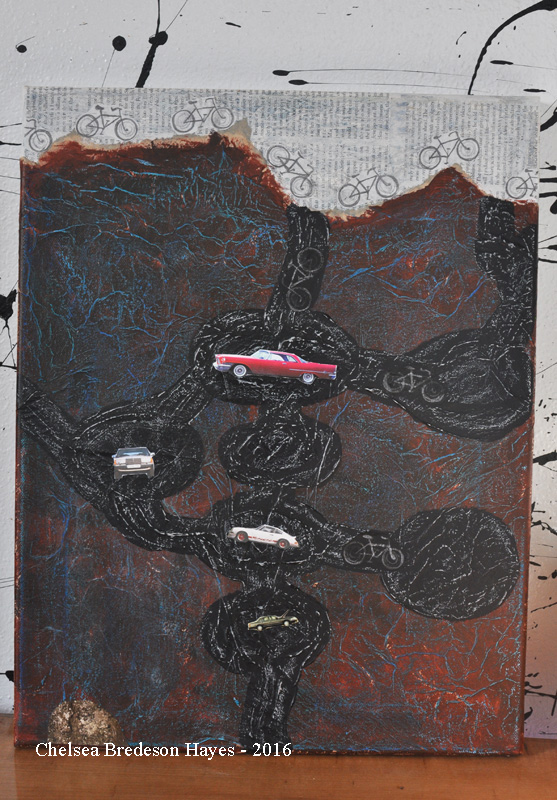
My newest finished artwork is one I have been working on for a while now, since before Christmas.  The texture, colors, and mixed media are all things I’m happy with.I started with a simple canvas and some collage materials.  The top of the canvas is magazine pages.  I discovered the best all-around craft and art adhesive a couple of years ago – Lineco Neutral pH Adhesive and will never go back to any other adhesive again.  It dries smooth, it is pH neutral, permanent, and not at all gooey!

To create the texture, I glued crumpled tissue paper, making sure it was not too smooth.

img_8455 
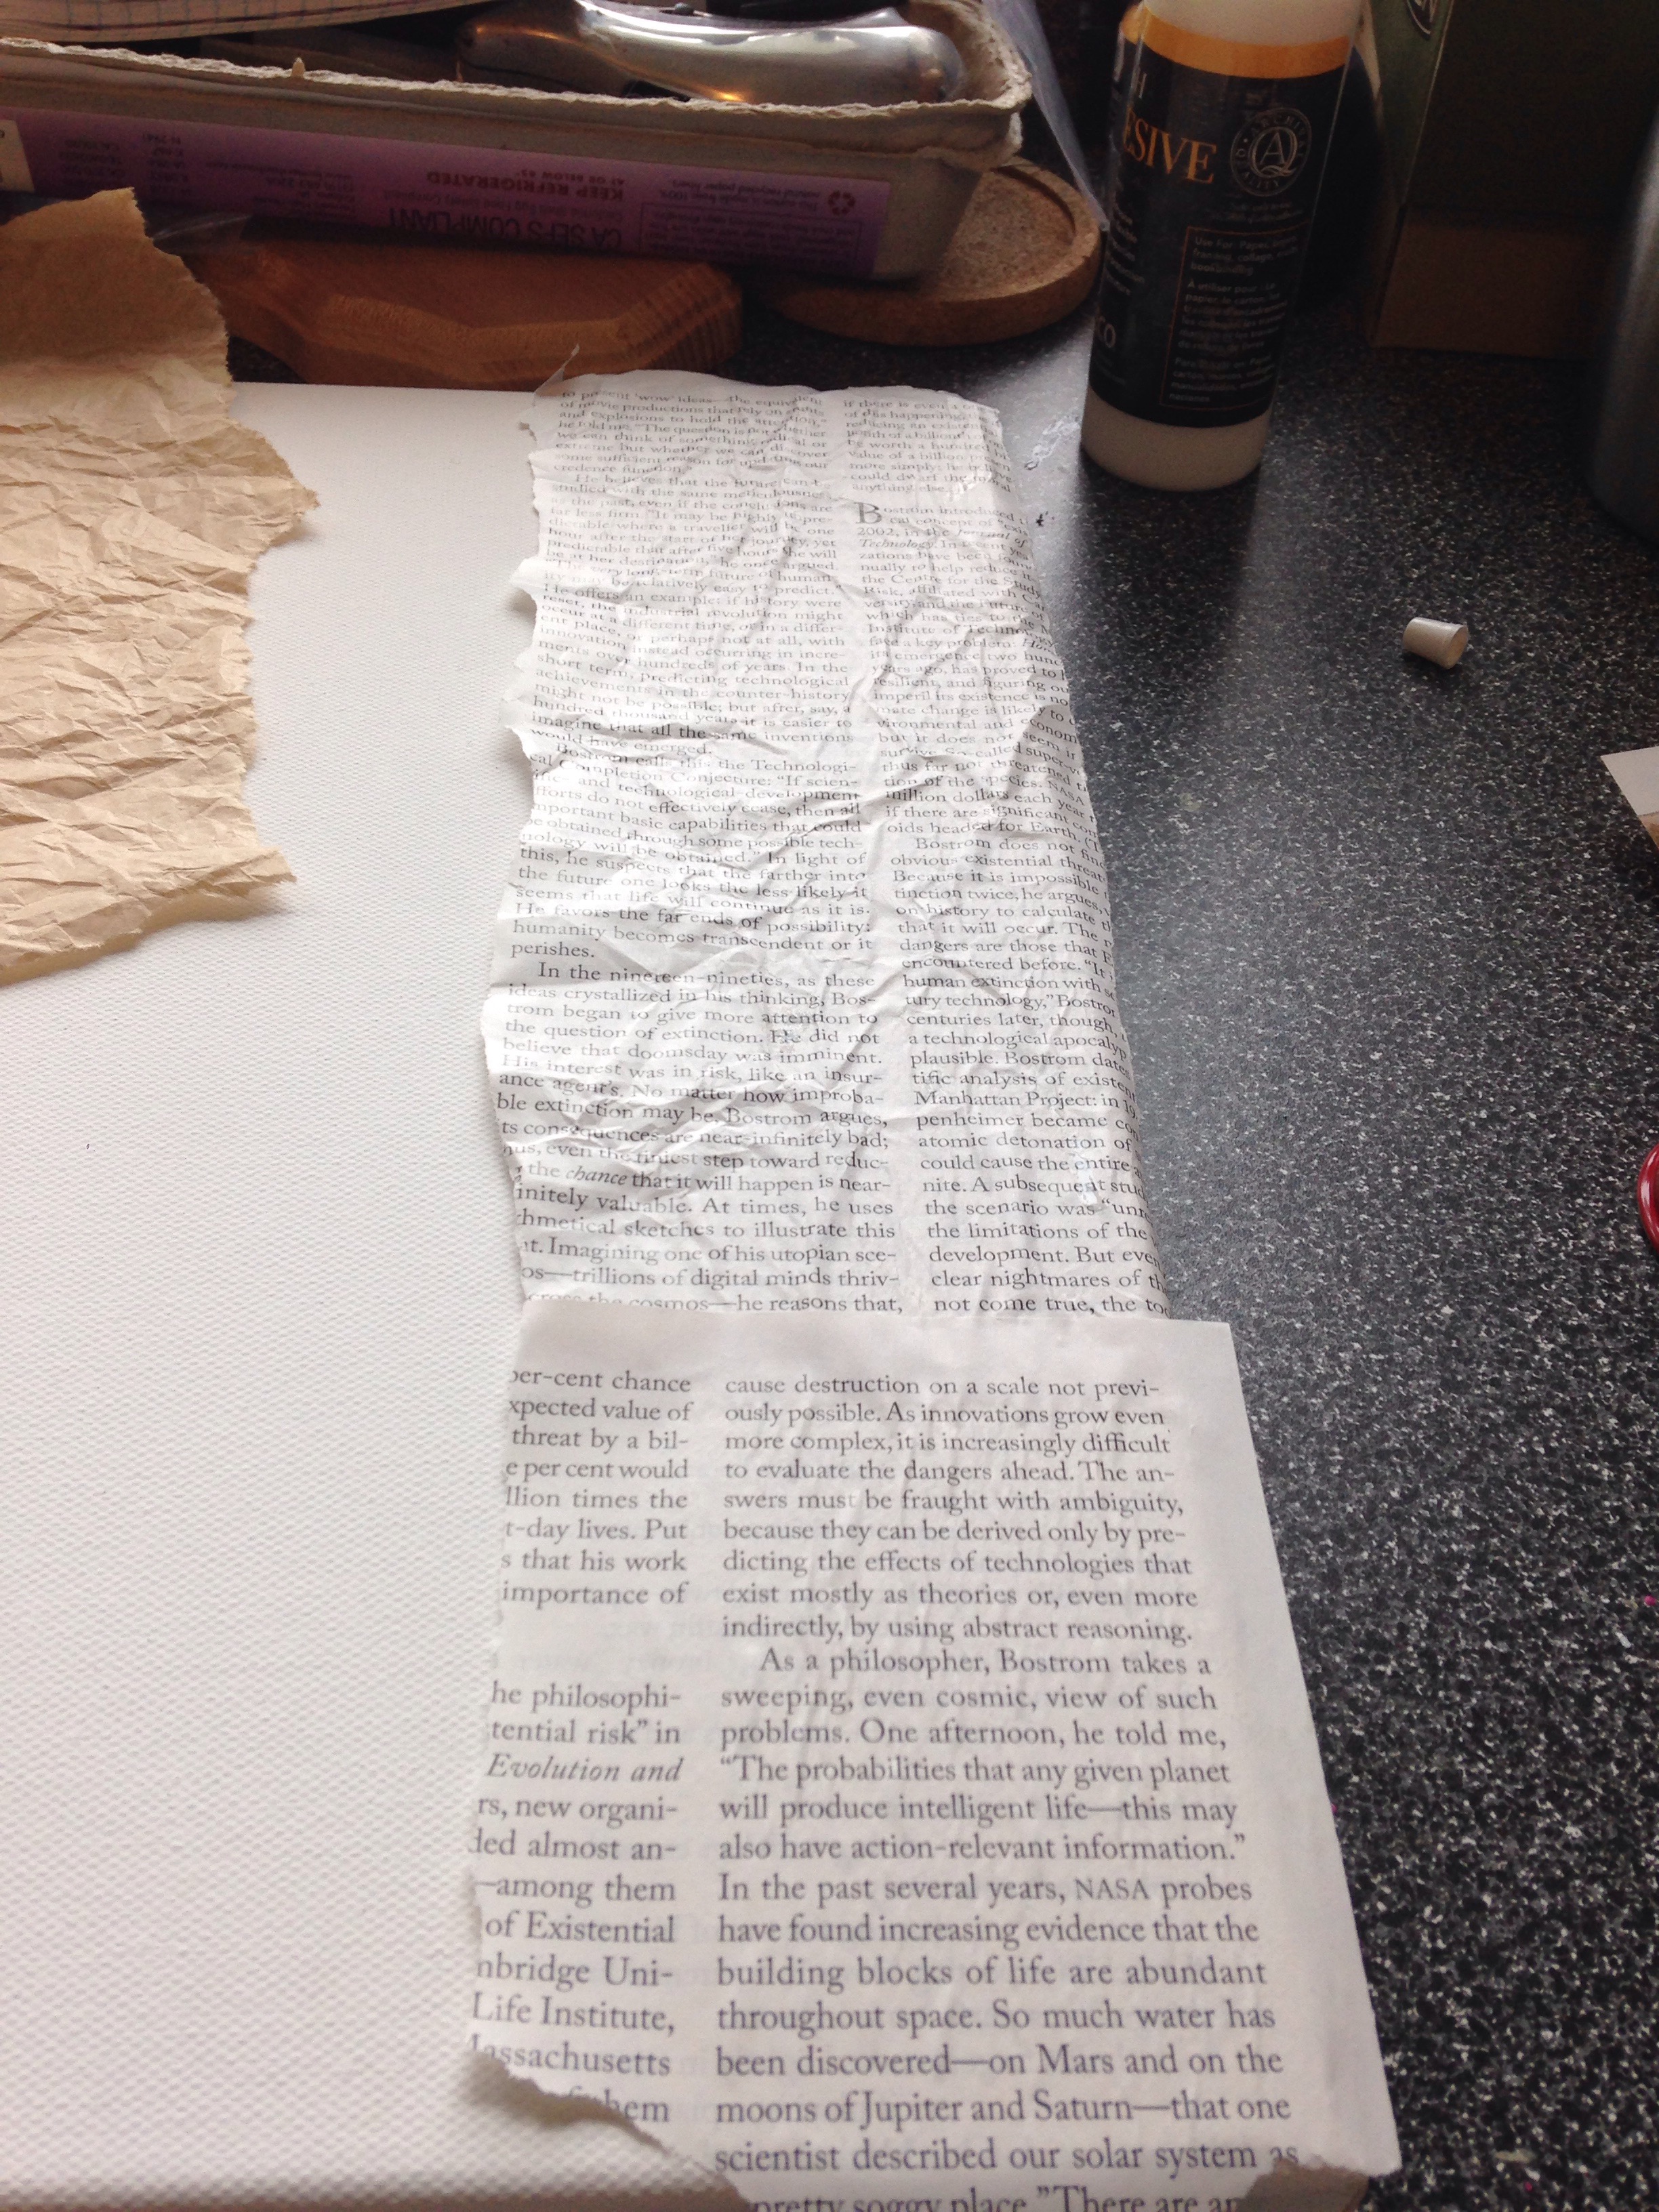
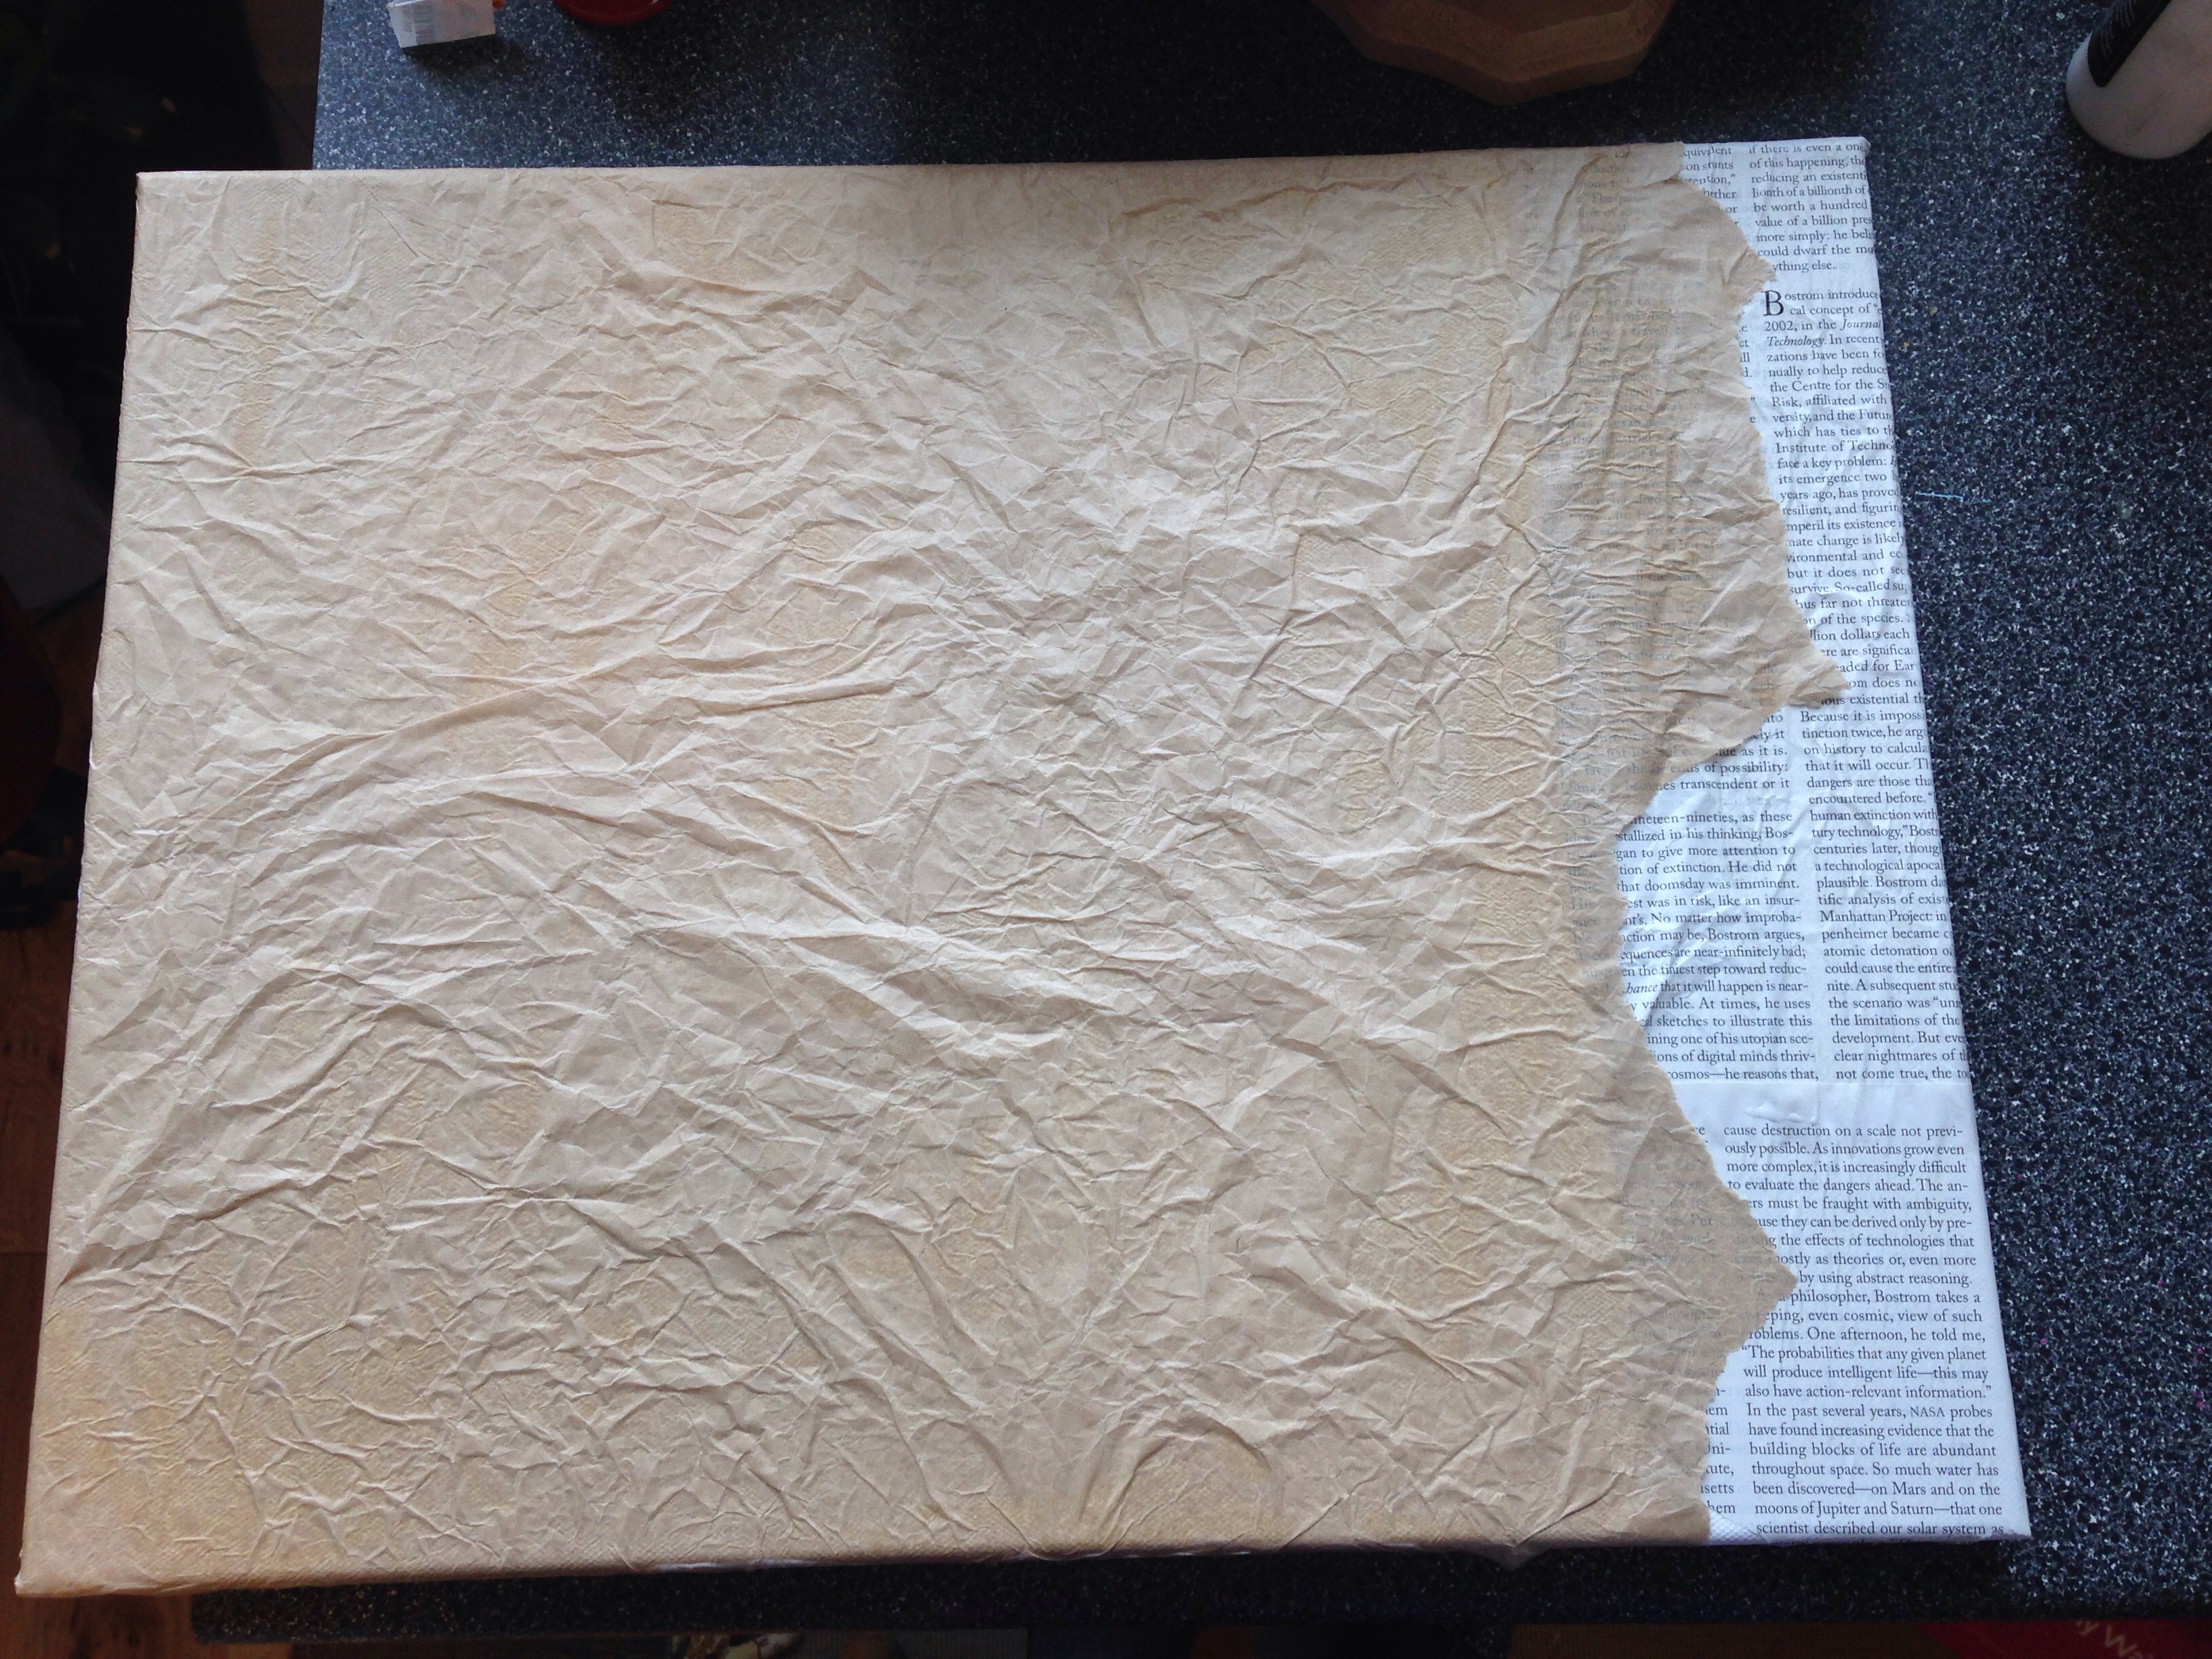
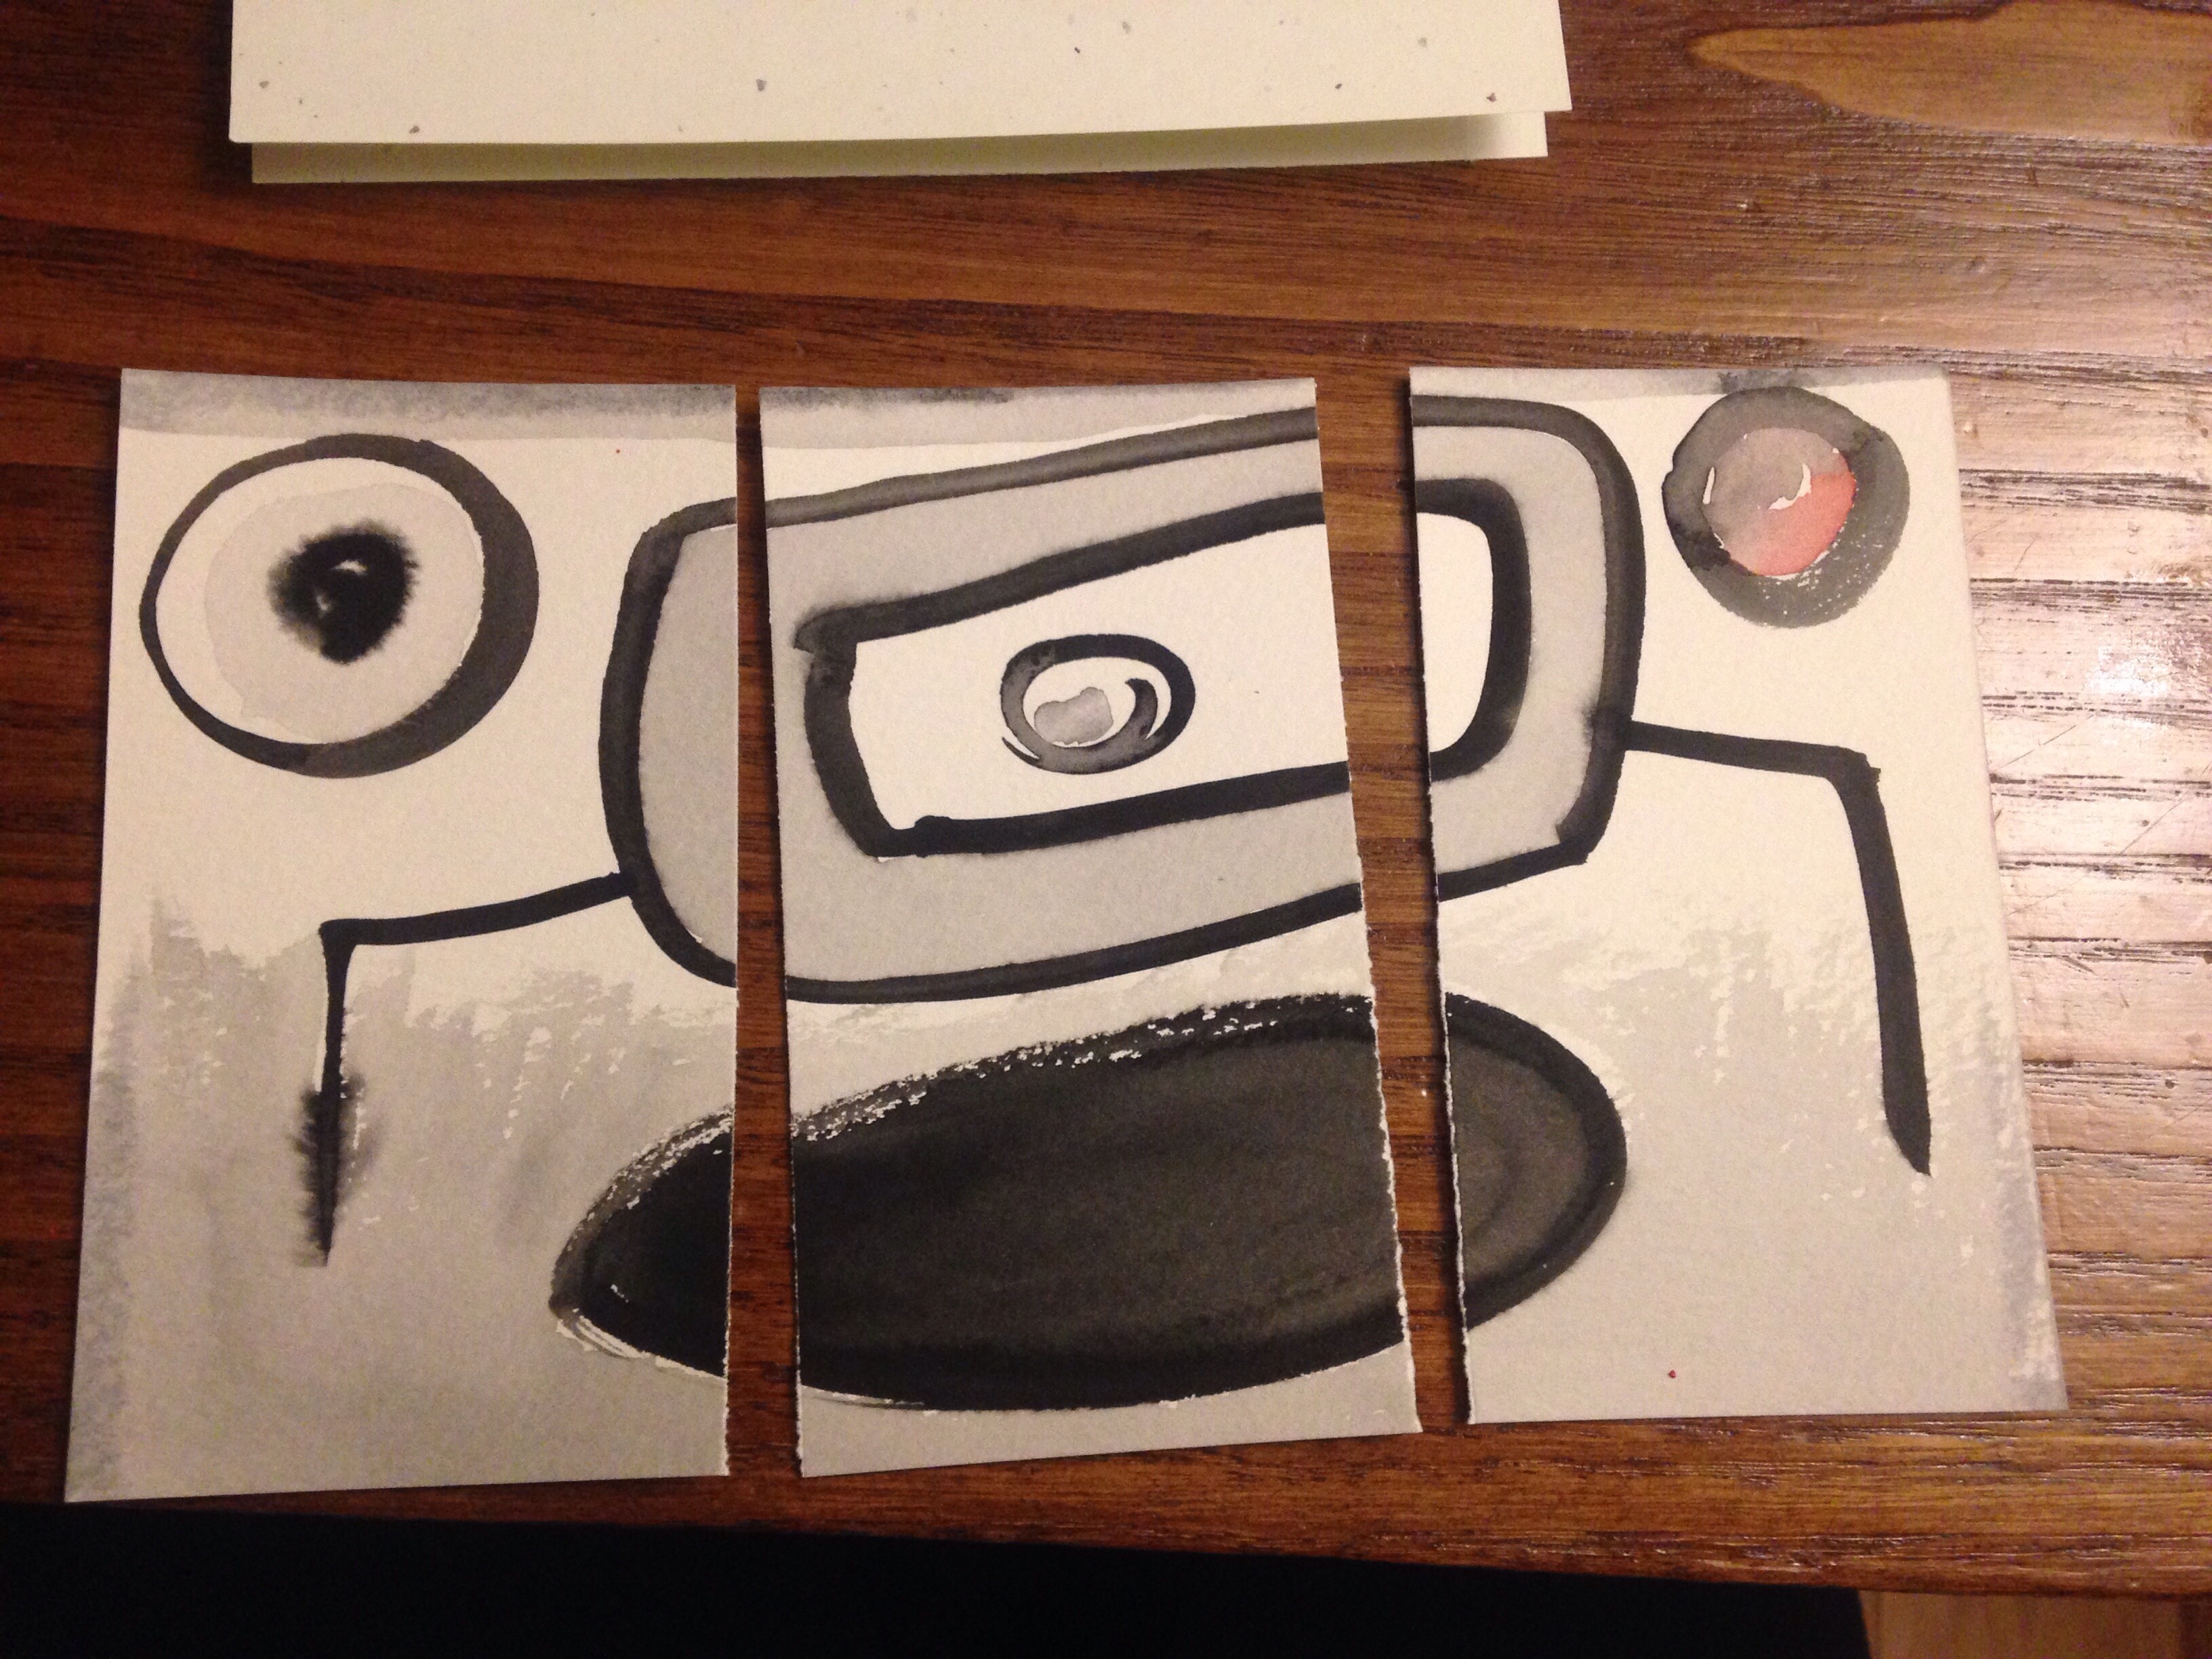
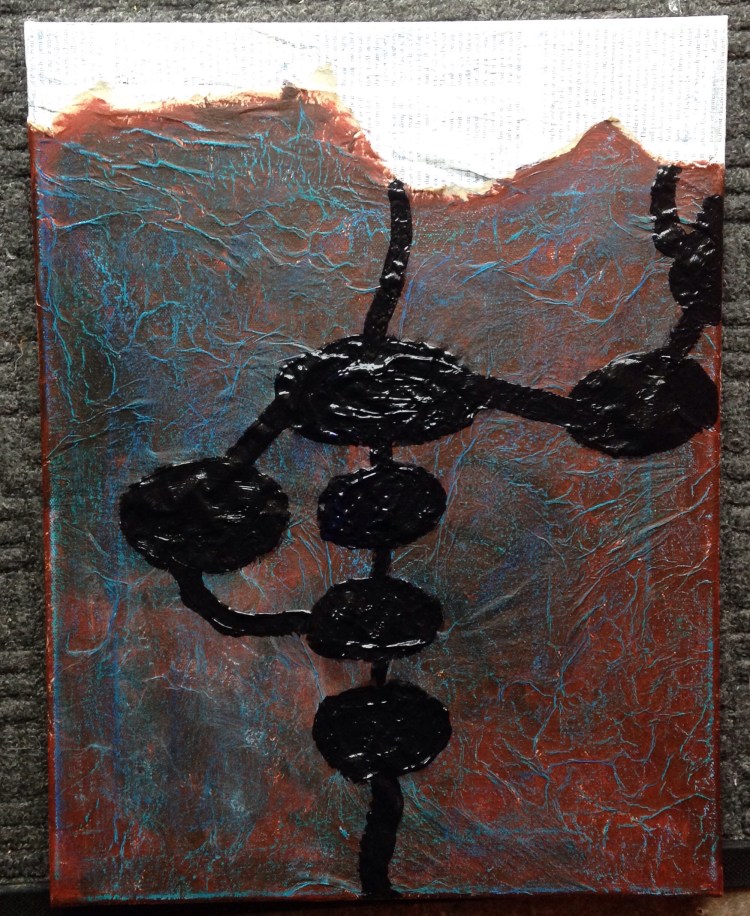
Next, I painted over the tissue with acrylic paint.  Then, added some oil pastels to add texture and visual interest to the rich browns.
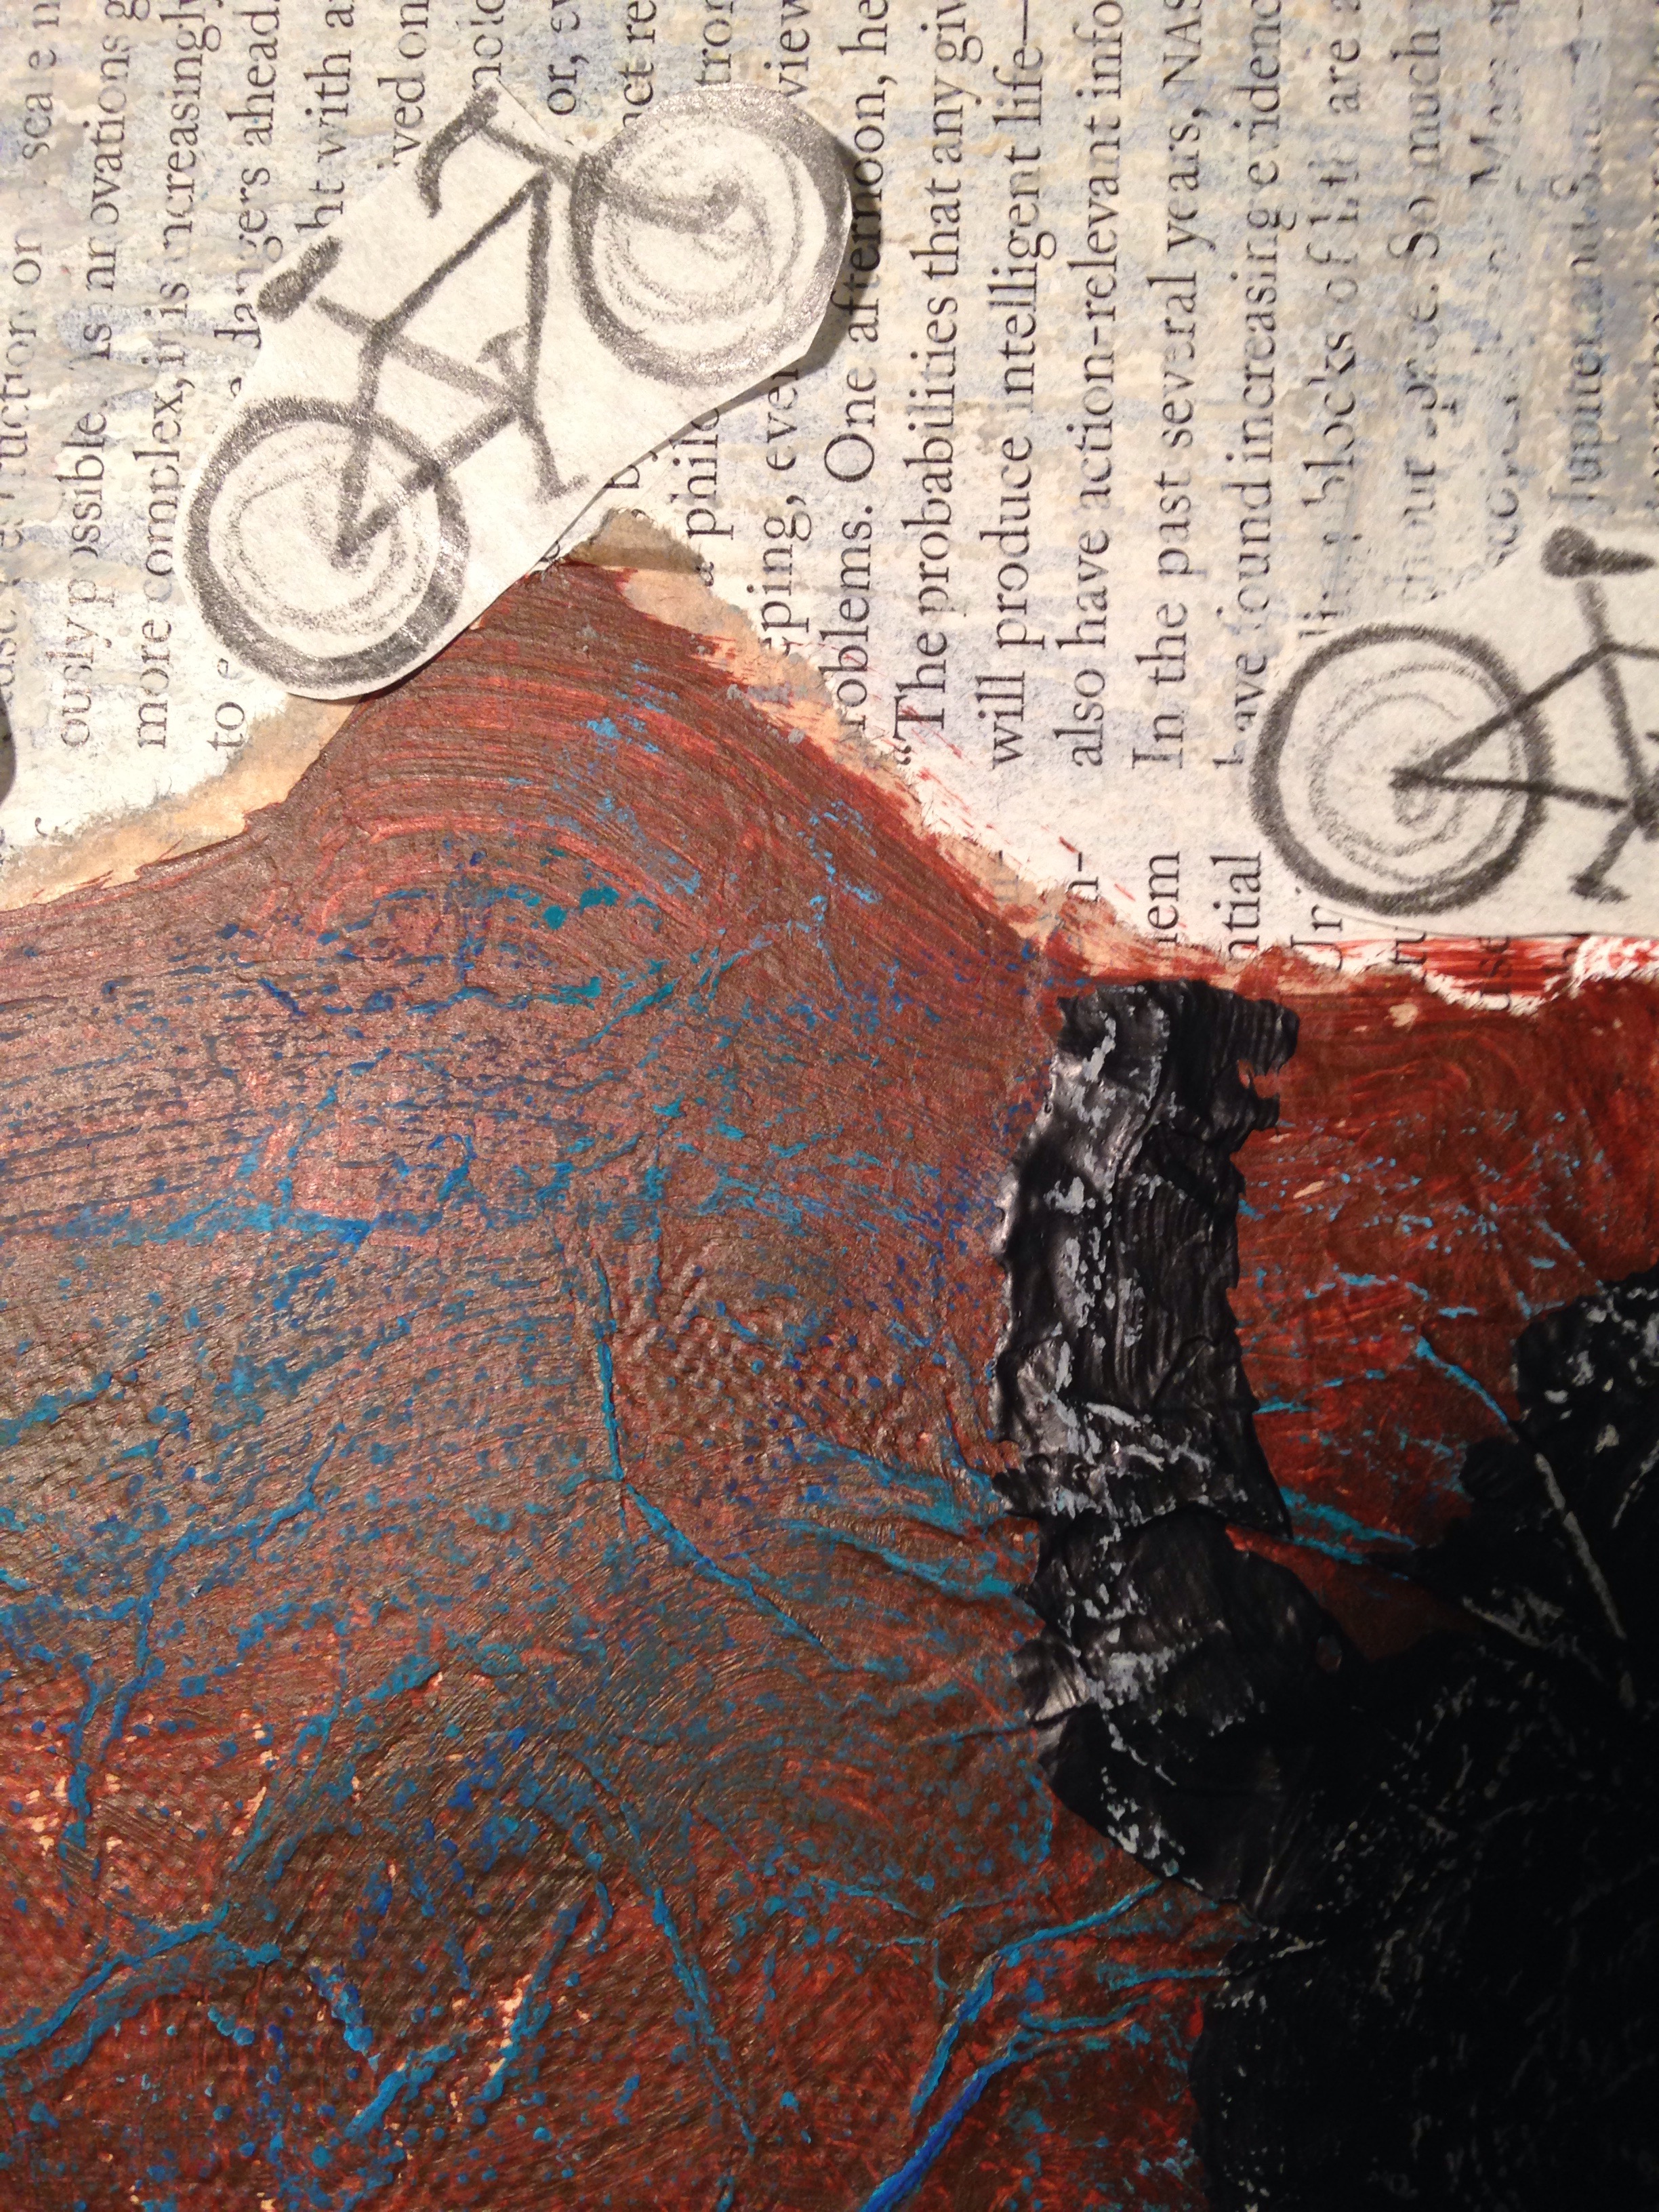
 Lastly, I added collaged items – pencil drawn bicycles parading along, buried classic cars, and a boulder or two.

Valentines 2016

  I still loathe buying greeting cards.  It’s a DIY disease – “I can make that.”

 This year’s Valentines have a bike theme going on.  I made this fun little stamp a couple weekends ago while Greta was working on her bicycle and heart print.  Or was that last weekend?  I don’t know…this time of year just escapes me.

 
 I started off my Valentines with some fun abstract watercolor paintings.  Once dry, I spliced them into sections.

 
 I attached the paintings to card stock with glue and by sewing machine.  Then, added small stamped bicycles to them.  On some of the cards, I stamped the bike directly on the painting.  Those ones turned out fine, but the bicycle ended up being a little hidden.

 
Greta had fun adding embellishments and her signature to her cards.  I love her ideas on what needed to be glued down!

 
 These are my two little Valentines, working hard at the kitchen table the other night.  The oldest was busy signing away – she opted for Ninja Turtle and Little Mermaid cards for her school buddies.  Meanwhile, little brother is sliding and throwing her Valentines on the floor.


 This is me this morning at work – I survived yet another year of teaching during the Valentine season – today were the element kids’ Valentine parties.  In the spirit, I decked myself out in my heart sweater (old one from Target!) and my heart earrings that my mom gave me way back in 8th grade.  They were sort of a big deal, because they were dangly and not just studs.  I cannot believe I still have them. My hubby and I are not much into gifts, cards, or any of the likes for Valentine’s Day, but whether you celebrate or not, Happy Valentine’s Day, y’all!


Printing & Stamping

diy.block.stamp

One of the best things about being an art teacher is the experimentation with materials and media in preparation for projects.  Lately, I have been into printmaking and stamping.  As my own kids get older, I often use them as guinea pigs for upcoming lessons at school.  The past few weeks, we have been experimenting with stamps and printmaking.  For further reading, I recommend a book called, Print & Stamp Lab: 52 Ideas for Handmade, Upcycled Print Tools (Lab Series), that I have in my classroom.

The image above, is the block stamp we made with a variety of materials – foam shape stickers, paper clips, a button, and pieces of pipe cleaner.  They are all attached to a scrap of wood with hot glue.  For twice the fun, I made the stamp two-sided.

DIY.stamps

We also tried DIY stamps from the trash bin – sturdy plastic caps are great for affixing Geometric Self-Adhesive Foam Shapes.  Wooden spools can turned on their sides and rolled, to make lines, or items can be affixed to the ends, in the same manner as the cap and wooden block stamps.

stamps

We have also been using pre-made, everyday items to stamp.  Above you see, small erasers in interesting shapes, a foam ear plug, and a cork.  All of these can be used as is, or carved into to create designs in relief.

bike.print

Our favorite project so far, was using clean foam take-out boxes and cutting them into squares.  Then, my daughter drew into the foam with a pencil, pressing hard to make deep lines.  Her motif for this print is a bicycle and a heart.  No take-out boxes?  You can buy foam trays too.

She then painted over the foam with tempera paint and a wide paintbrush.  I cut papers into 5×7″ rectangles and showed her how to use her hands to smooth the paper and create a print.  After her prints were dry, she signed all of them and added some stickers for flair.  Can we say easy homemade Valentine’s?