Felted Wool Stuffed Cat

I remember asking for a kitten for Christmas when I was around 5.  We had 1 or 2 aging cats at the time, so it was obviously out of the question with two young children in the house.  To my disappointment, on Christmas morning, there was a stuffed cat and kittens under the tree.  When I grew older I realized that my mom had made these cats, and of course grew to love them.  The creative answer, to a far-fetched request was, I am sure not so easy for her to do.  Hopefully I was not an ungrateful brat for the stuffed cats that Christmas, nor any Christmas after.  As a crafty person, I prefer the gifts made by the giver, as I know they are gifts of time.  
Greta is bound to be crafty – there is no way around it.  Her parents are both frequently heard saying, “I could make that.”  It is with no surprise then, that this year she has a few home made gifts for Christmas.  This cat stuffed doll came about because I was flipping through catalogs and looking on Etsy at all the kitchsy, mismatched, it’s-cool-to-not-look-cool toys.  You know the style.  
I am proud to say that start to finish this project was all my own creation.  I made the pattern for the body, felted the face, and even made the dress. My only regret – the dress is a little crude, so I may be replacing it with a nicer one at some point.  
The pattern is made from a lightweight drawing paper.  The pieces are folded or doubled up for better symmetry.  
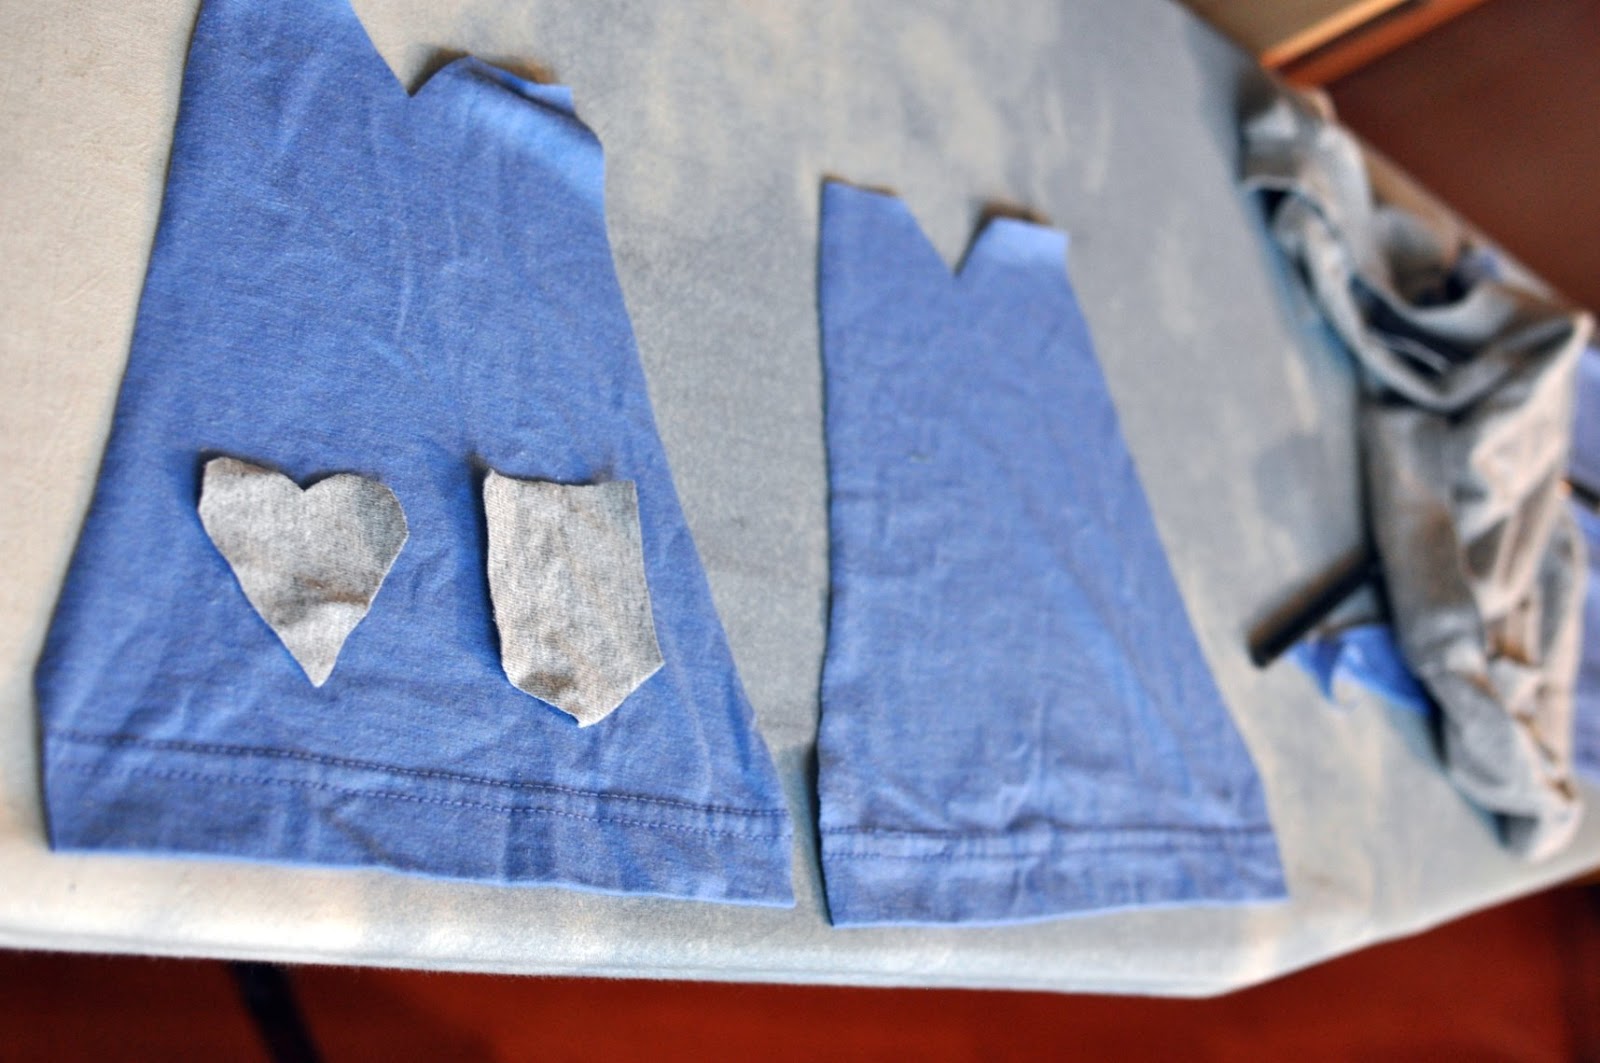
The pattern pieces are then traced onto a felted merino wool sweater.  The pieces are cut out, pinned together, and then sewn.
The top leg has not been reversed, but the bottom leg has been turned so the seams are inside and is ready to be stuffed. 
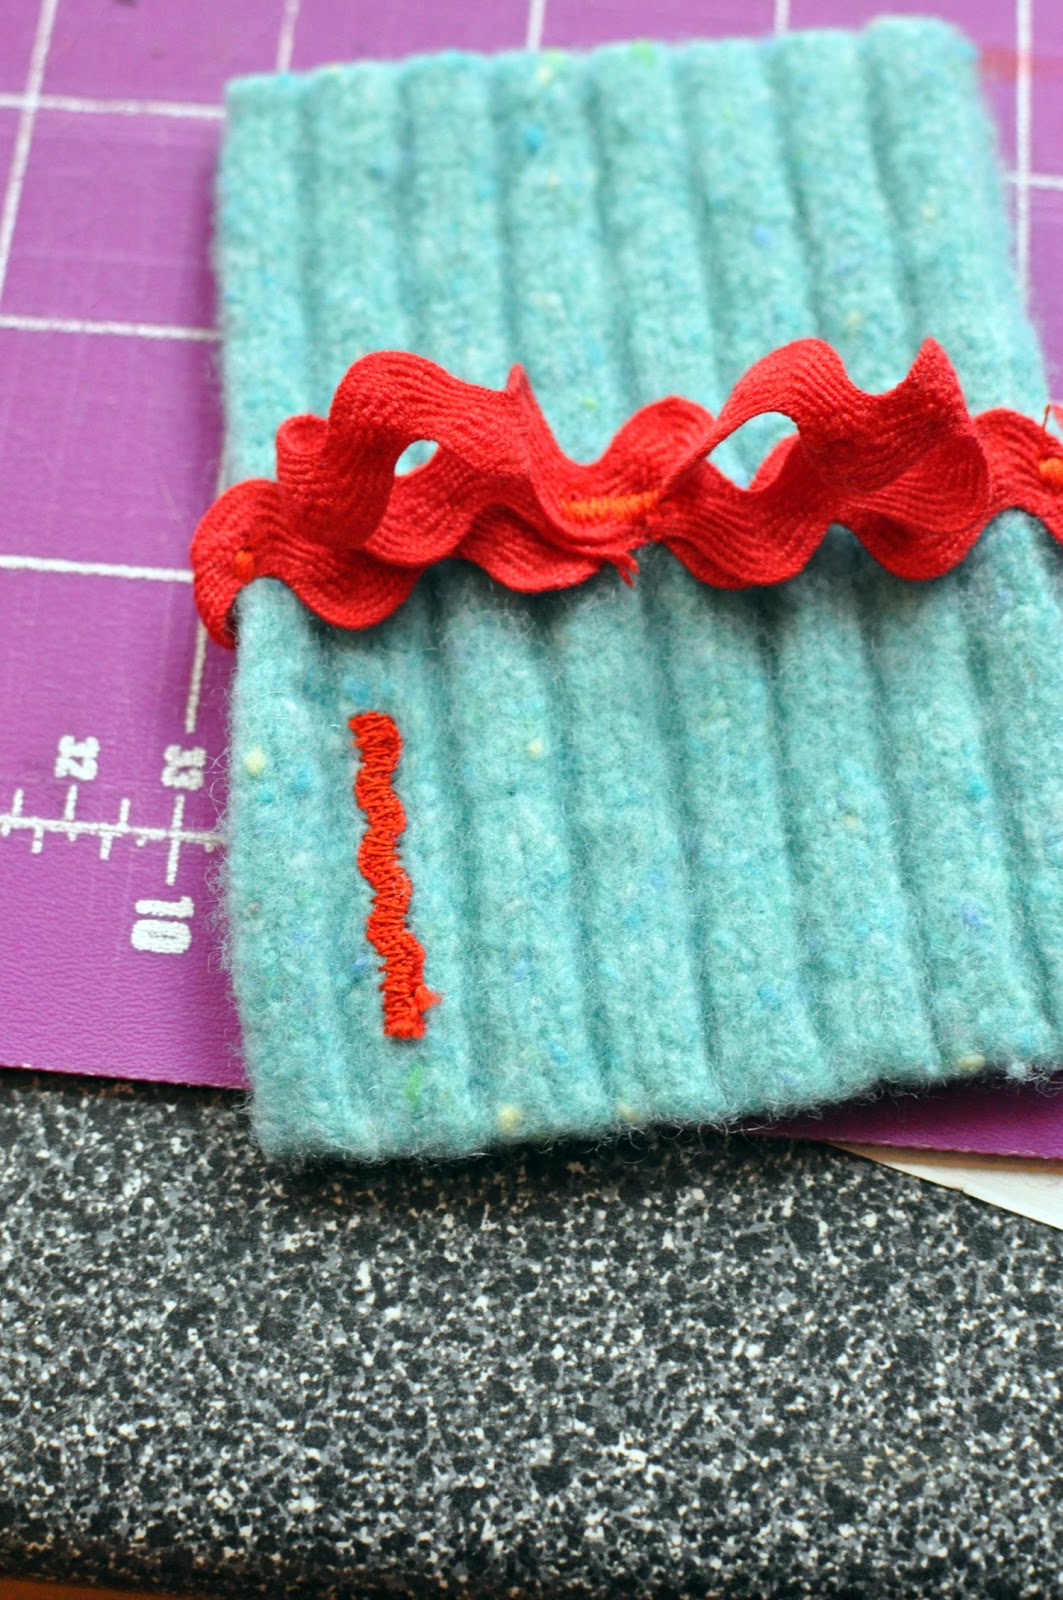
Holes?  No big deal with felted wool – just simply sew on a small patch.  
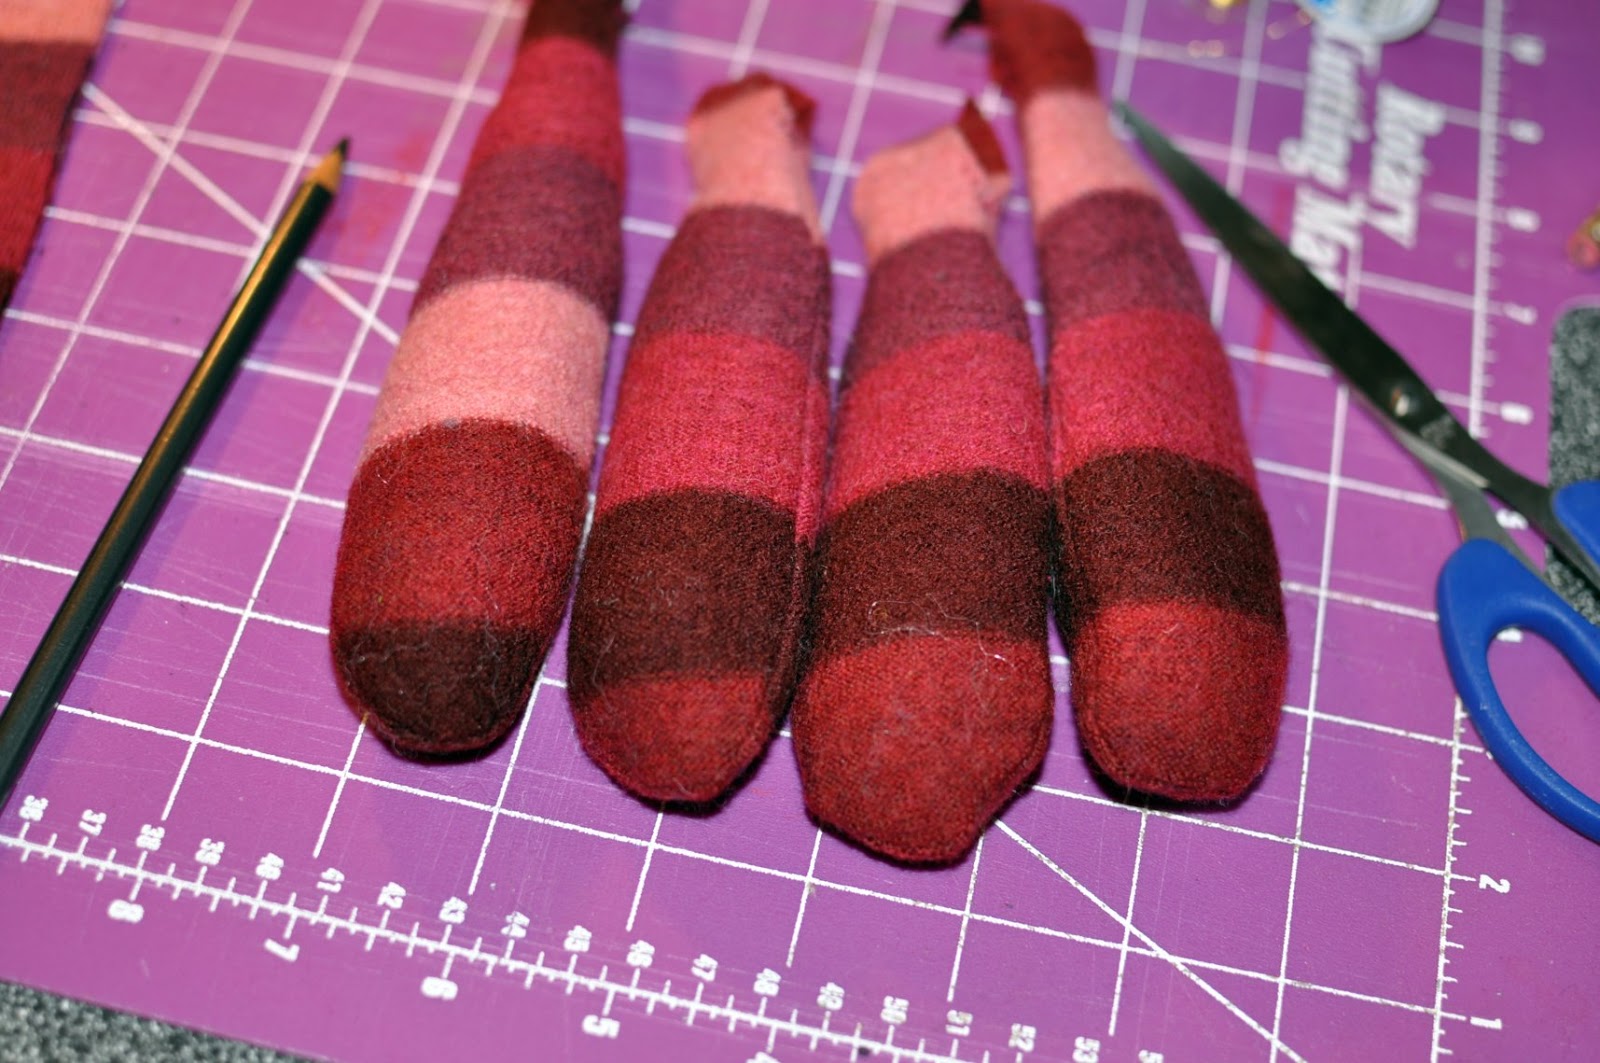
The arms and legs all stuffed and ready to be attached to the body. 
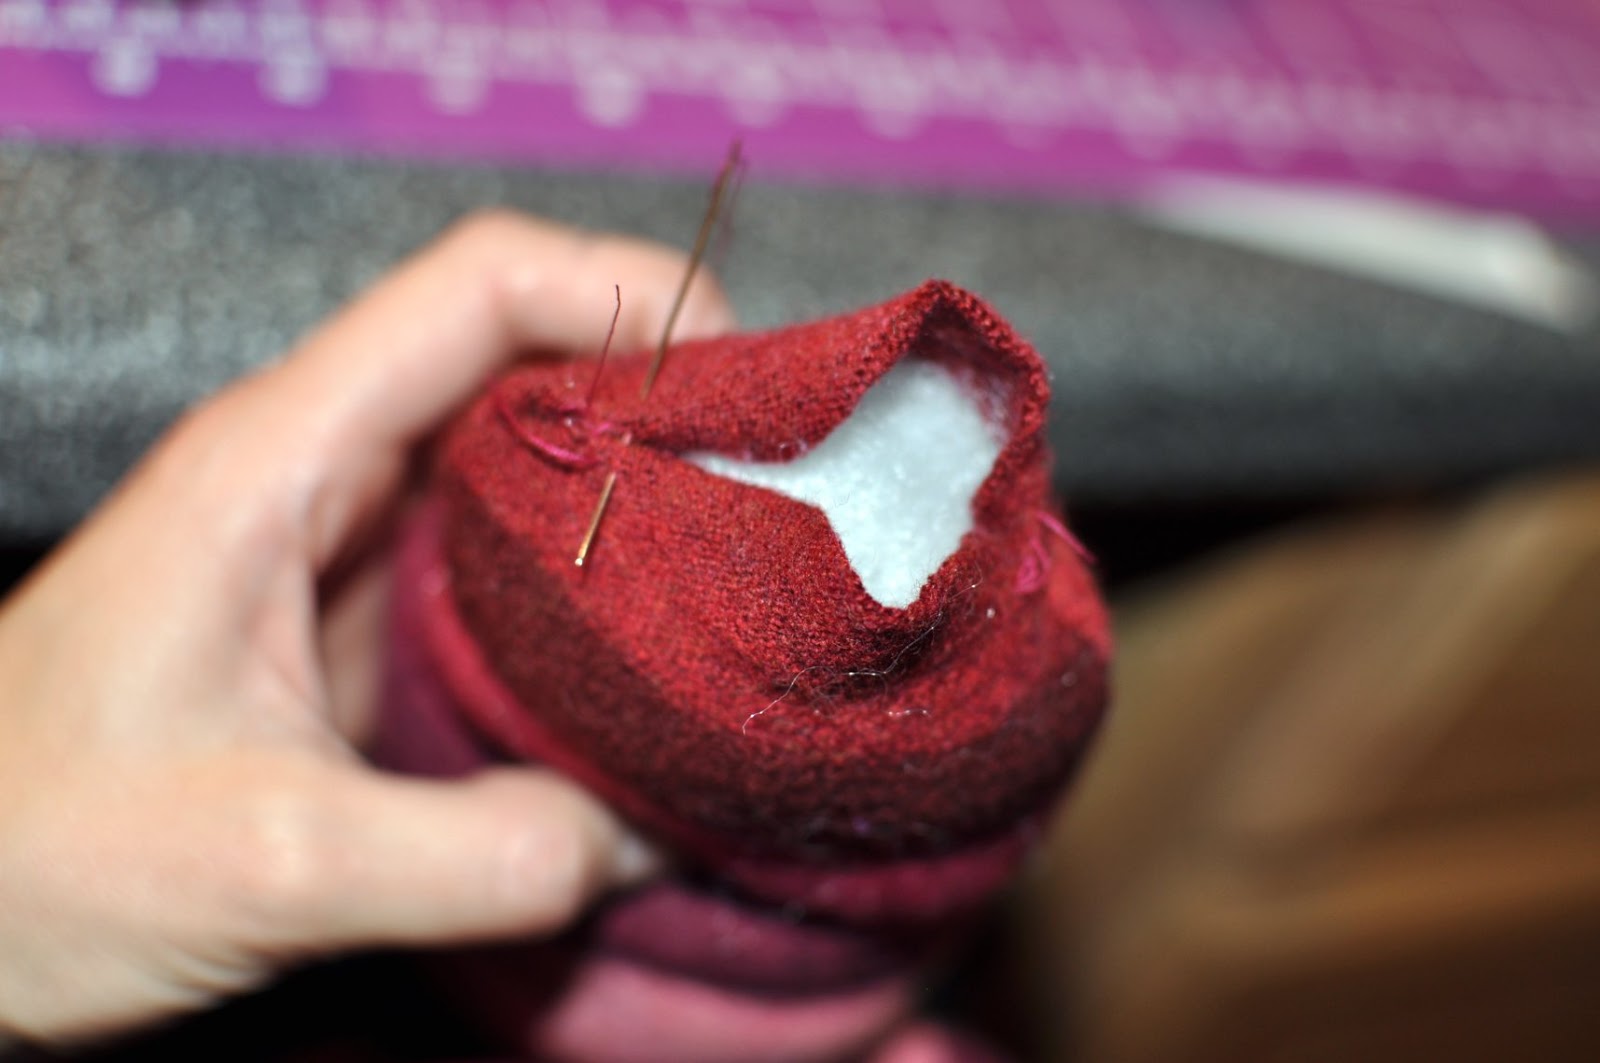
The body stuffed and in the process of being sewn shut.  
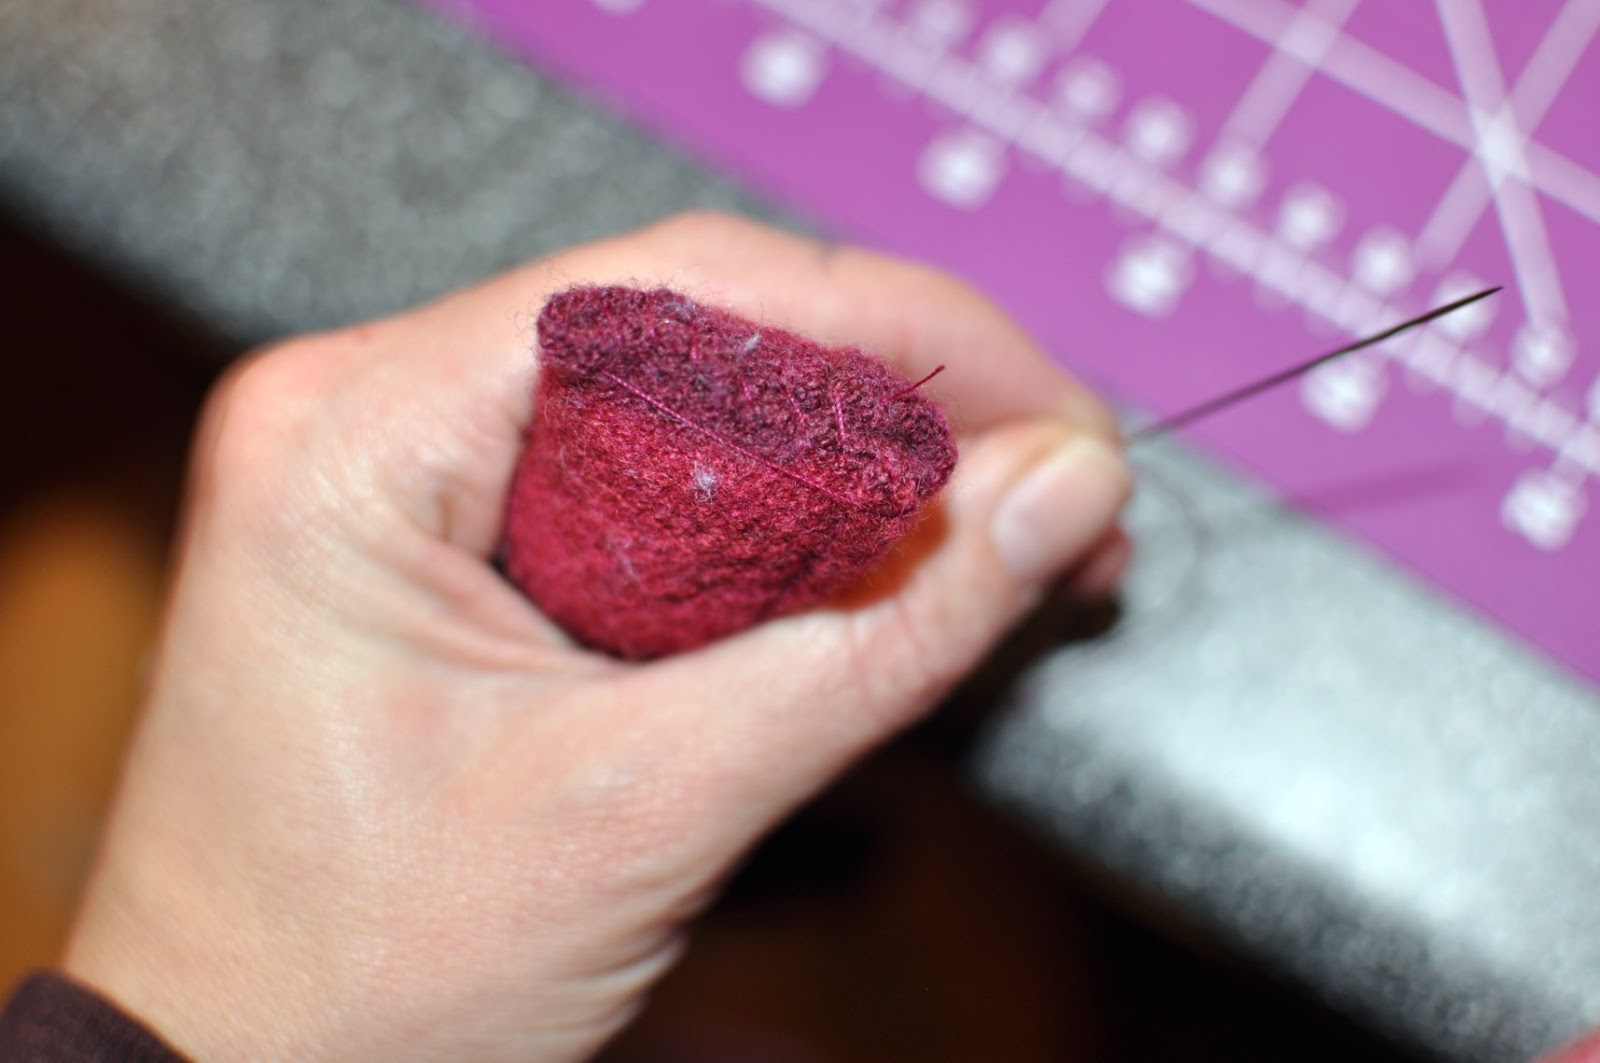
The tail sewn shut and ready to be attached to the body. 
To attach the tail, simply place in desired location and sew together. 
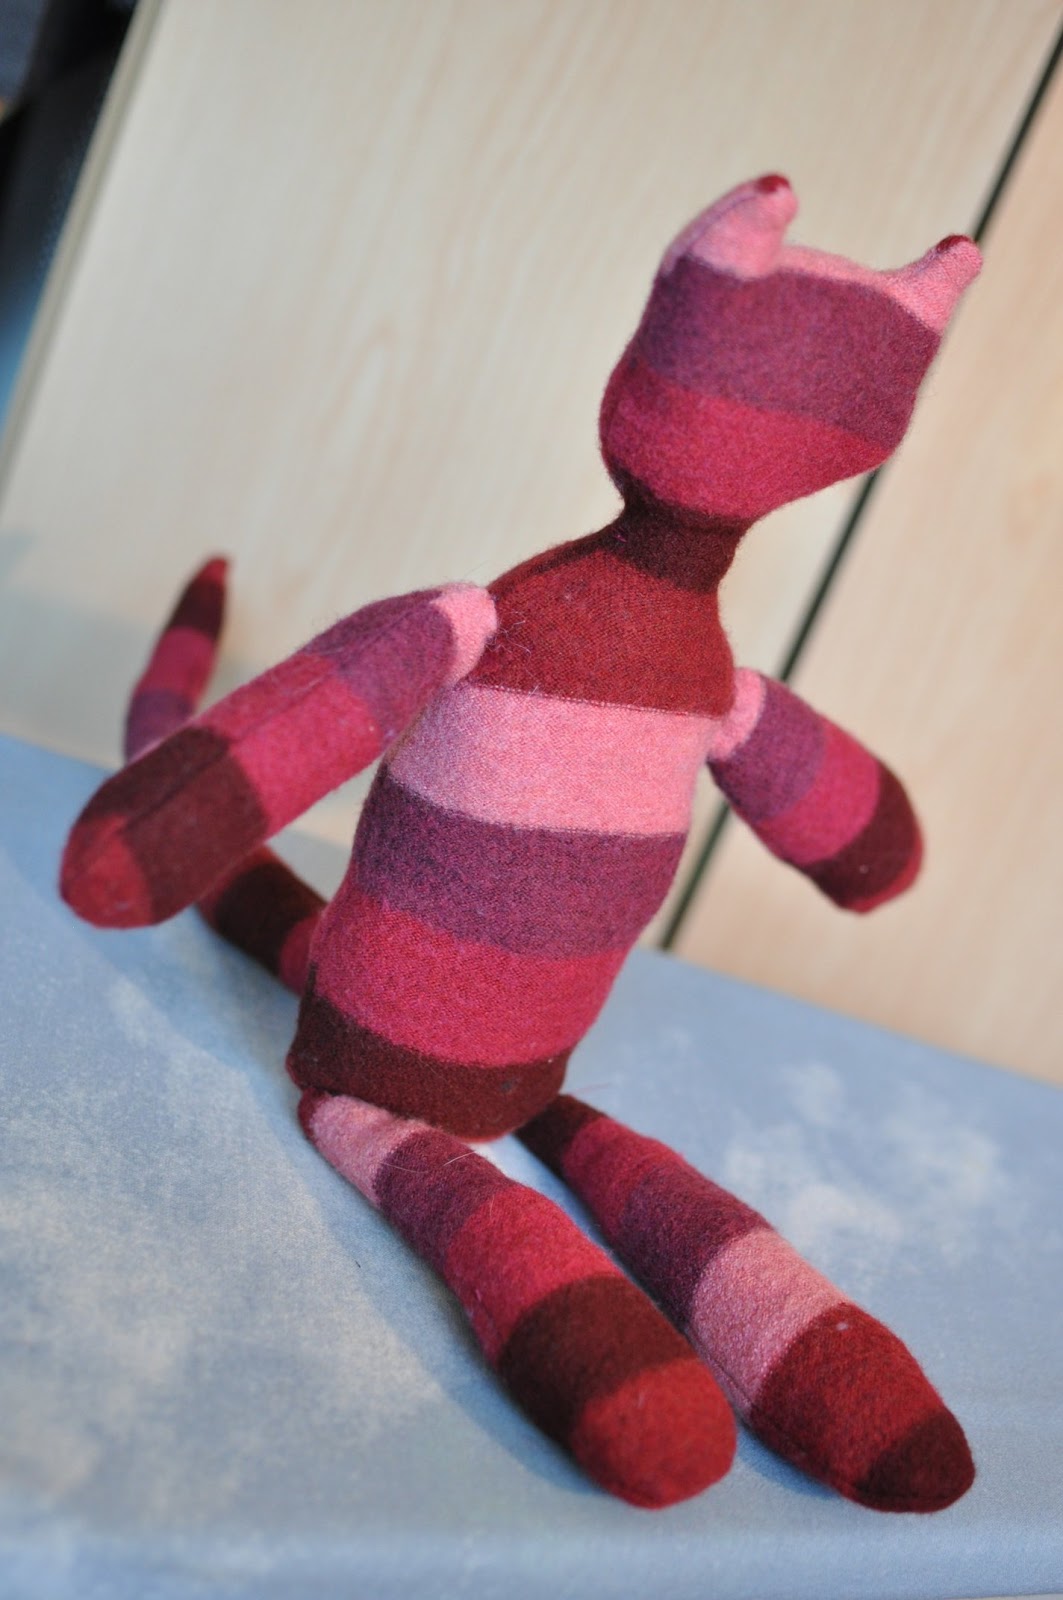
The finished stuffed cat. 
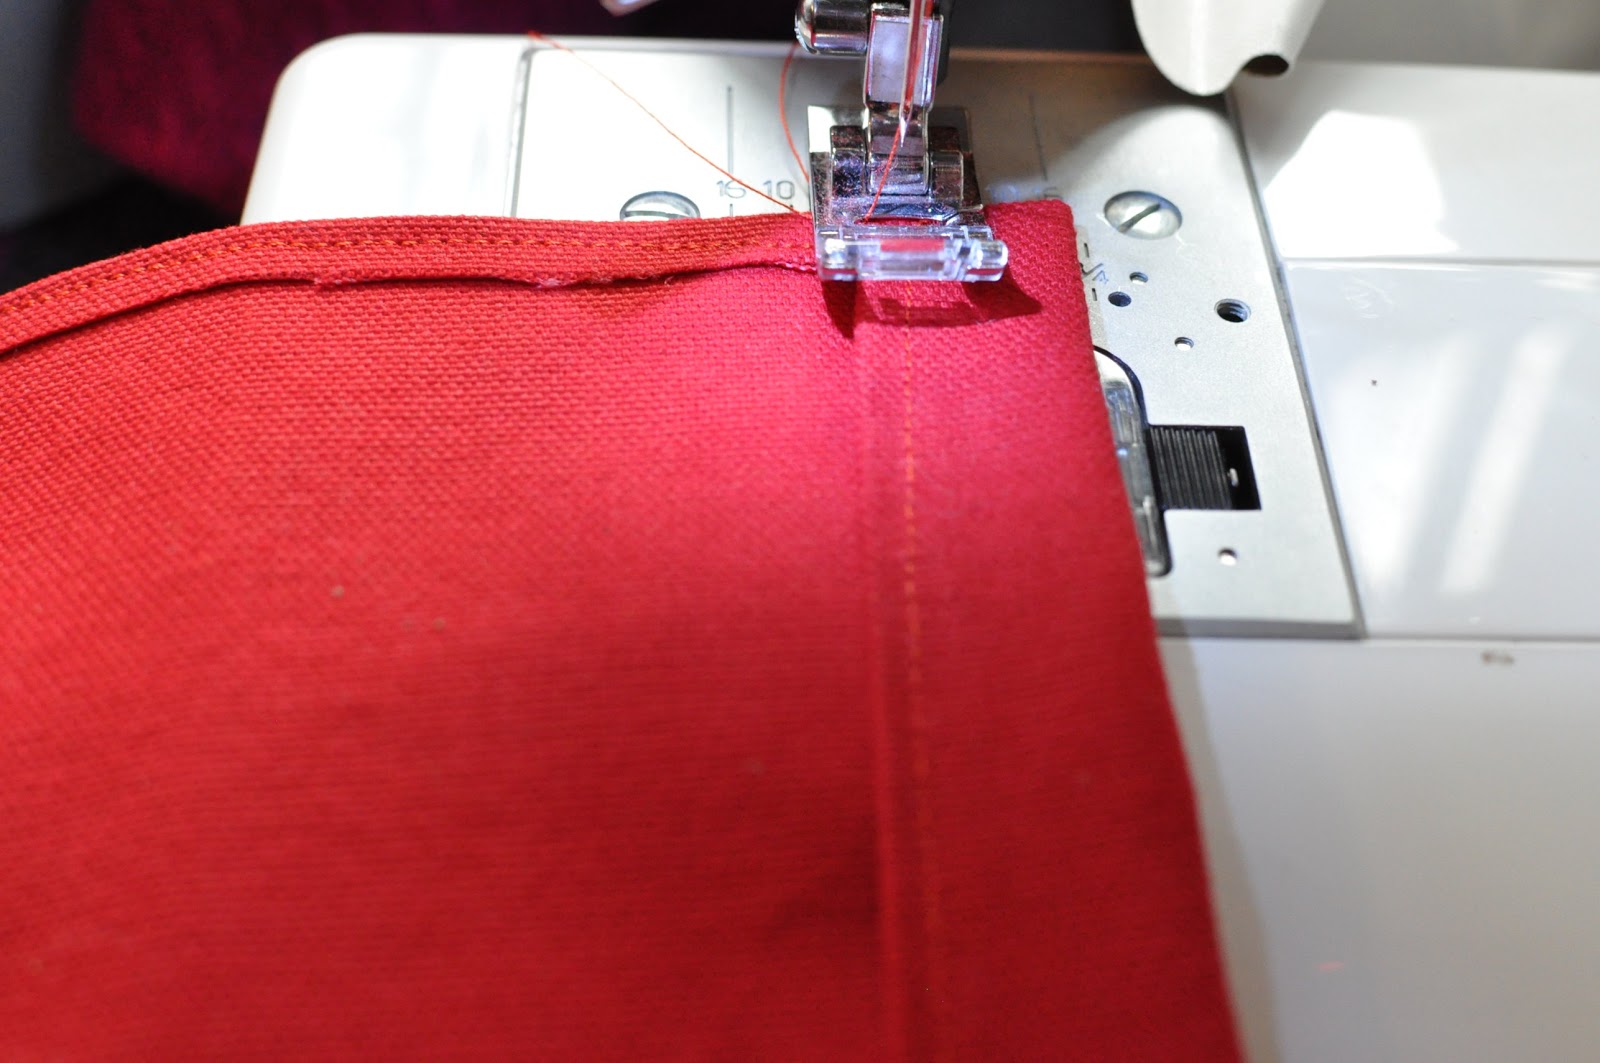
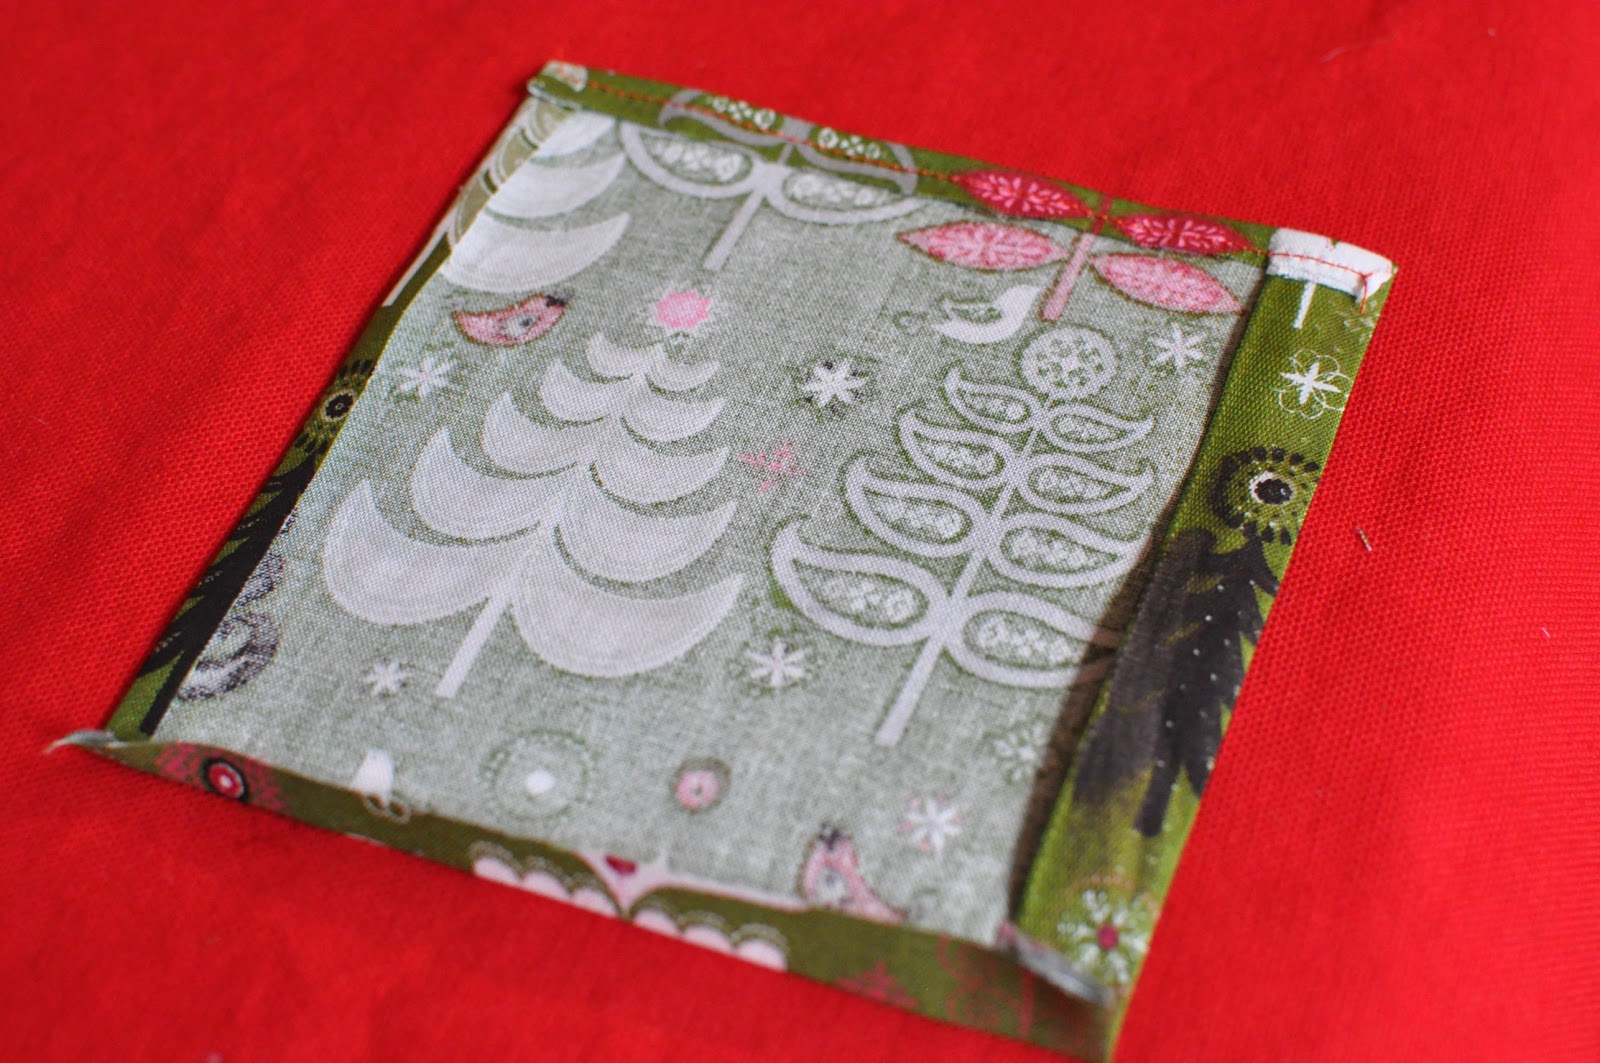
To make a simple dress, use tee shirt scraps.  Cut two pieces, sew pockets on the front section, and then sew together, right sides together.  Leave spaces for the head and arm holes.  
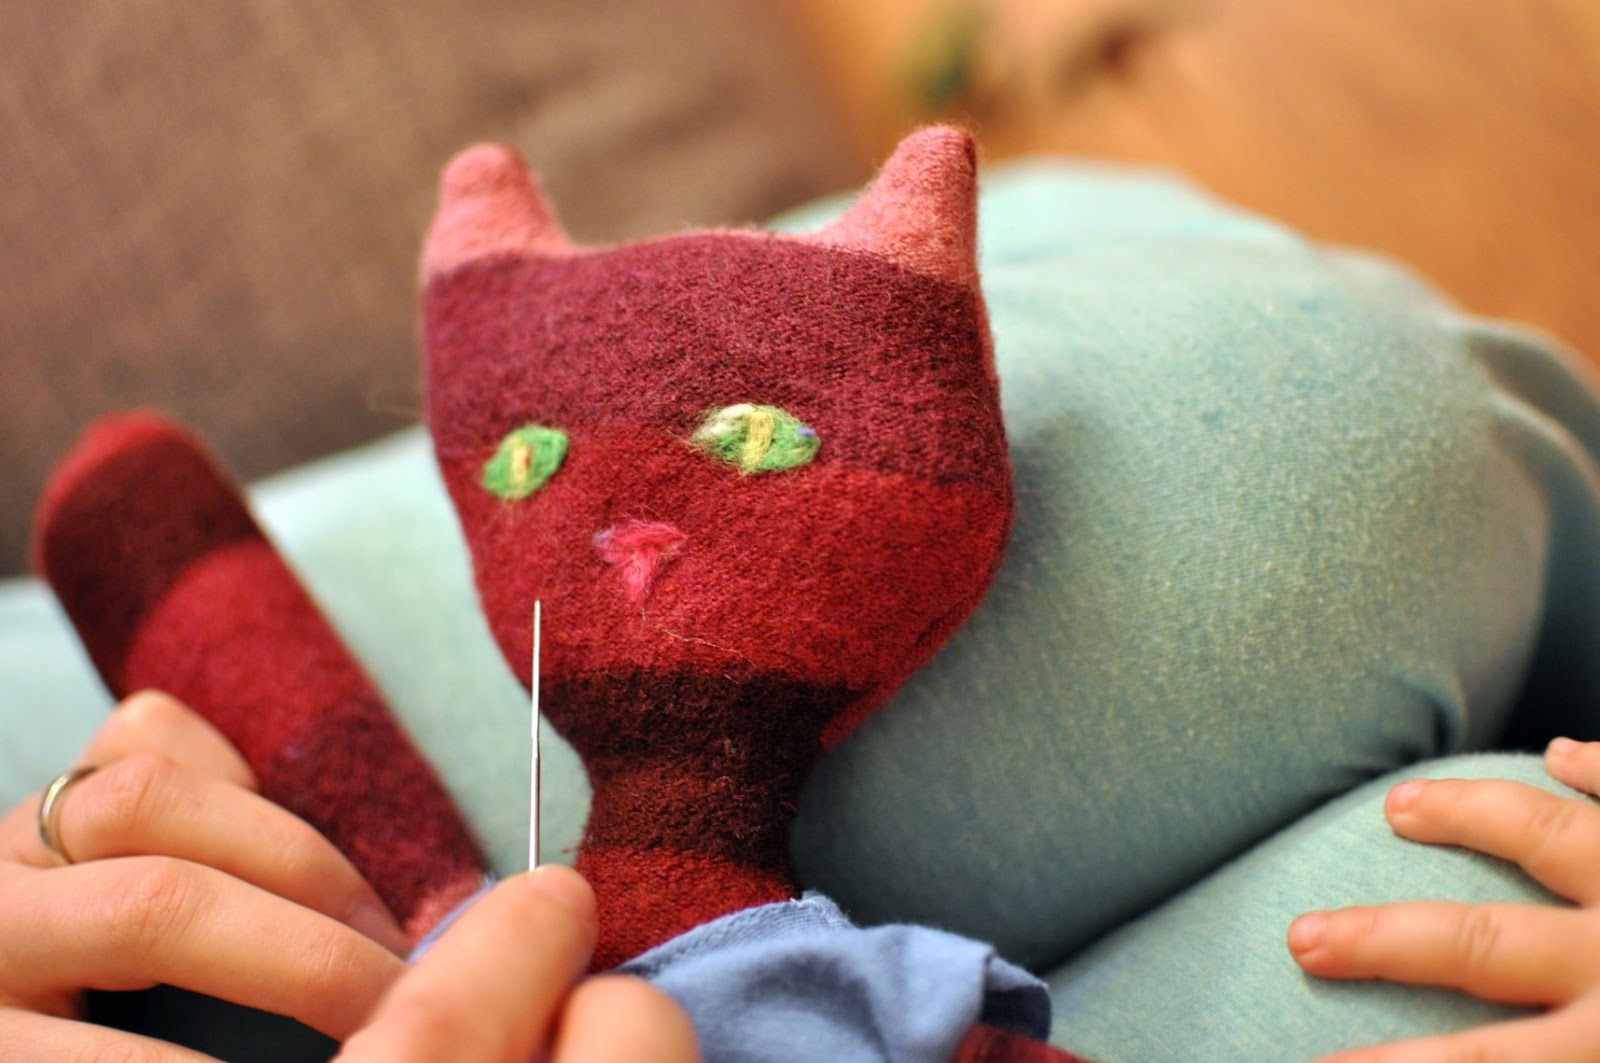
Felt a face using a felting needle and loose colored wool – called carded roving.  I have a large bag of many colors that I have been using.  
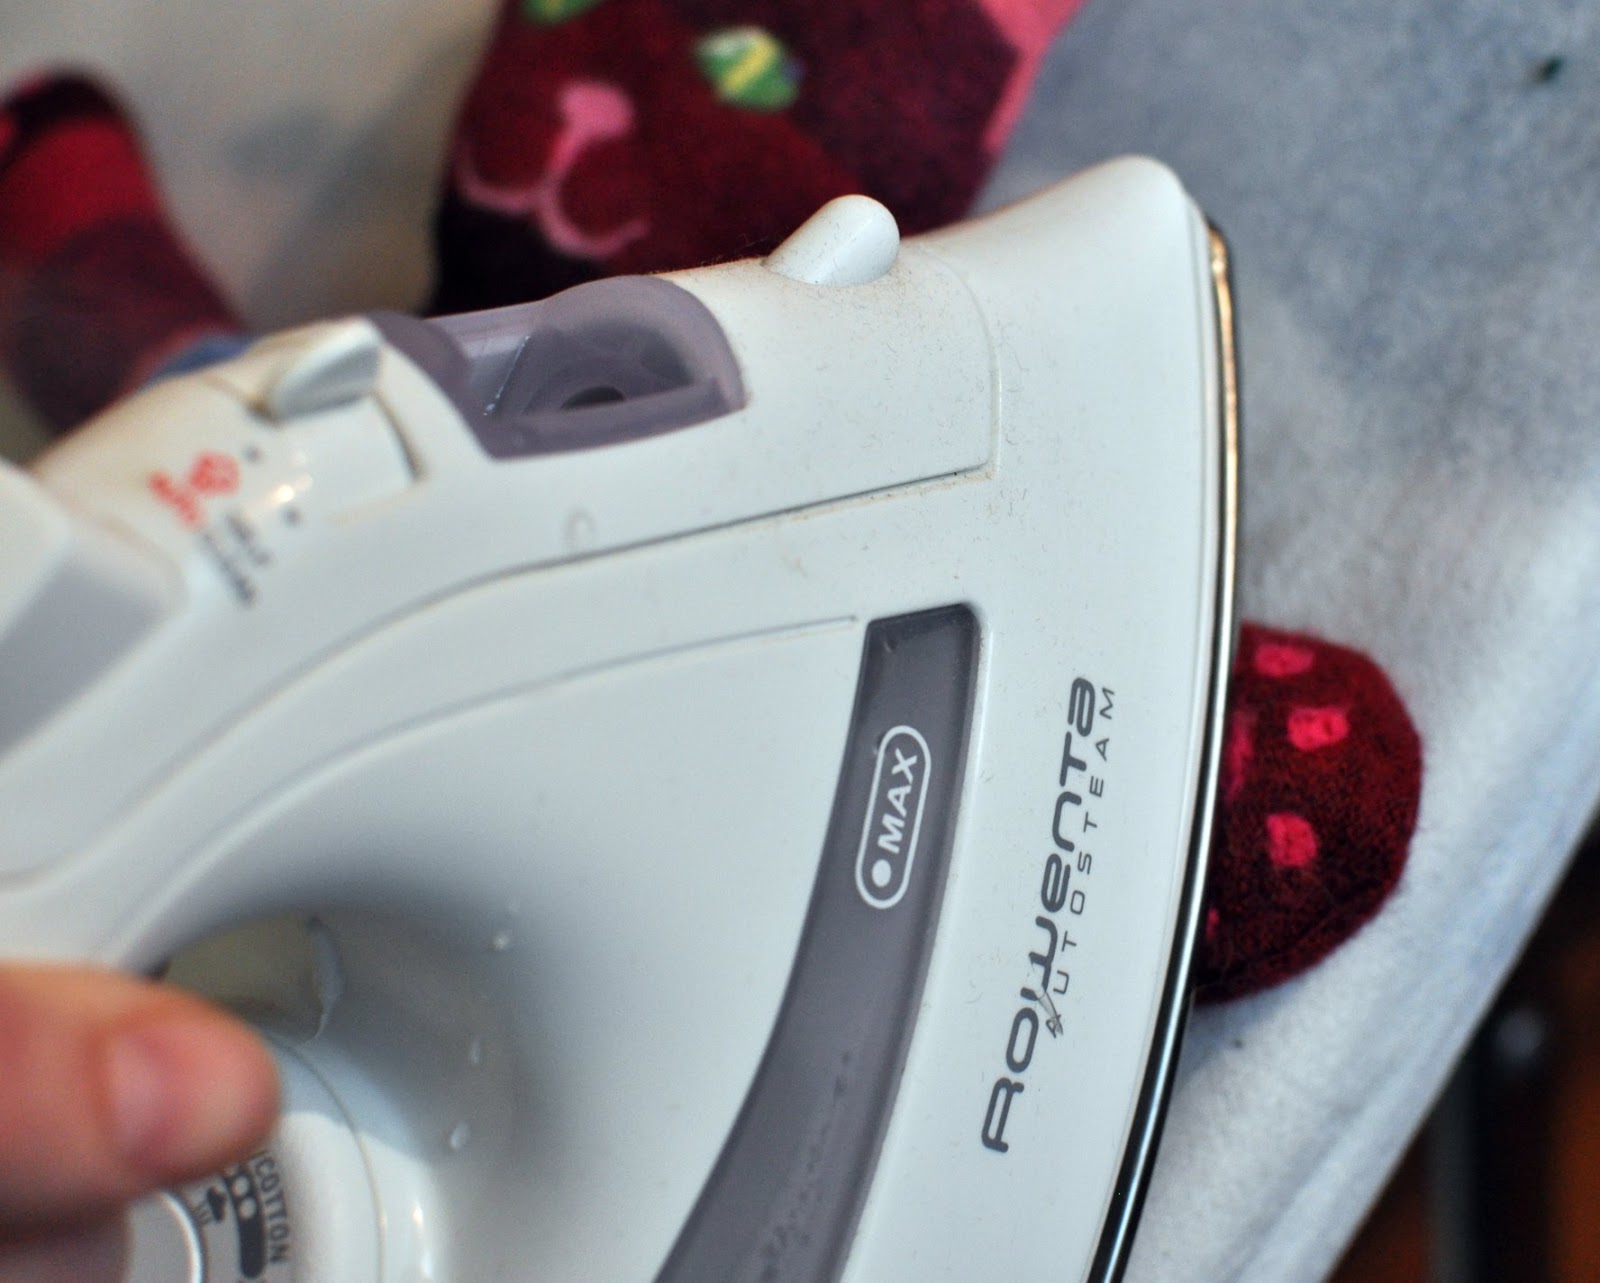
Once the felting is complete, use a hot iron to shrink the wool and hold in place.  
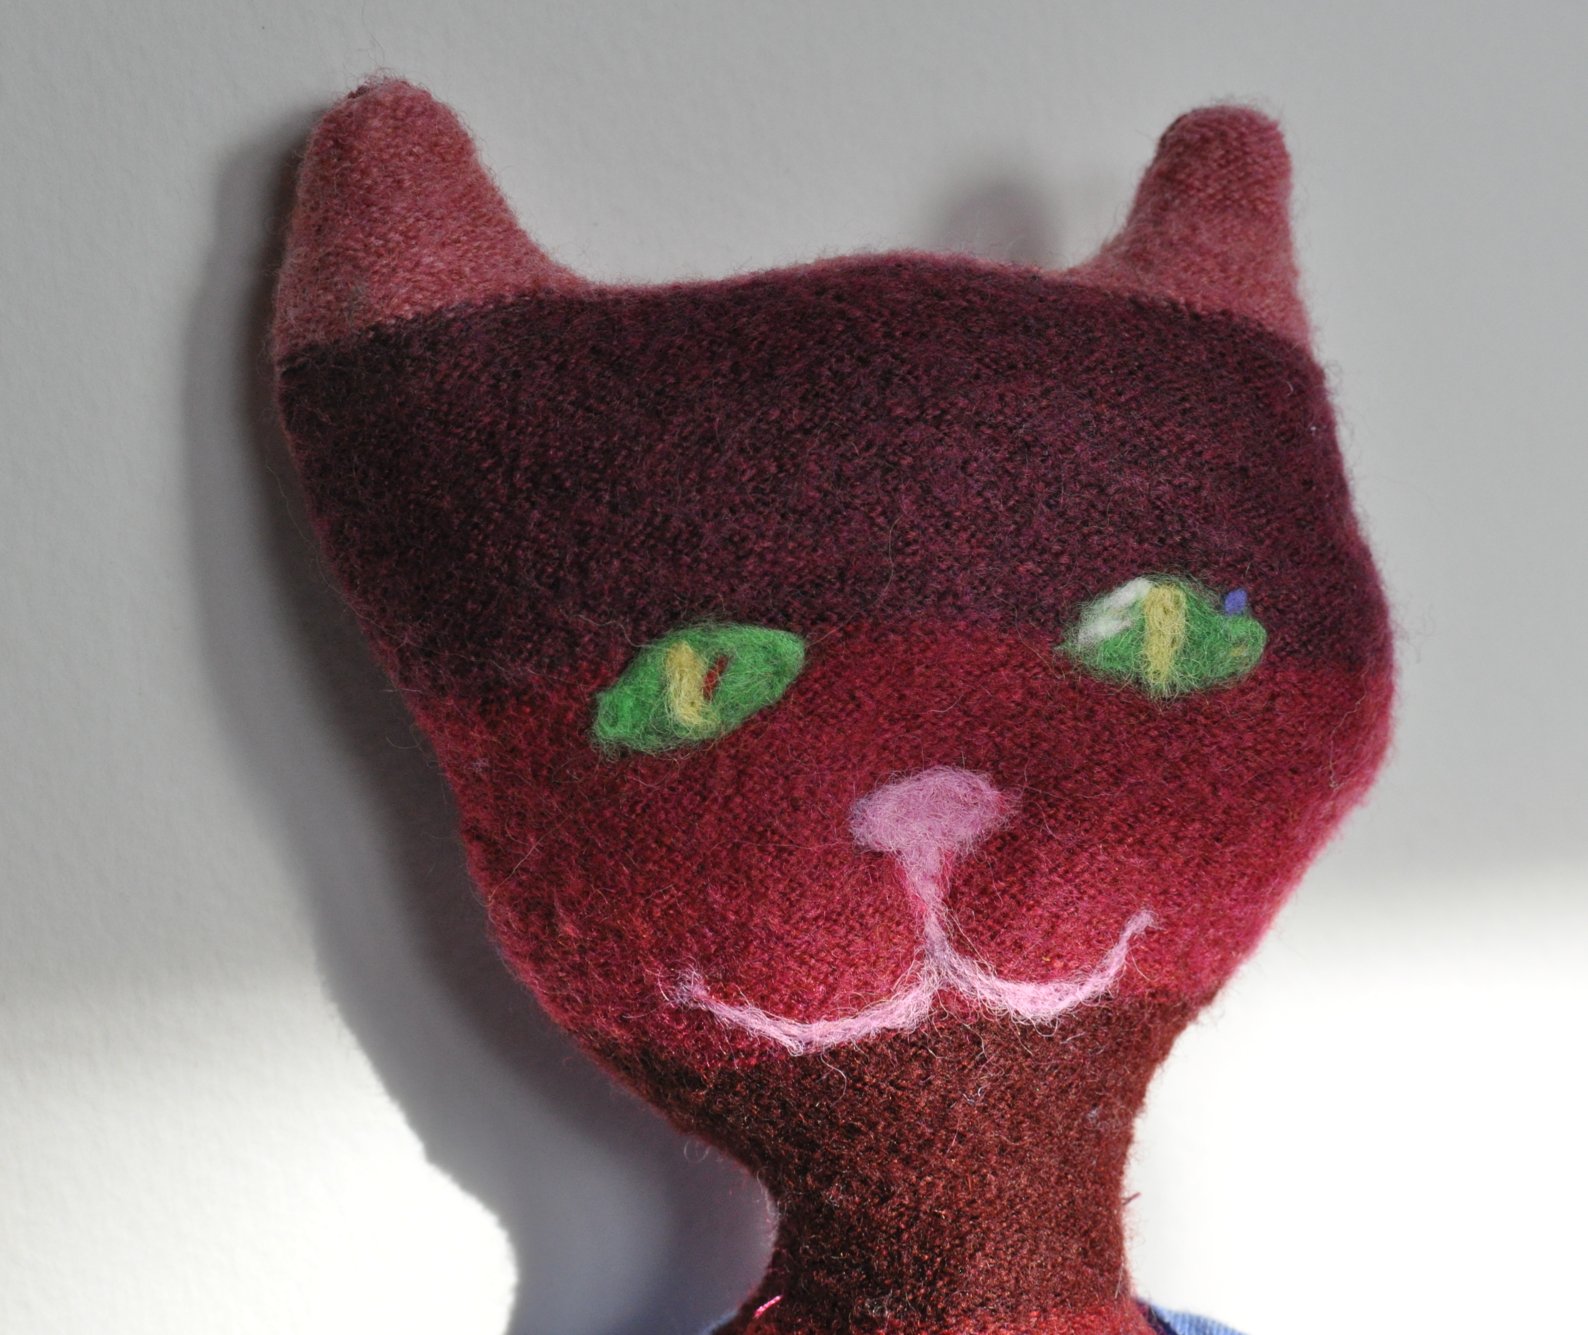
The finished face.  So much for symmetry.  Oh well, she will love it anyway.  After all, if something is worth doing, it is worth doing badly!  
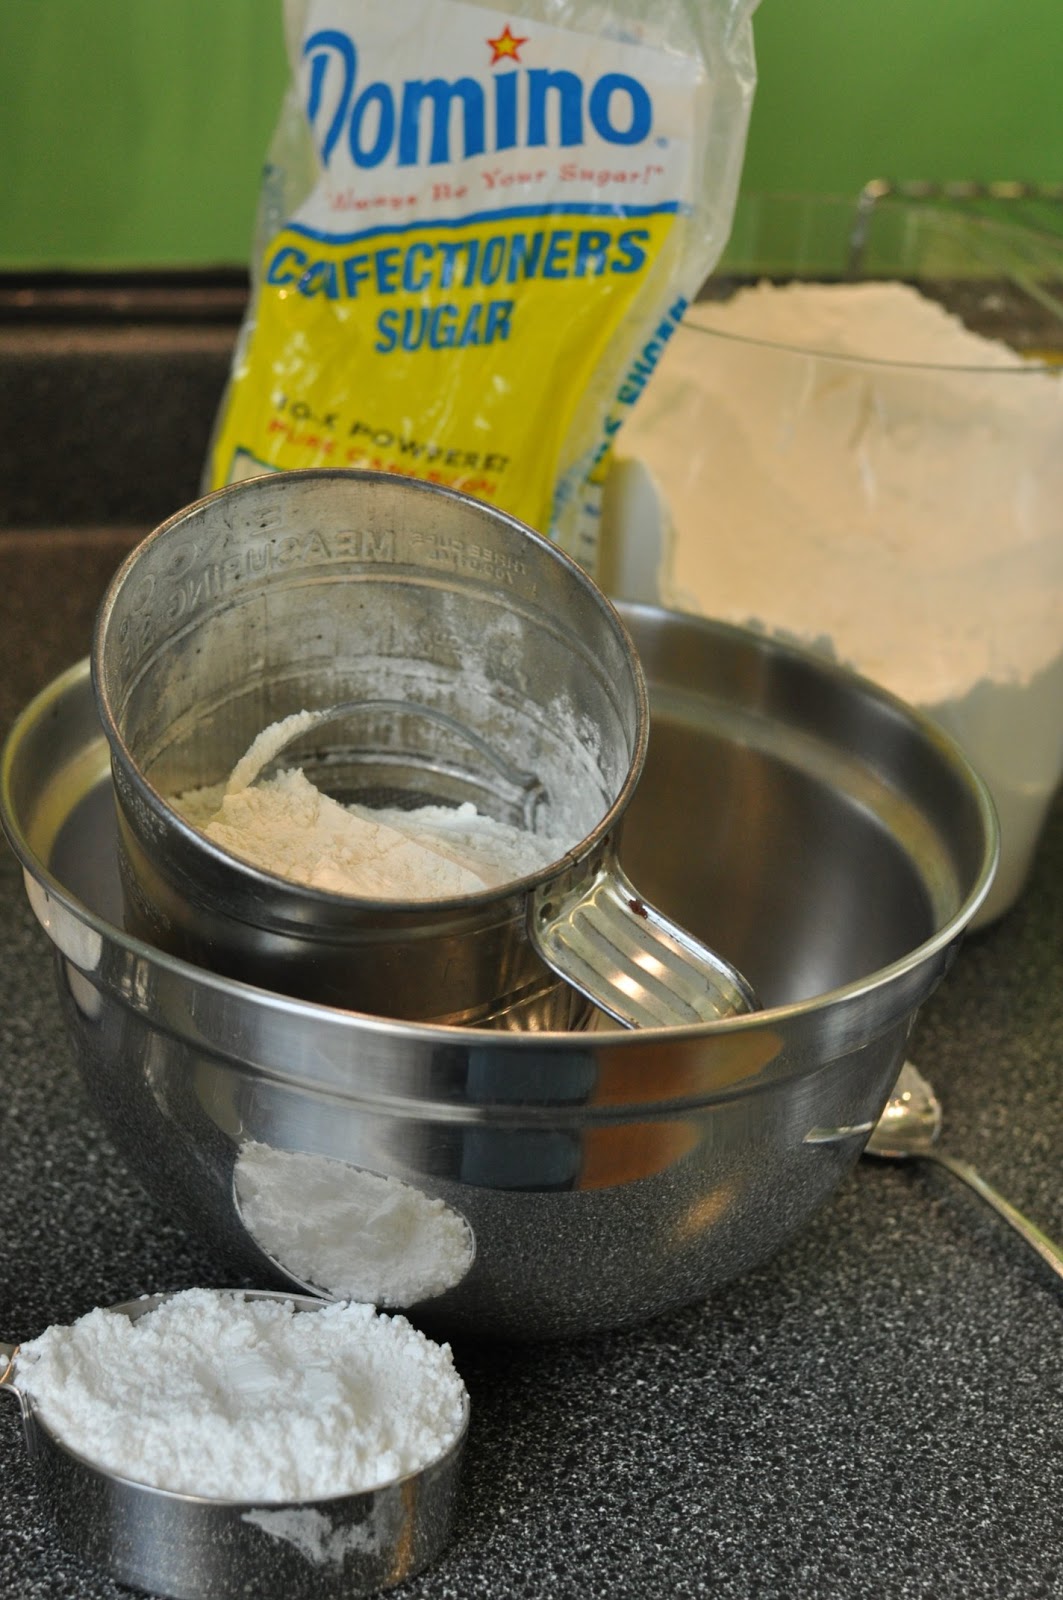
This is an easy kit to get you started on felting without breaking the bank.  

DIY Felt Garland

This wool felt garland is ridiculously easy.  So easy I cannot imagine why anyone with scissors and a sewing machine would ever shell out $25 or more for a garland in a store. 

I had a pile of triangular felt scraps left over from another project and so decided to put them to good use.  More about the other project later.  
I needed a few more scraps to complete the garland.  I started with a felted red sweater, and cut it into a rectangle with my rotary cutter.  
Next, I cut sections on the diagonal – like so. 
Then, I cut vertically – like so. 
You will be left with a series of triangles.  
Then, simply sew the triangles together.  Let the machine run for a few stitches between each triangle to allow room for extra thread.  This way, when you hang the garland it will twirl and move a bit.  I opted for gold metallic thread for a little more of a festive look.  
This garland is easily adapted to other shapes, colors, materials, and thread.  The basic concept is: cut, sew, hang.  
Happy sewing!

Scotch Short Bread + Easy Table Top Tree

There have been too many sick days in our household as of late.  This past weekend after plenty of naps, a trip to the science center, the last of the Christmas shopping, and some craft time, I found time to bake.  This recipe is in my top 5 favorites for Christmas.  It is an easy to make and easy to please recipe with only 4 ingredients.  
This one comes from the Joy of Cooking.  I love the format of this cookbook – so easy to use!  I did a little digging on Scottish Shortbread and discovered that this treat is centuries old, but has evolved over the years from an oatmeal and yeast creation to the flour and butter treat it is today.  It was originally quite expensive and eaten at Christmas, weddings, Hogmanay (New Year’s) and other such holidays. 
Sift together 2 cups sifted all-purpose flour, 1/2 cup sifted confectioner’s sugar, and 1/4 teaspoon salt.  
When I do use salt, I love the Kosher salt. 
Sifting is essential to this recipe – it gives these bars a creamy texture. See before and after?  
Next, cream 1 cup butter.  
Blend the dry ingredients into the butter.  Pat the stiff dough into a 9 x 9 inch ungreased pan.  
Press the edges down.  Pierce with a fork through the dough every 1/2 inch.  If the dough is too sticky, refrigerated until chilled and stiff again.
Bake in a 325 degree oven for 25 to 30 minutes.  Edges should be slightly browned.  I did not have a 9 x 9 pan, so I just stopped the dough short of the edge of this pan.  
Cut into squares while it is still warm.  
In other news, the band saw Eric bought in a yard sale earlier this fall has turned out to be quite useful.  He created a tabletop Christmas tree for me.  
He used a large dowel rod for the center.  He then cut smaller dowel rods at various lengths for branches – shorter for the top of the tree and longer for the bottom of the tree.  He drilled holes with a corresponding drill bit for the dowel rods.  He then simply tapped the dowel rod branches into place with a hammer. 
He used a square of wood and drilled the large dowel rod trunk into place.  
I decorated it and it was ready to go.  Now if I can only keep cats away from it…

DIY Advent Calendars

This year has been a crafty year in terms of home made holiday gifts.  We get more catalogs than is ever healthy and of course there are inspiring things in each and every one.  

This is one of my home made advent calendars, which seem to be all the rage this year.  
I saw this advent calendar in the Land of Nod Catalog and decided I was going to make my own version.  This is the disease I suffer from – “I can make that!”  Eric cringes at that phrase.  
I headed to the fabric store to find the perfect prints – 2 trips actually.  One trip on my own and one with my mom when she was in town for my birthday weekend.  Nothing like taking a quilter and avid sewer to a fabric store.  I found some beautiful prints, solids, metallics, and heavy cotton duck fabric for the background.  
I started with the red cotton duck as the base for my advent calendar and its pockets.  This was a fun fabric to sew with, let me tell you.  The machine and even heavy duty needle was not a fan. 
I used a rotary cutter and cutting board to create all of my pockets.  The prints, solids and even felted sweater were cut into various sizes and shapes to create pockets. 
My mom’s brilliant idea was to use ric rac for the numbering system.  I was glad for her input as I was still stuck on fabric paint, which would have looked sloppy. 
My mom also pointed out another duh moment – why wash fabric when it is for crafty projects?  The starch makes it easier to measure and cut.  This is a life-changing idea!  I cut out a variety of pockets and then, if using the cotton fabric, I ironed and sewed the top seam before adding the numbers.  The wool needed no top seam.  I think next time, to save time, perhaps I will use only wool for the pockets.
My mom chimed in with yet another idea, why no do the 12 Days of Christmas to change up the idea of an advent calendar?  So I made one traditional advent calendar and 1 non-traditional 12 Days of Christmas calendar. 
This is the practice lay out for the pockets on the 12 Day of Christmas project. 
The finished 12 Days of Christmas advent calendar.  

Instagram turned Painting

Instagram has proven to be my favorite phone app again and again.  I have taken quite a few photos with Instagram only to say, “I should make that into an artwork.”  I finally did just that.  I took an Instagram photo from Sticks and Stones and turned it into a watercolor.  See below.  
Beer Lace, watercolor on paper, 2012. 
Here is the original Instagram.  
This blog was originally started to document my art making processes.  It was a way to keep myself working and producing, and then Greta came along.  I soon found the only creating I was doing was in the kitchen, since we all have to eat.  While I love cooking and baking, I need to make art.  So, I am trying to get back to the beginning of all of this and make more art.  I know now I need to carve this time out during the week.  There will still be recipes on here, but hopefully better balanced with art.  Enjoy. 

Melted Crayon Art

Untitled, mixed media on mat board, 2012. 
This is a lesson that came about from Pinterest.  I needed a short filler lesson for between major units and this one was a smashing success.  Sometimes I think I come across as a staunch neat freak to these kids because they were so excited that I was encouraging them to melt crayons instead of color with them!  This is a great use for all those little crayon nubs that just cause frustration during drawing units.  
Step 1: Glue crayon pieces onto a board with school glue.  Peeled crayons will melt faster, if you leave the wrapper on, you will have a wrapper glued in place, but the wax will still melt away.  I had pieces of mat board cut in advance for them to choose from.  Consider designs or using objects to block and direct the melted wax. 
Step 2 : If using blocking objects, tape them in place.  I used a cardboard tube held in place with masking tape. 

Step 3: Place on newspaper, and preferably inside of a box.  The box will help catch the hot molten wax that will spray you and will burn. 
Step 4: Turn hair dryer on to high heat and point at crayons.  Hold 6 inches or so away form crayon.  Point the hair dryer in the direction in which you wish for the wax to flow. 

Within a few minutes you should see the crayons start to soften and melt. 

You can also use pieces of cardboard to block wax and direct the flow.  If you have a helper, be careful of their hands as well. 

Once the wax starts to flow, direct it with the hair dryer.  If crayons begin to come off, use a pencil or popsicle stick to hold them in place or move.  If your hair dryer has a cold air setting, use that to set the wax more quickly. 

Step 5: Allow artwork to cool completely before moving.  Remove blocking objects carefully so as not to remove wax as well.  
This melted wax design reminded me of a wave, so I added the watercolor ship design in later on. 
As we discovered through trial and error during this unit, some designs work better than others.  This circle just turned into a mess of colors and was not very interesting.   
This heart worked well because the student directed the wax with the hair dryer to the outside edges.  She then filled in the interior of the heart with collage.  

This piece turned into an almost Chagall-like stained glass window of colors.  

Thanksgiving 2012 + Apple Pie

We started Thanksgiving off with baking and cooking and a fridge clean-out to make room for the goods.  Greta was a big helper to Eric’s fridge cleaning.  She wanted to carry the salad dressing bottles.
We gathered at a friend, Mary Elise and David’s house with Julie and Dipesh for a noon-time meal.  This was a perfect time since all three families have children.  These gatherings are always a hoot – my family away from Iowa home.
There was plenty of time to sit around and watch football.
The table was a work of art in itself.
Mary Elise was, as always, a gracious host.
Greta had her own Thanksgiving plate that was not family heirloom wedding china.
The spread was incredible – Apple Raisin stuffing, ham scalloped potato casserole, fruit, turkey legs, ginger cranberry relish (described as exploding rainbows and unicorns, I might add!), rolls, balsamic roasted carrots, green bean casserole, and mashed potatoes.  Most of these items were vegan – you would never have even guessed though.
The green bean casserole and balsamic carrots were the most popular dishes.
We all gathered around to eat, even Greta sat in a big girl chair.
We wrapped up the meal with apple pie and vegan pumpkin pie.


Oh yes, best one yet.
Check out the flaky crust on this baby.
The final part of this gathering was the obligatory group photo.  Had this photo been taken 8 years ago when I first met Julie and Mary Elise, it would have been just the 6 adults.  My how time flies!
For my apple pie, the recipe is as follows.  I am giving away major secrets here, so I hope to hear that all of you are making apple pies soon.
For the filling, peel and slice 3 lbs of apples (about 5 medium to large), mixed variety.  I heard this secret from a friend, who spoke to an apple grower at farmer’s market about apple pie secrets.  I used Fuji, Granny Smith, and Braeburn for this pie. 


I saved my apple peels, spread them out on a baking sheet, sprinkled them with cinnamon and sugar and baked at 350 degrees for 25 to 30 minutes or til dried.  They make a great snack!


Place apples in a large mixing bowl and add 2 tablespoons lemon juice1/4 cup sugar3 tablespoons nutmeg1 tablespoon cinnamon, and 1/4 teaspoon nutmeg.  Set aside.
For the double-crust, in a medium mixing bowl, cut 1/3 cup cold butter into 2-1/4 cups flour.  Use a pastry blender until the pieces are pea sized. 
 
Sprinkle 1 tablespoon ice cold water or vodka over part of the flour mixture, toss with a fork.  Push aside moistened dough, repeat using 1 tablespoon of water/vodka at a time (8-10 tablespoons total) until all flour is moistened.  Do not over moisten.  Divide dough into two balls, dough should be crumbly and semi-dry.
I used 4 tablespoons ice water and 4 tablespoons iced vodka for the perfect crust.   I put ice cubes in a bowl and keep the vodka in the freezer to keep the crust as cold as possible.  The other key to a perfect pie is working fast so the dough does not get too warm.  Take a break and refrigerate the dough if it gets too warm.  


On a lightly floured surface, use your hands to slightly flatten 1 dough ball.  Roll from center to edges into a circle about 12 inches in diameter.  Transfer to a pie plate by carefully wrapping dough around a rolling pin, being careful not to stretch the dough.   Trim extra dough.
Transfer apple filling to pie plate.
 
Roll remaining dough ball into a circle about 12 inches in diameter.  Place on top of filling, press edges together, trimming extra.  Cut steam vents in the top of the dough.  Sprinkle with cinnamon and sugar. 
 
Cover edges in foil and bake at 400 degrees for 20 to 25 minutes. 


Remove foil, reduce heat to 350 degrees and bake for 35 to 45 more minutes.  Filling should be bubbly and hot and top of pie slightly golden.  Cool on a wire rack.  


Mommy’s Medley Apple Pie
1. For the filling, peel and slice 3 lbs of apples (about 5 medium to large), mixed variety.  Place in a large mixing bowl and add 2 tablespoons lemon juice, 1/4 cup sugar, 3 tablespoons nutmeg, 1 tablespoon cinnamon, and 1/4 teaspoon nutmeg.  Set aside.
2. For the double-crust, in a medium mixing bowl, cut 1/3 cup cold butter into 2-1/4 cups flour.  Use a pastry blender until the pieces are pea sized.
3. Sprinkle 1 tablespoon ice cold water or vodka over part of the flour mixture, toss with a fork.  Push aside moistened dough, repeat using 1 tablespoon of water/vodka at a time until all flour is moistened, 8-10 tablespoons total.  Do not over moisten.  Divide dough into two balls, dough should be crumbly and semi-dry.
4. On a lightly floured surface, use your hands to slightly flatten 1 dough ball.  Roll from center to edges into a circle about 12 inches in diameter.  Transfer to a pie plate by carefully wrapping dough around a rolling pin, being careful not to stretch the dough.   Trim extra dough.  Transfer apple filling to pie plate.
5. Roll remaining dough ball into a circle about 12 inches in diameter.  Place on top of filling, press edges together, trimming extra.  Cut steam vents in the top of the dough.  Sprinkle with cinnamon and sugar. 
6. Cover edges in foil and bake at 400 degrees for 20 to 25 minutes.  Remove foil, reduce heat to 350 degrees and bake for 35 to 45 more minutes.  Filling should be bubbly and hot and top of pie slightly golden.

Cranberry Ginger Relish

What have you done so far today?  I was up at 6 AM making apple pie (my best one yet!) and this yummy cranberry relish.  Today is the perfect time to make your Thanksgiving day cranberry sauce.  This is one I have been making since 2007.  It has the perfect zing with the addition of fresh grated ginger. 
More on that pie later.  Enjoy your day!

Cranberry Ginger Relish from Martha Stewart, 2007
1. In a large saucepan, bring 12 oz of cranberries, 1 cup sugar, 2 tablespoons water, 1 tablespoon grated fresh ginger to a boil.  Reduce heat to low and summer until most of the cranberries have popped, 10 to 15 minutes.  Stir in 2 tablespoons red-wine vinegar
2. Remove relish from heat. Let cool to room temperature, and serve.  Or refrigerate in an air-tight container for up to 3 days.

Quick Wheat Buns

There is just something magic about bread.  Specifically home made from scratch yeast bread.  Nothing compares.  Just look at the crusty top and you know there is a soft, chewy bread interior in this bun, right?  I could go on and on about this recipe.
These buns are the easiest from scratch rolls I’ve ever made – there is no kneading involved and the dough is all mixed by an electric mixer or on a mixing stand.  The recipe is versatile and you could easily swap ingredients in and out to change the flavors.  I beg you, if you try no other new recipe this Thanksgiving, try this one!  You will not be disappointed.  These buns are also excellent the following day, and so could be made in advance.
This post may seem over the top, lengthy, and photo-heavy, but that is how I am about a good yeast bread recipe.  I savored writing this entry almost as much as I savored eating three of these buns tonight.
In a large mixing bowl, combine 3 cups all-purpose flour and 2 packages active dry yeast.
In a saucepan, heat 2 cups milk1/2 cup packed brown sugar3 tablespoons cooking oil, and 1 teaspoon salt until warm (120 to 130 degrees), stirring constantly.
Use a thermometer to measure the temperature of the mixture as you heat it up.  This step is crucial, too much heat = dead yeast and too cold = yeast will not ferment and your bread will not rise. I have gone through at least 5 digital thermometers in the past 10 years, but have found that this tried and true Candy/Deep Fry Thermometer just keeps working.  It isn’t digital, but maybe that is why it has lasted!
Add to the flour mixture.
Add 2 eggs. 


Return to low speed and beat in 2 cups of whole wheat flour.
This is a lovely heavy dough and quite sticky, but like I mentioned before, there is no kneading!
Fill greased muffin pans 1/2 full.  Cover and let rise till double, about 25 minutes.  If your house is cool, turn the oven on at 350 degrees for one minute, turn off, and allow dough to rise in the oven.
Add sprigs of fresh cut rosemary to the top of each bun.
Bake in a 400 degree oven for 15 – 20 minutes or till golden on top.  Note: dark pans will create darker buns.  Remove from the pans; serve warm.  Makes about 24 buns.
Look how beautiful these babies are!

Quick Wheat Buns – Adapted from Midwest Living Magazine’s All-time Best Recipes
 
1. In a large mixing bowl, combine 3 cups all-purpose flour and 2 packages active dry yeast.  In a saucepan, heat 2 cups milk, 1/2 cup packed brown sugar, 3 tablespoons cooking oil, and 1 teaspoon salt until warm (120 to 130 degrees), stirring constantly.  Add to the flour mixture.  Add 2 eggs. 
 
2. Beat the batter with an electric mixer, using a dough hook, on low speed for 30 seconds, scraping the sides of the bowl.  Beat batter on high speed for 3 minutes.  Return to low speed and beat in 2 cups of whole wheat flour. 
3. Fill greased muffin pans 1/2 full.  Cover and let rise till double, about 25 minutes.  Add sprigs of fresh cut rosemary to the top of each bun.  Bake in a 400 degree oven for 15 – 20 minutes.  Remove from the pans; serve warm.  Makes about 24 buns.

Roasted Carrot Ginger Soup

Here is another option for a Thanksgiving side.  Soup is a fantastic way to feed a large crowd, especially as a starter or a side.  This can be made a day or two in advance and refrigerated or even frozen a week or more in advance.  Simply put in the slow cooker on warm.  Be sure to plug this in somewhere out of the way to leave more room for the preparation for the rest of your Thanksgiving dishes. 
Place 7 – 10 large carrots, 1/2 – 1 yellow onion, 1 garlic head, bottom edge trimmed off, on a rimmed baking sheet. 
Spray with olive oil and bake at 400 degrees for 40 minutes, rotating half way through.  

Vegetables should be soft and blackened when cooked fully.  Allow vegetables to cool, enough to handle.  
Peel the garlic and slice off blackened bottom edge.  
Place vegetables in a blender or food processor.  Blend with 1-1/4 cup milk (I used unsweetened almond milk) and 1 cup broth until smooth and pureed. 
Cut off about 2 inches of ginger root, peel, and blend with the carrot puree.  I keep my ginger root frozen and use a sharp knife to cut off what I need.  

Place the carrot puree into a slow cooker, mix in 1 cup water and 1 cup of broth, stir well.  Cook on low for 5 to 6 hours.  
Serve warm with Easy Rosemary Wheat Rolls.  
Check back tomorrow for this easy dinner roll recipe that makes Greta say, “Ooohhhh!” 
Roasted Carrot Ginger Soup – makes an almost full slow cooker

1. Place 7 – 10 large carrots1/2 – 1 yellow onion1 garlic head, bottom edge trimmed off, on a rimmed baking sheet. 
2. Spray with olive oil and bake at 400 degrees for 40 minutes, rotating half way through.  
3. Vegetables should be soft and blackened when cooked fully.  Allow vegetables to cool, enough to handle.  Peel the garlic and slice off blackened bottom edge.  
4. Place vegetables in a blender or food processor.  Blend with 1-1/4 cup milk and 1 cup broth until smooth and pureed.  Cut off about 2 inches of ginger root, peel, and blend with the carrot puree.  
5. Place the carrot puree into a slow cooker, mix in 1 cup water and 1 cup of broth, stir well.  Cook on low for 5 to 6 hours.