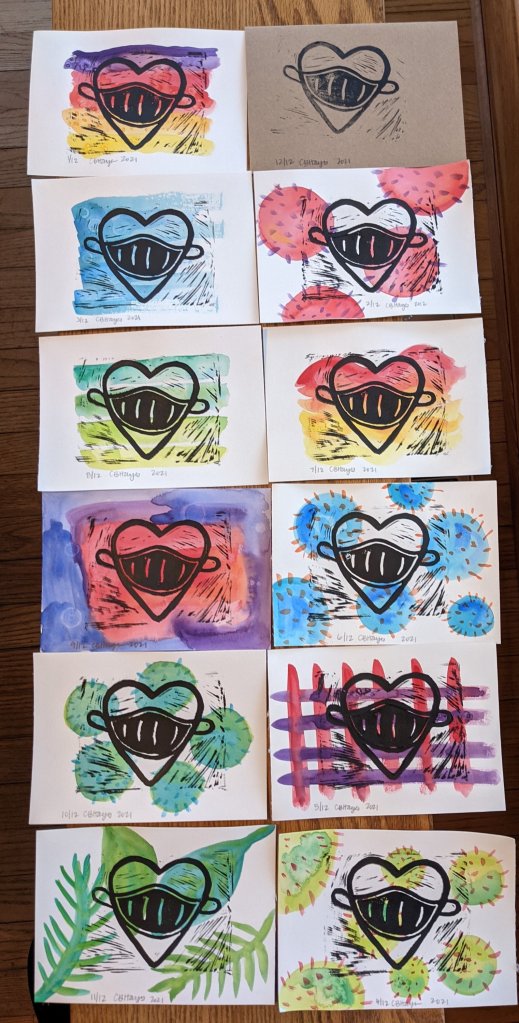
I’ve been using printmaking to make Valentine’s since I was a kid – maybe started this tradition when I was in 3rd grade? My parents were always into printmaking and they thankfully taught me linocut early on.
This year I had to go with the masked theme. Some of these will be available in the shop section of this site soon!
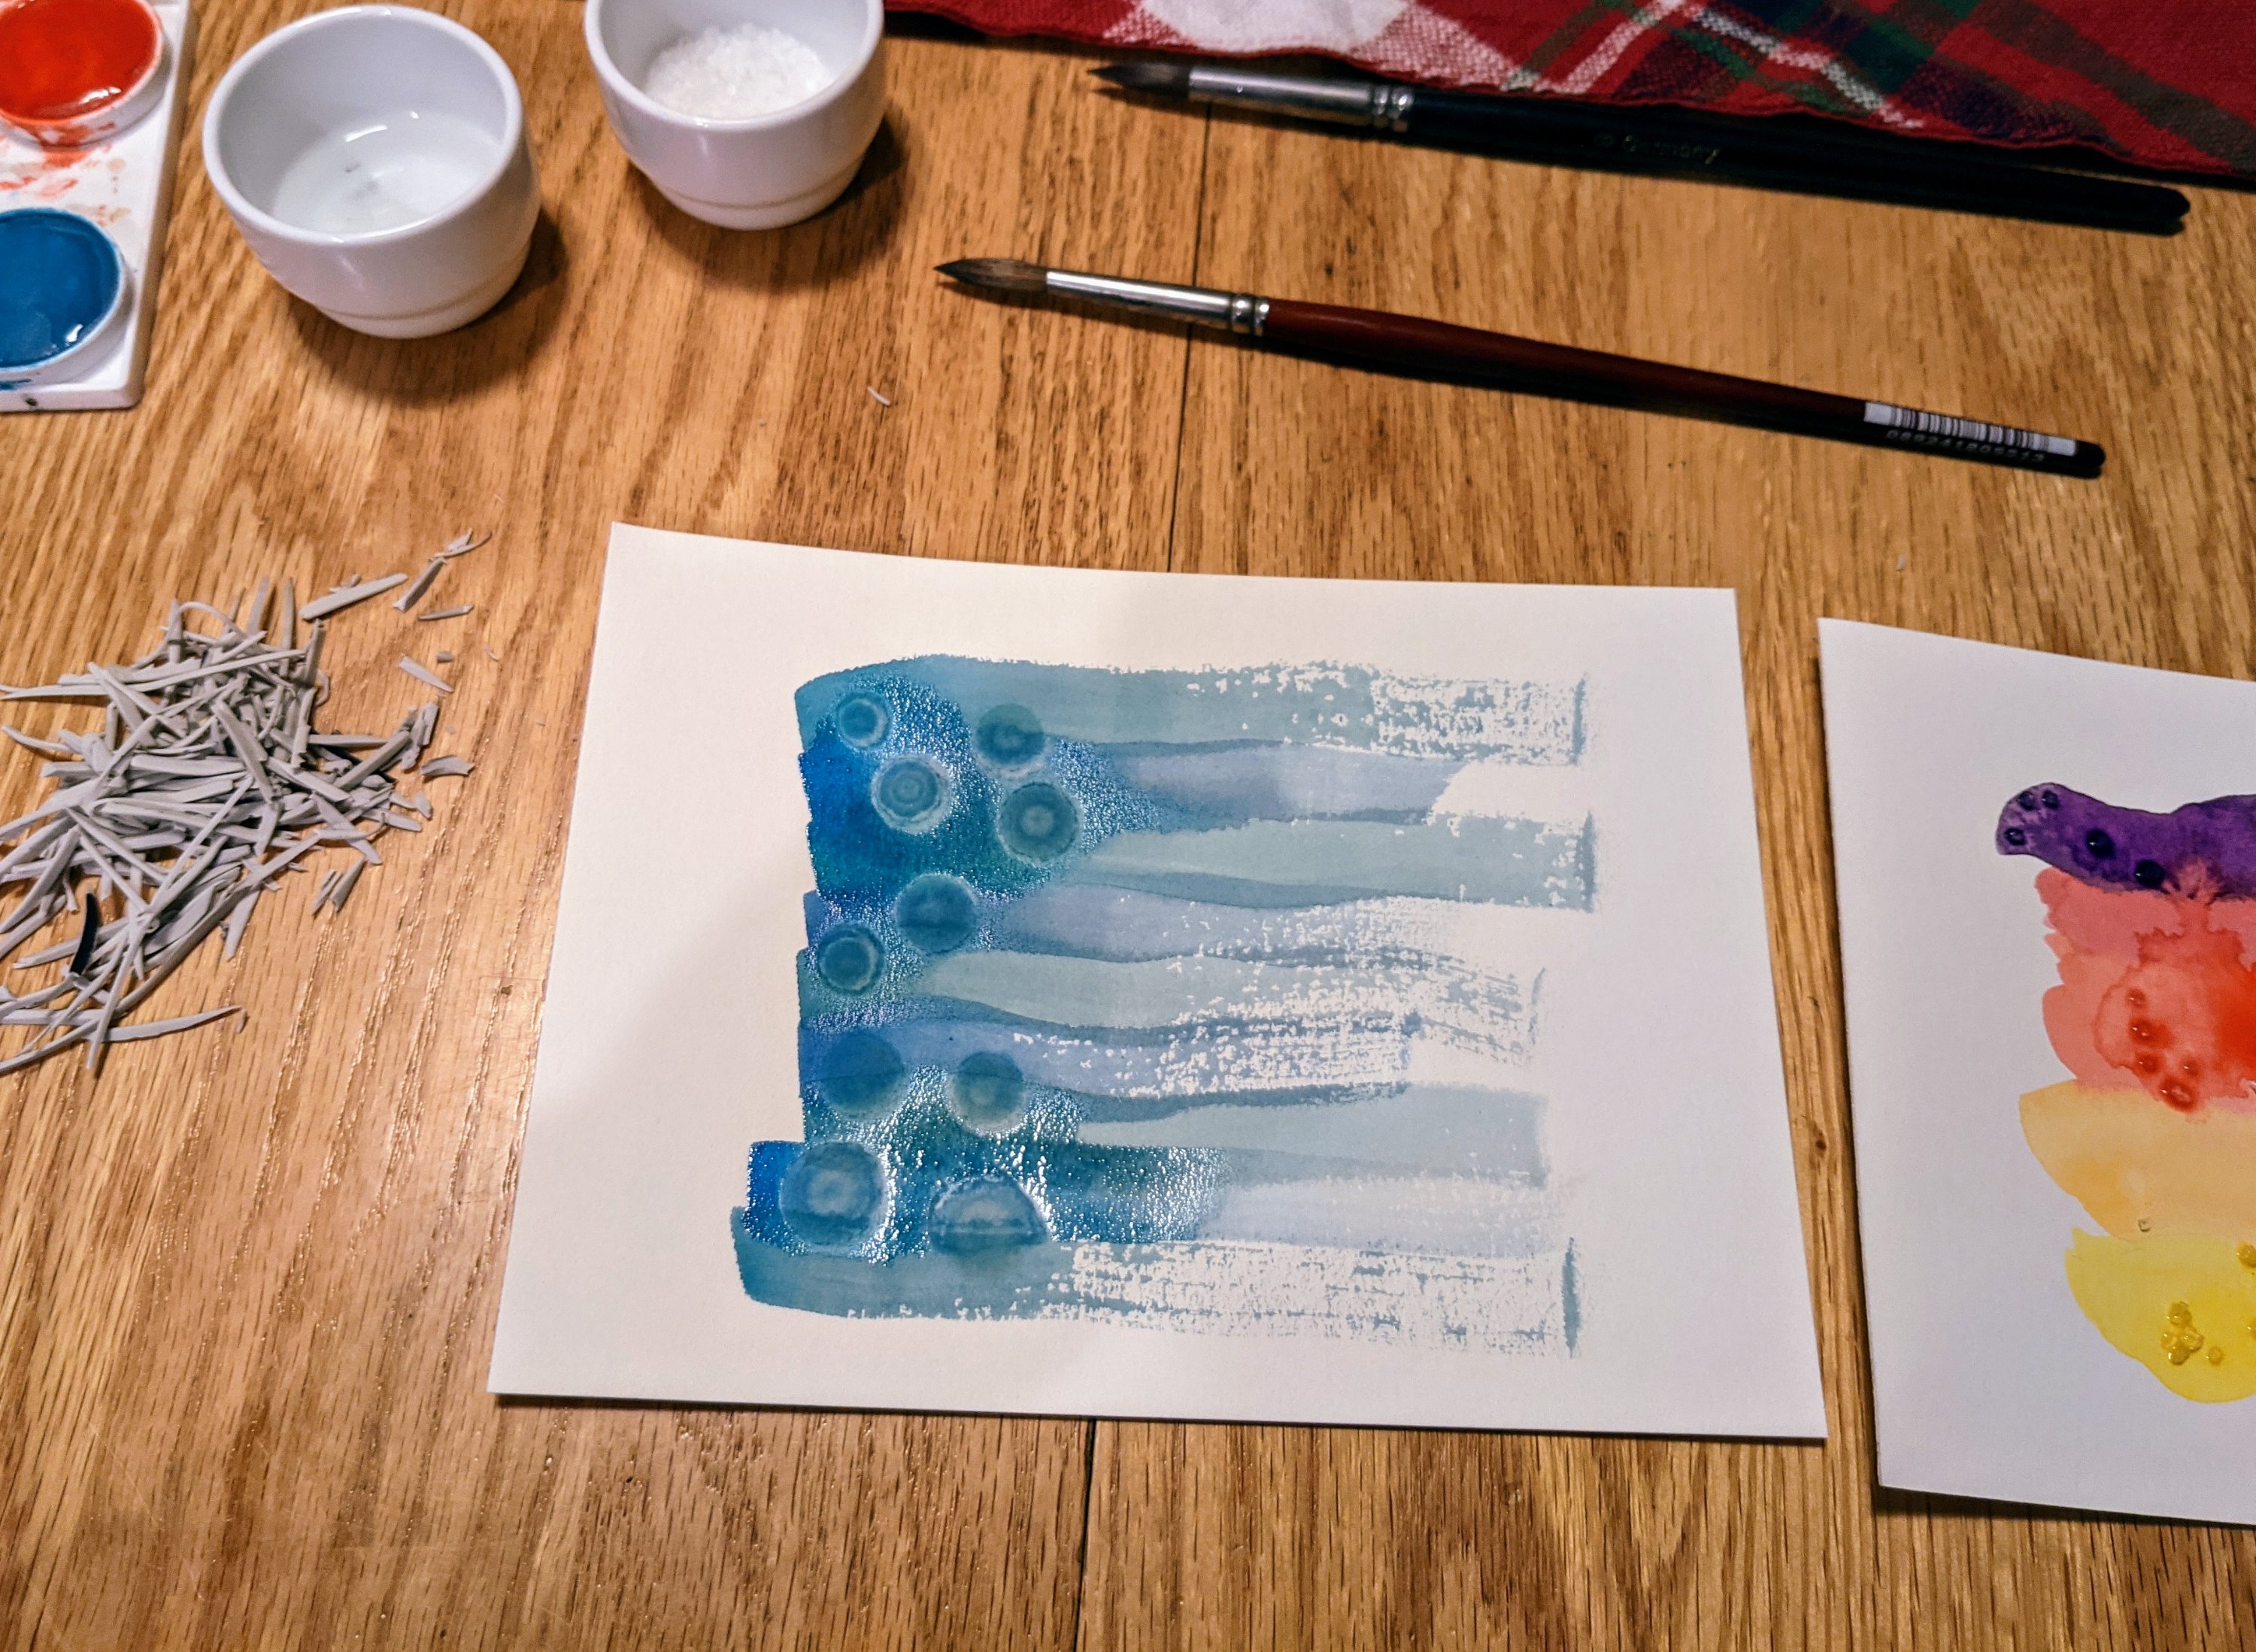
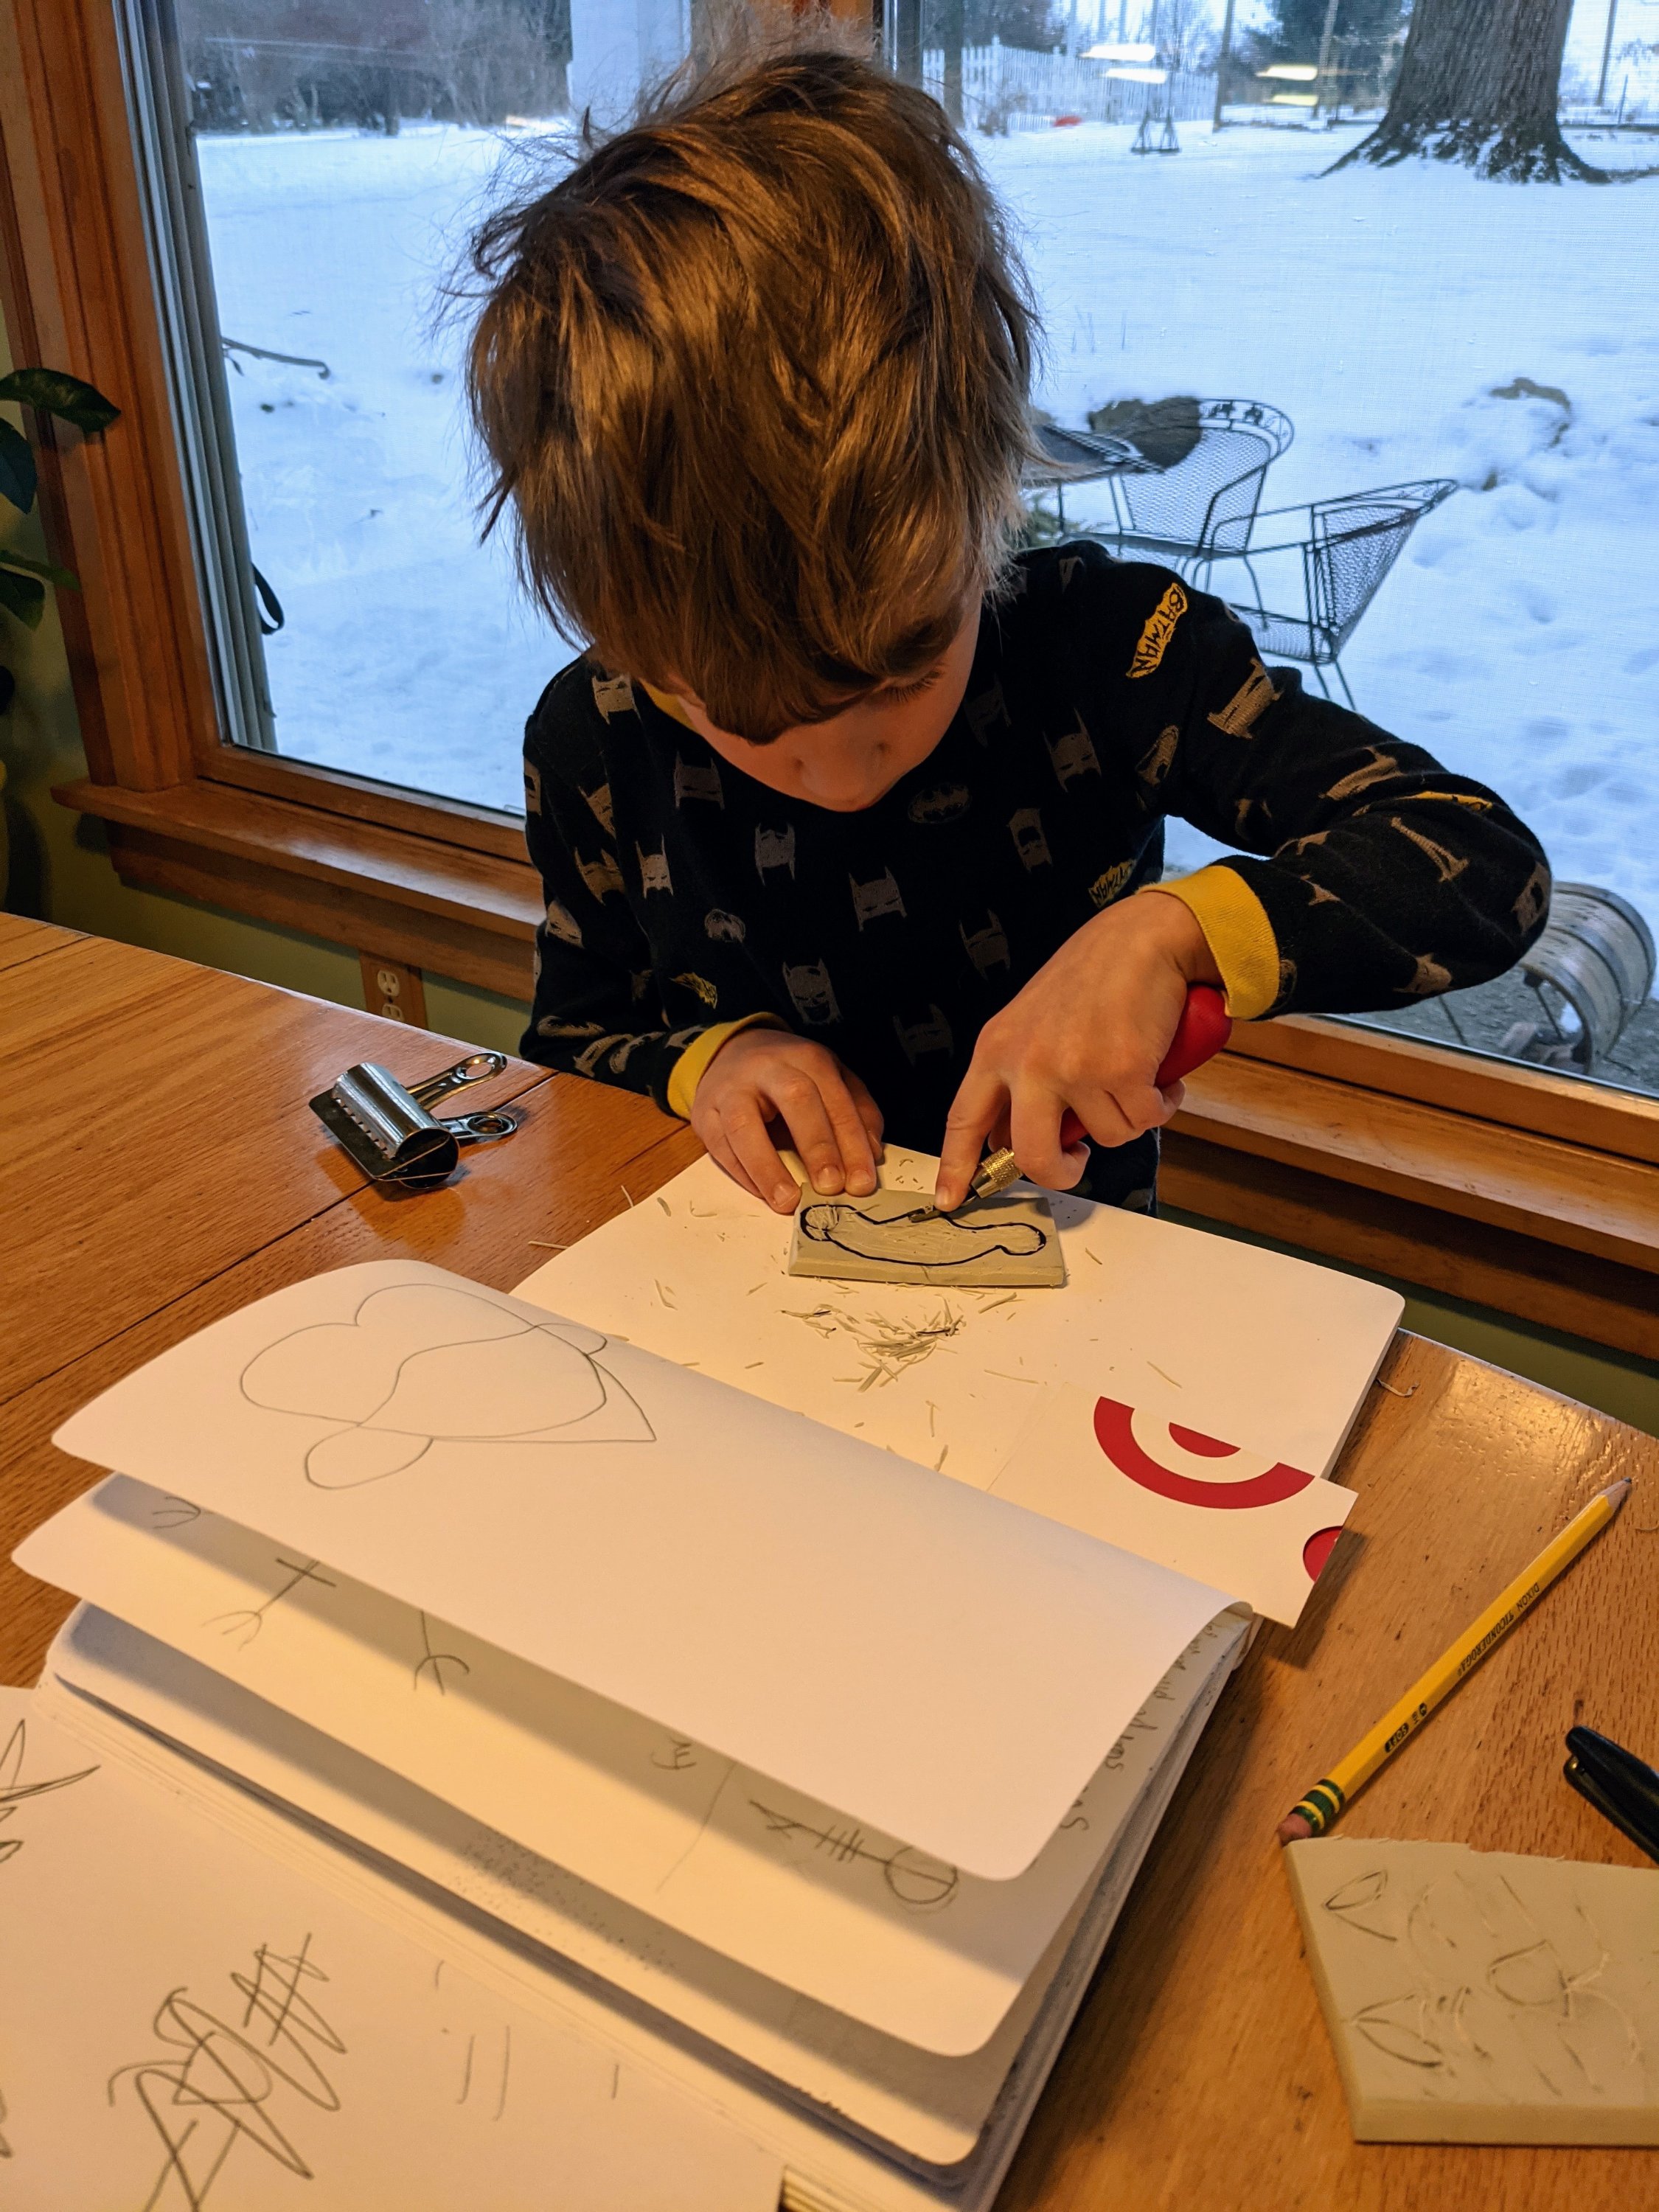
I started with the soft-kut linoleum blocks. This is a fabulous material that my first grader even handled with ease. I love using a thick line of marker to ensure I don’t cut too much away.
I used watercolor paintings as the background of my prints. Rubbing alcohol and salt were fun additions to the paintings.
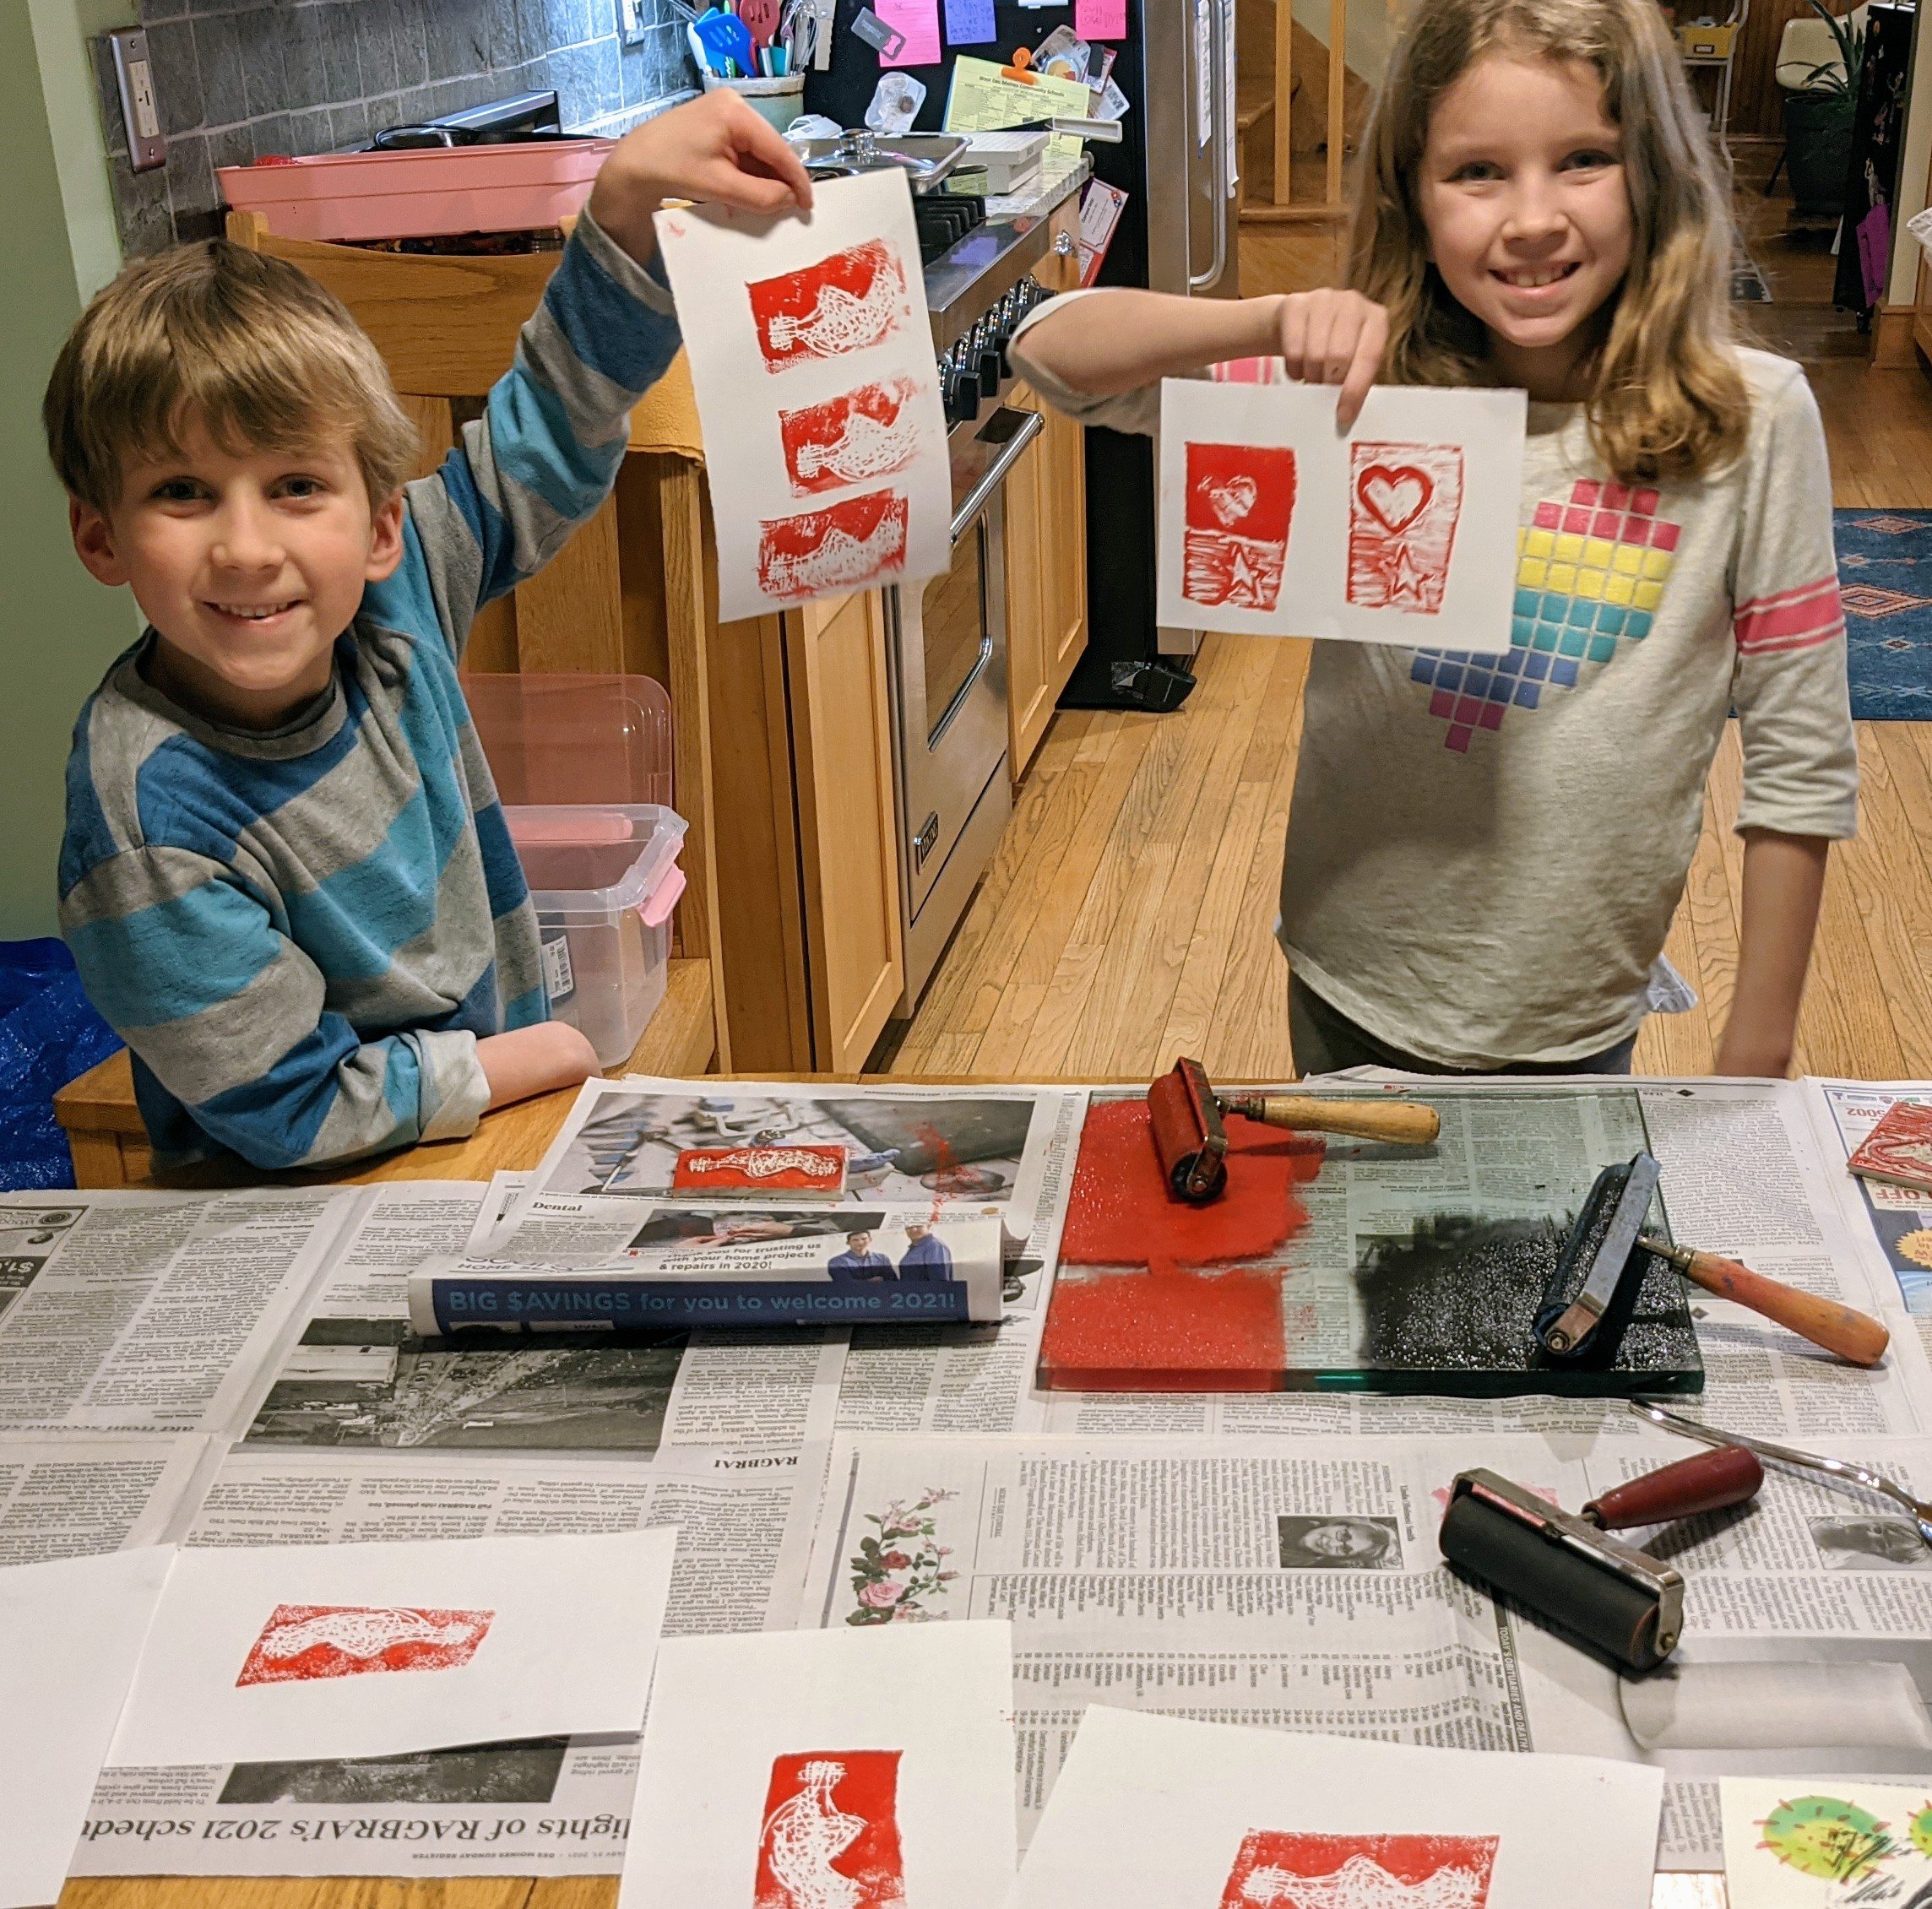
Both my kids were hooked – even working at breakfast instead of eating.
My son created a mask and heart design, but separately. The kids figured out they could cut designs on both sides of their printing block. My daughter did a cat and hearts.
My daughter forgot to make her carved words mirrored backwards, and didn’t catch it until her proof. She rolled with it and adapted her design – a great example of a beautiful oops!
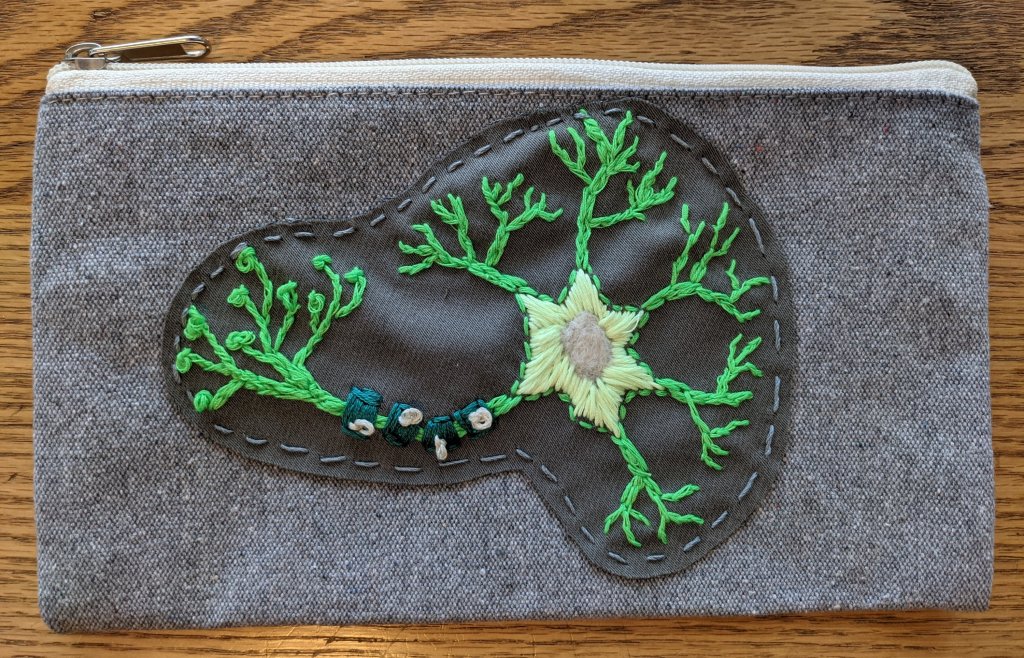
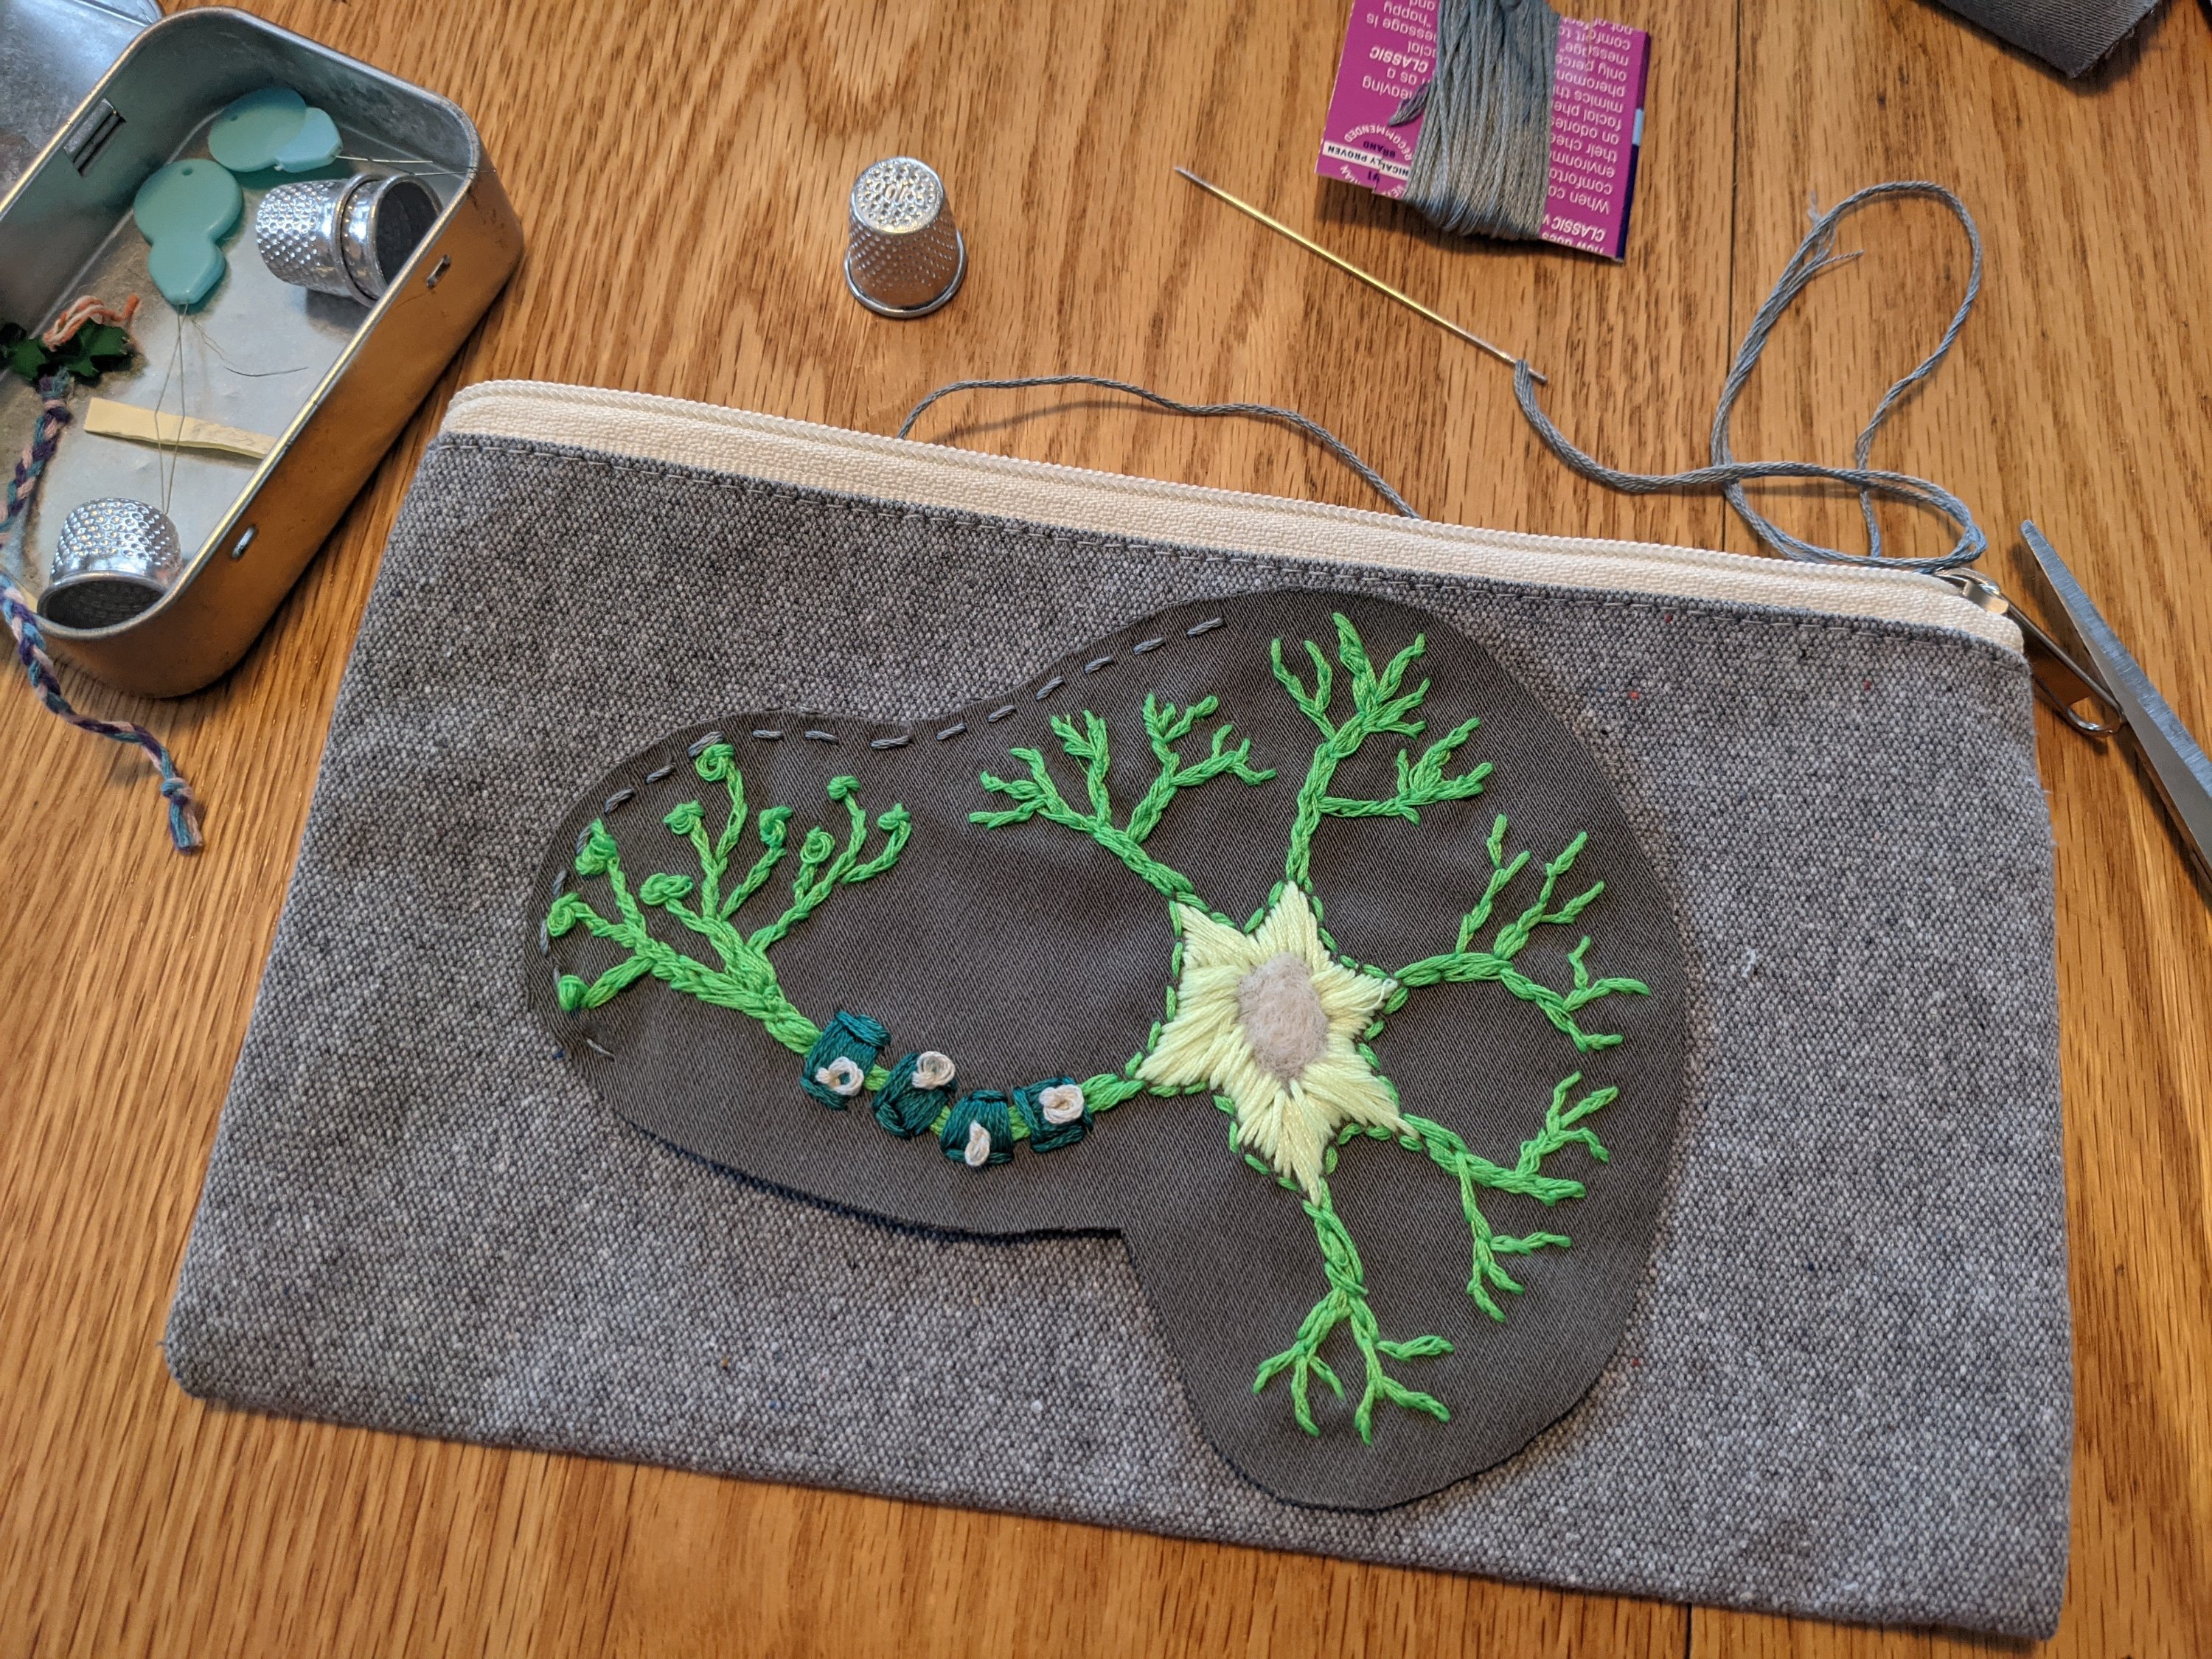
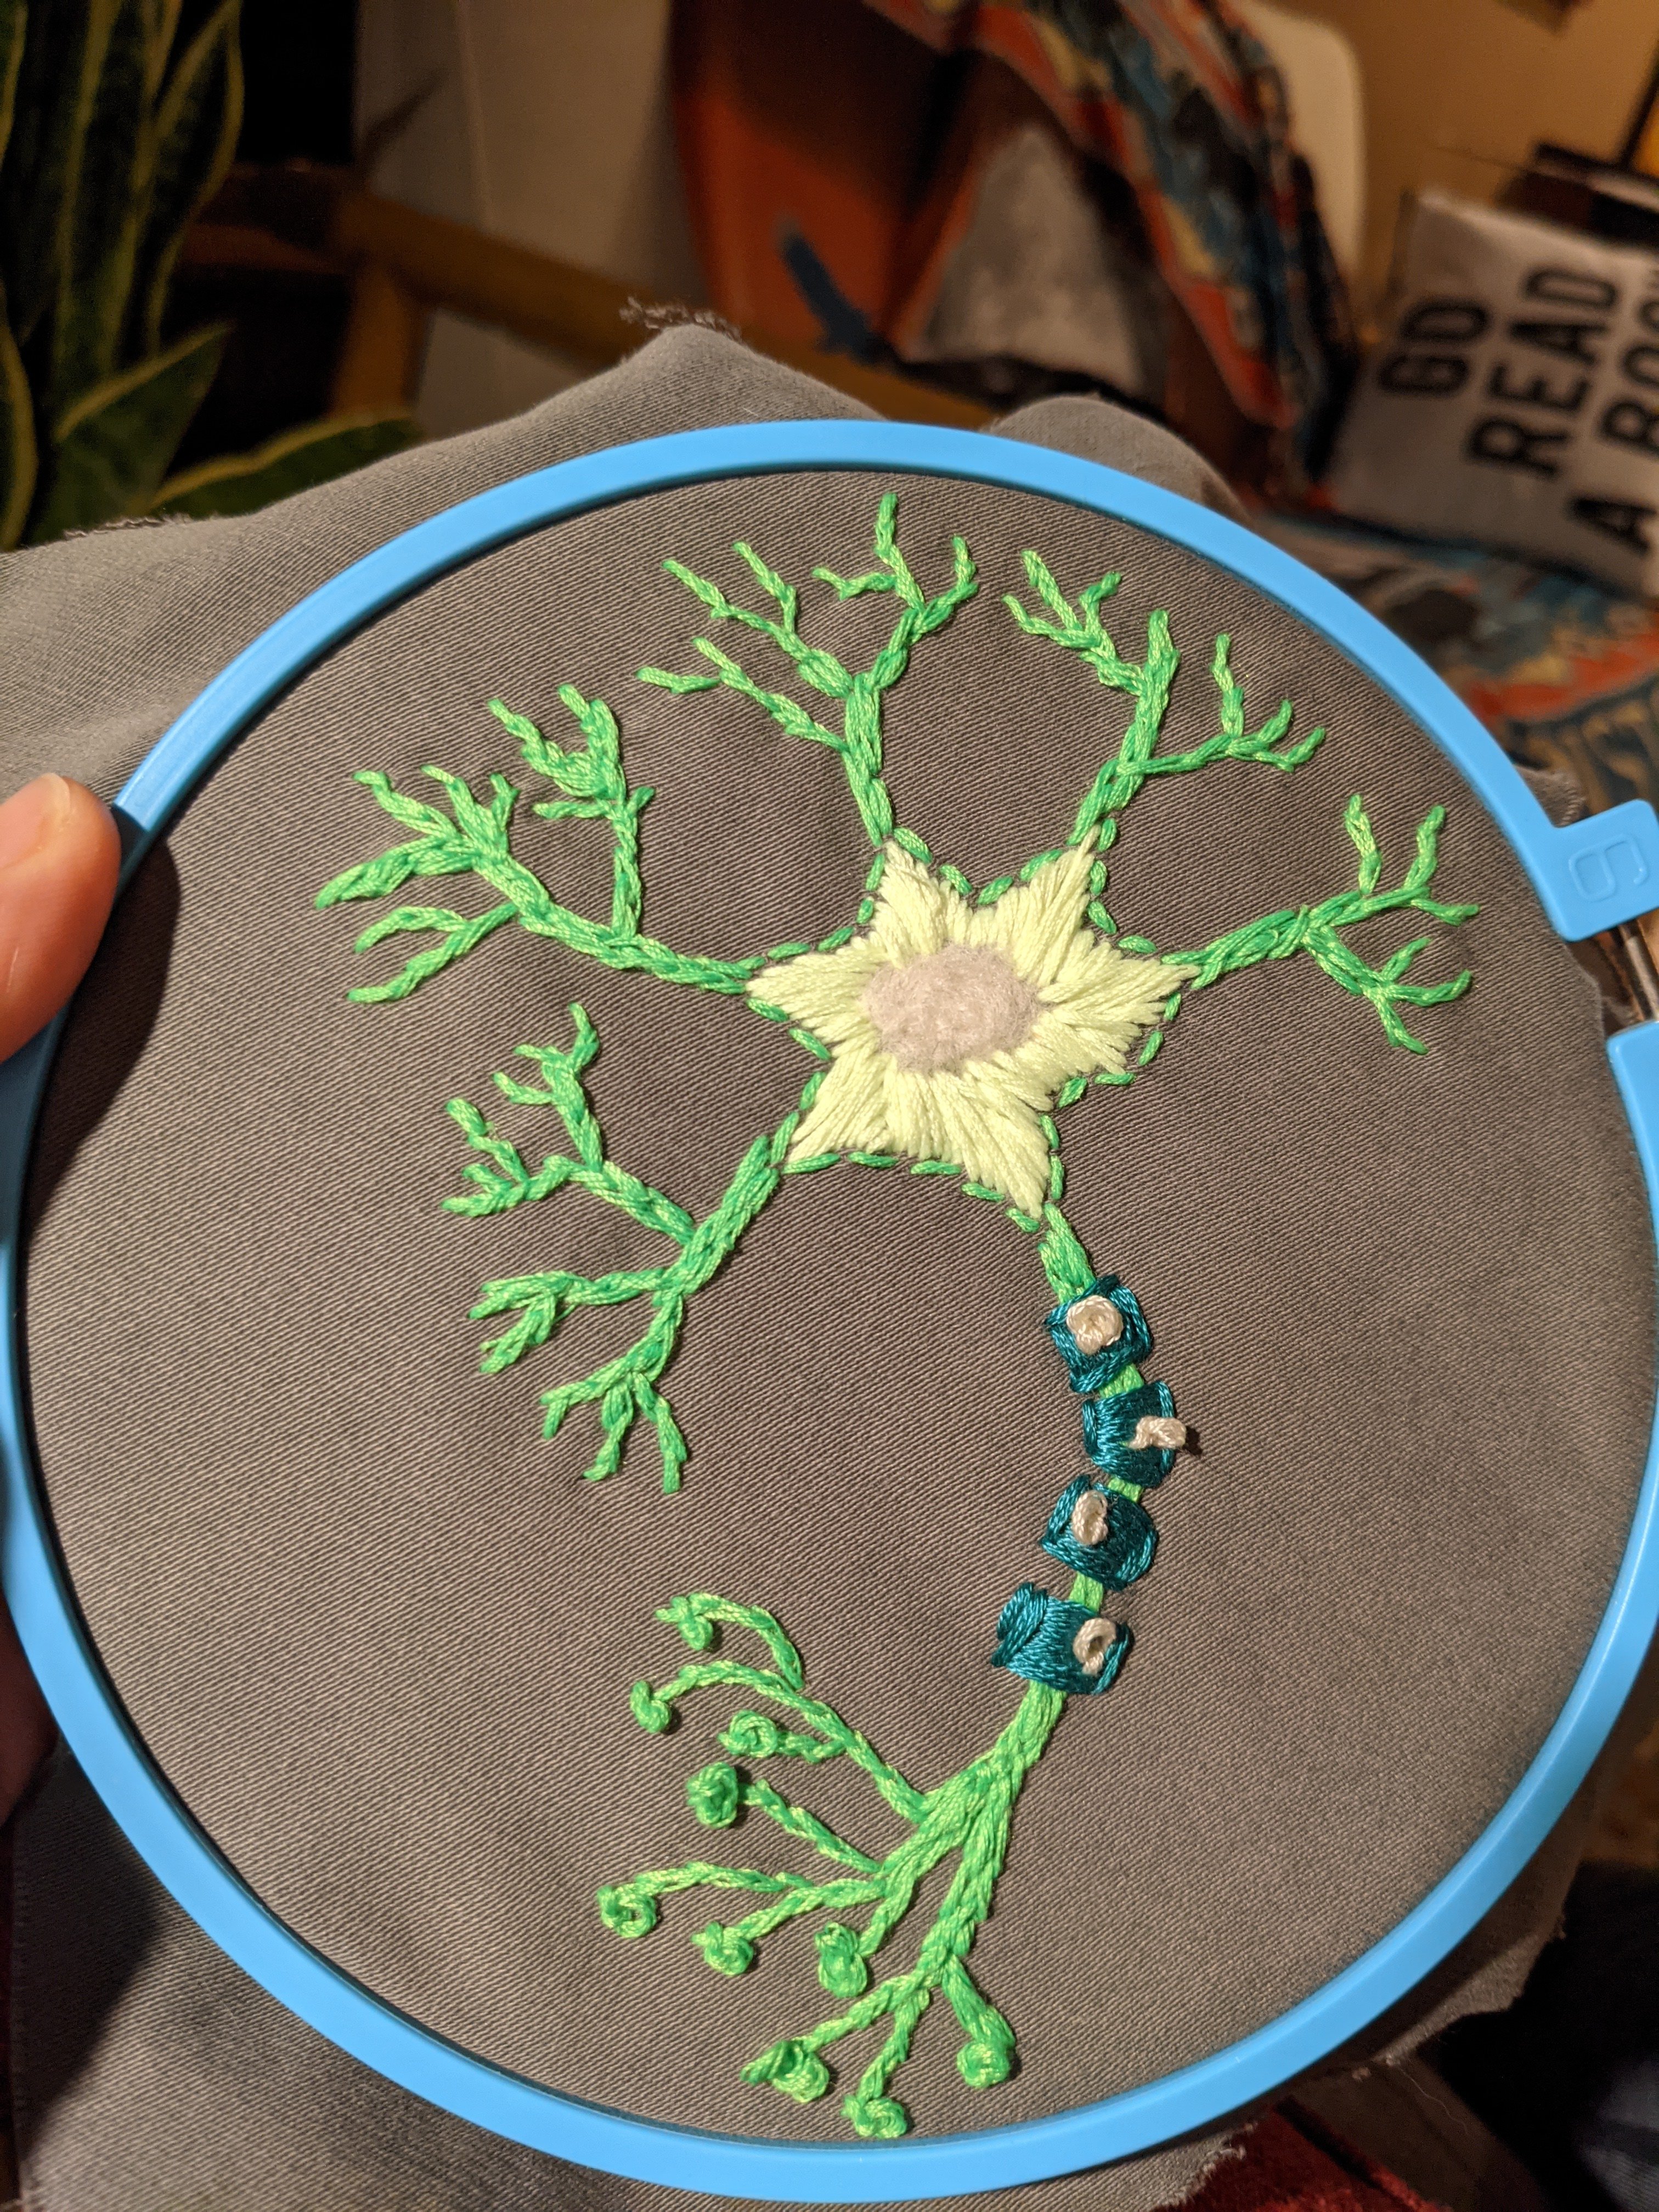
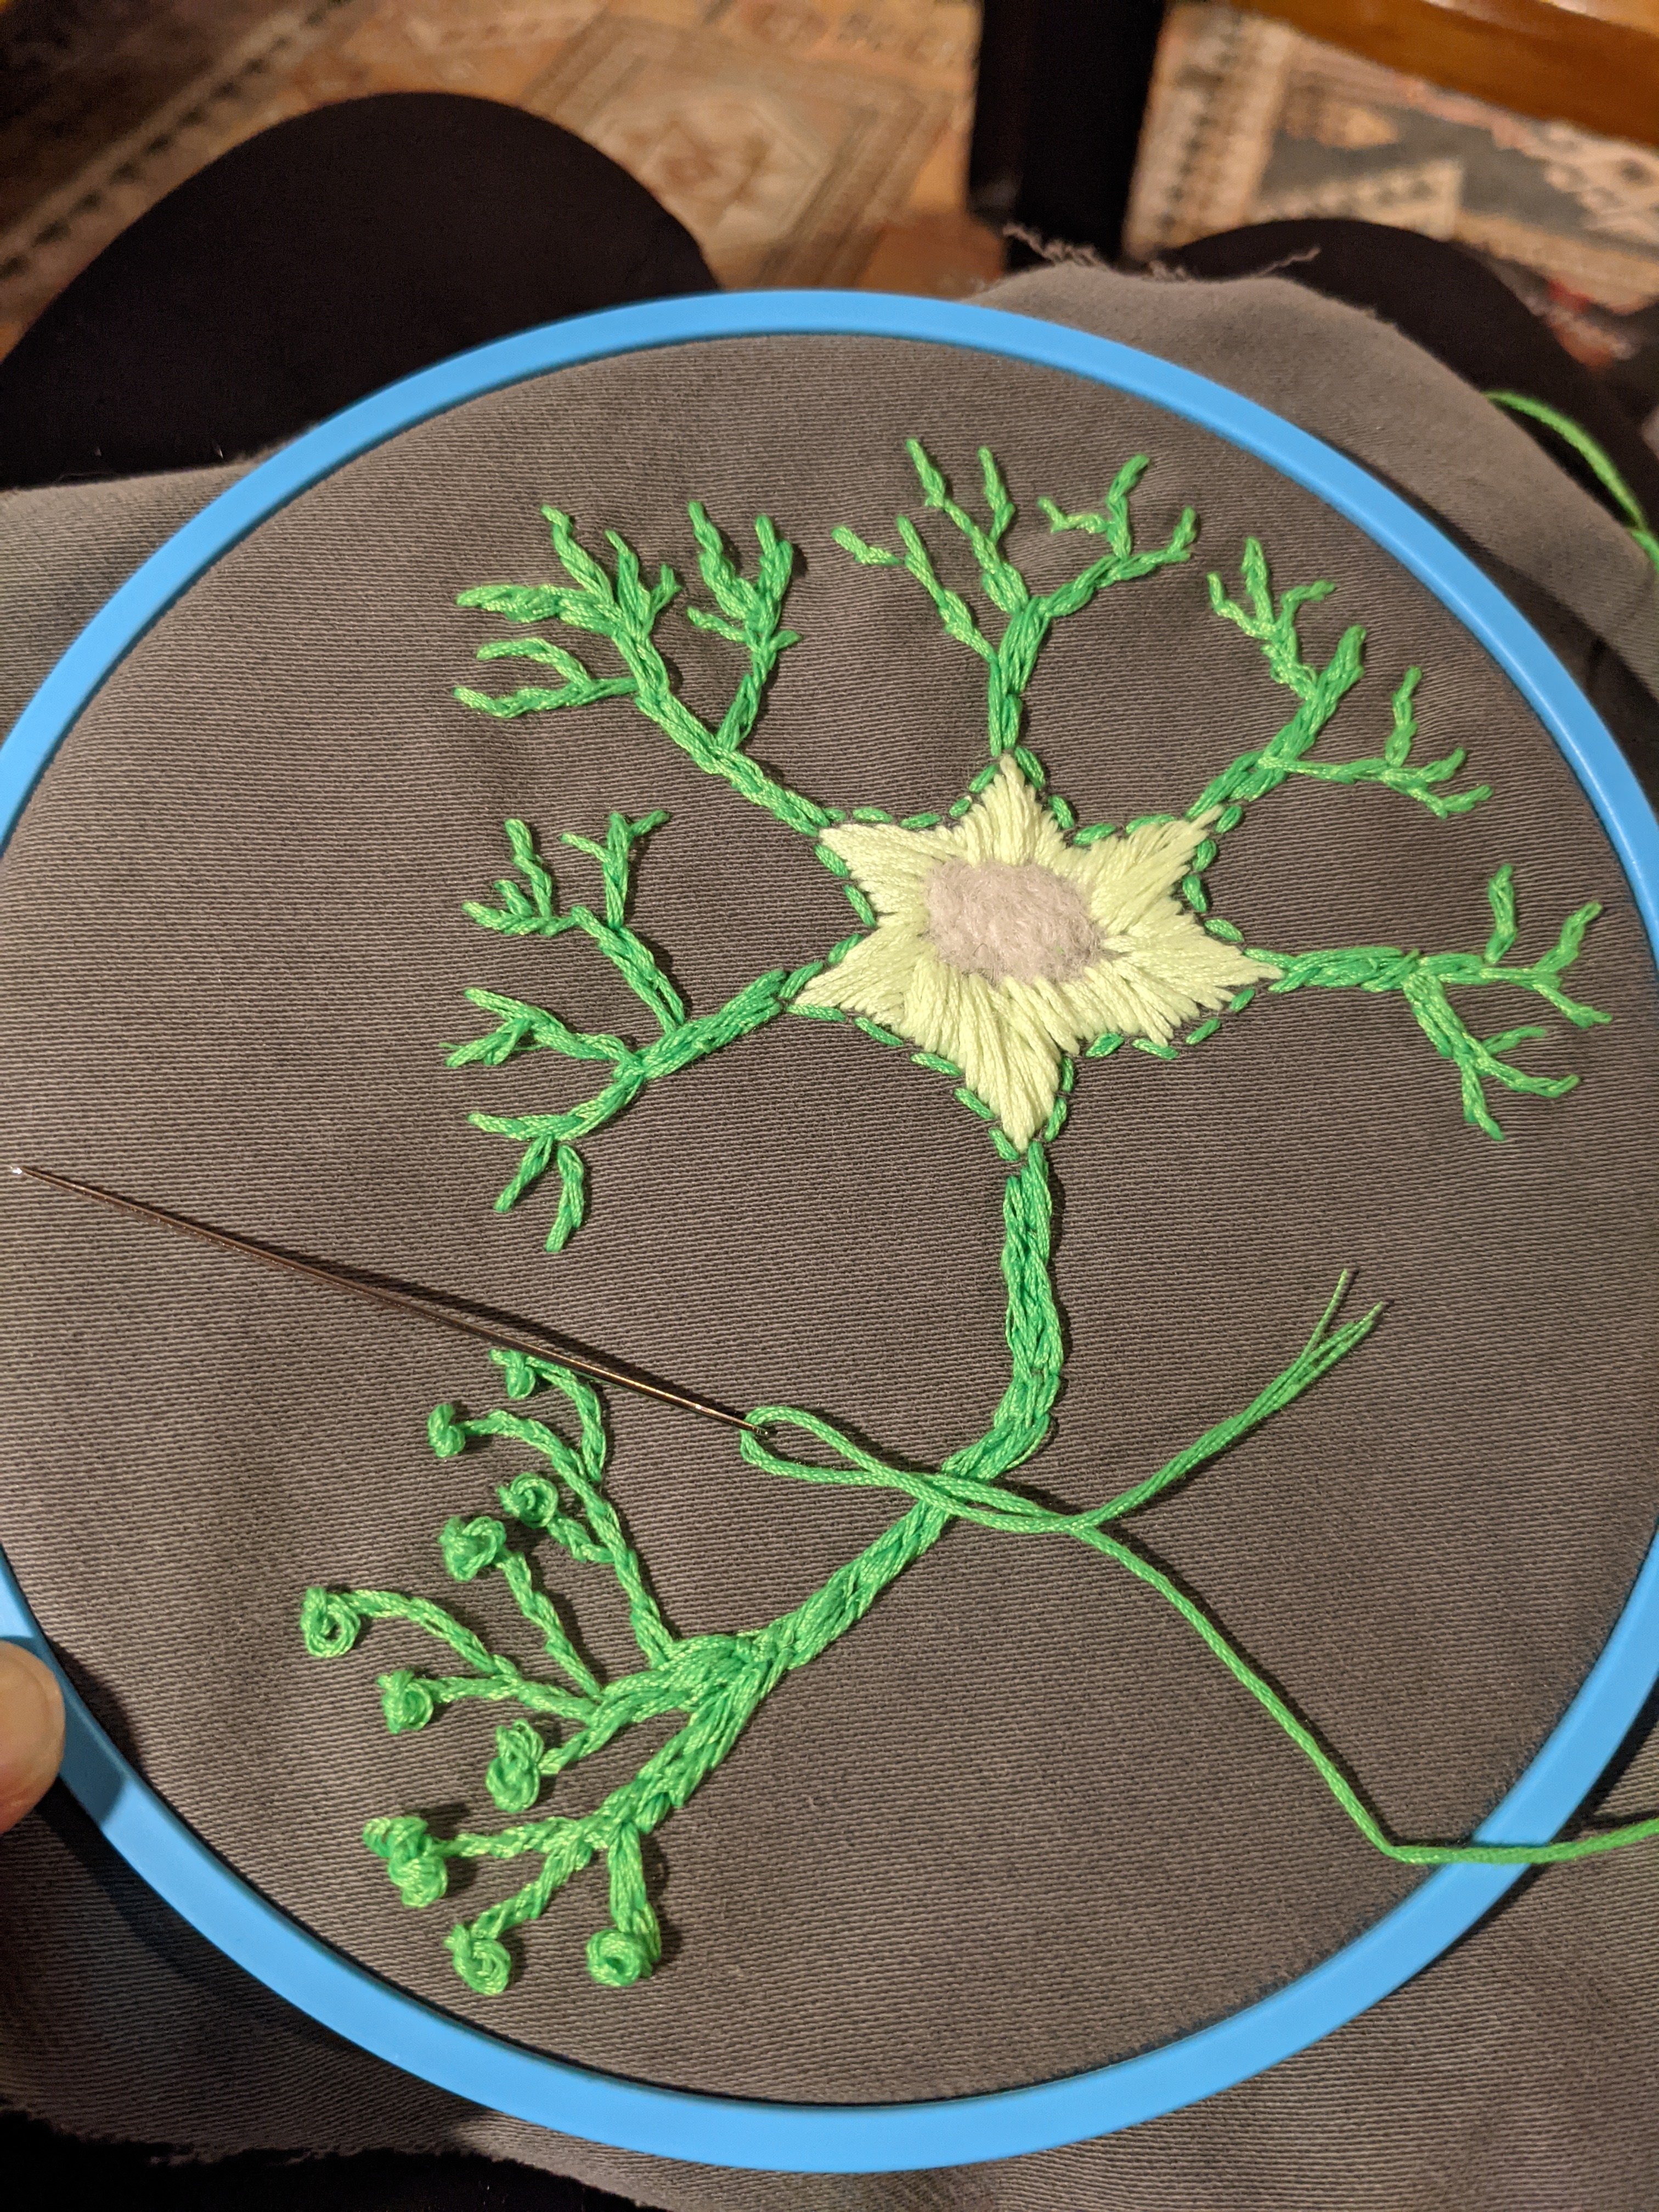
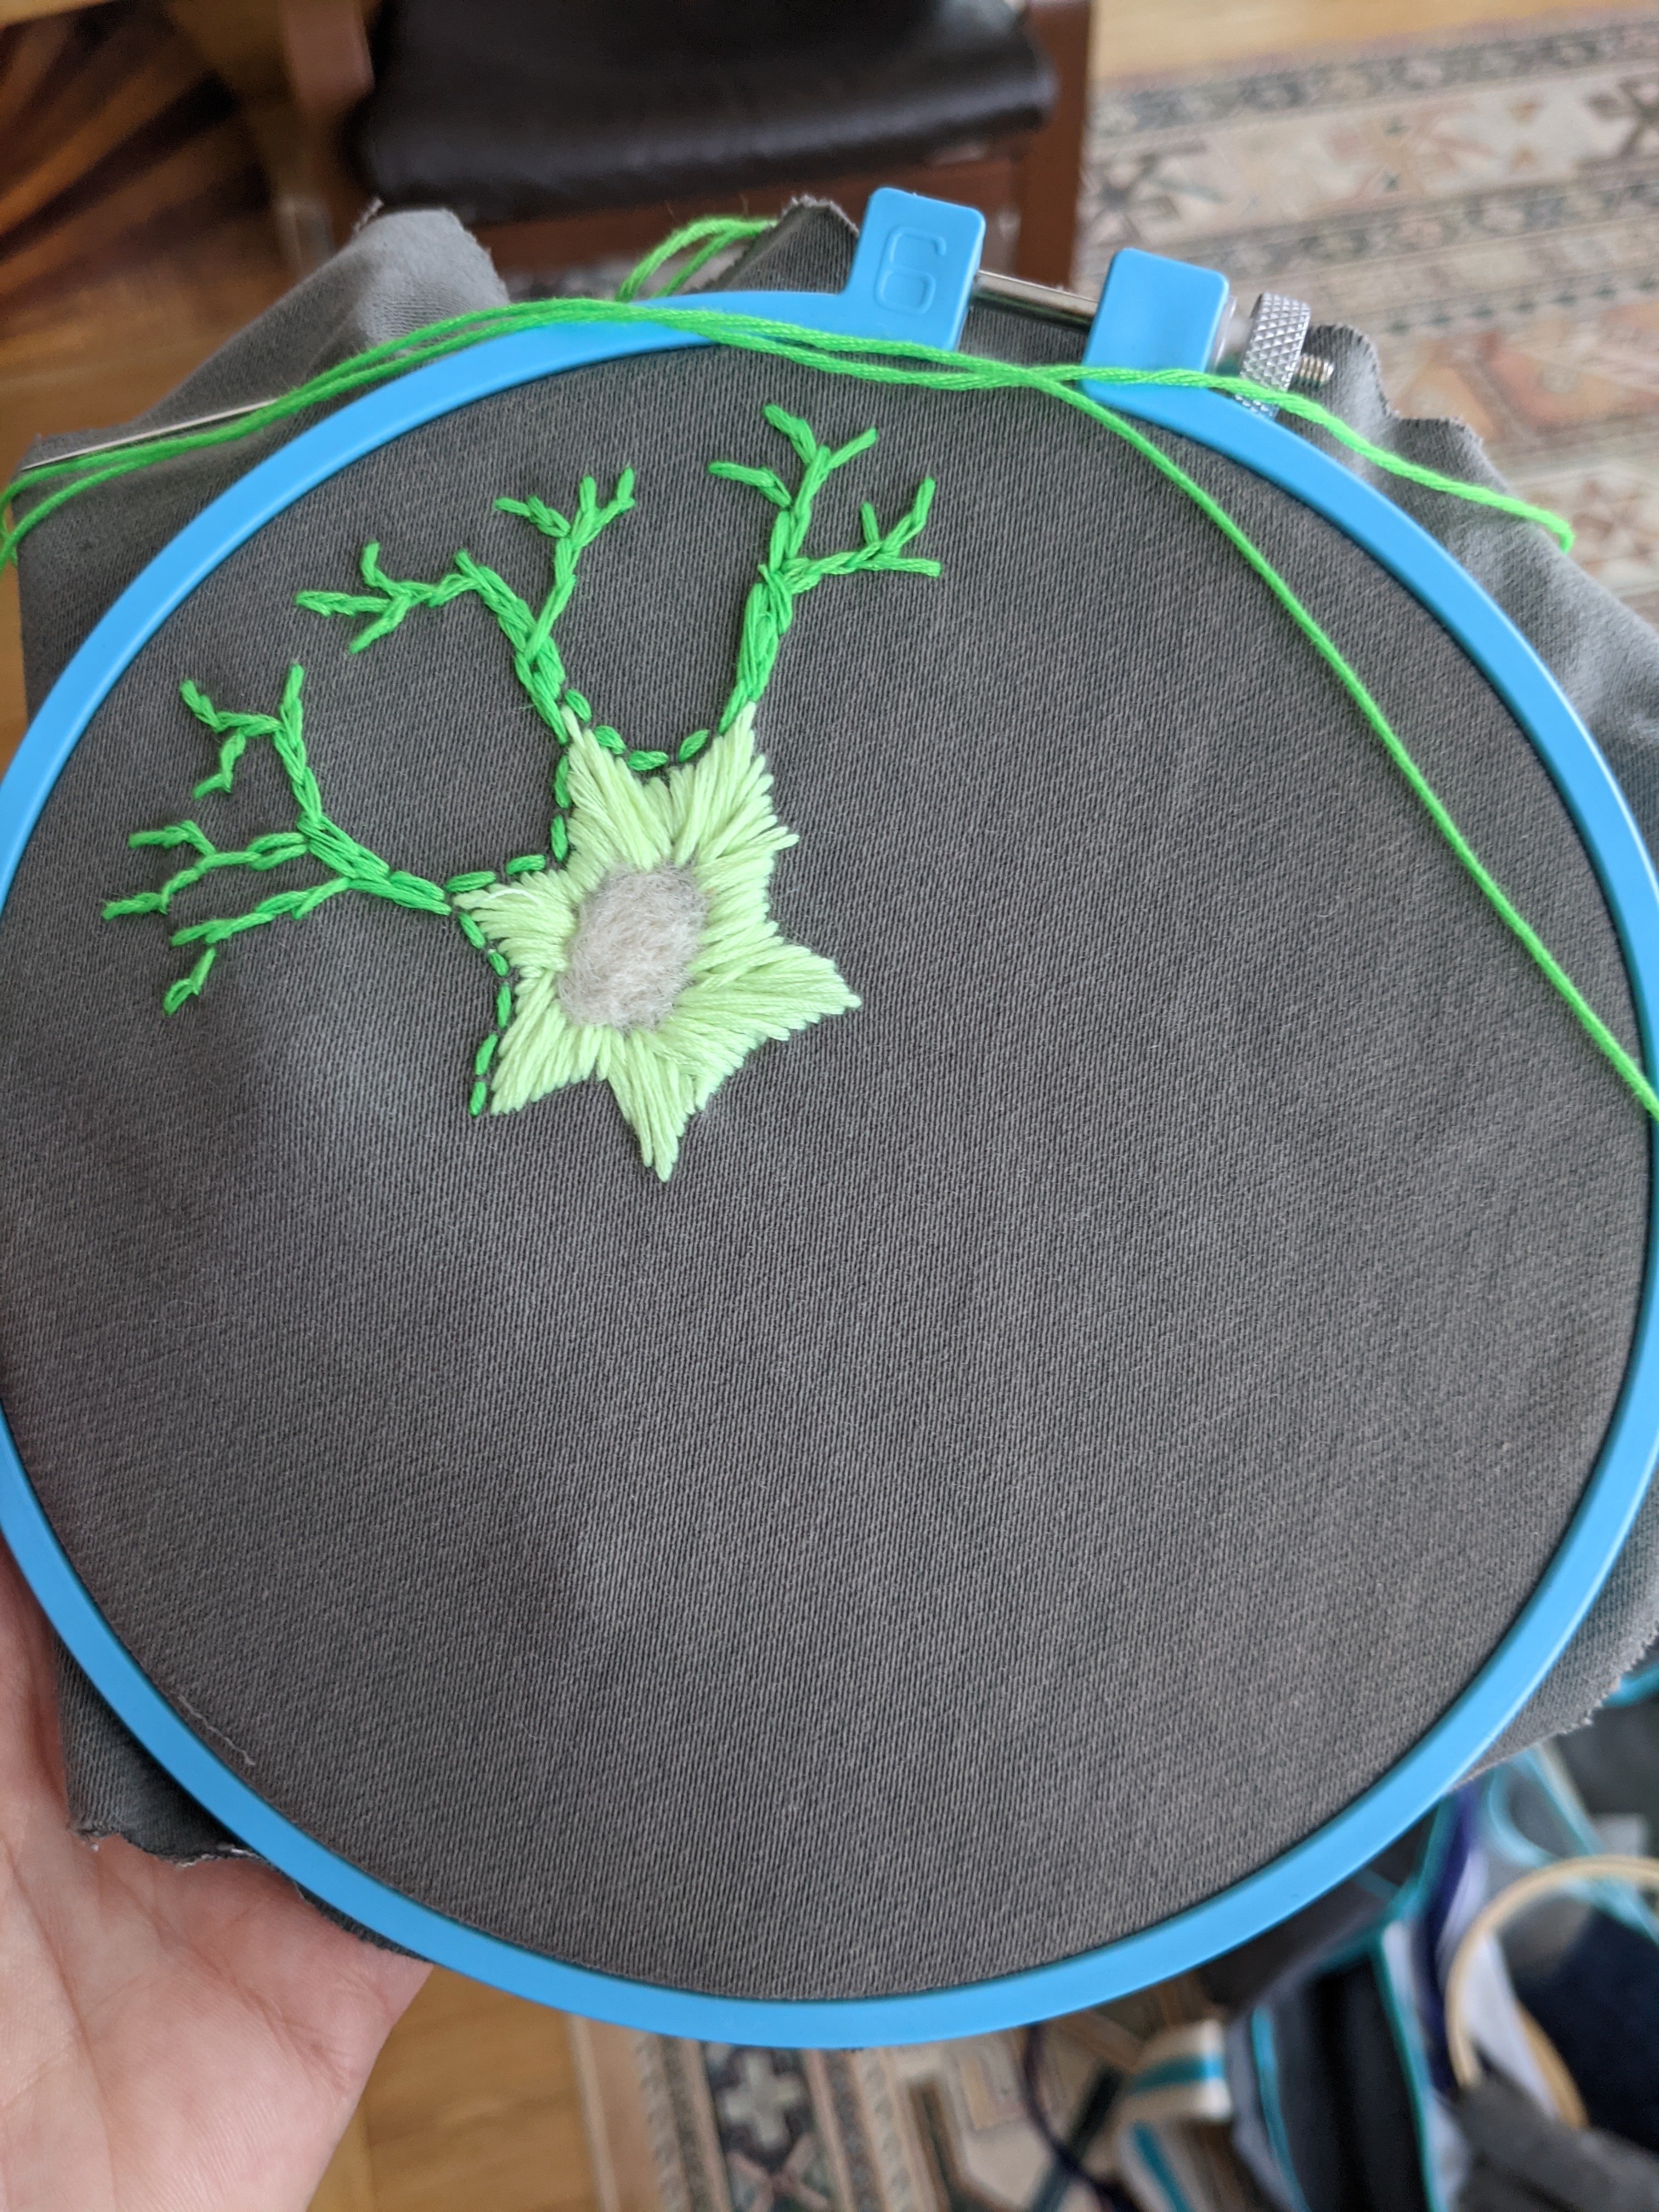
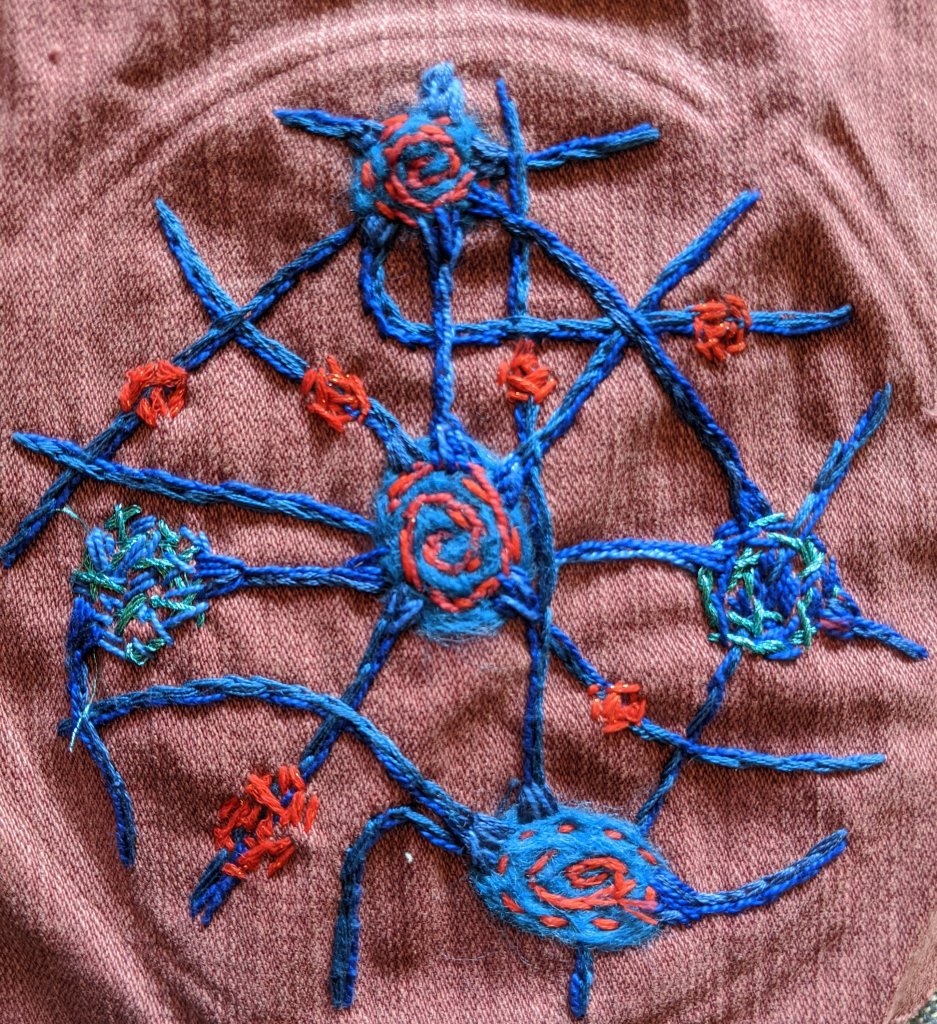
This neuron is the second round from a much earlier embroidery that was never completely satisfied with the outcome.
I started with the leg of some worn out pants. This gray would prove to be a good choice when I decided to make this a functional artwork and not a wall hanging.
The pouches are made of recycled cotton and come from Dick Blick. They come in a handy variety of sizes, but only the gray color.
My starting point embroidery.
At some point I’ll revisit the synapse concept, but for now the marvelous structure of a neuron works for me.
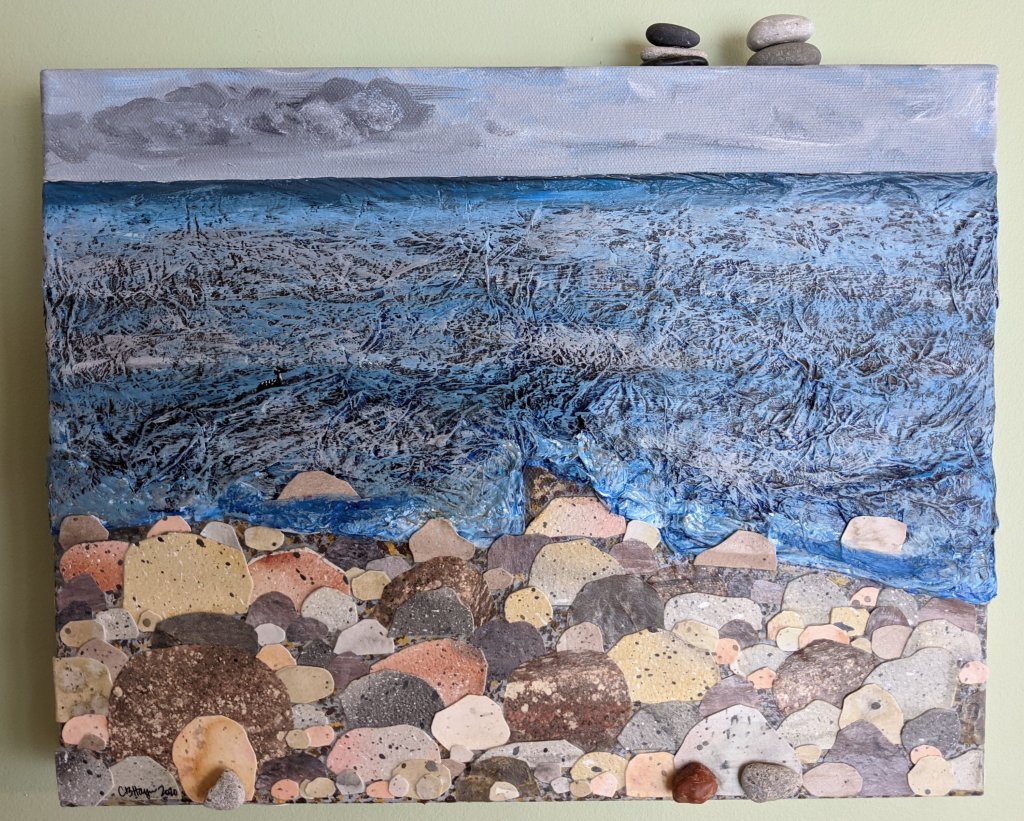
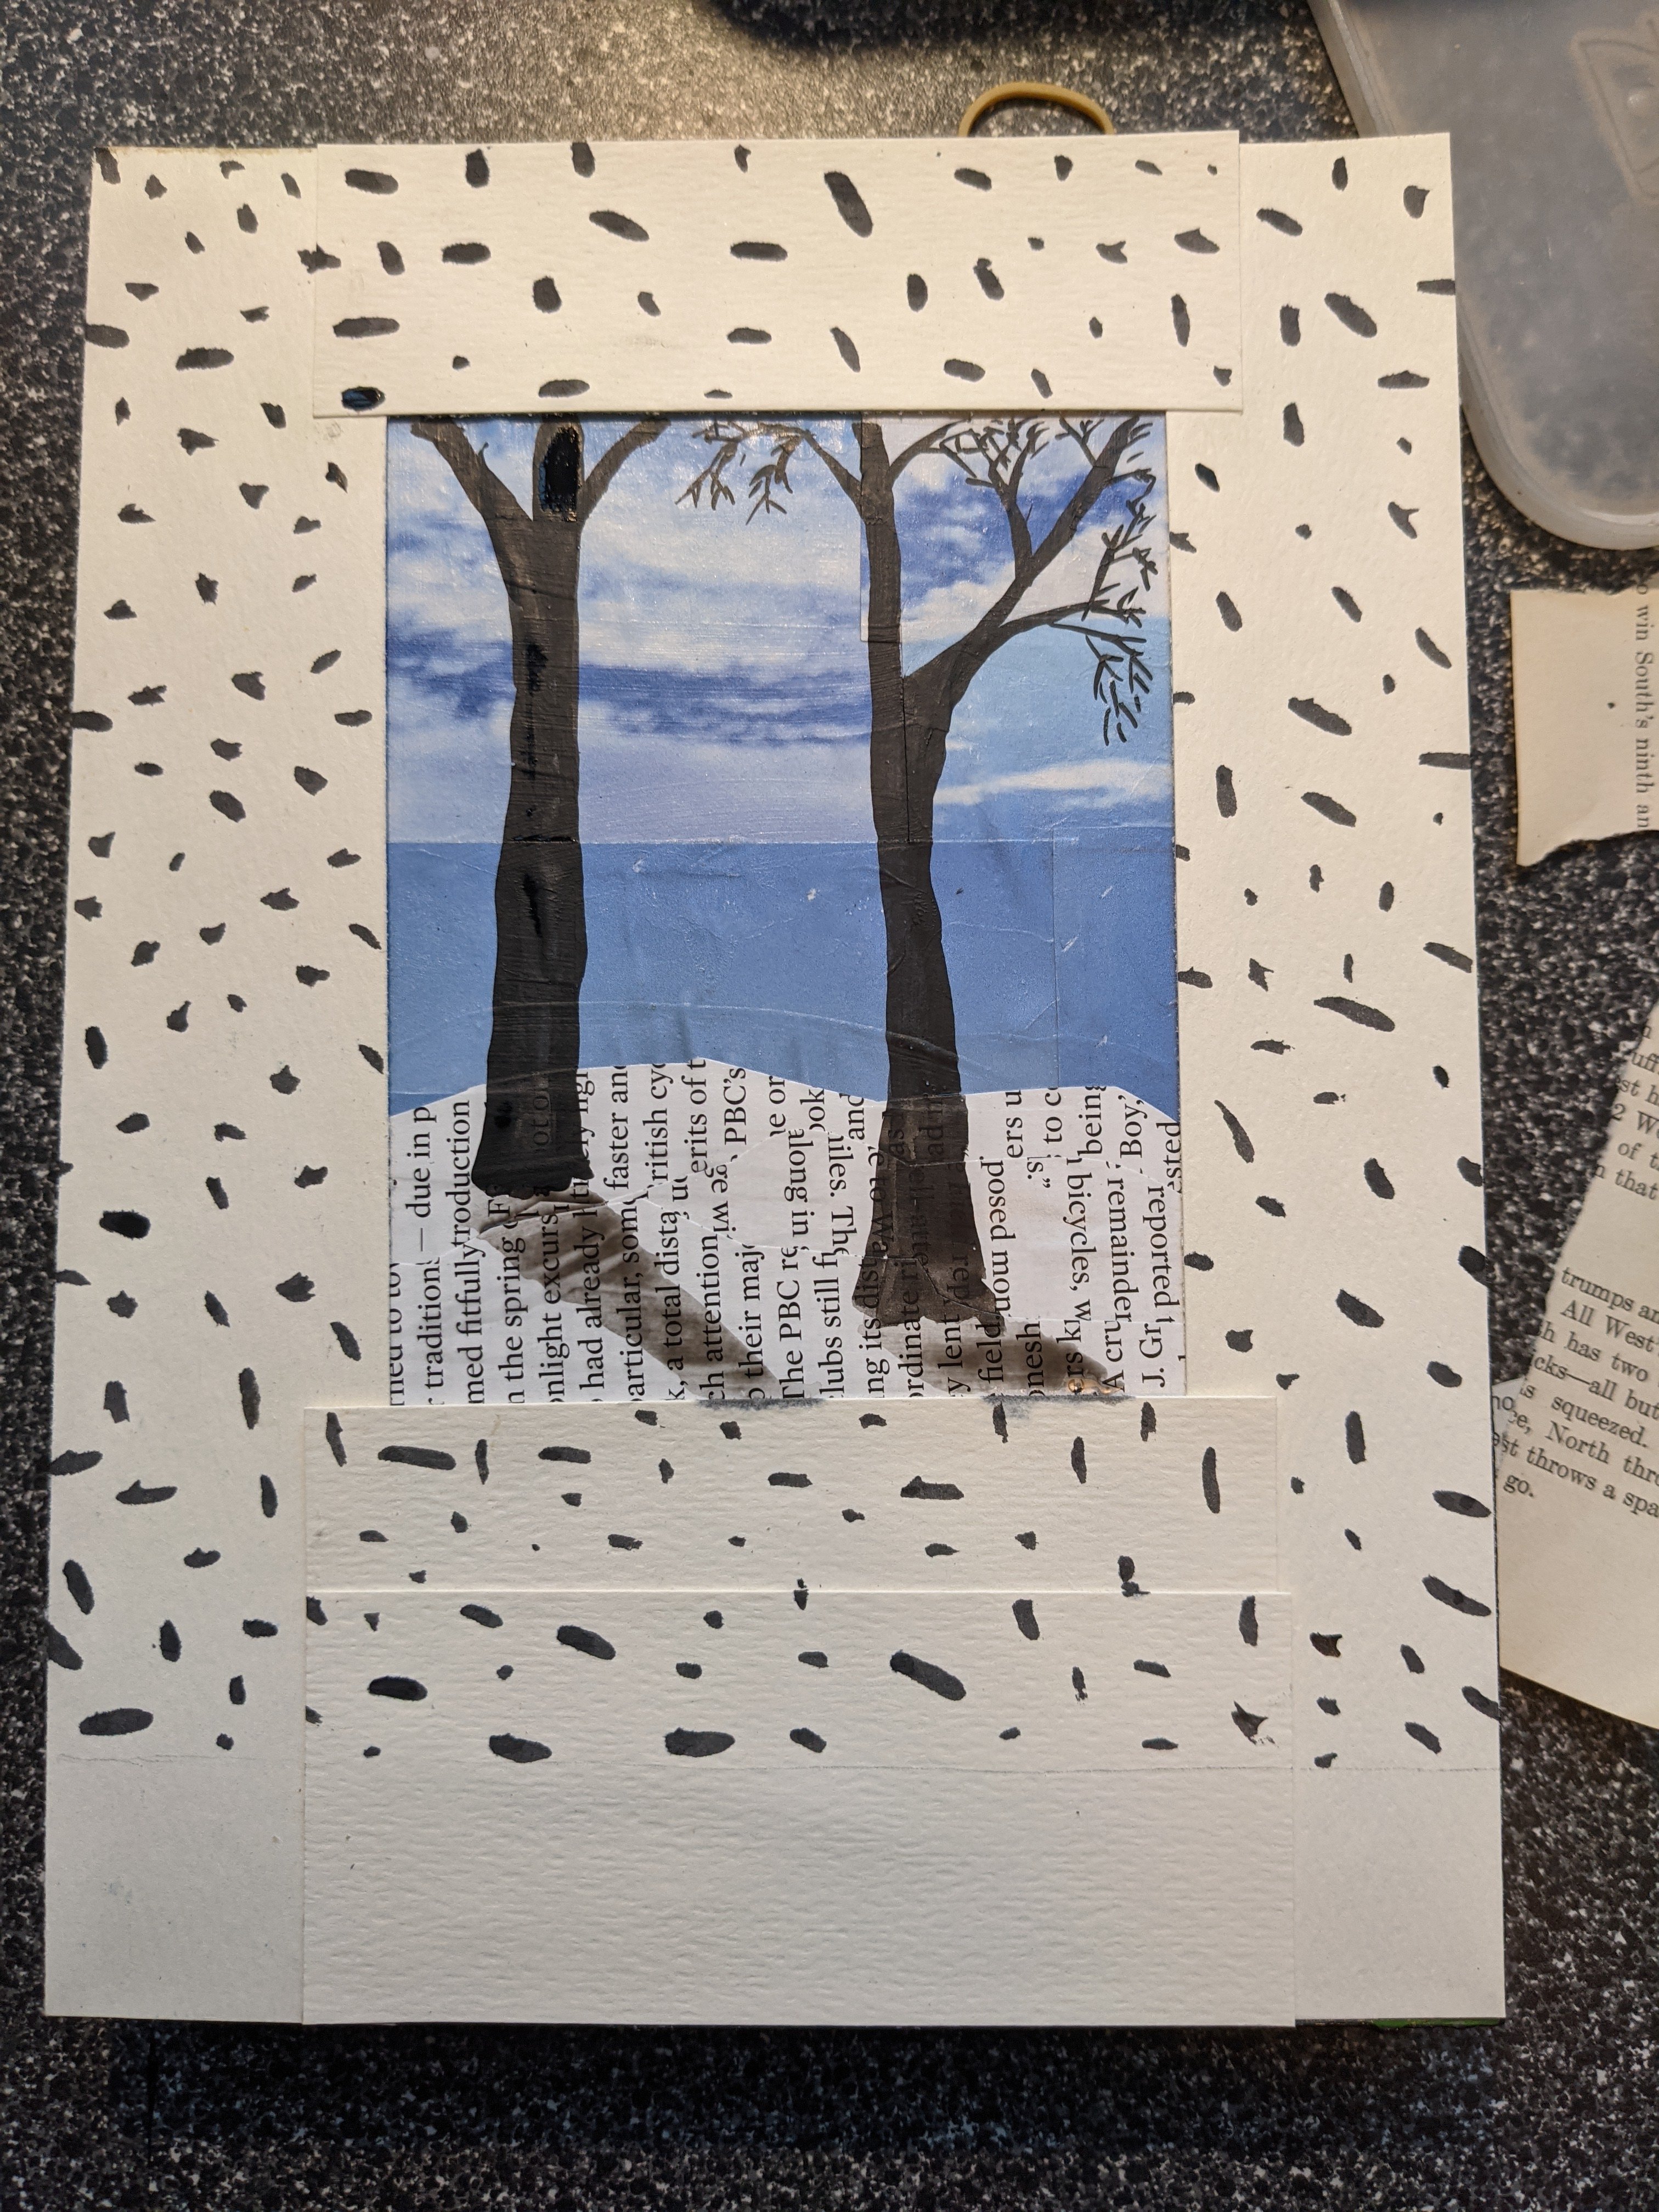
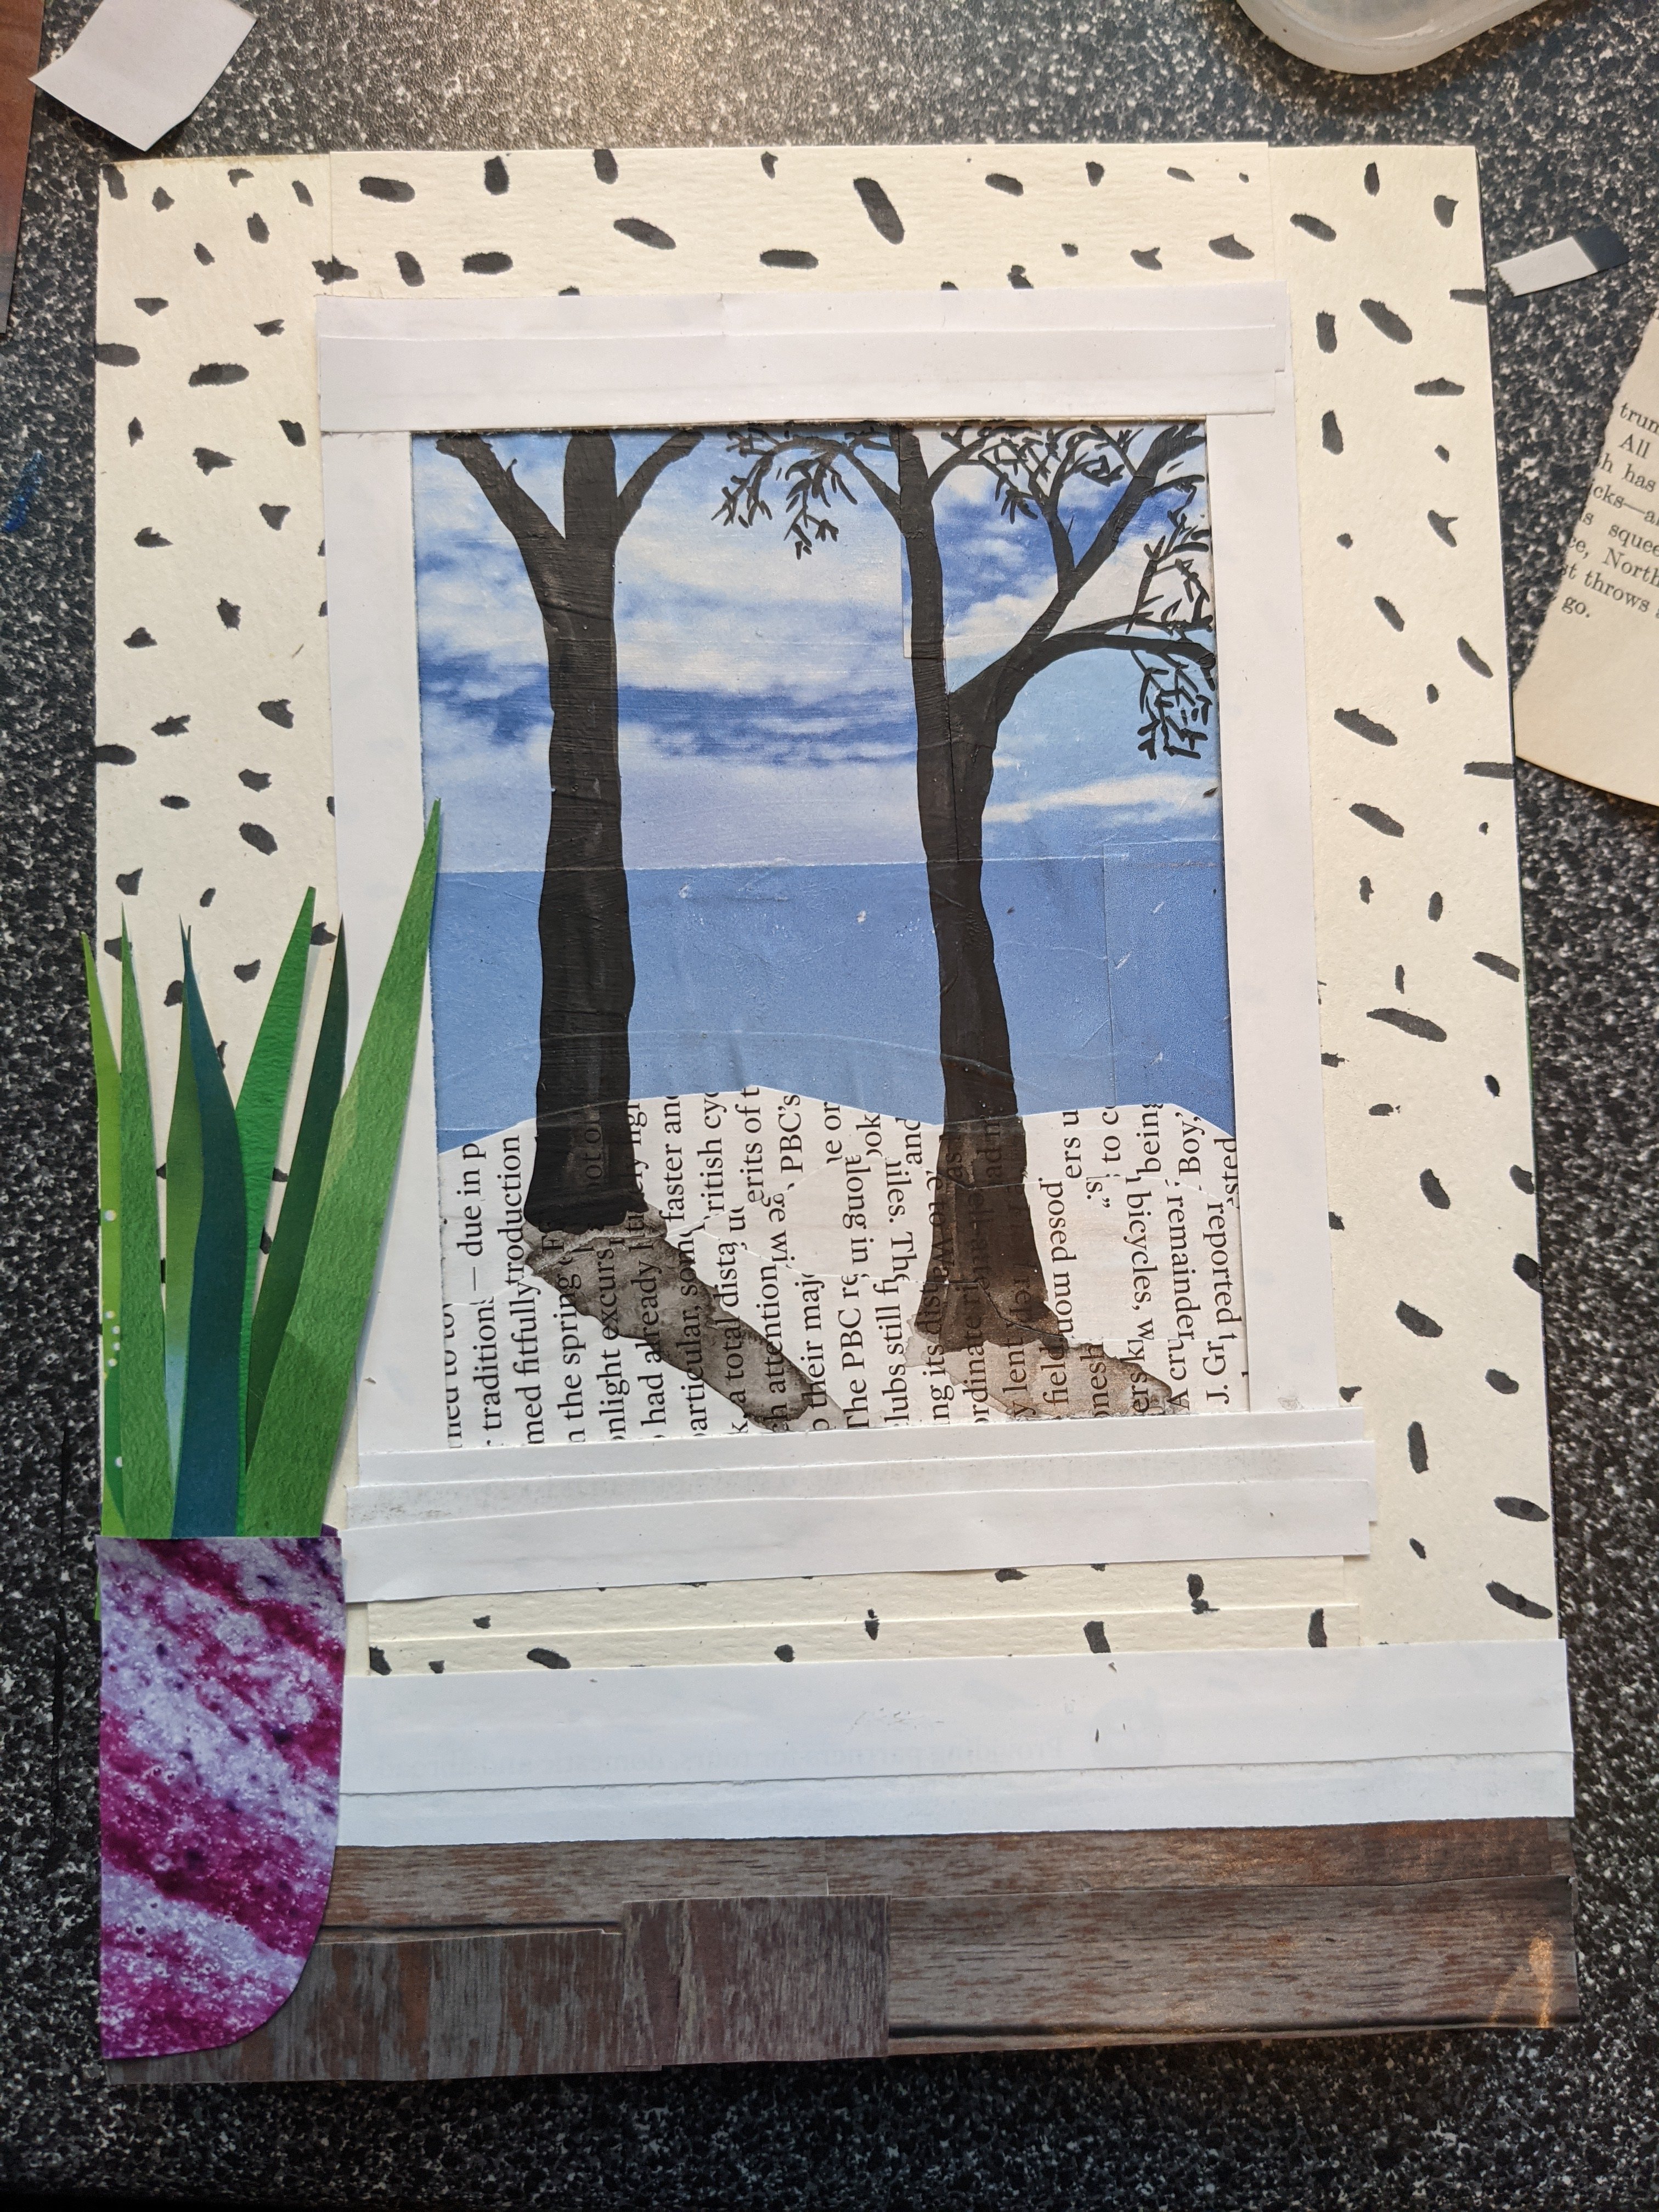
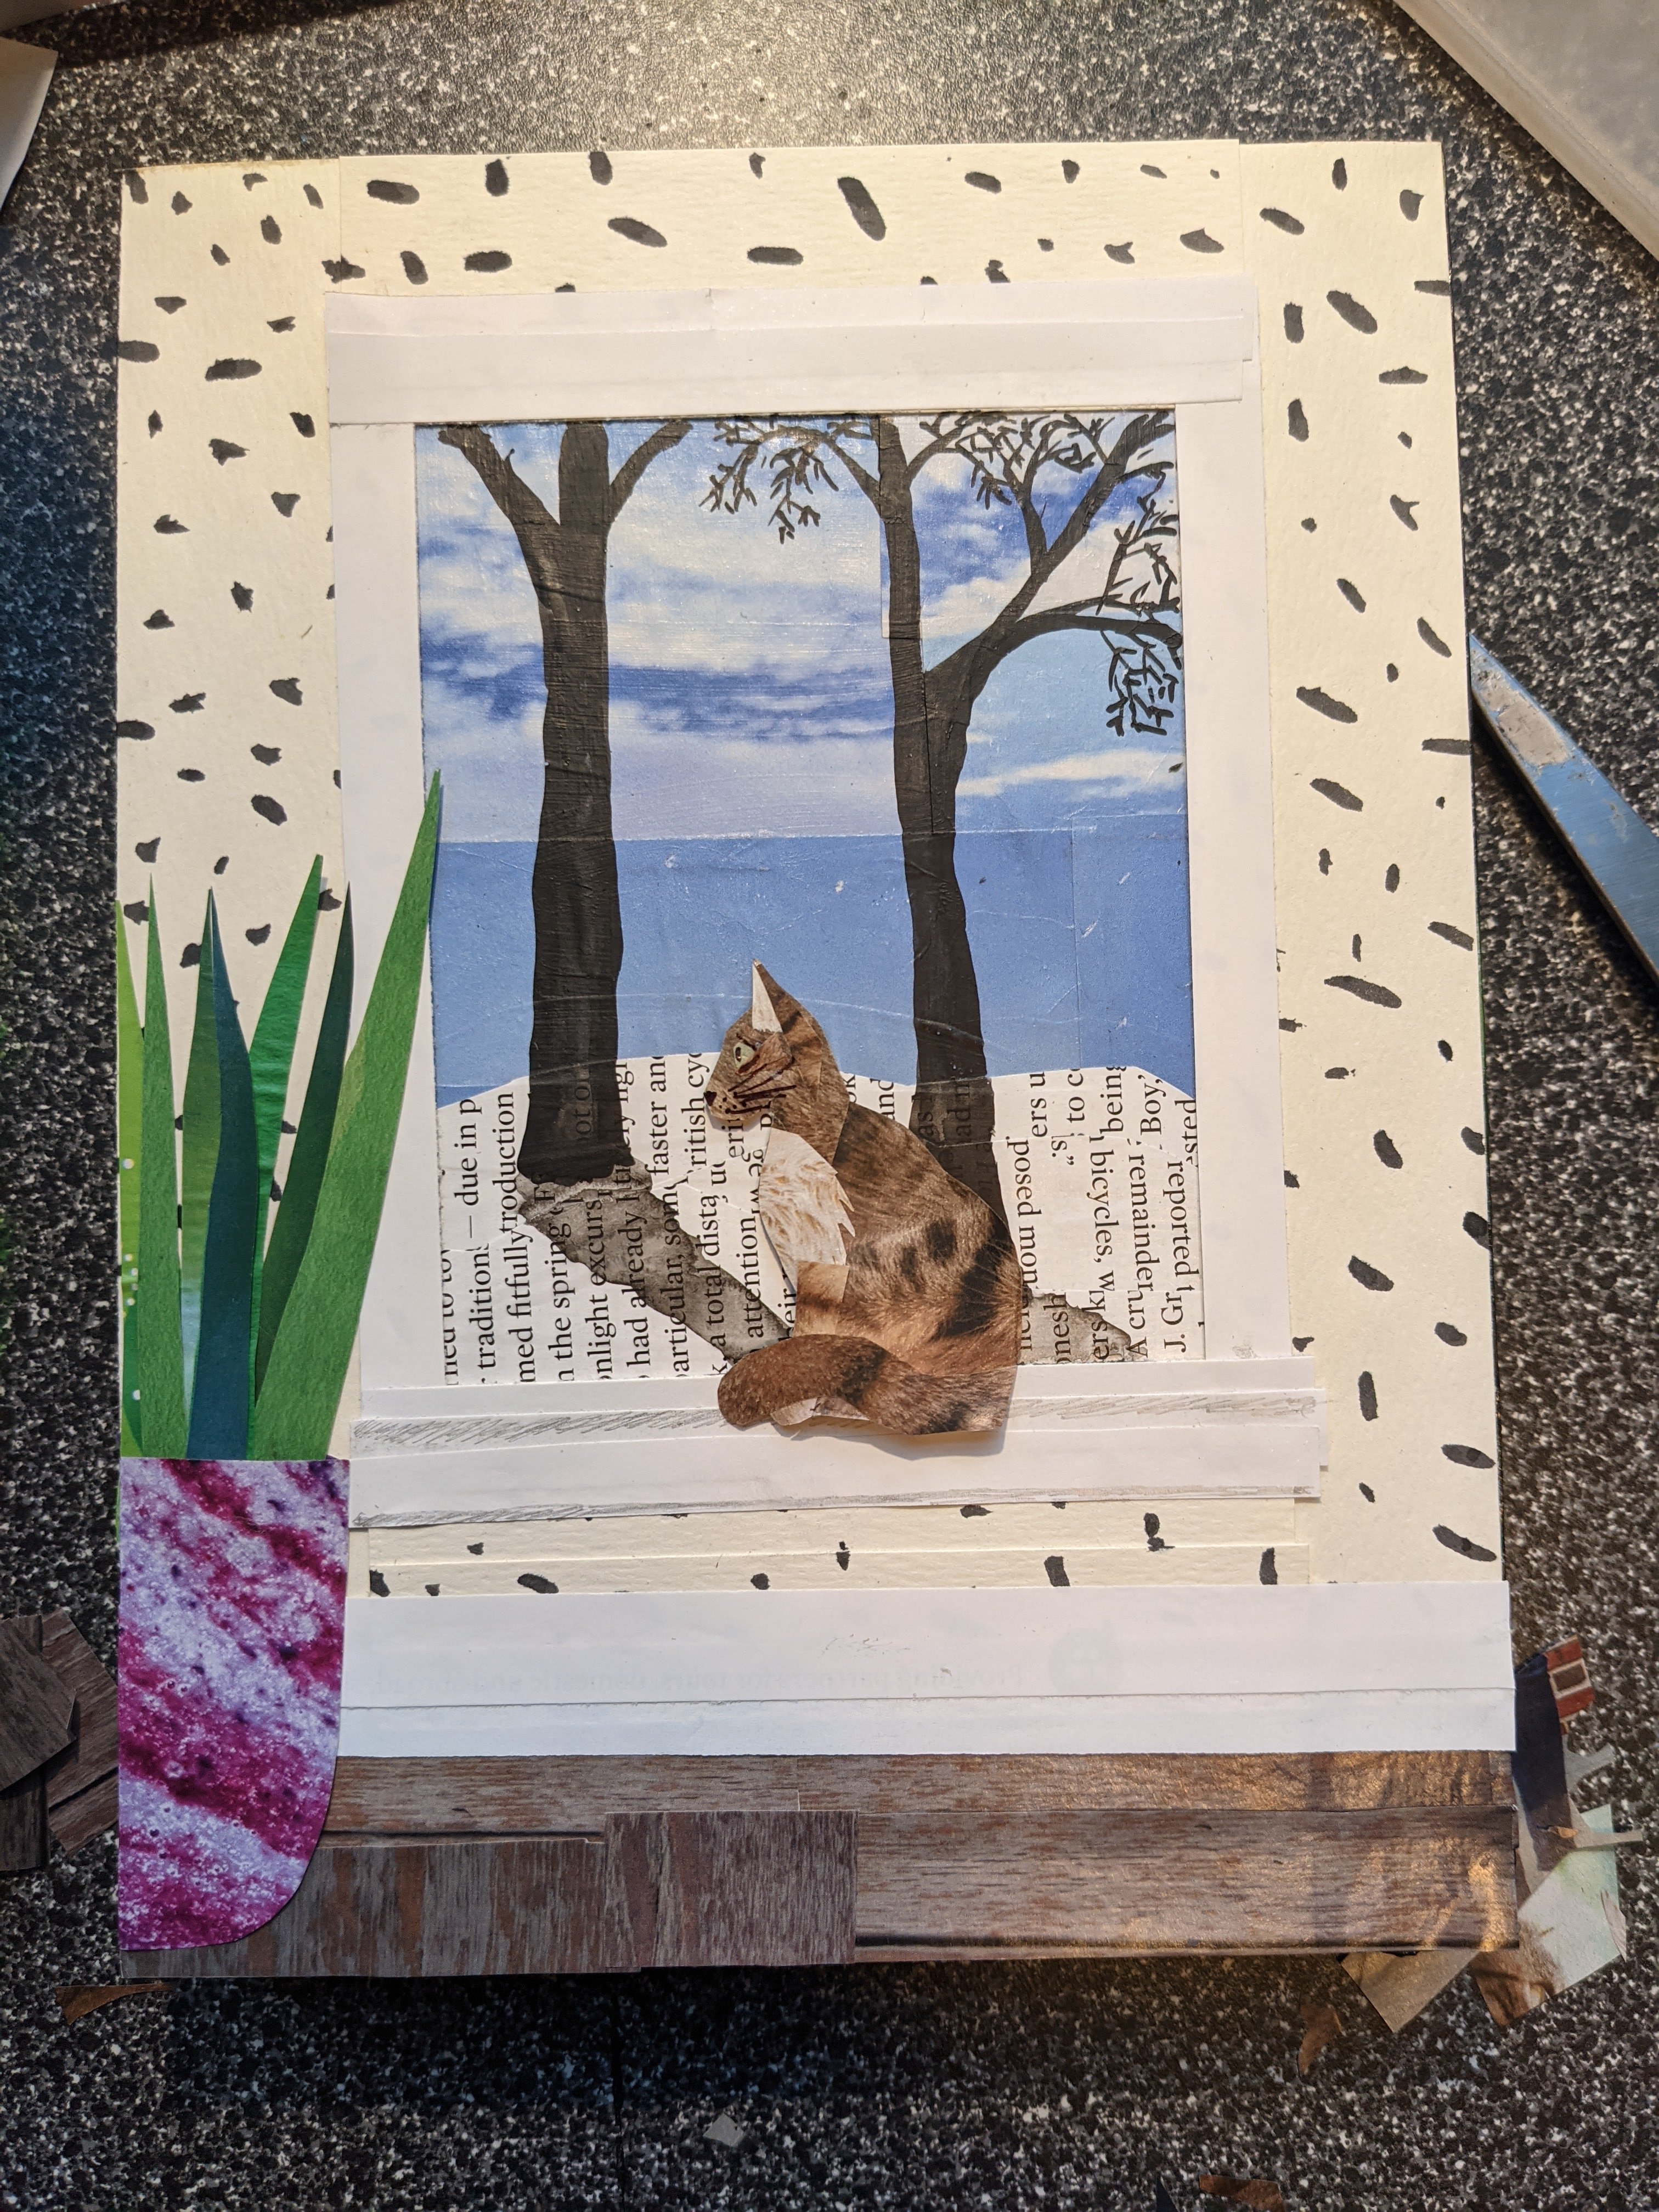
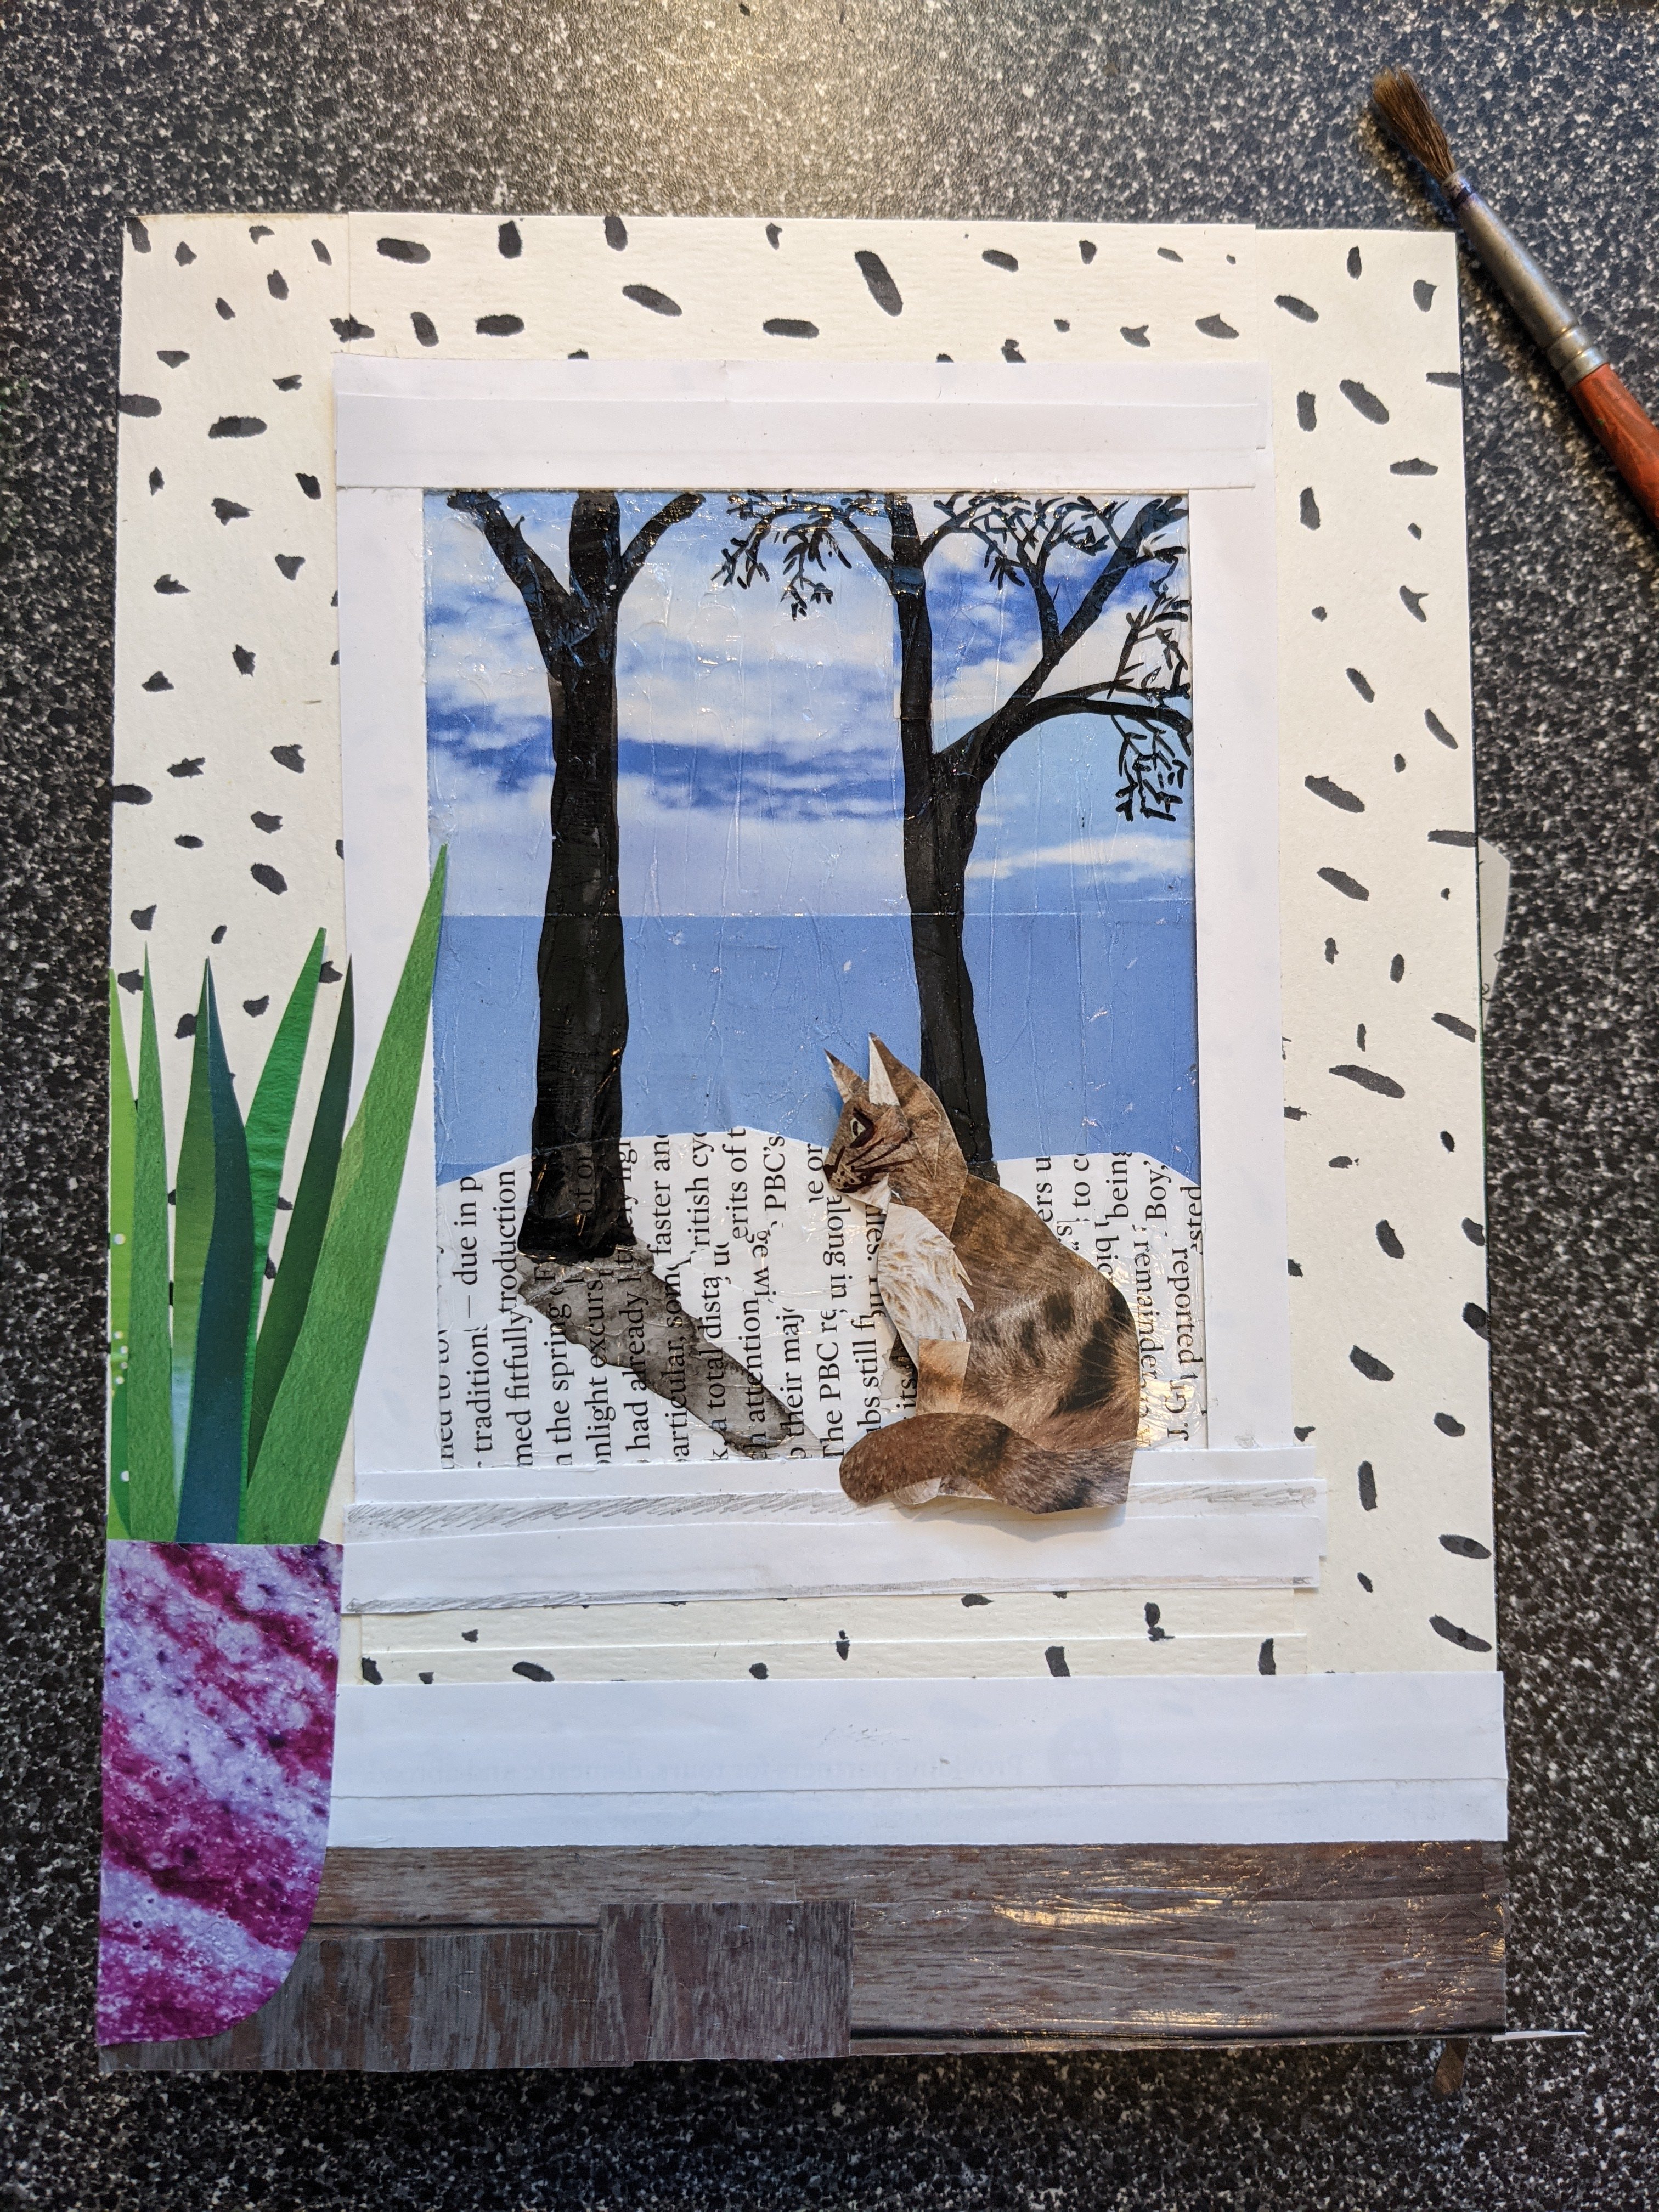
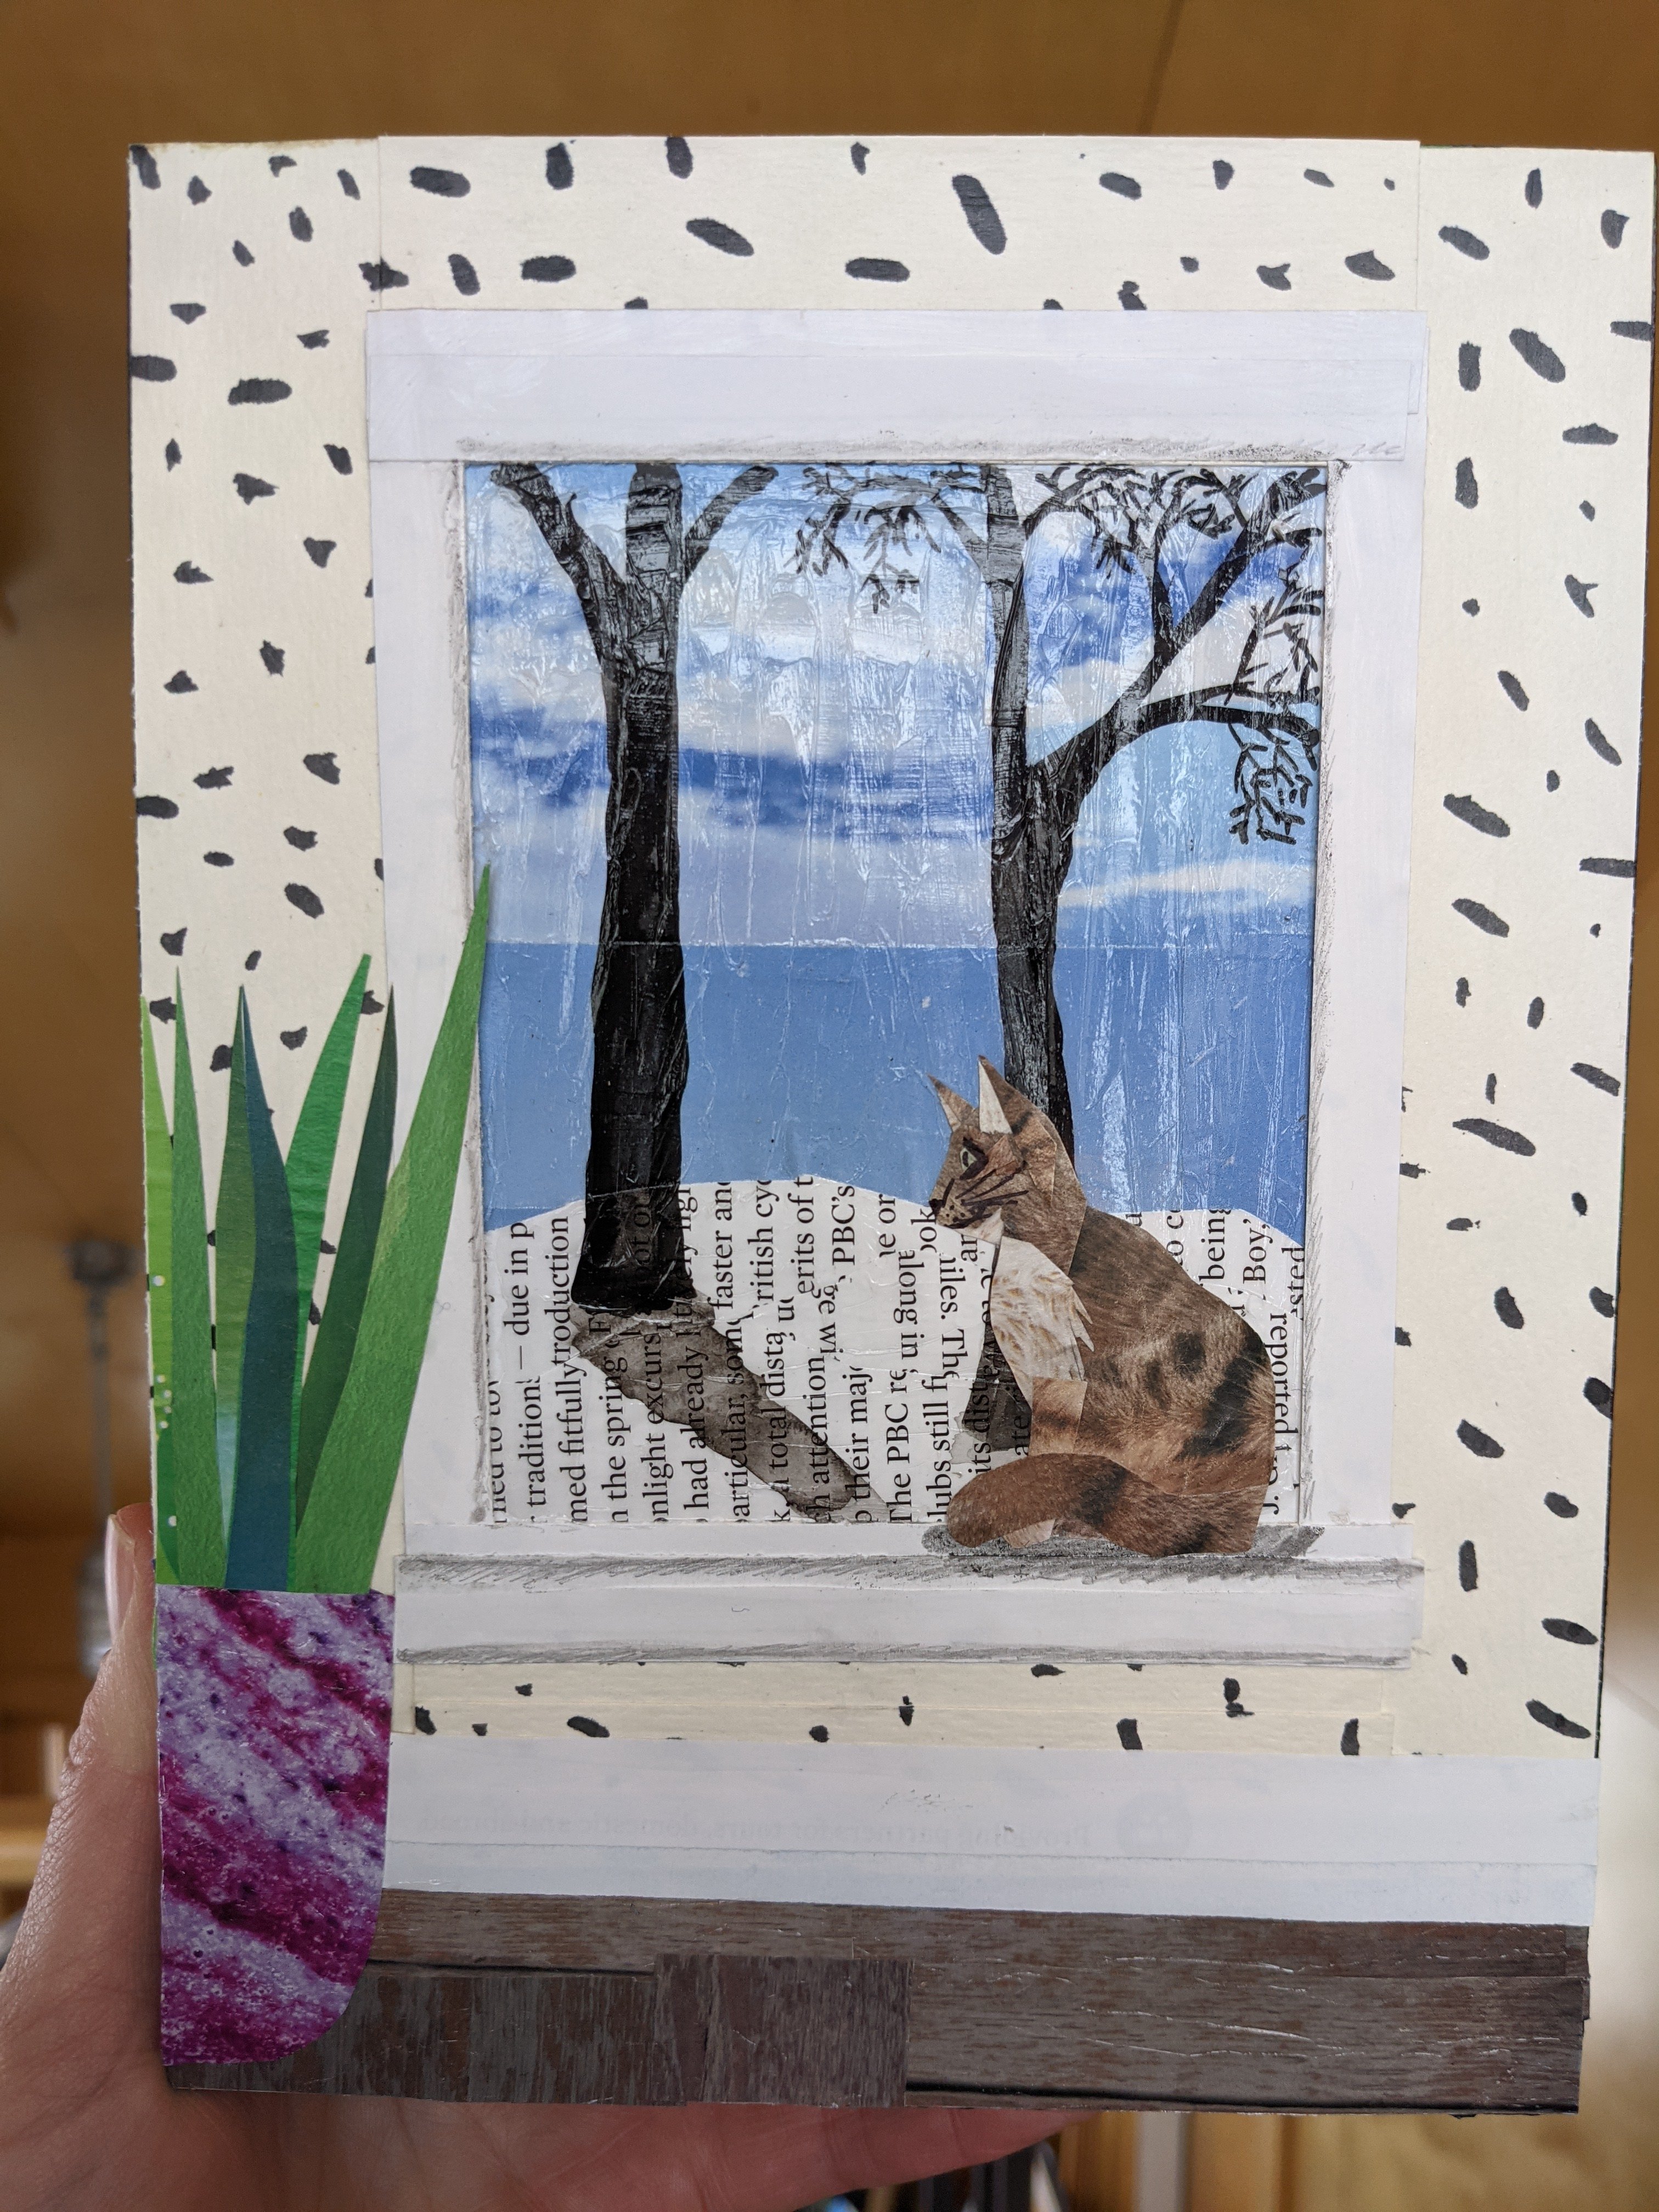
Winter Tabby, collage and mixed media on board, 6.5 x 8.25″, 2021.
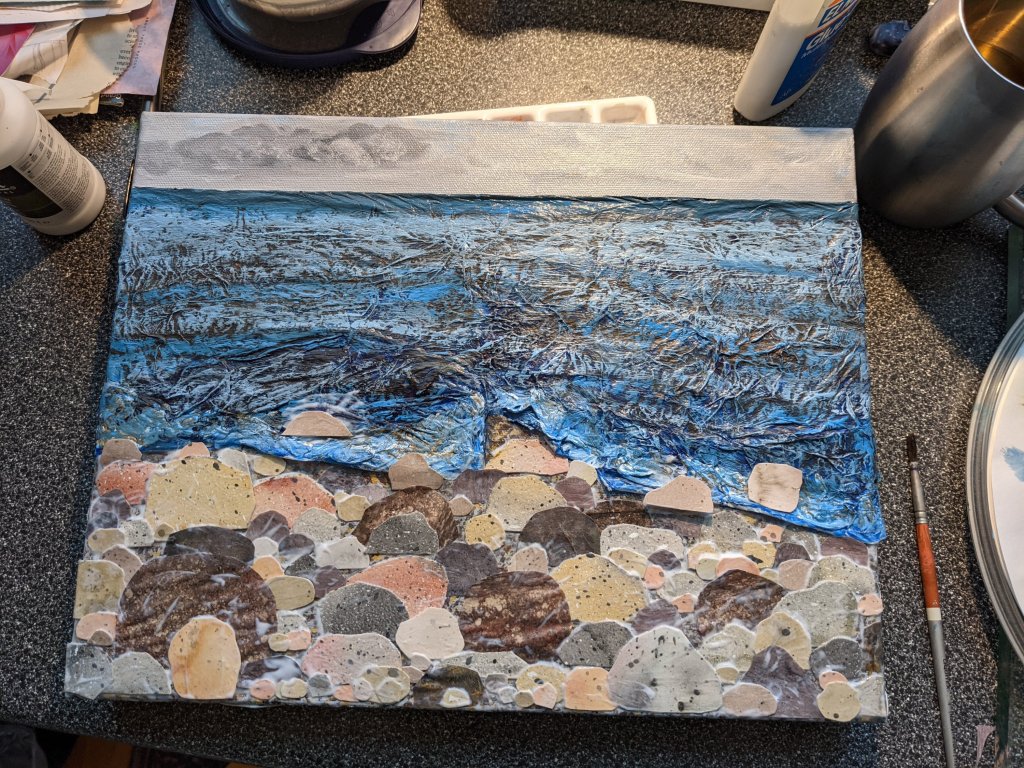
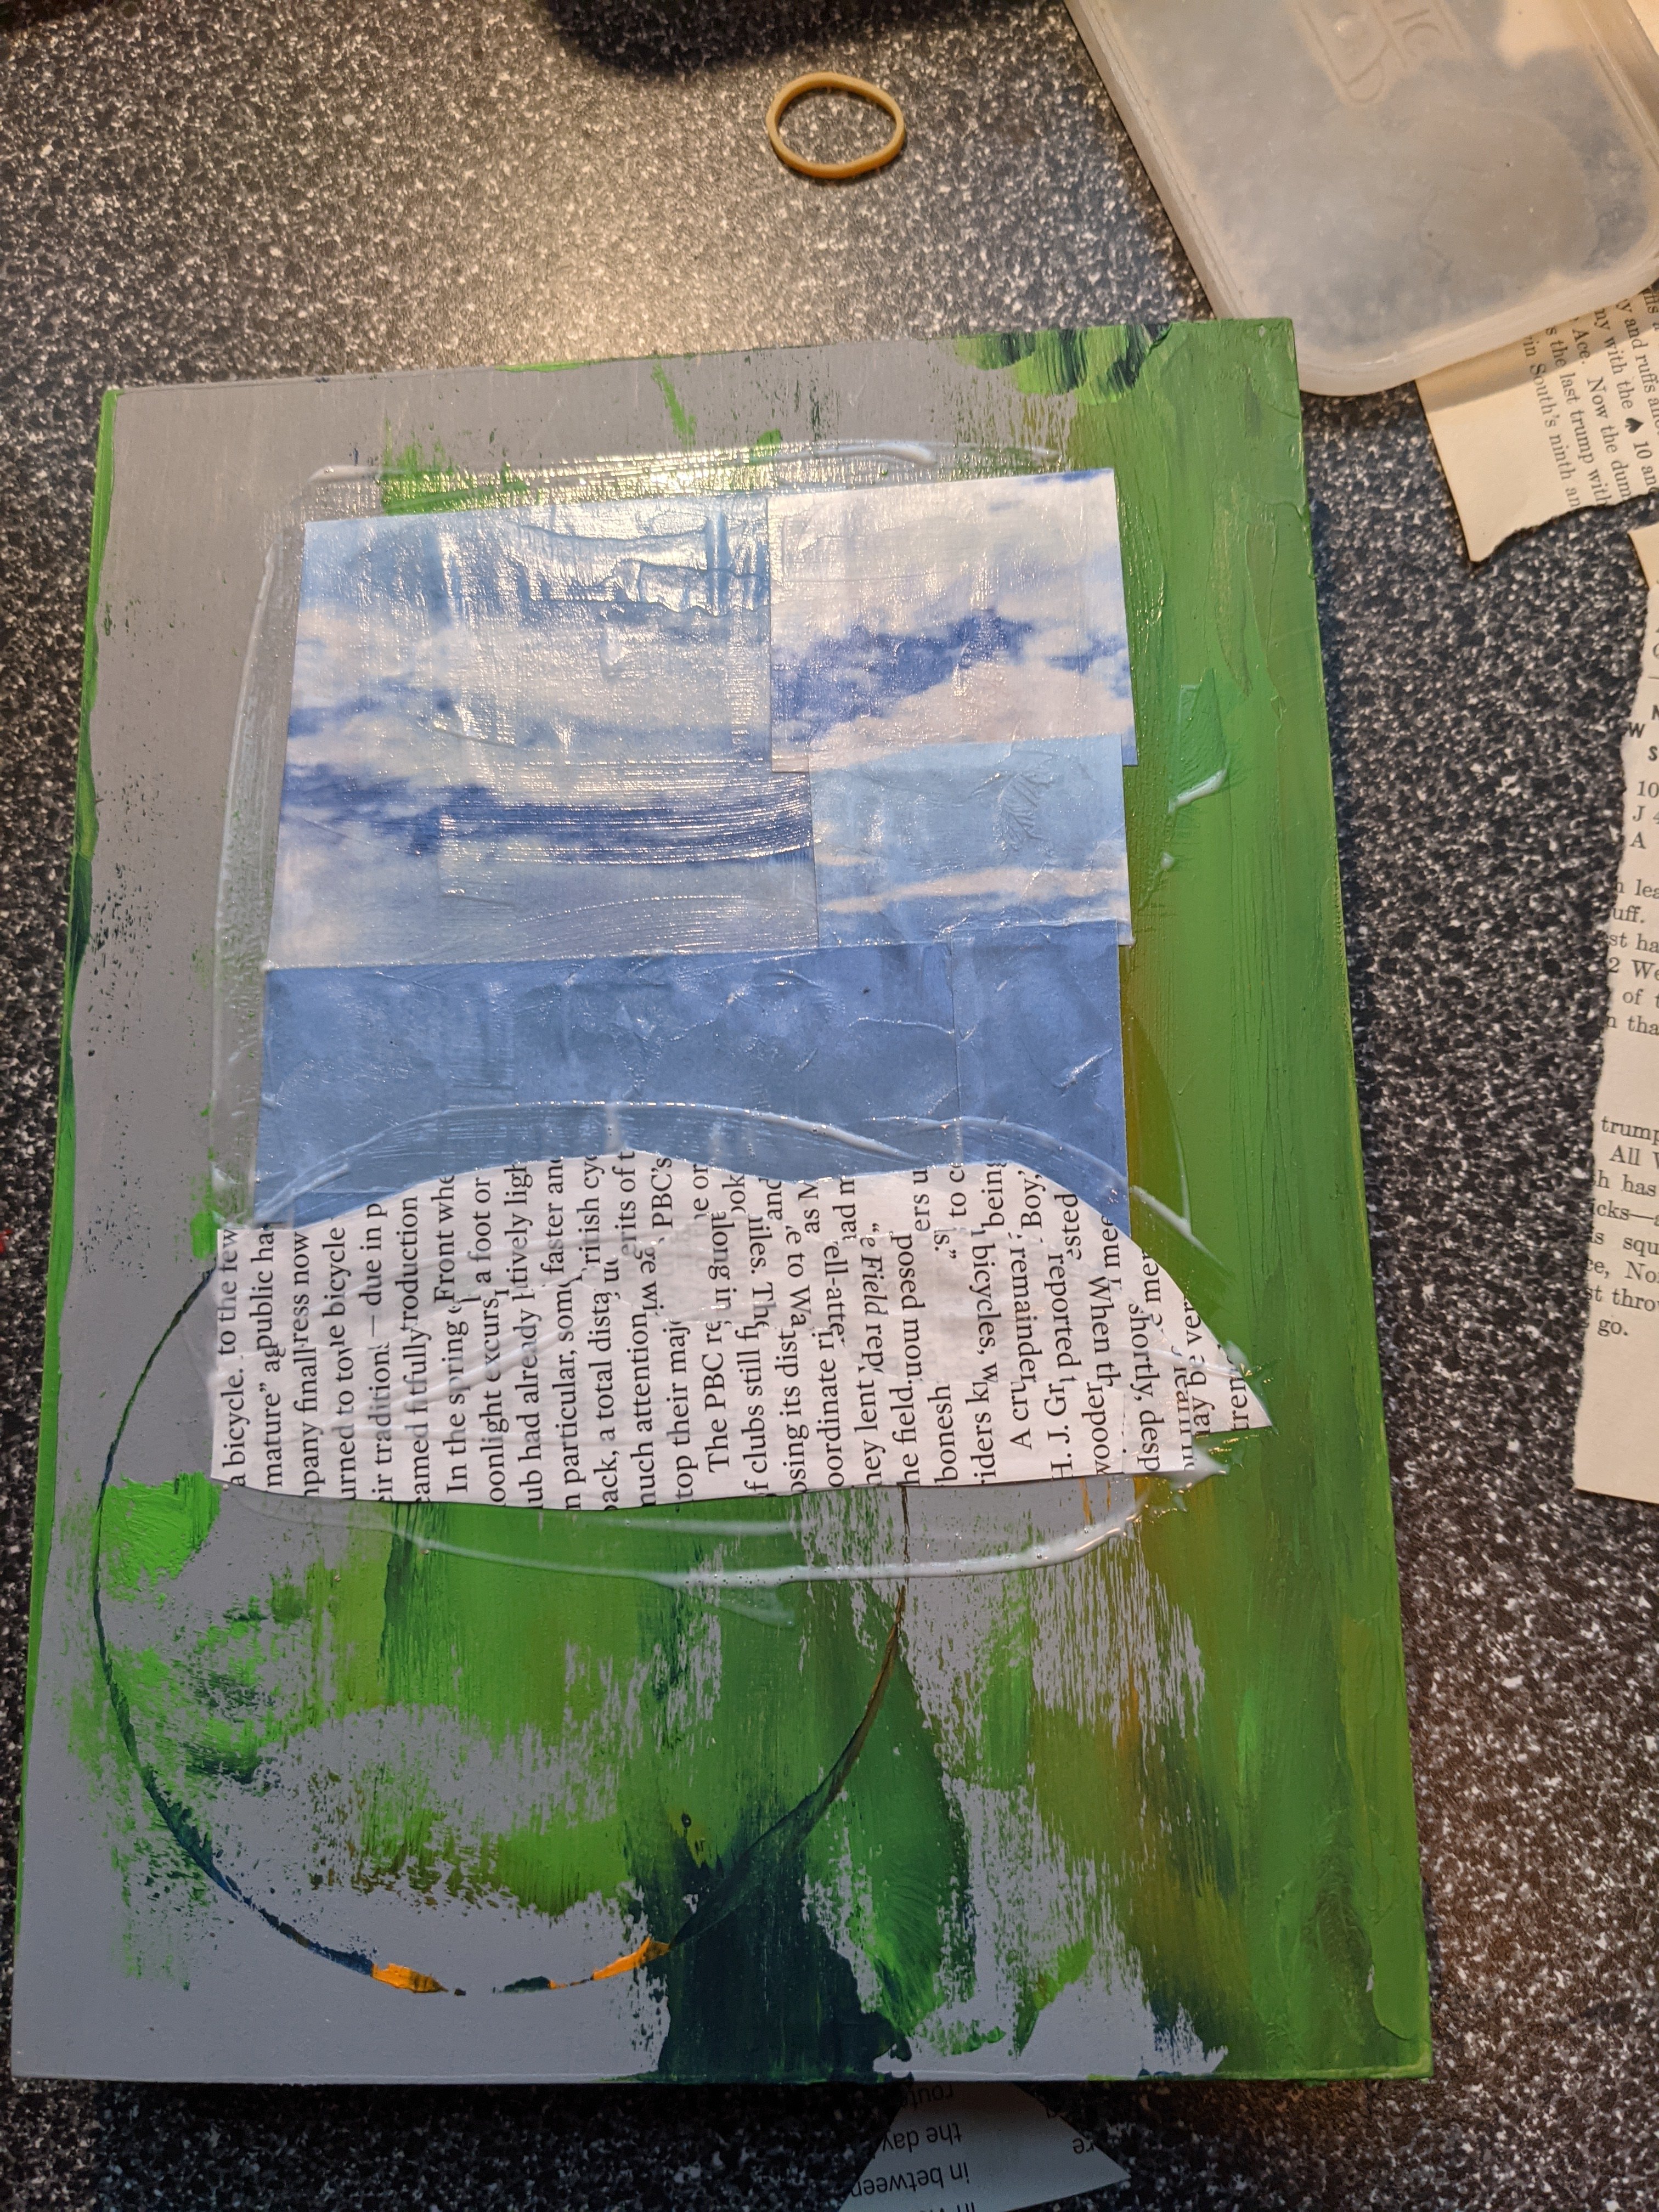
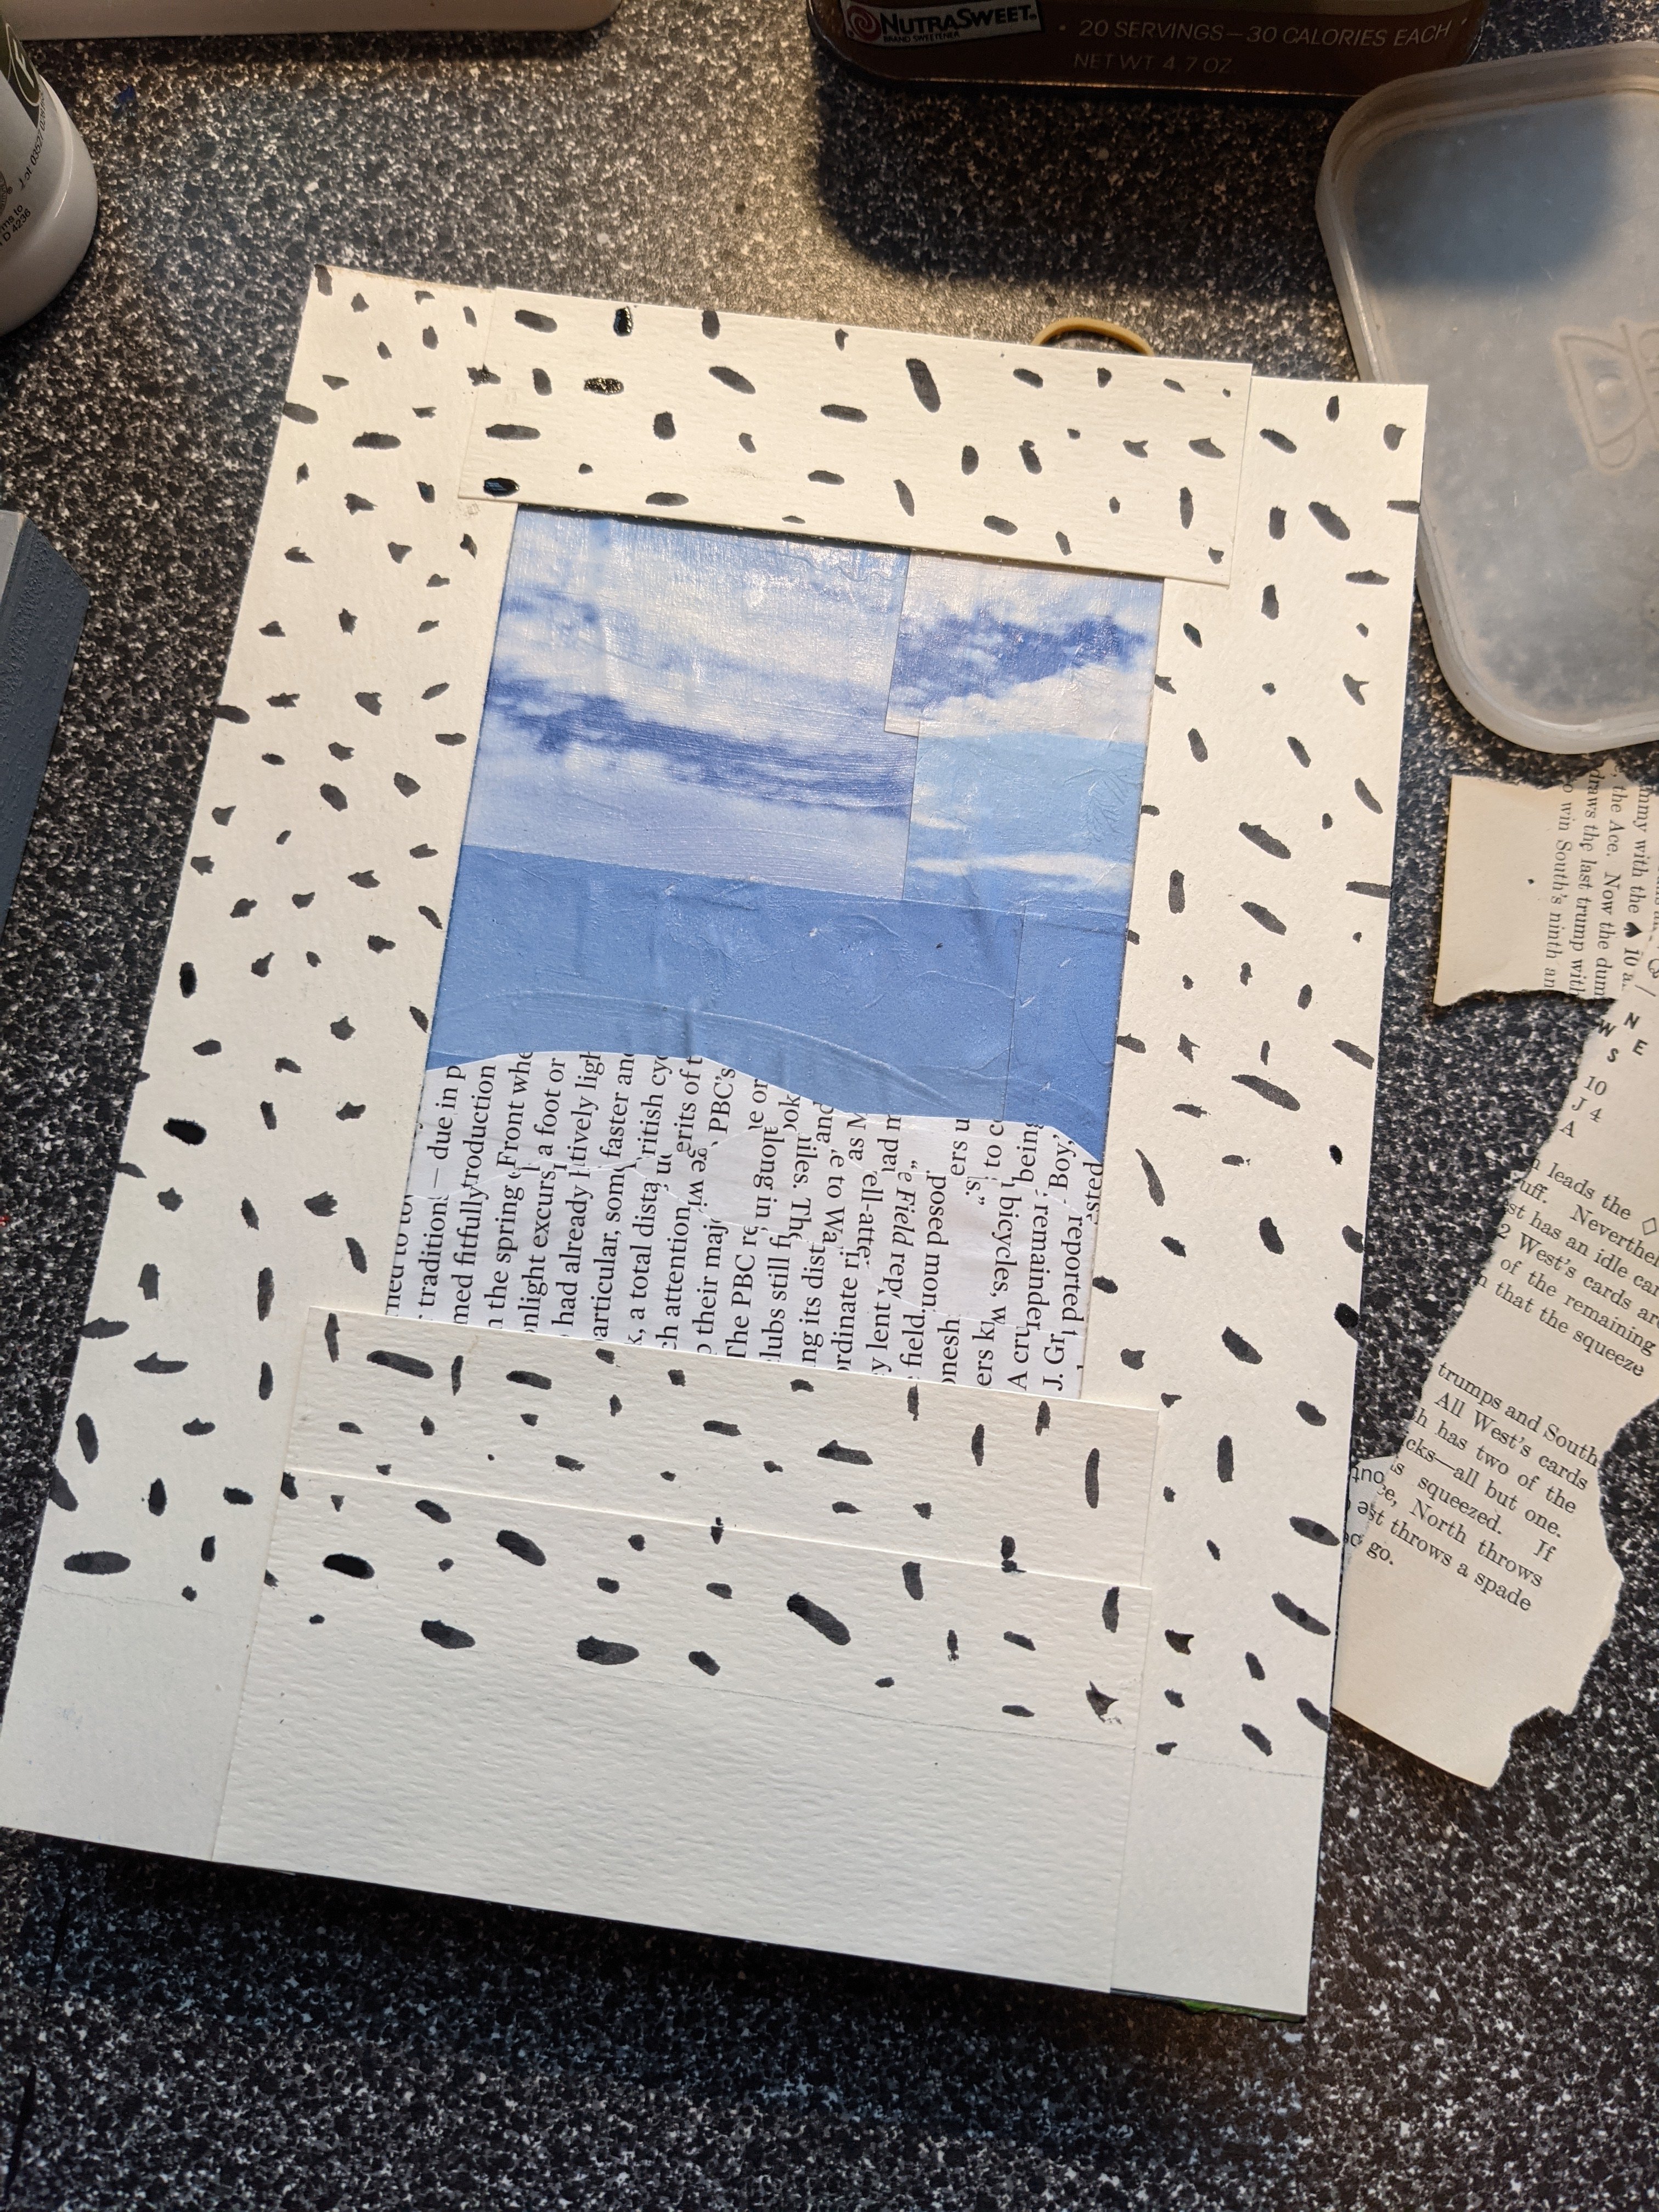
I don’t always remember to document the process of my art, but collage lends itself particularly well to this.
I always have an image in my head when I begin an artwork. My perfectionism hinders my speed at times. For whatever reason, I find that collage is the media where the outcome most often matches the initial vision.
This Tabby winter scene is an artwork I am preparing for an online auction benefitting my church. I’m trying to finish two more artworks this weekend. Deadlines are good for me!
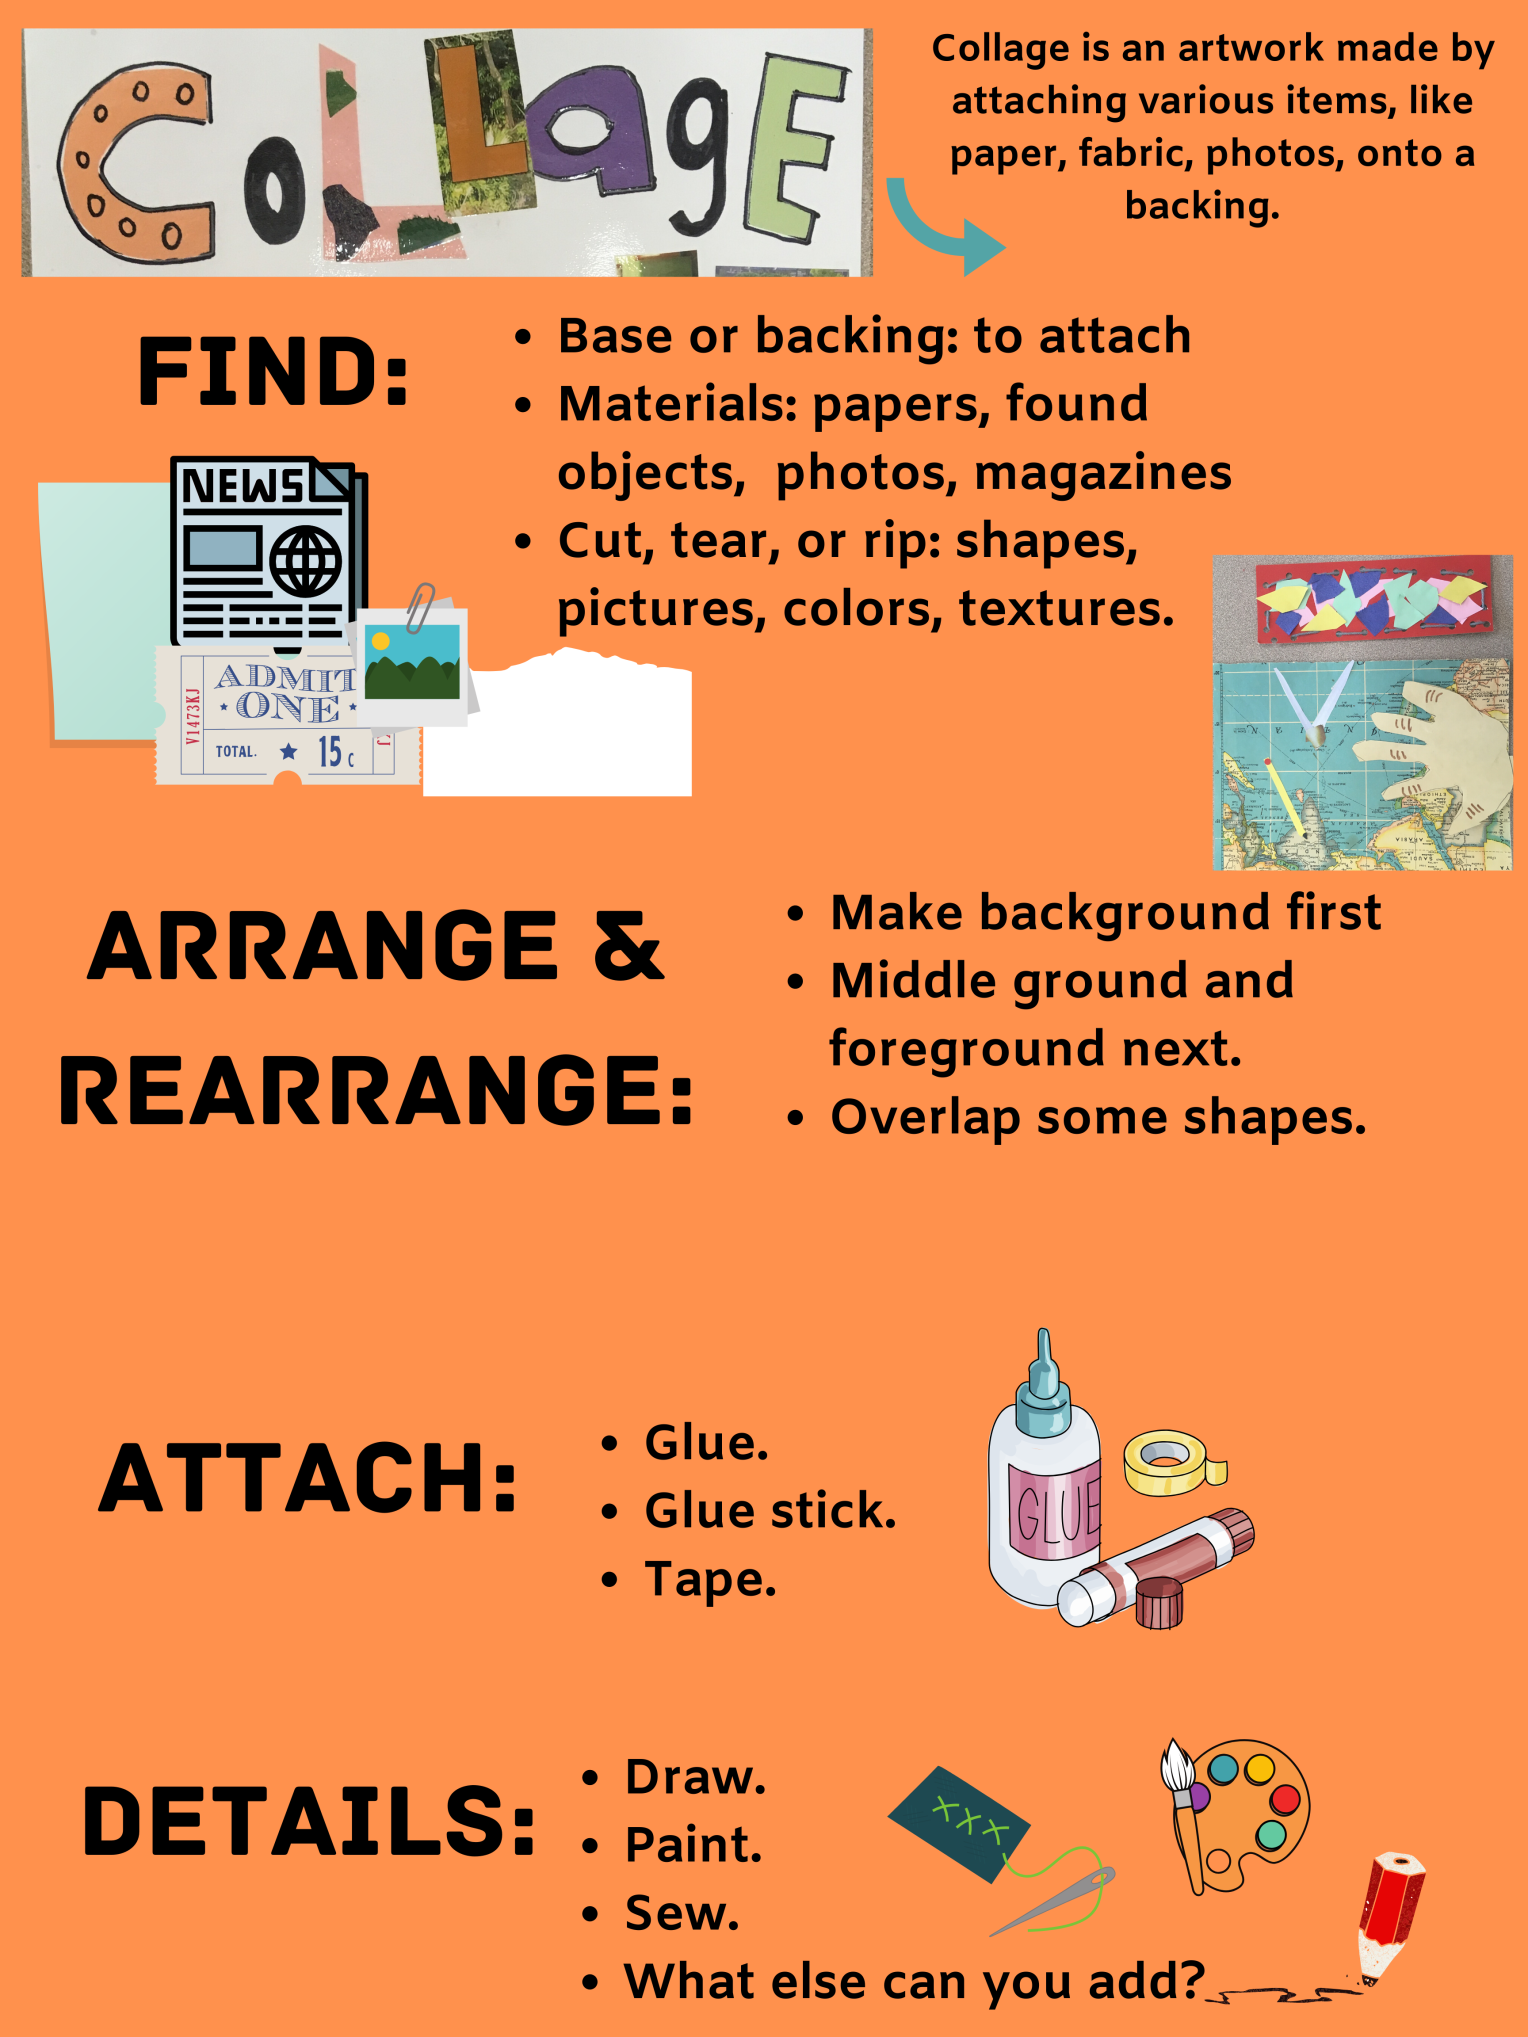
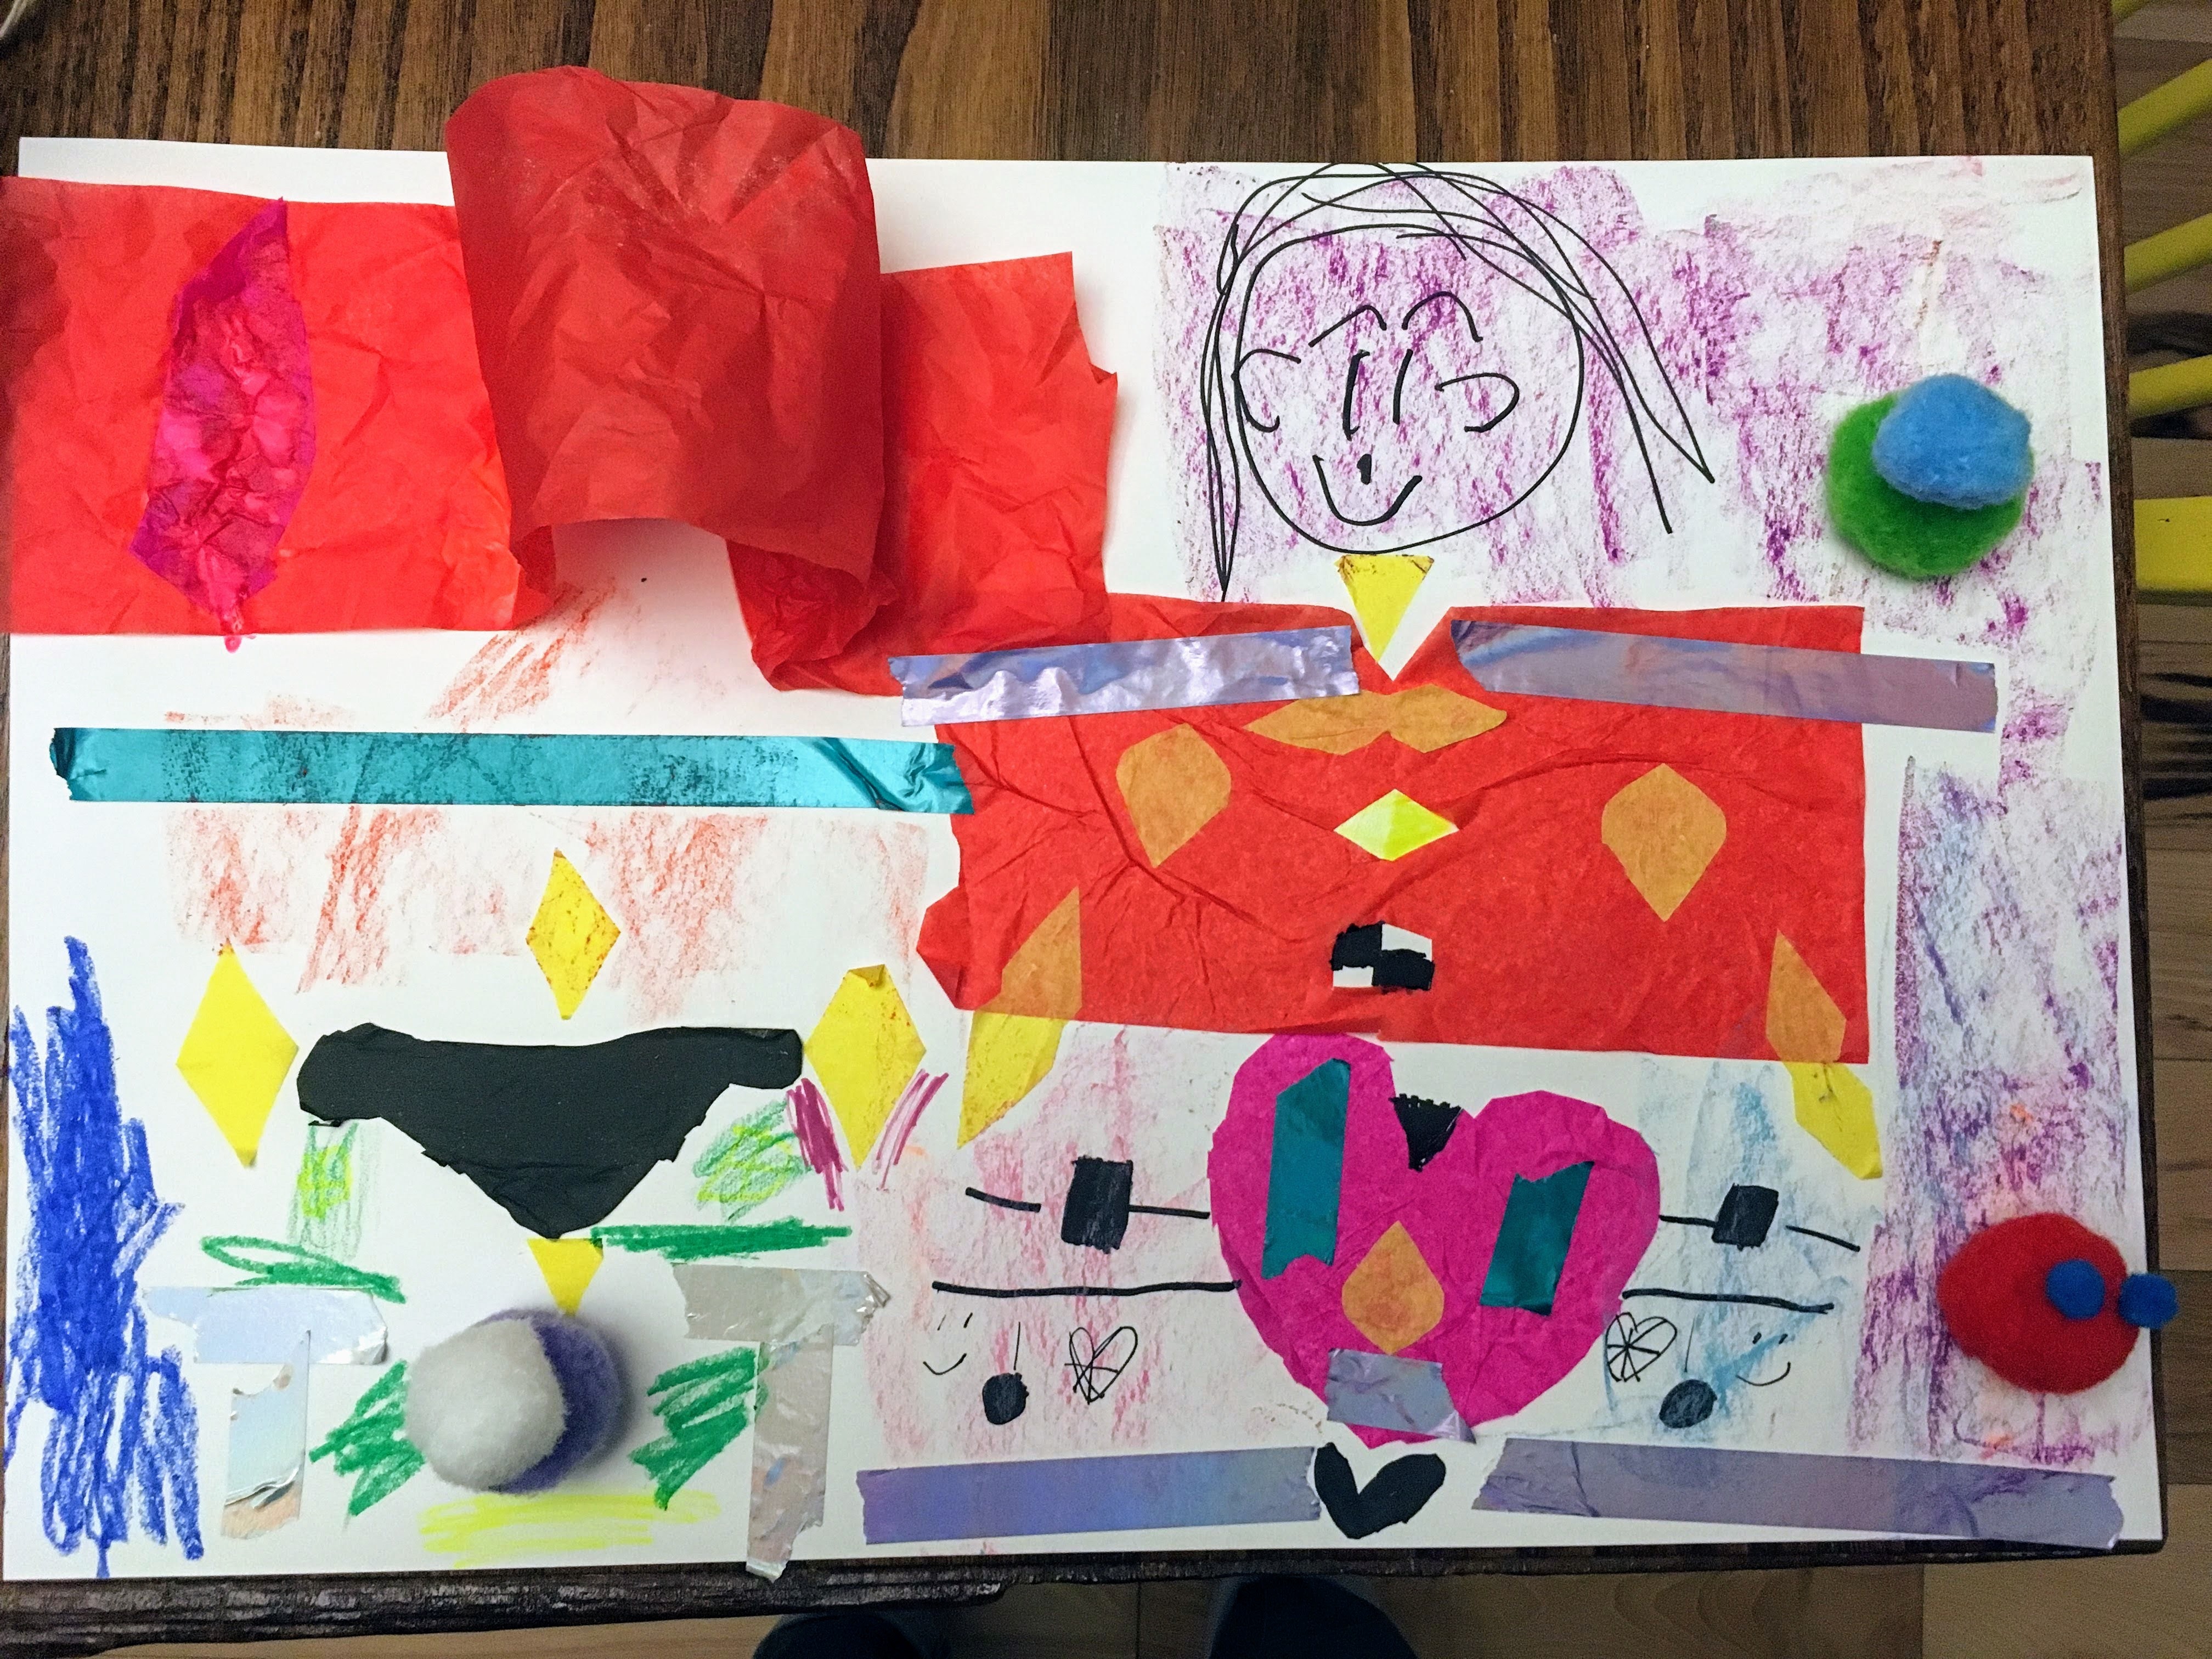
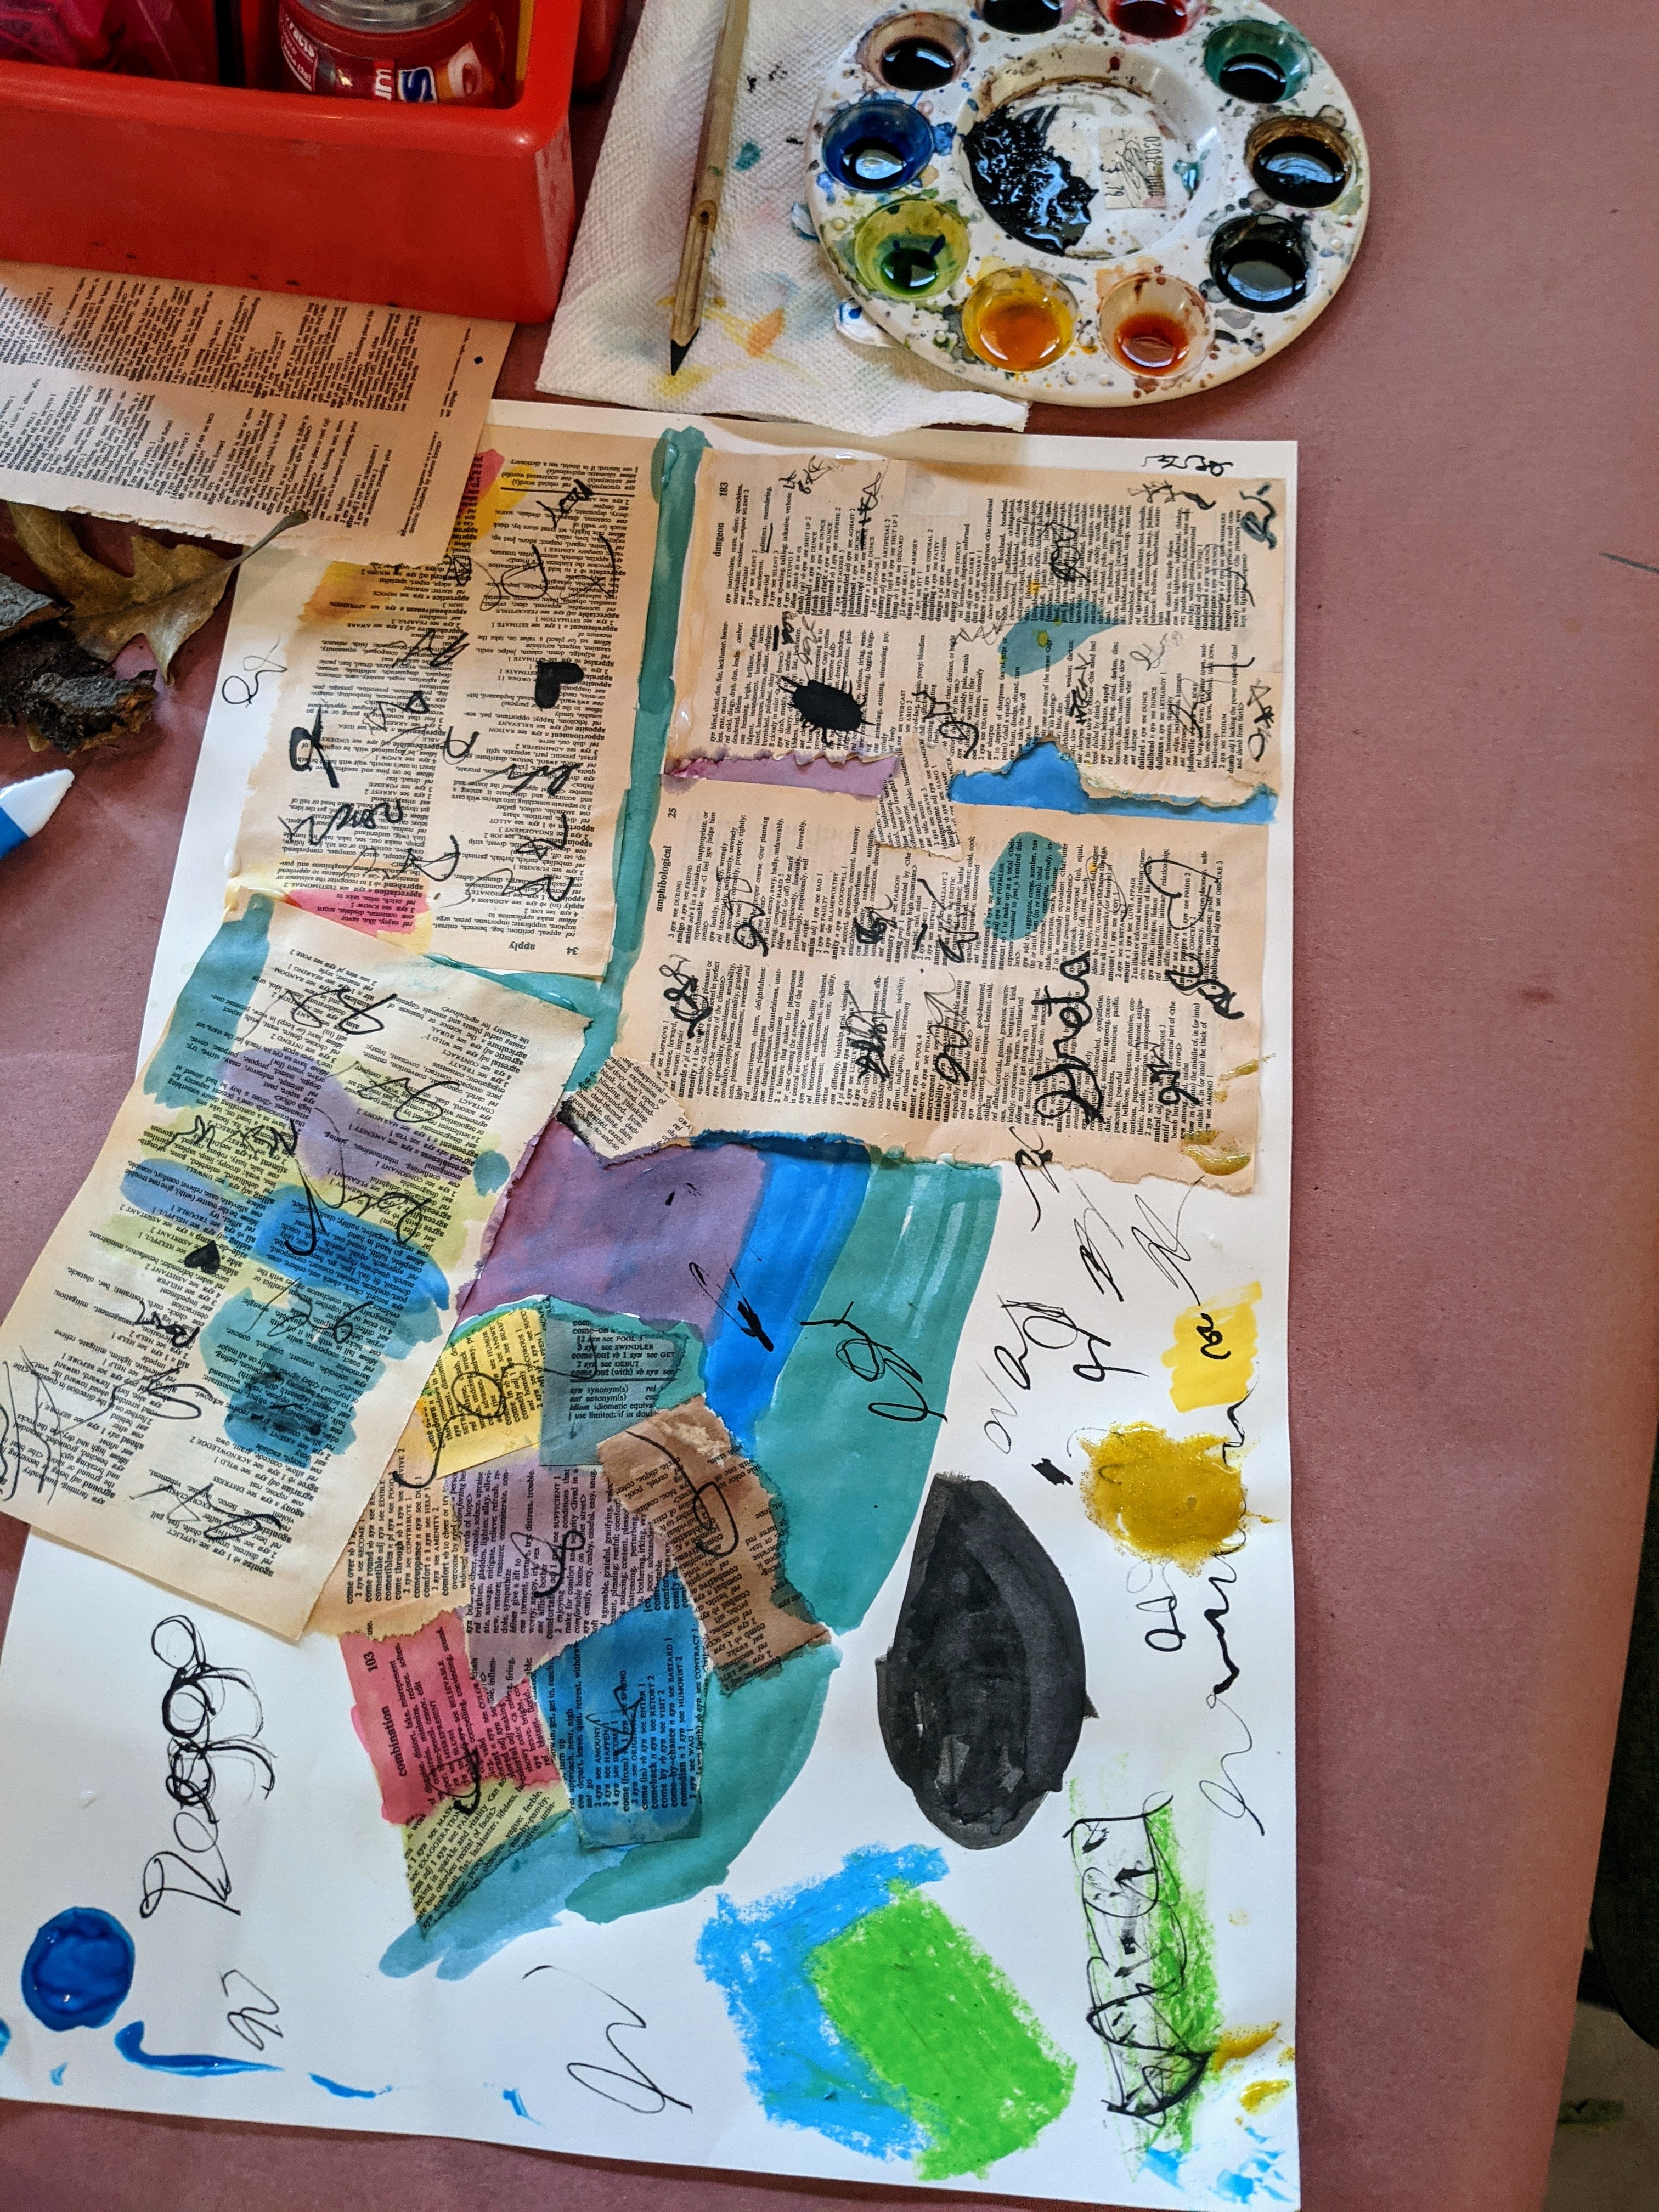
Collage is one of those art forms that kids naturally understand. As adults, I think it is best if we give them access to materials and then get out of the way. However, as children spend more time practicing with collage, their work will become more sophisticated and they will need additional supports with materials, composition, and next possible steps. In this post, I will introduce the basics, along with some student examples. Future posts will dive into more detailed collage techniques. Collage truly is my favorite media to work with, as an artist.
Here is a basic how-to poster I created for my classroom on collage.
Some of my favorite collage materials are:
magazines
aluminum foil
doilies
lace
string
wax paper
tissue paper
tape
old photographs
tickets
receipts
junk mail
old book pages
found objects: paper clips, twist ties, playing cards, pop tabs, toothpicks, things in your junk drawer
fabric
plastic bags, fused or not
wallpaper
wrapping paper
newspaper
cardboard
old greeting cards
maps
Collage shows exuberance like no other media, in my opinion.
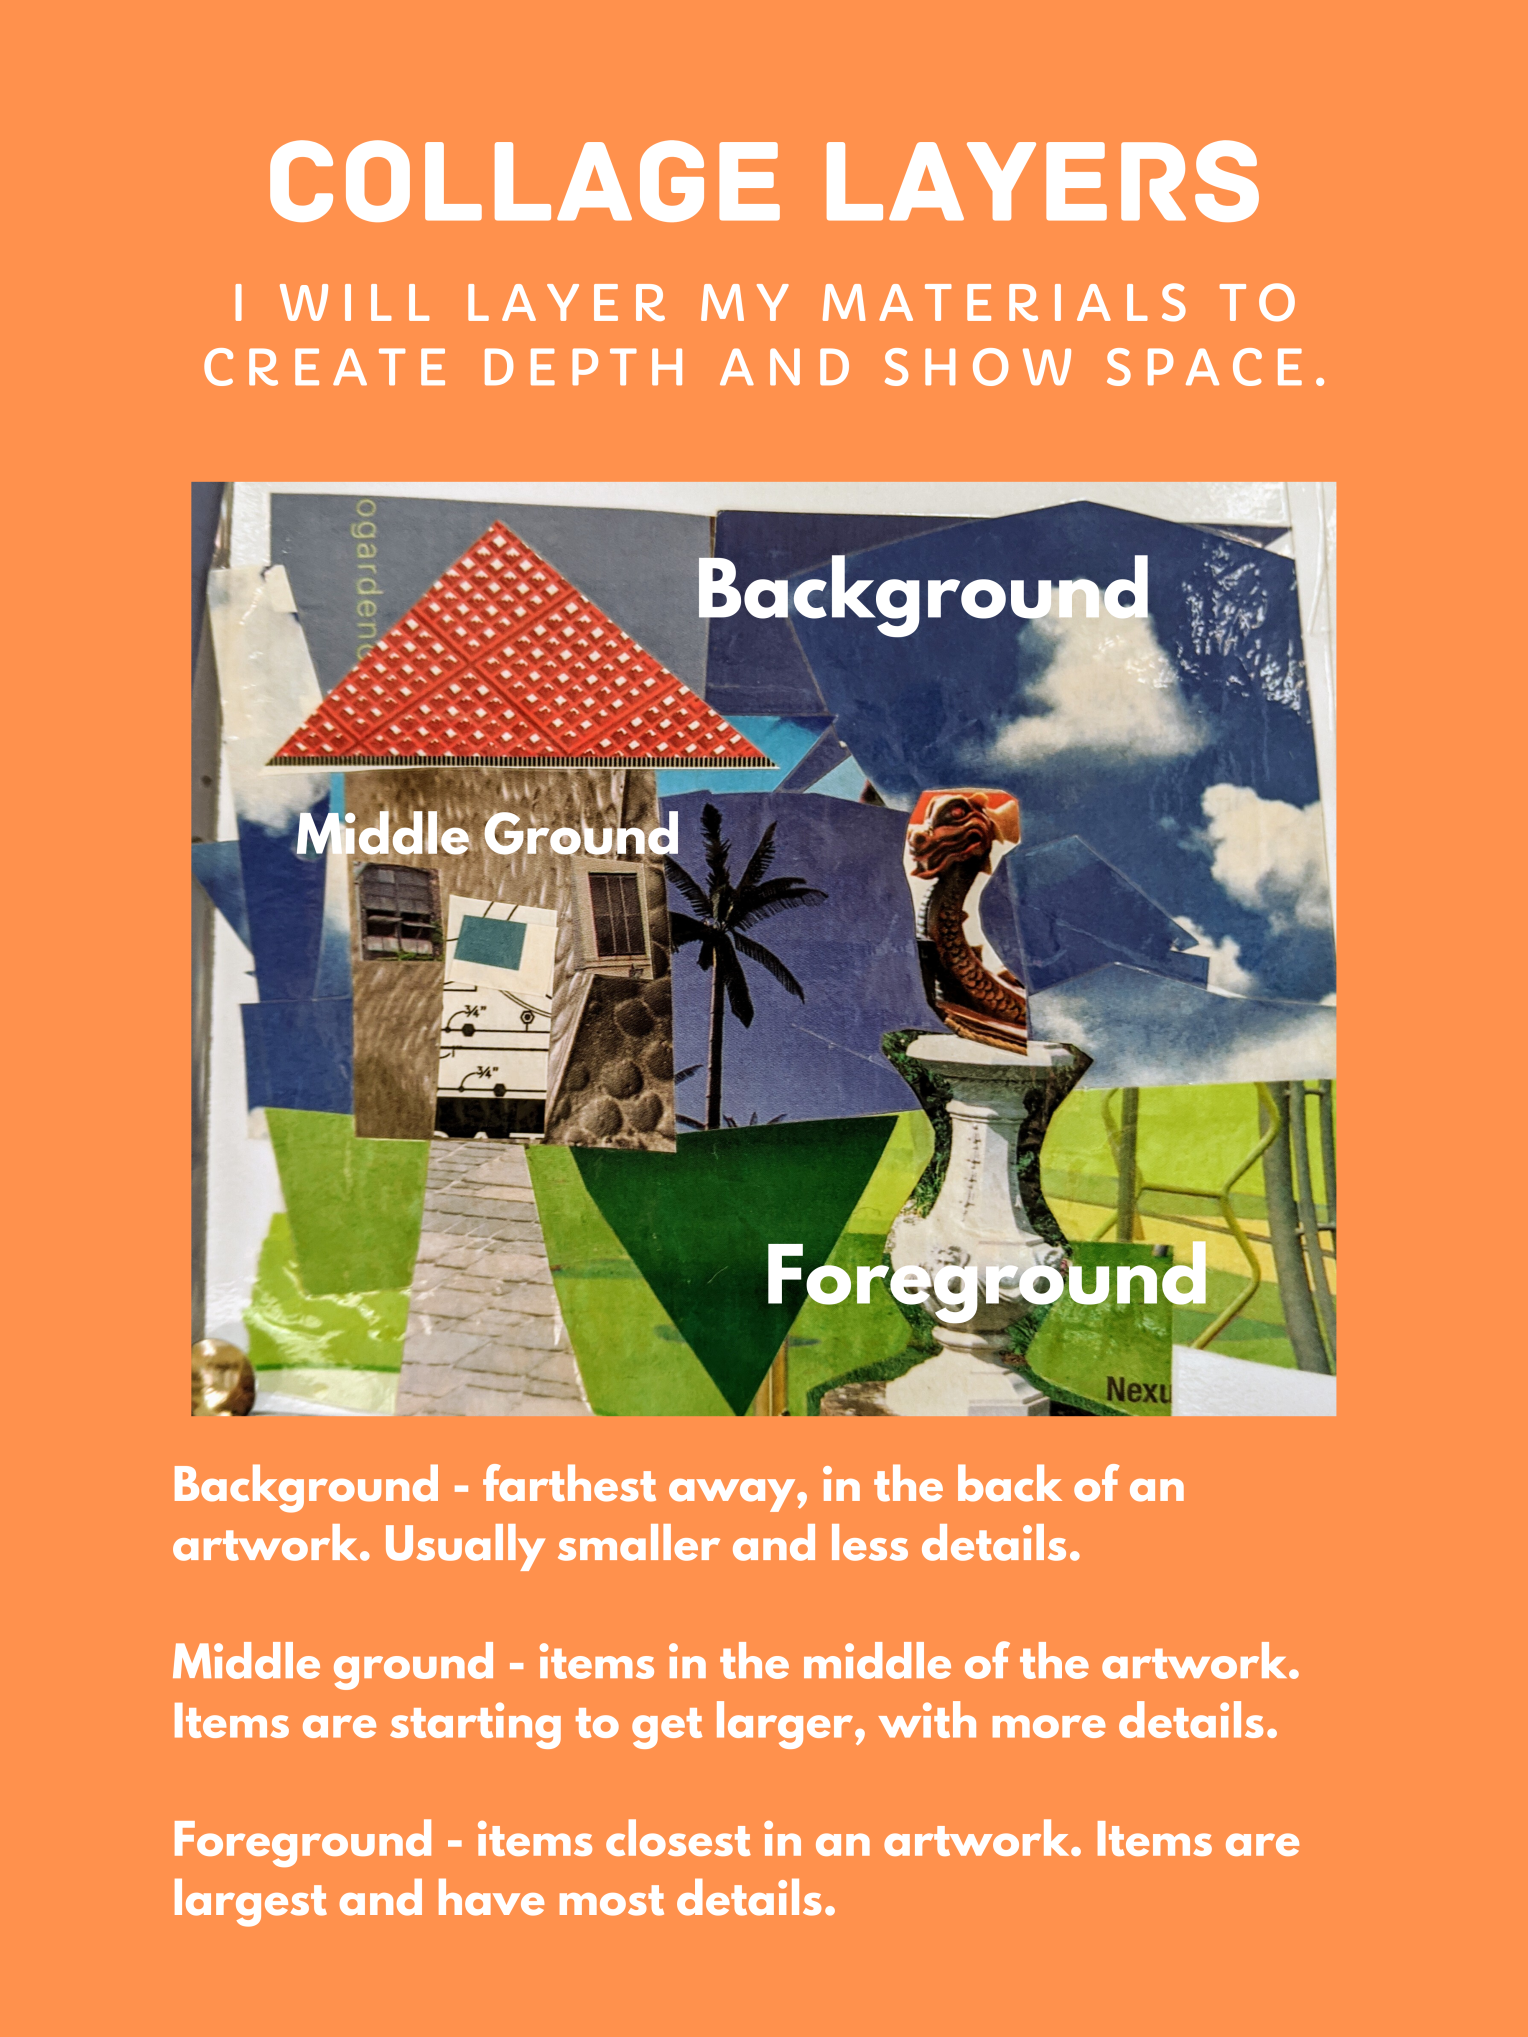
Collage is really all about layers. Helping students to see that there is potential in their stacking of shapes, objects, papers, and even with their layering of paint or drawing will help broaden students’ ideas of what a collage is.
My daughter made this collage with torn pages from an old book. She explored adding oil pastel, watercolor, and India ink.
Sometimes the sandwich or pizza analogy is helpful when planning for a collage. Students should ask themselves: What is my first layer? What is my next layer? What will be my top layer?
There are so many terrific different types of collage to explore. More coming soonish on: photo montage, dioramas, tissue paper collage, and torn paper collage.
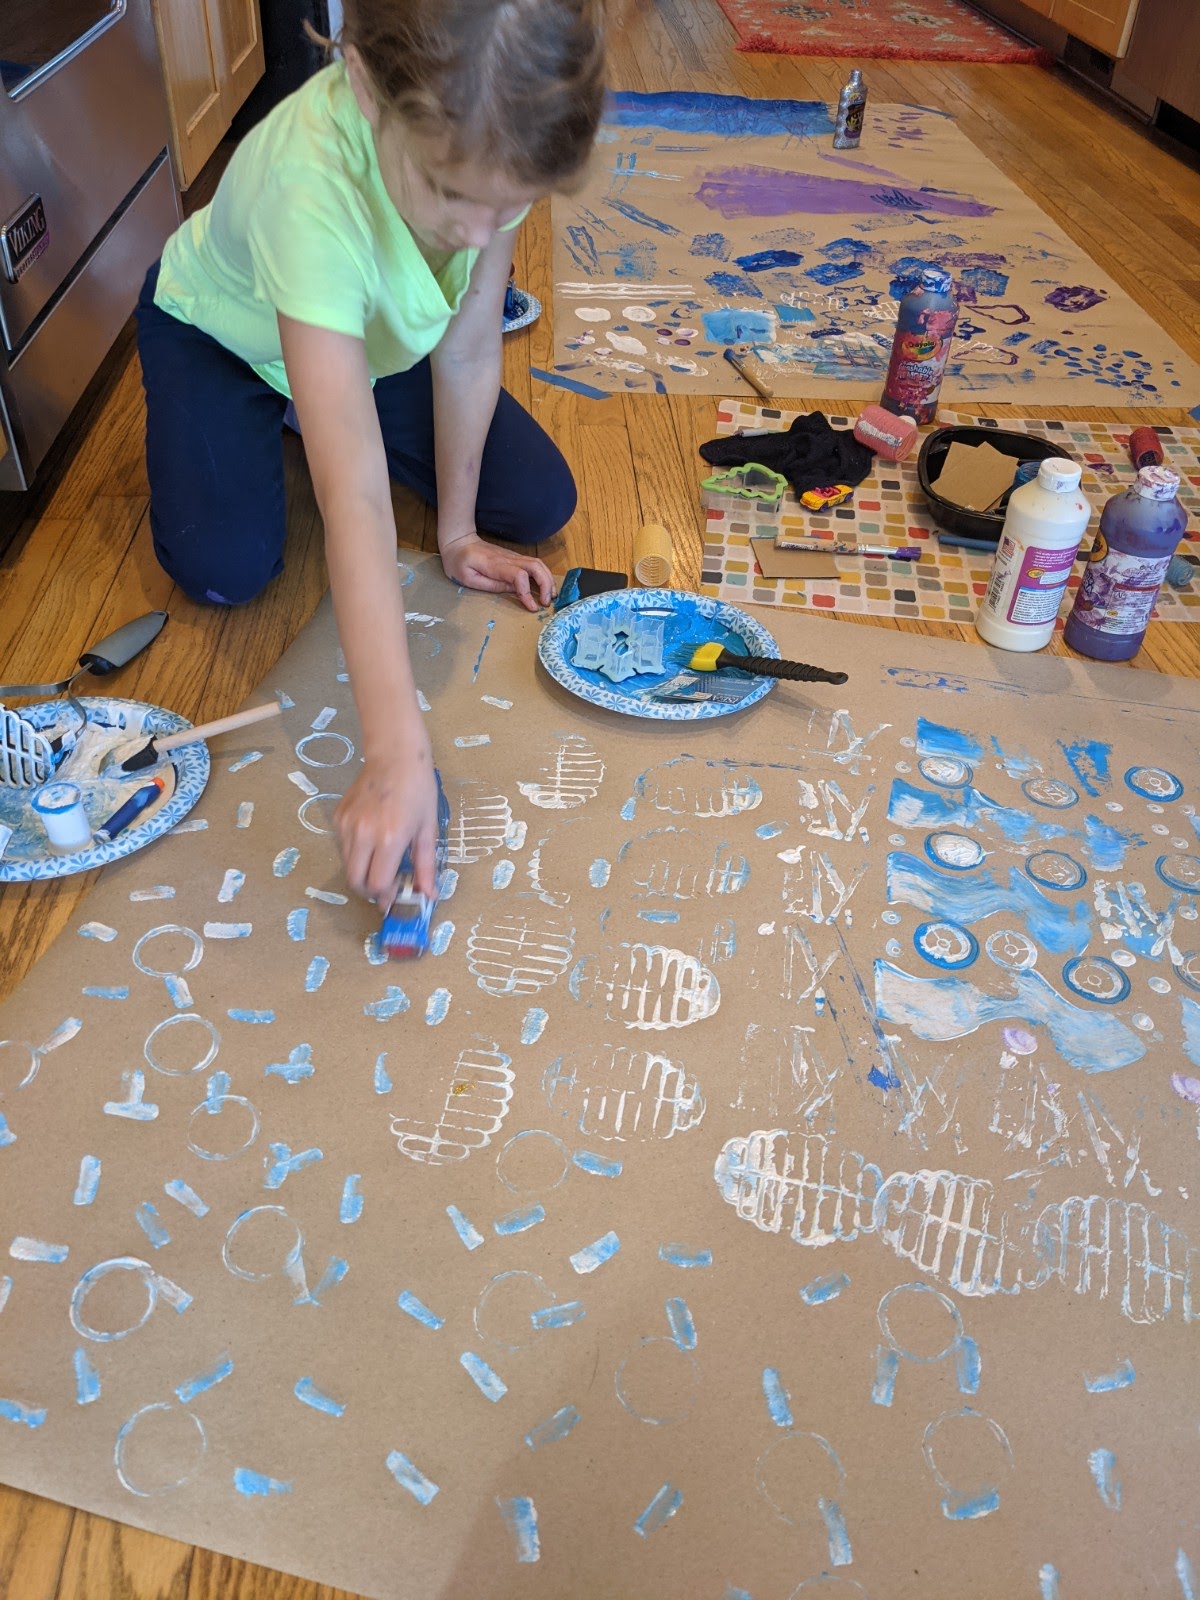
Object stamping is one of my favorite artistic processes to do with young artists. There is something so magical about scrounging around for everyday items and with a little paint transforming them into beautiful works of patterns, richly layered designs, and textured papers just waiting to be used or simply happy to be an artwork in itself.
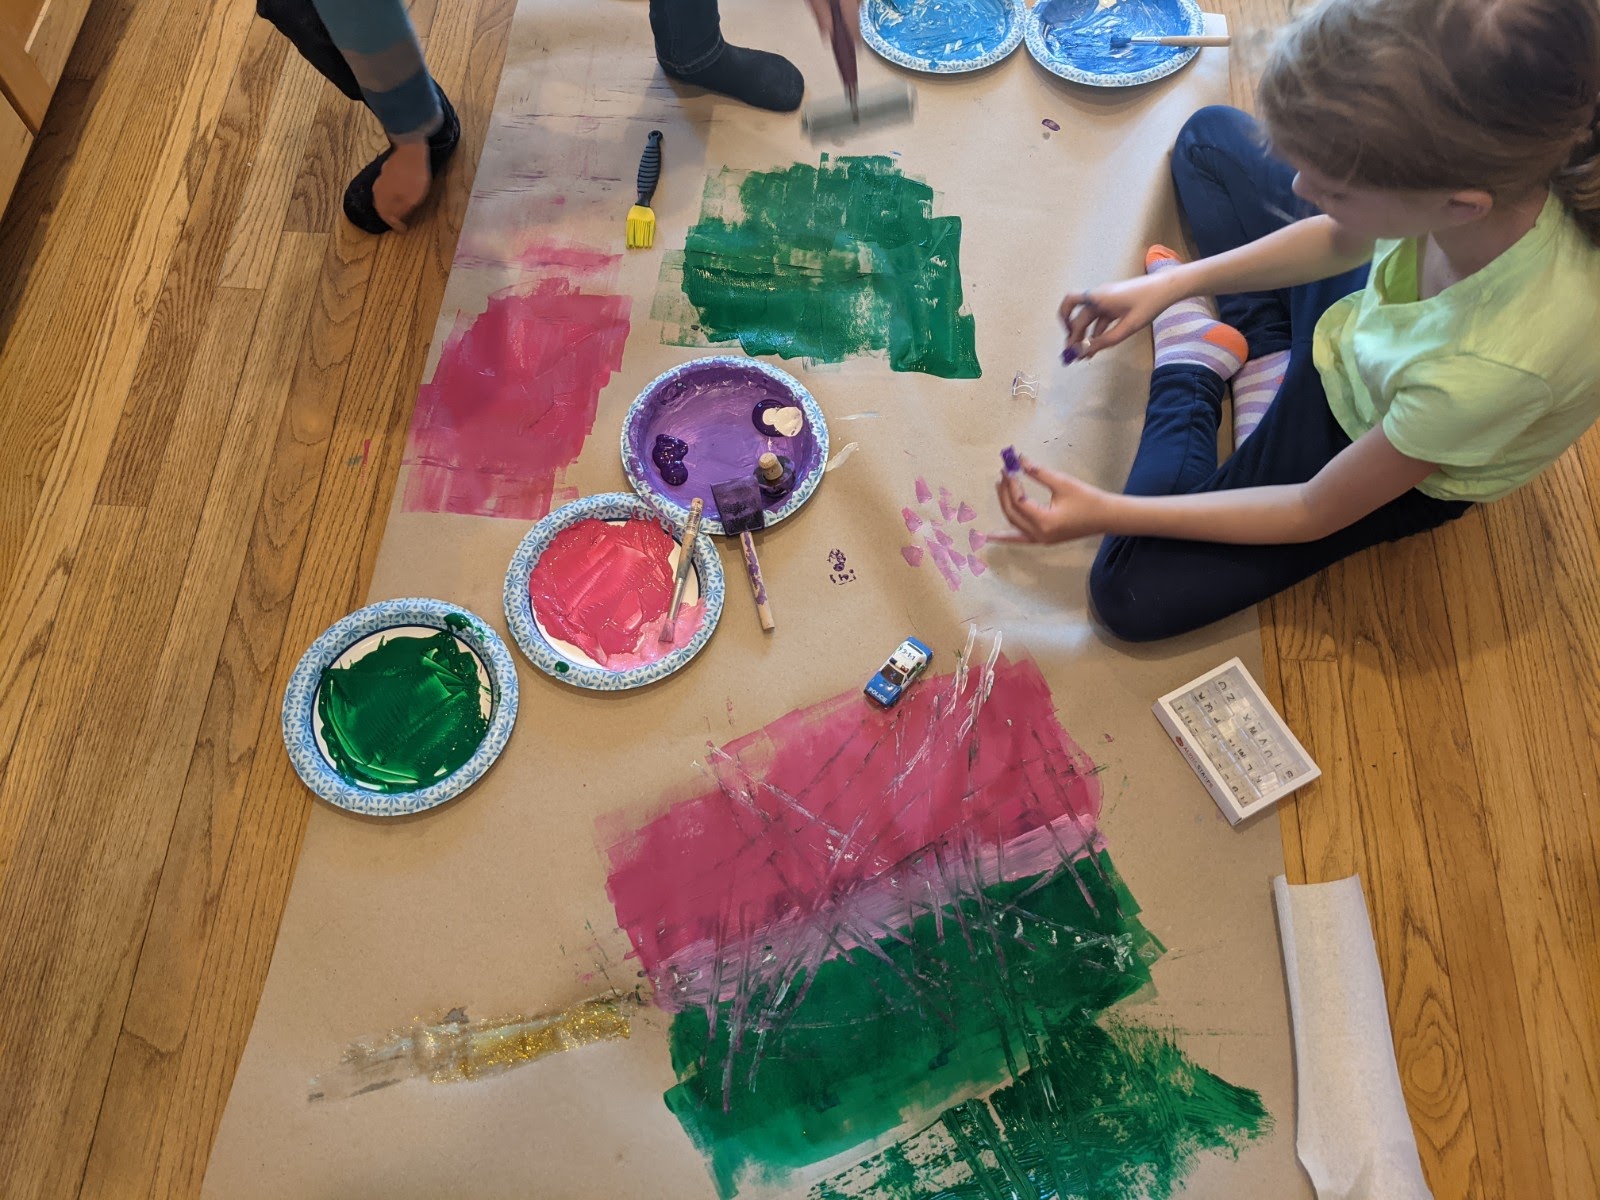
My daughter making stamped wrapping paper with a toy car, potato masher, cookie cutters, foam darts, cut cardboard, hair curlers, spools, foam brushes, gift cards, bubble wrap taped on a box, and silicone basting brushes.
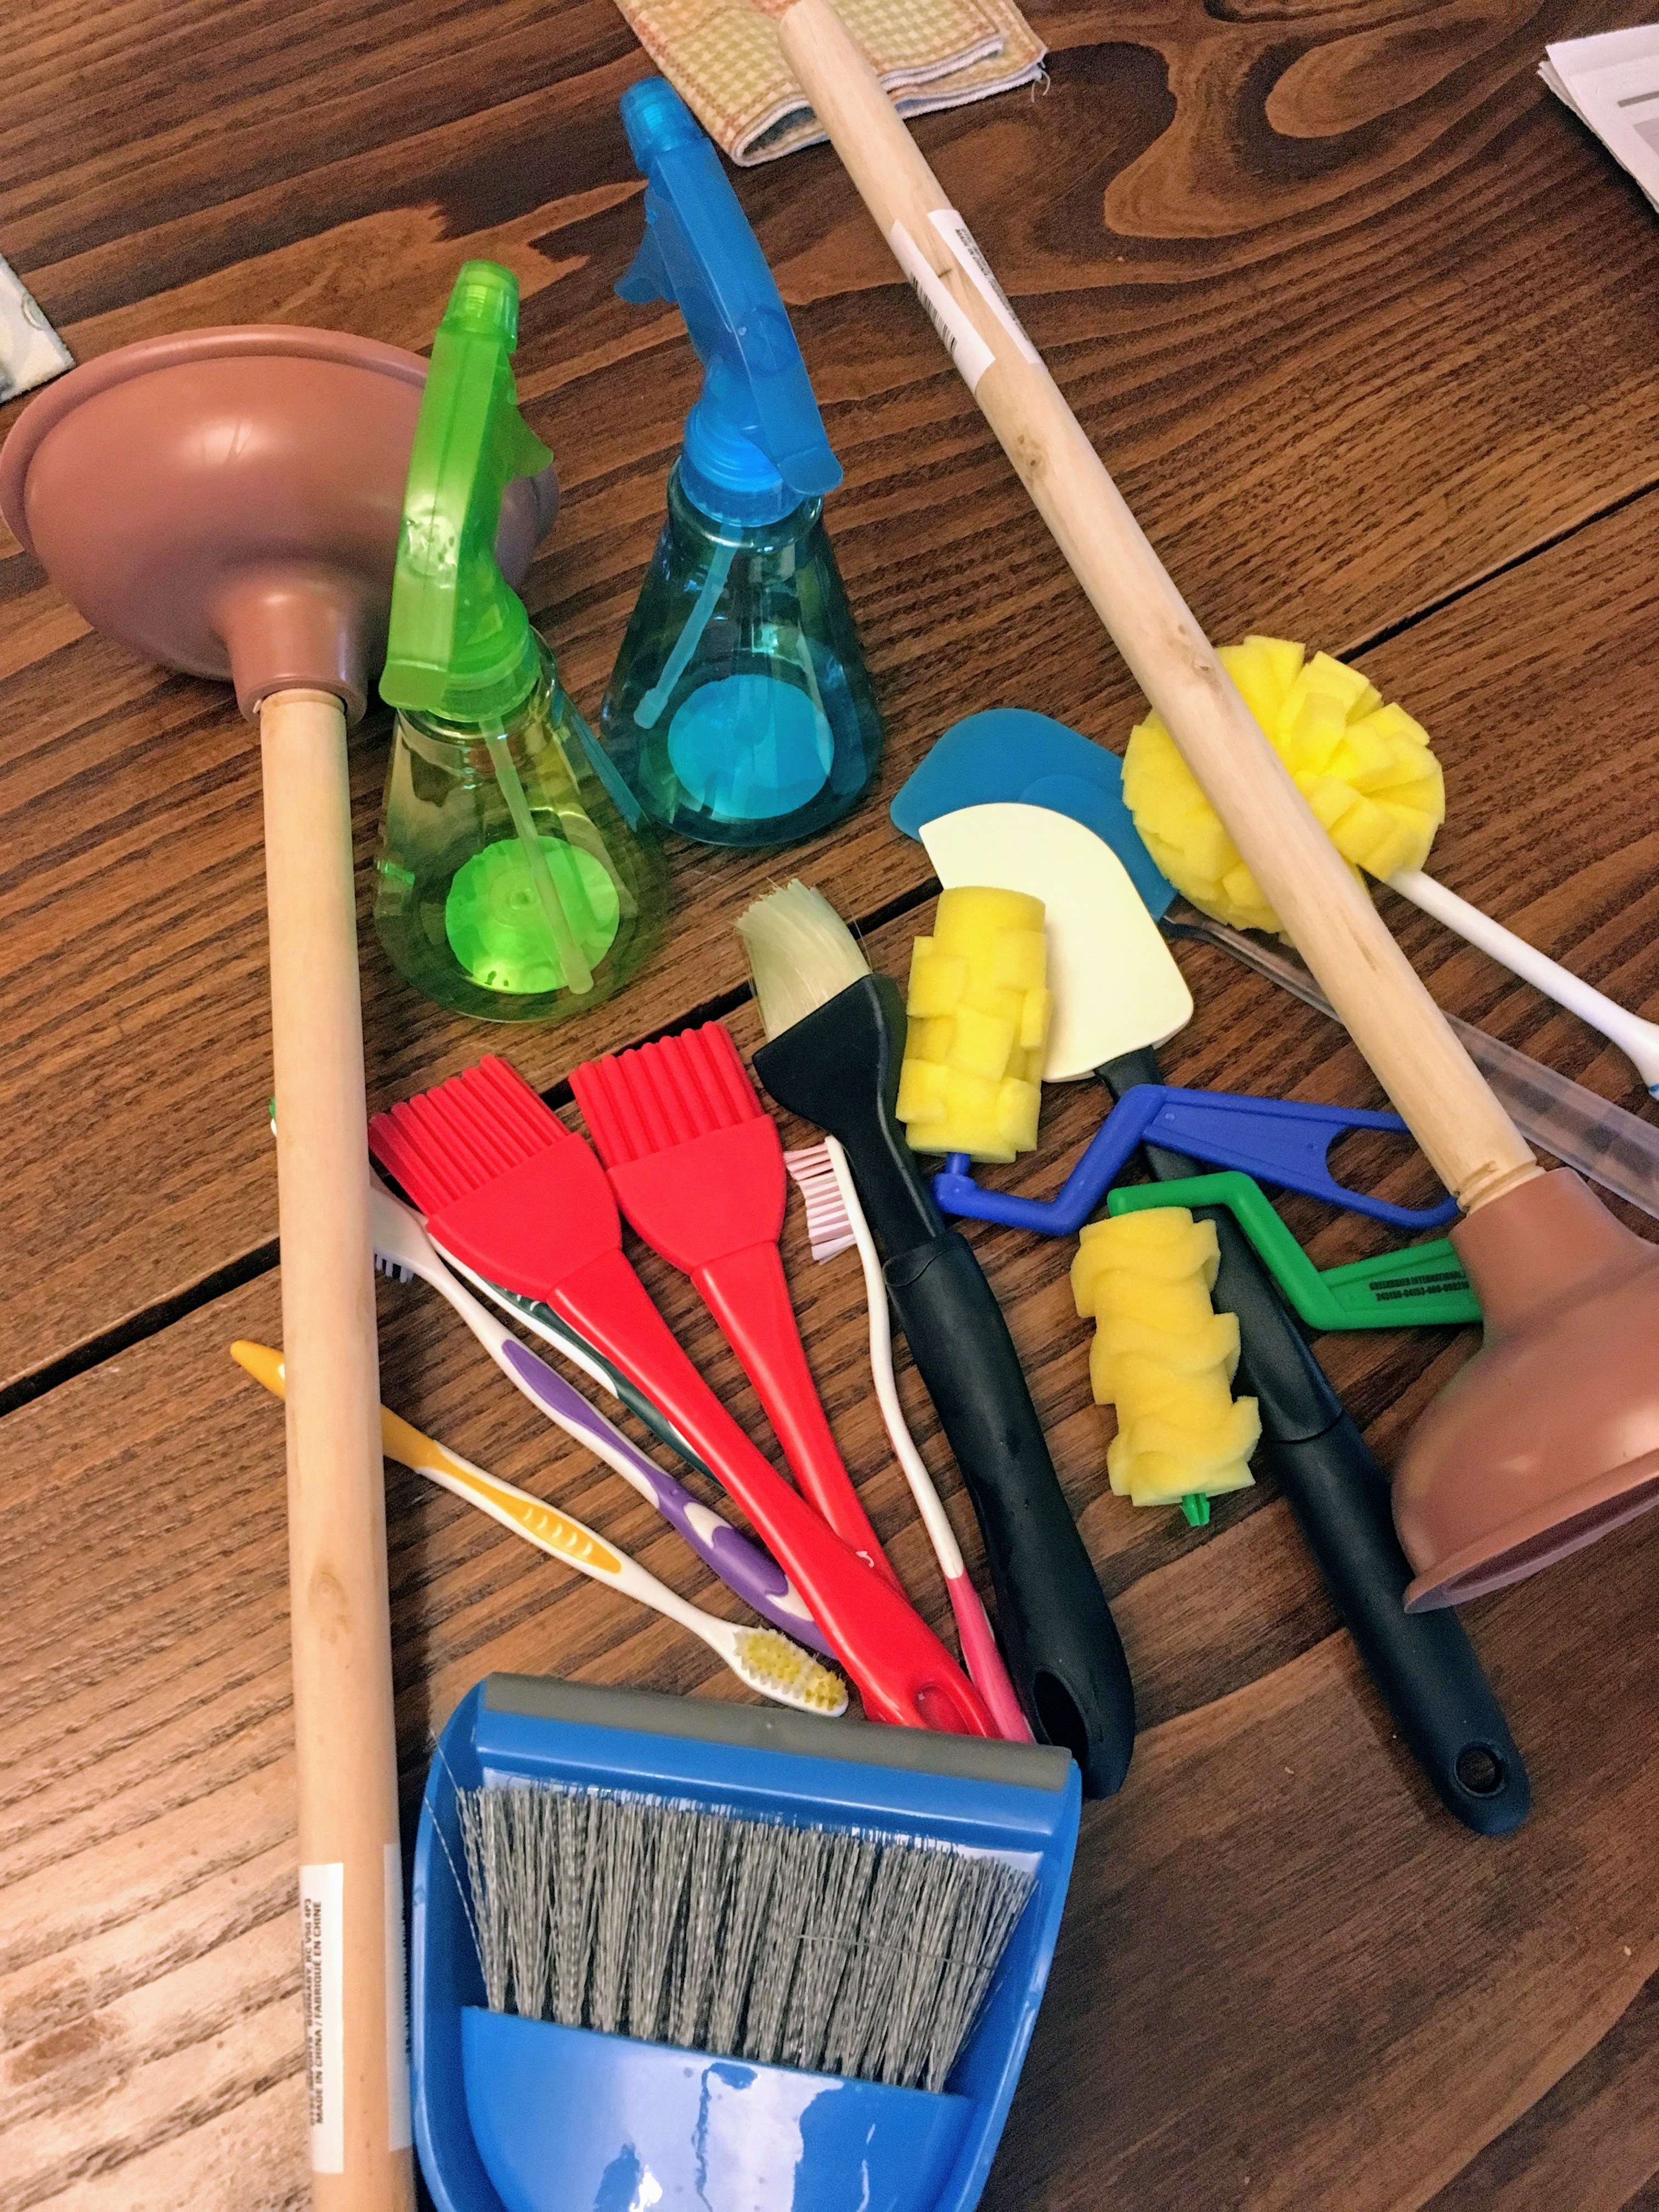
The beauty of this process is that you can use any object that you can dip, roll, or dab in paint. No fancy or expensive brushes needed – just raid the toy chest, junk drawer, or kitchen cabinets.
Some of my dollar store finds – toothbrushes, foam rollers, plungers, brooms, silicone basting brushes, spatulas, and spray bottles. Spray bottles can be filled with very watery paint for spraying effects. This can make a lovely snow texture.
When I do this process with students at school, we use the tables. At home, I just roll out paper on the floor and spread out supplies. Clean up is fairly quick – fill a large bowl with soapy water and soak the objects before washing, drape papers over tables and chairs until dry, and then a quick mop of the floors.
I always use liquid tempera paint – as it is more washable. If you want a glittery or iridescent effect – mix glitter in with glue or paint. Metallic liquid tempera paints are always a great option too. I prefer Dick Blick tempera paint or Crayola washable. Tip: I always buy the smaller sizes for home, because once you open the paint, they will start to smell. Smaller sizes get used up more quickly. Do not put extra paint back into the bottles, as this will speed up the smelliness.
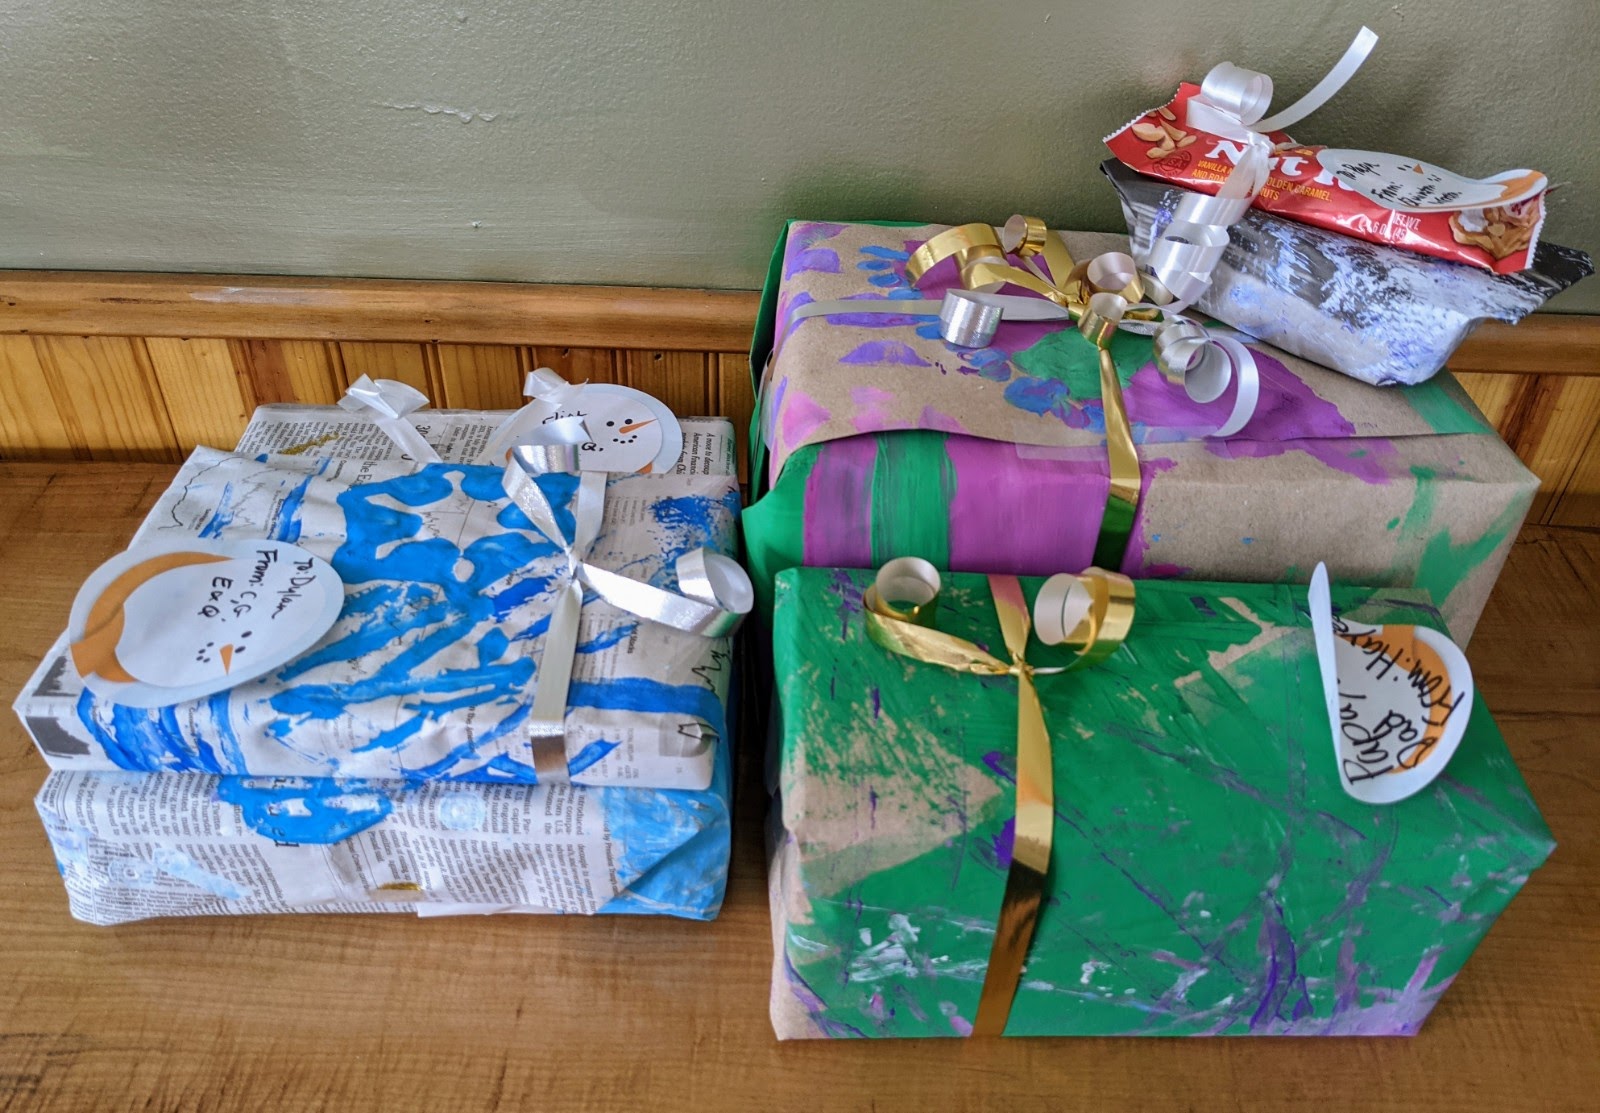
This year’s wrapping paper was made from newspaper sheets and butcher paper. I used winter sticky notes for gift tags and am in the process of using up my plastic ribbon. When it’s gone I plan to go with more eco-friendly choices.
A few of the stamped wrapping paper gifts.
Check out a few more ideas and see the process below:
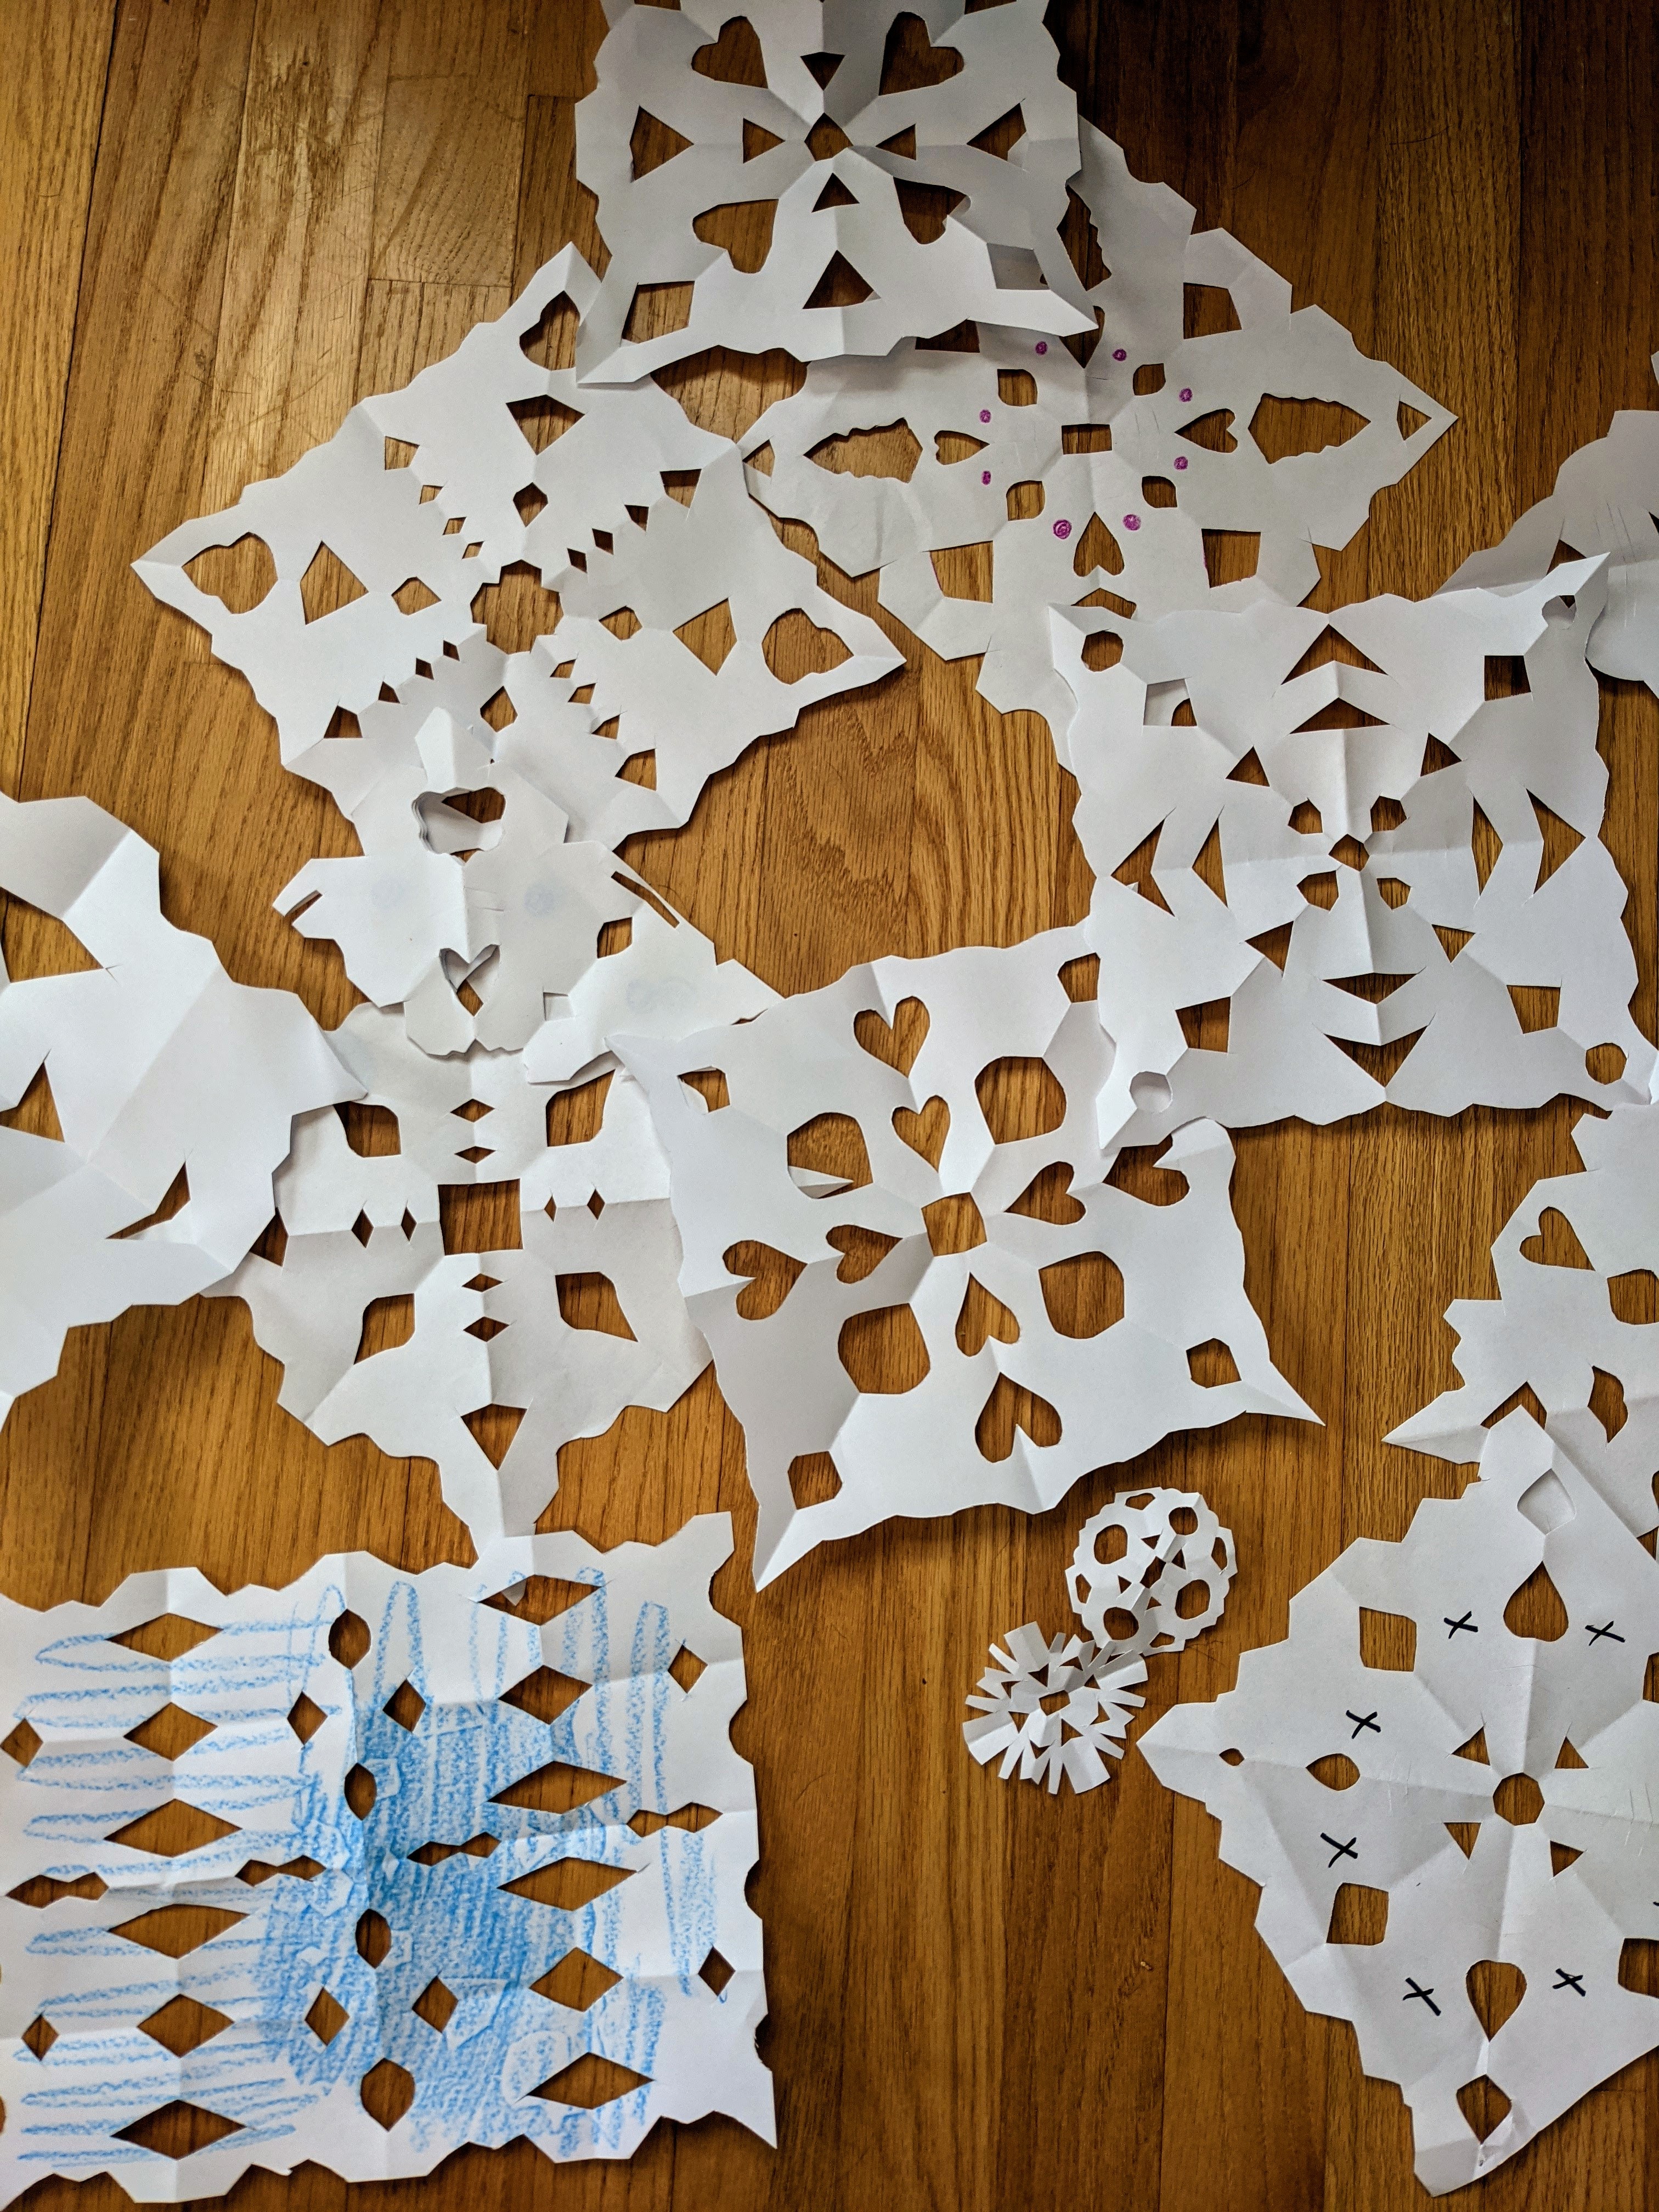
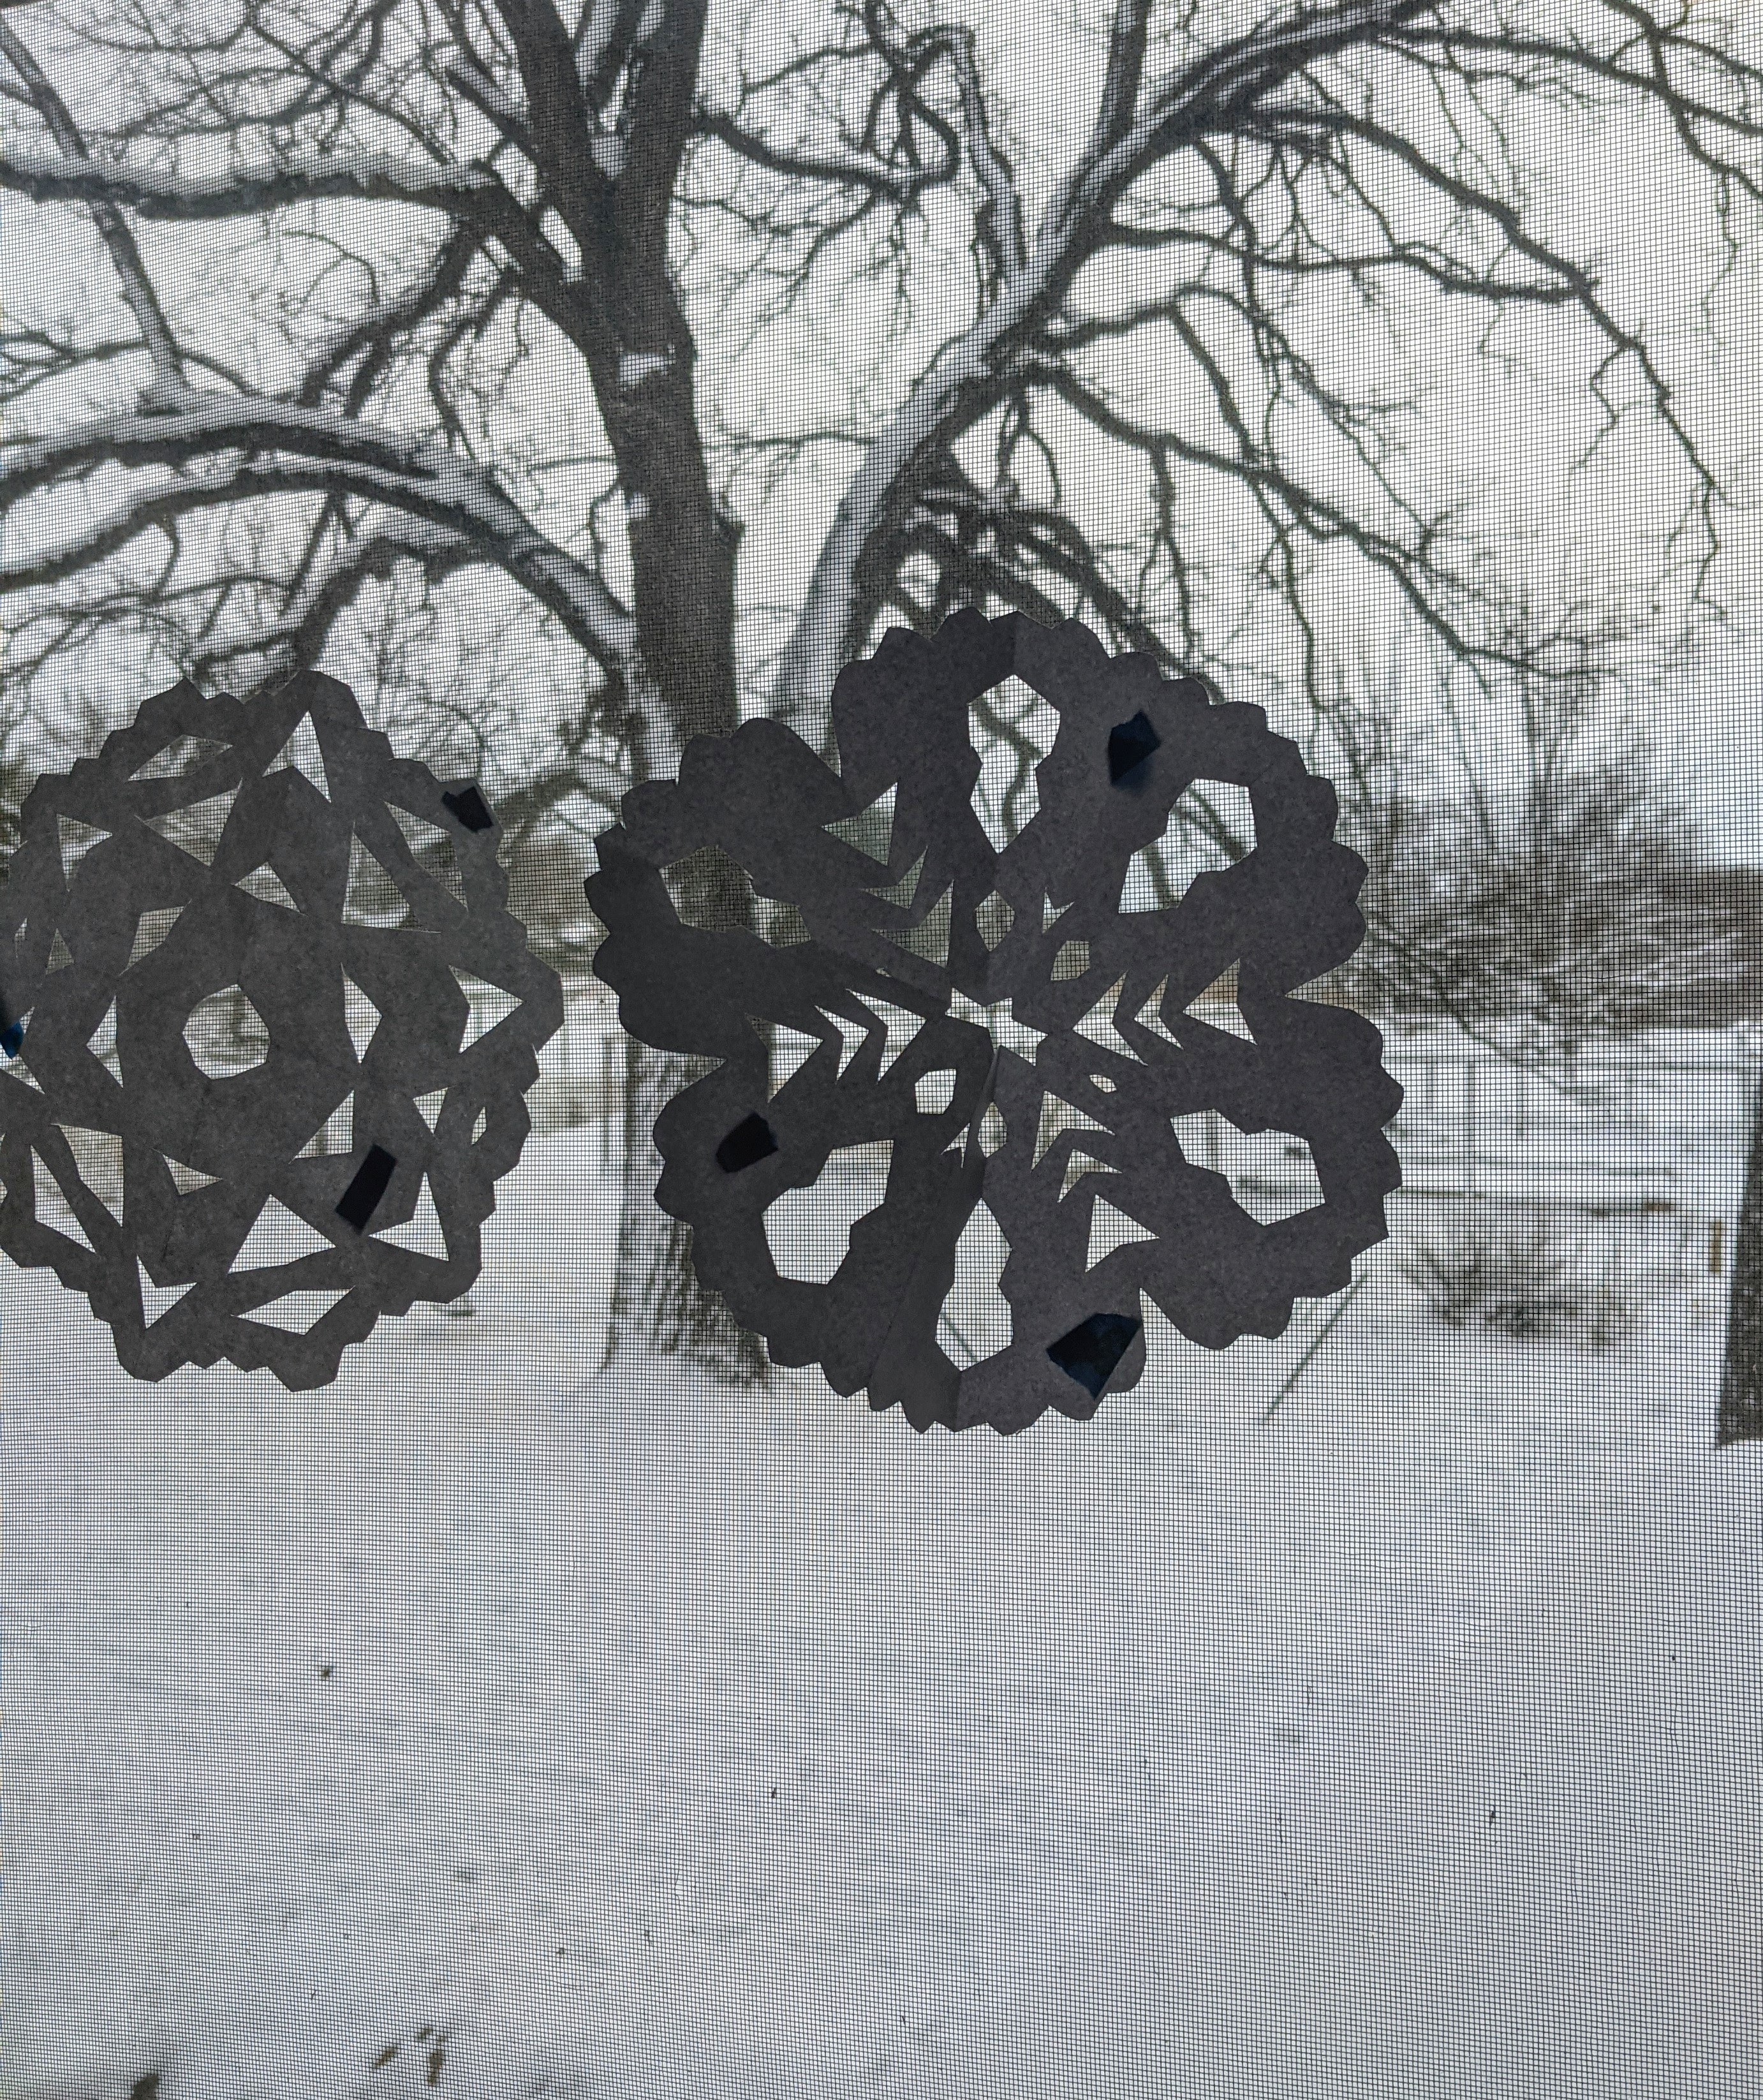
This week has been the week of paper snowflake demos for many of my virtual art classes. There are papers, scraps, and snowflakes in all stages of completion all over my bedroom, which has been taken over as my remote teaching space.
I love the unexpected element of a paper snowflake, as I tend to go in with no preconceived plan. There are some amazingly complicated paper snowflakes to be found on the web. Search for them and be prepared to be awed.
What to do with your paper snowflakes? Hang them up, make them into cards, color on them, draw on them, make them into texture rubbings, make them into masks. I always like the simple silhouette of a paper snowflake on a window.
Outside my snowflake adorned window, there is plenty of real snow beckoning me to go and play. The kids and I are done soon and headed outside. The gray sky and cold temperatures won’t keep us away!
Check out the how-to videos below! The second video are the steps I use for my younger students – think Pre-K through 1st or 2nd grade. The second video has some ideas on some possible next steps for paper snowflakes, including the texture rubbing.
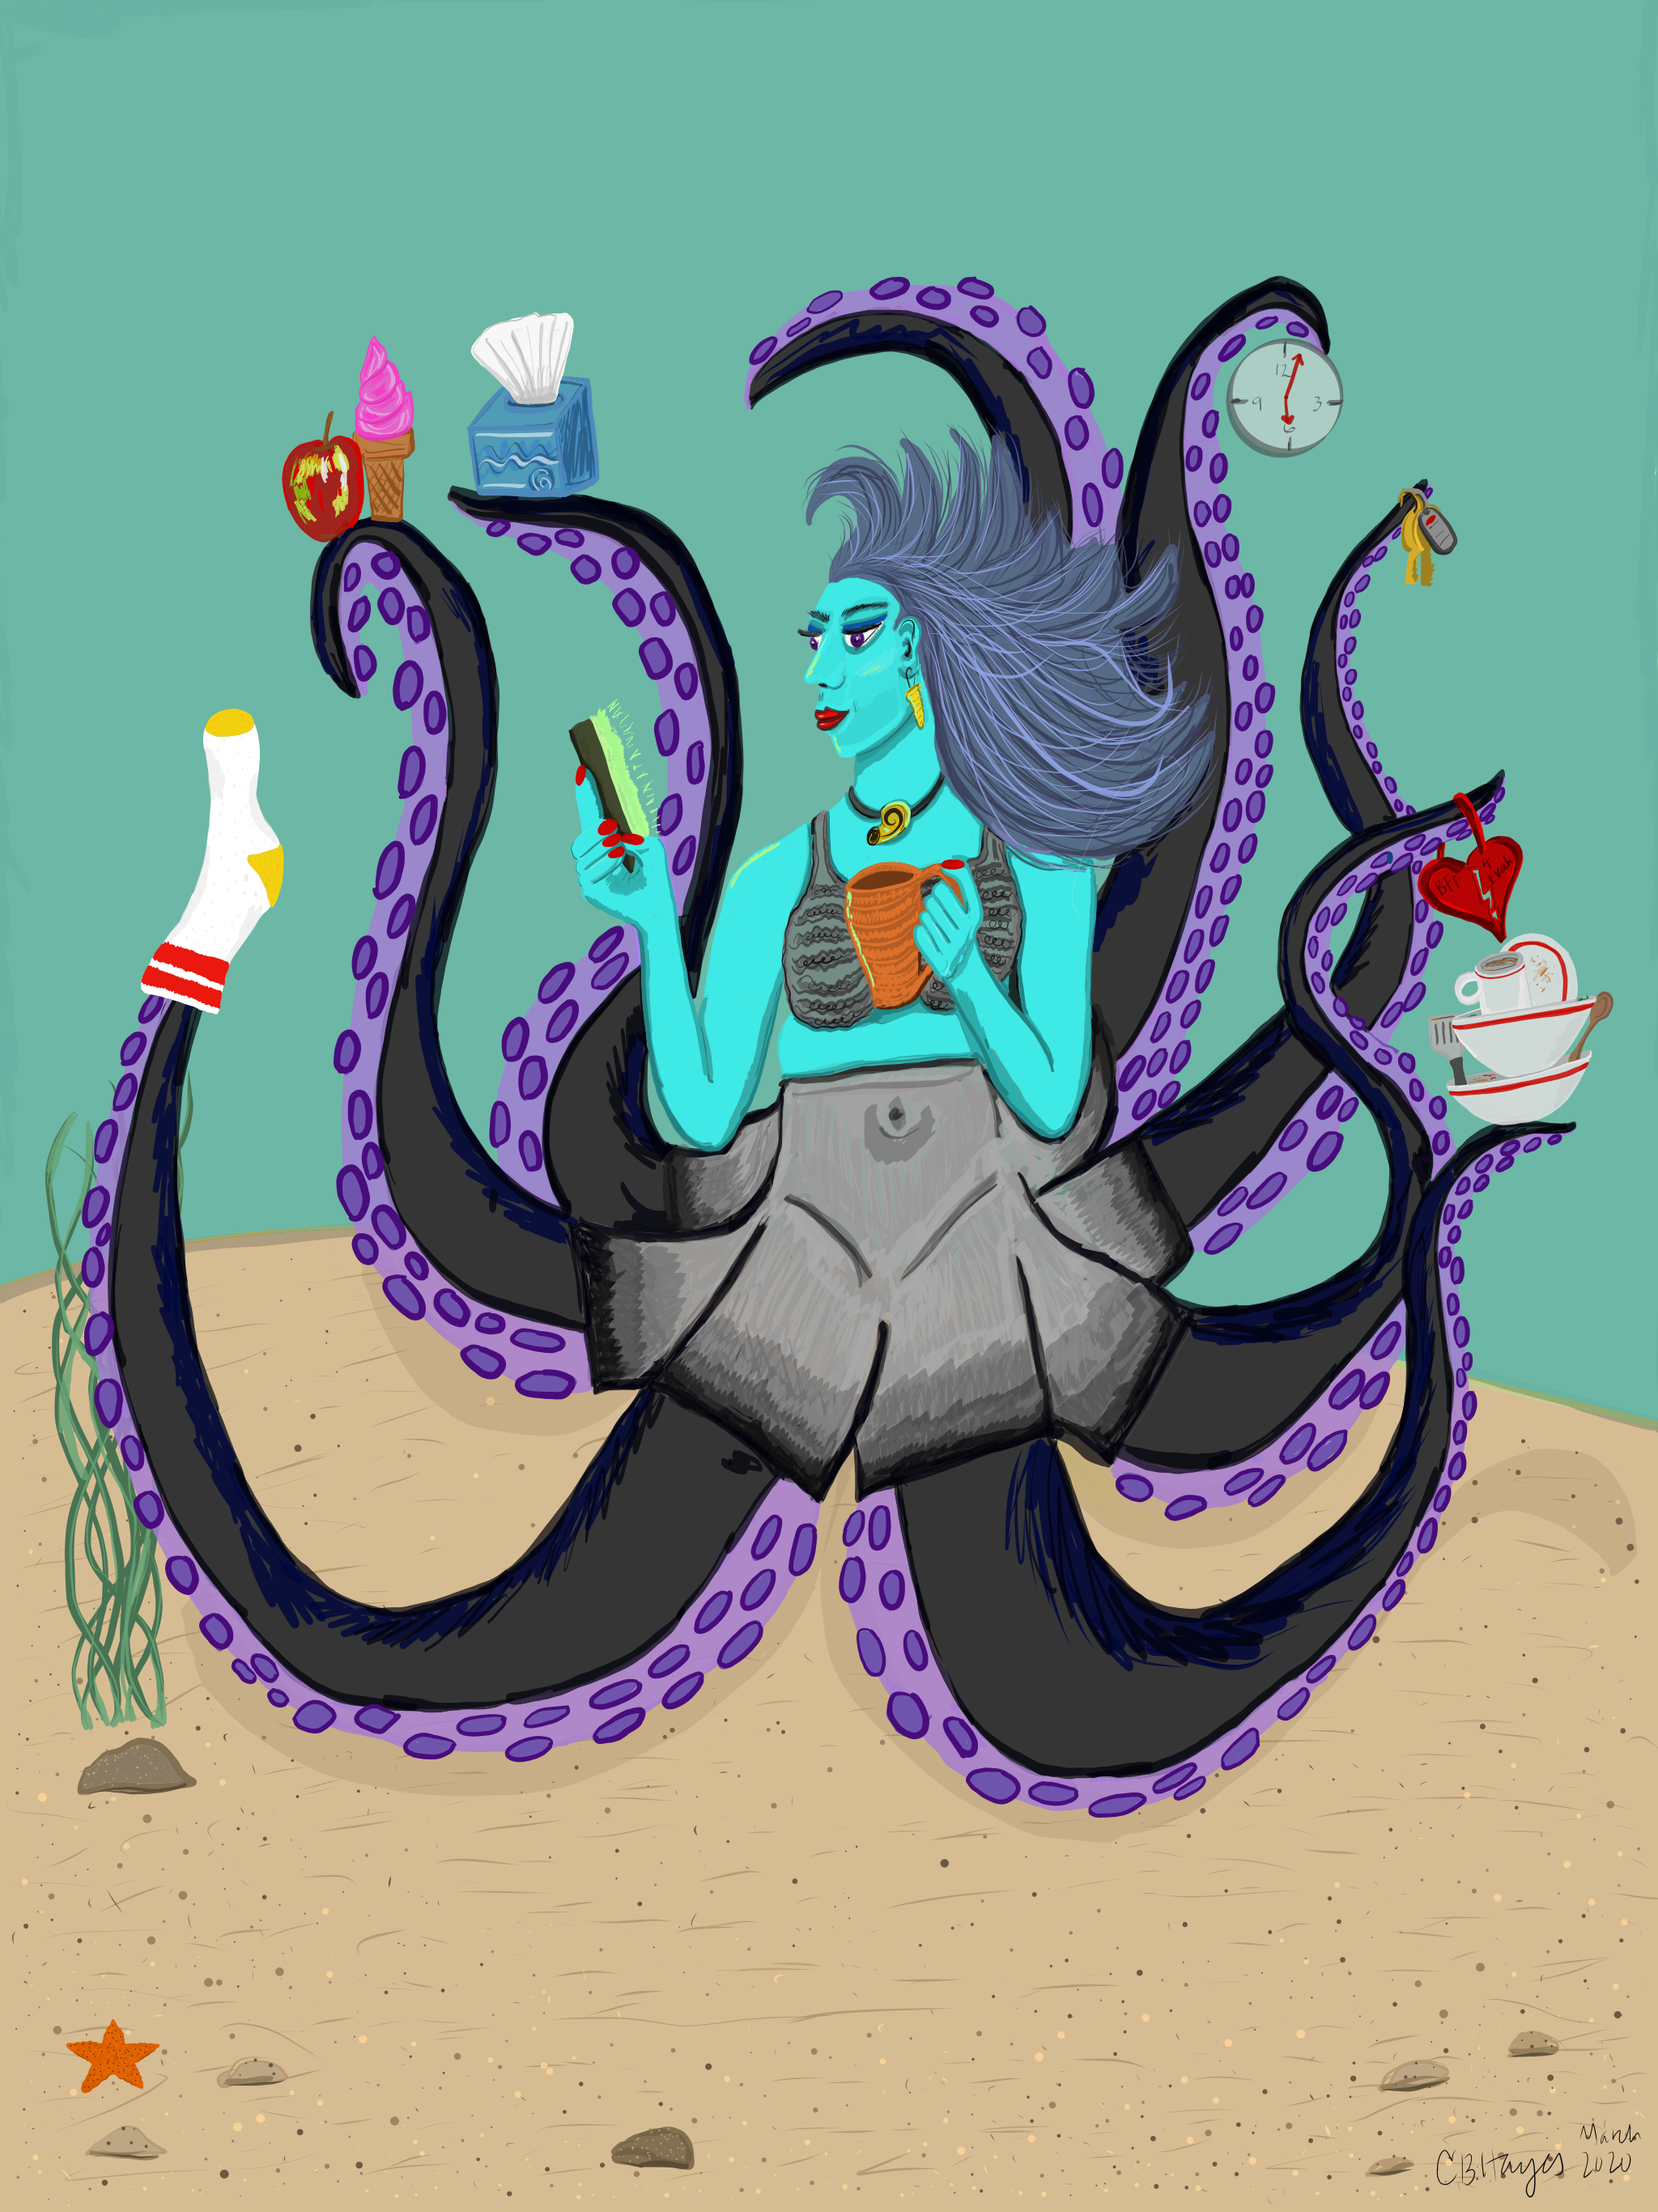
I finally completed this artwork that has been over a year in the making. The initial idea came from my daughter asking me, “Mom, don’t you sometimes wish you had eight arms?”
Yes, yes, I do sometimes wish that. This concept of me having eight arms further evolved into Mother Ursula due to my childhood love of The Little Mermaid. However, Ursula is seen here balancing the challenges and pressures of modern motherhood.
For my first sustained, detailed digital illustration, I am pleased. More of this media to come.
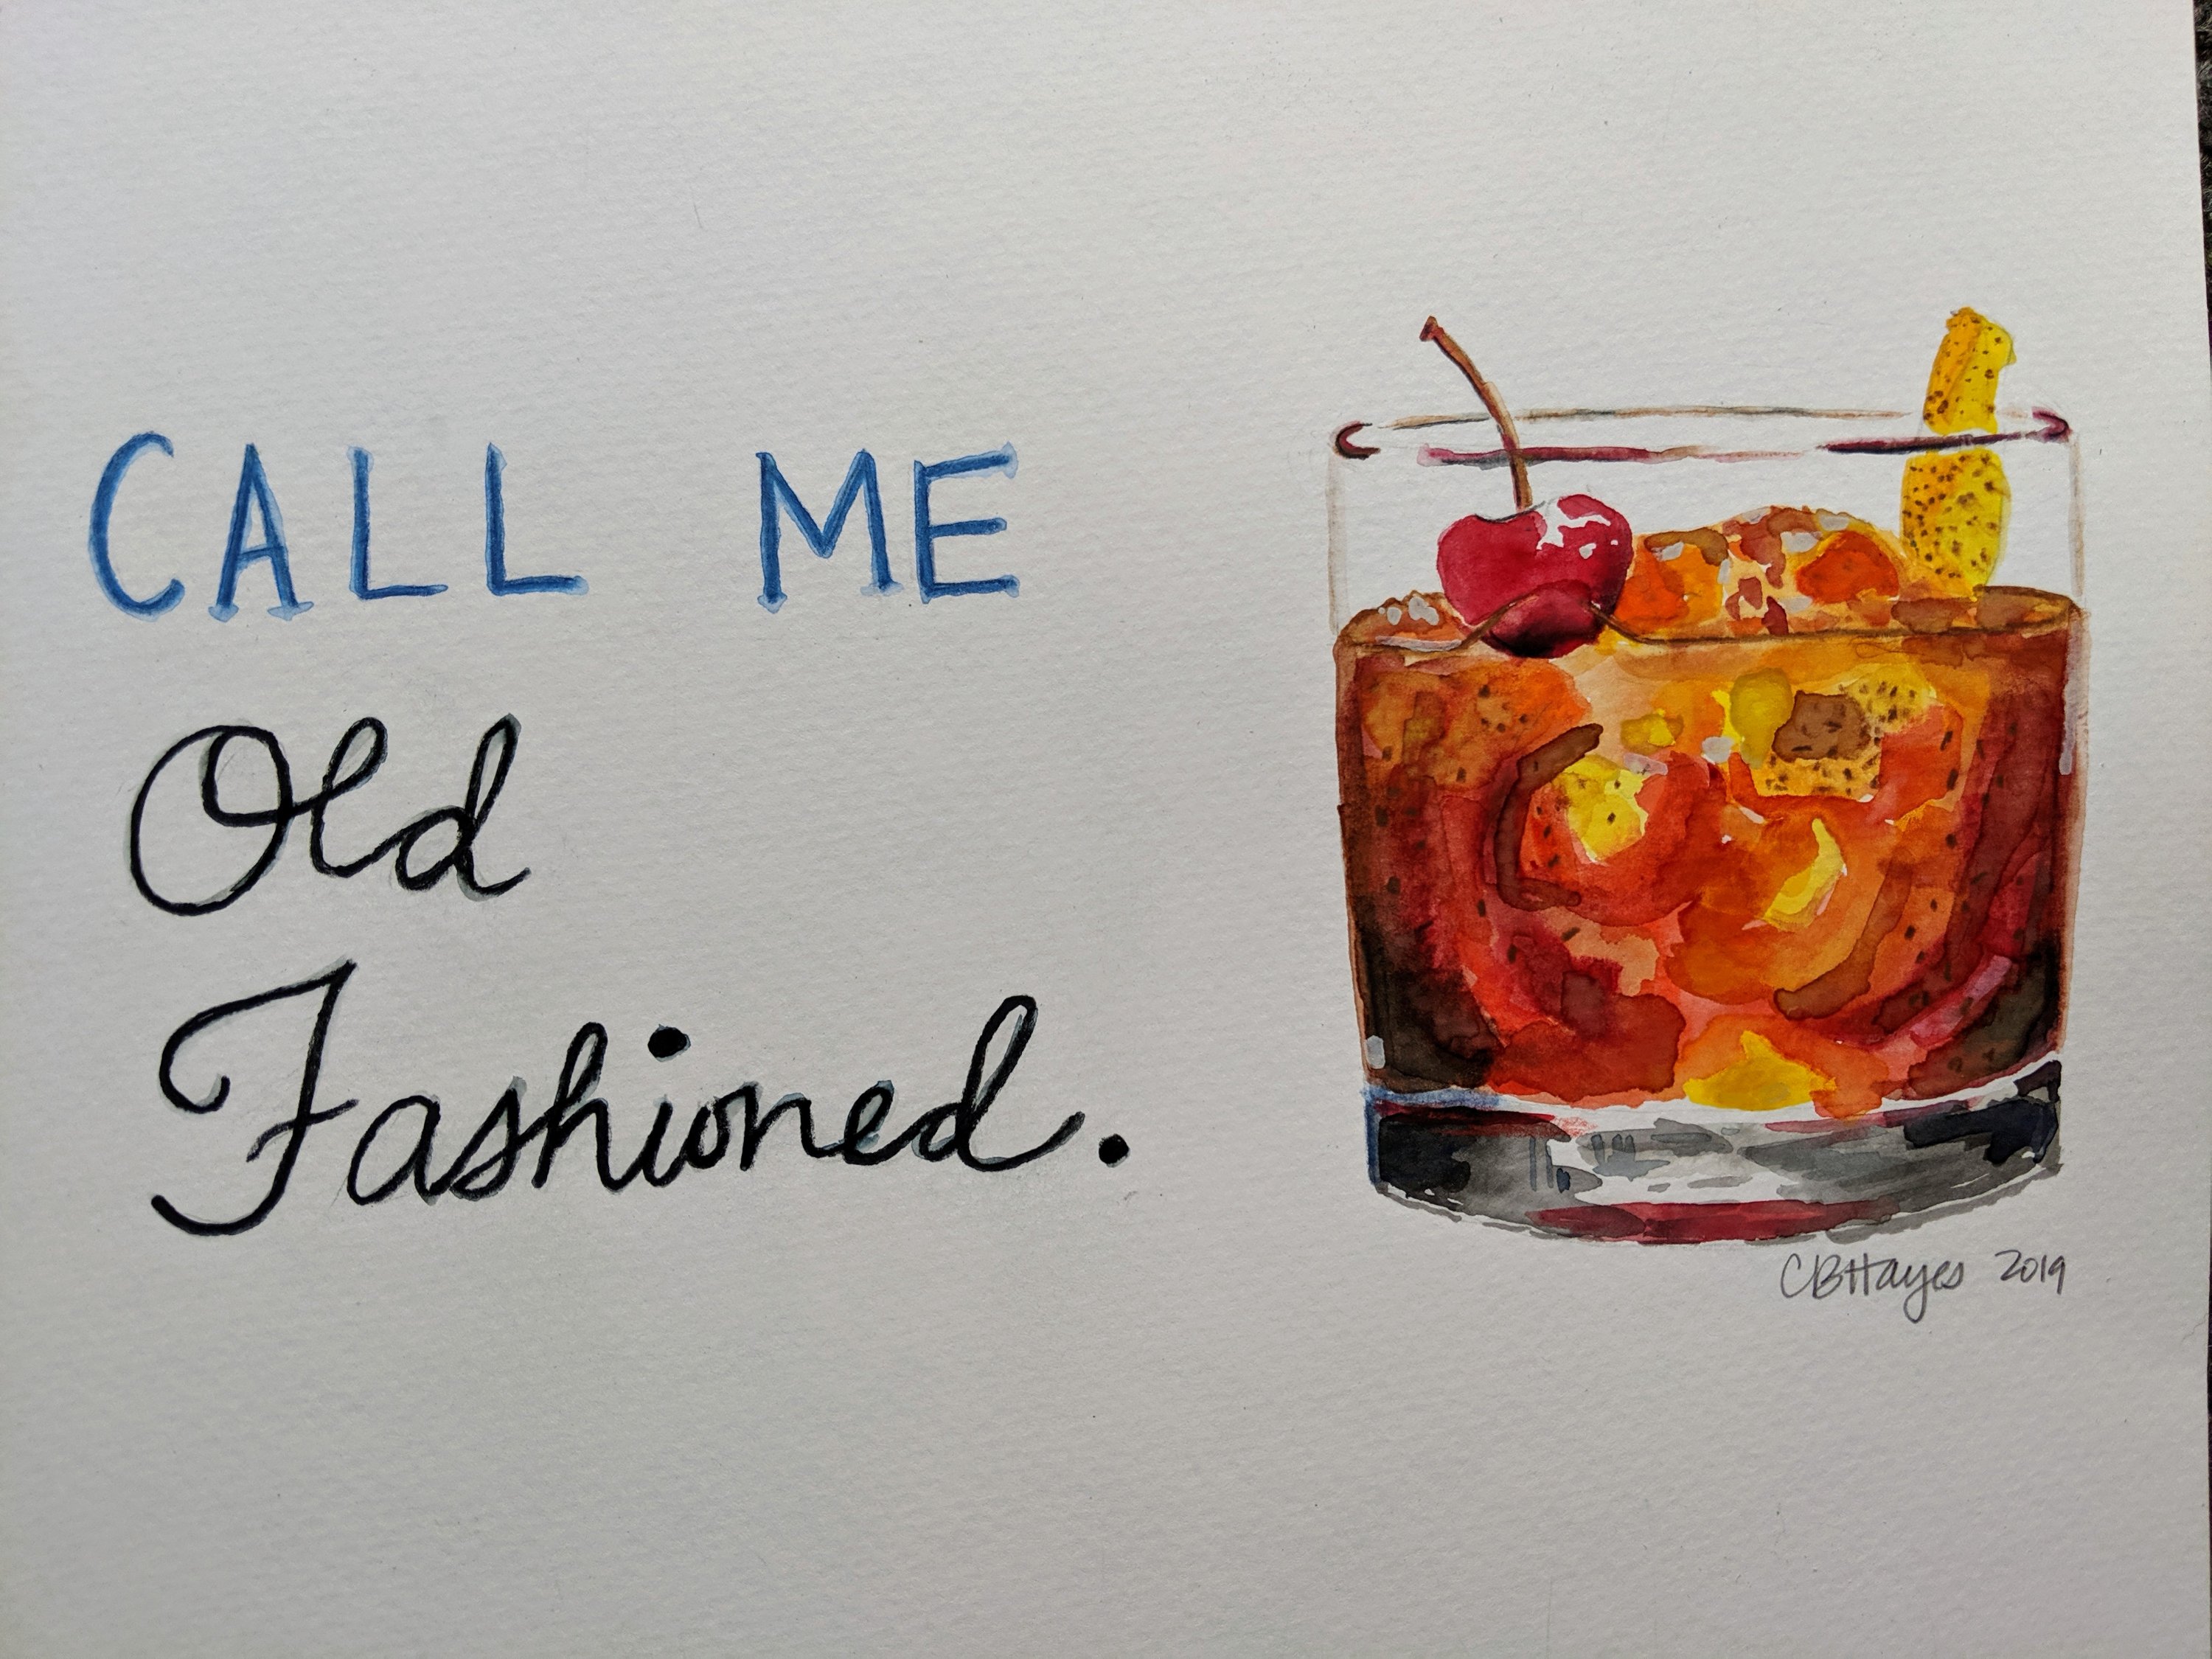
Just before my sister’s birthday, I always troll her Pinterest page looking for artful ideas for her, and several times old fashioned drinks popped up. This was perfect since we both share a love for all bourbon based drinks.
I’d like to change up the blue lettering and do something else – I just don’t love how that turned out.
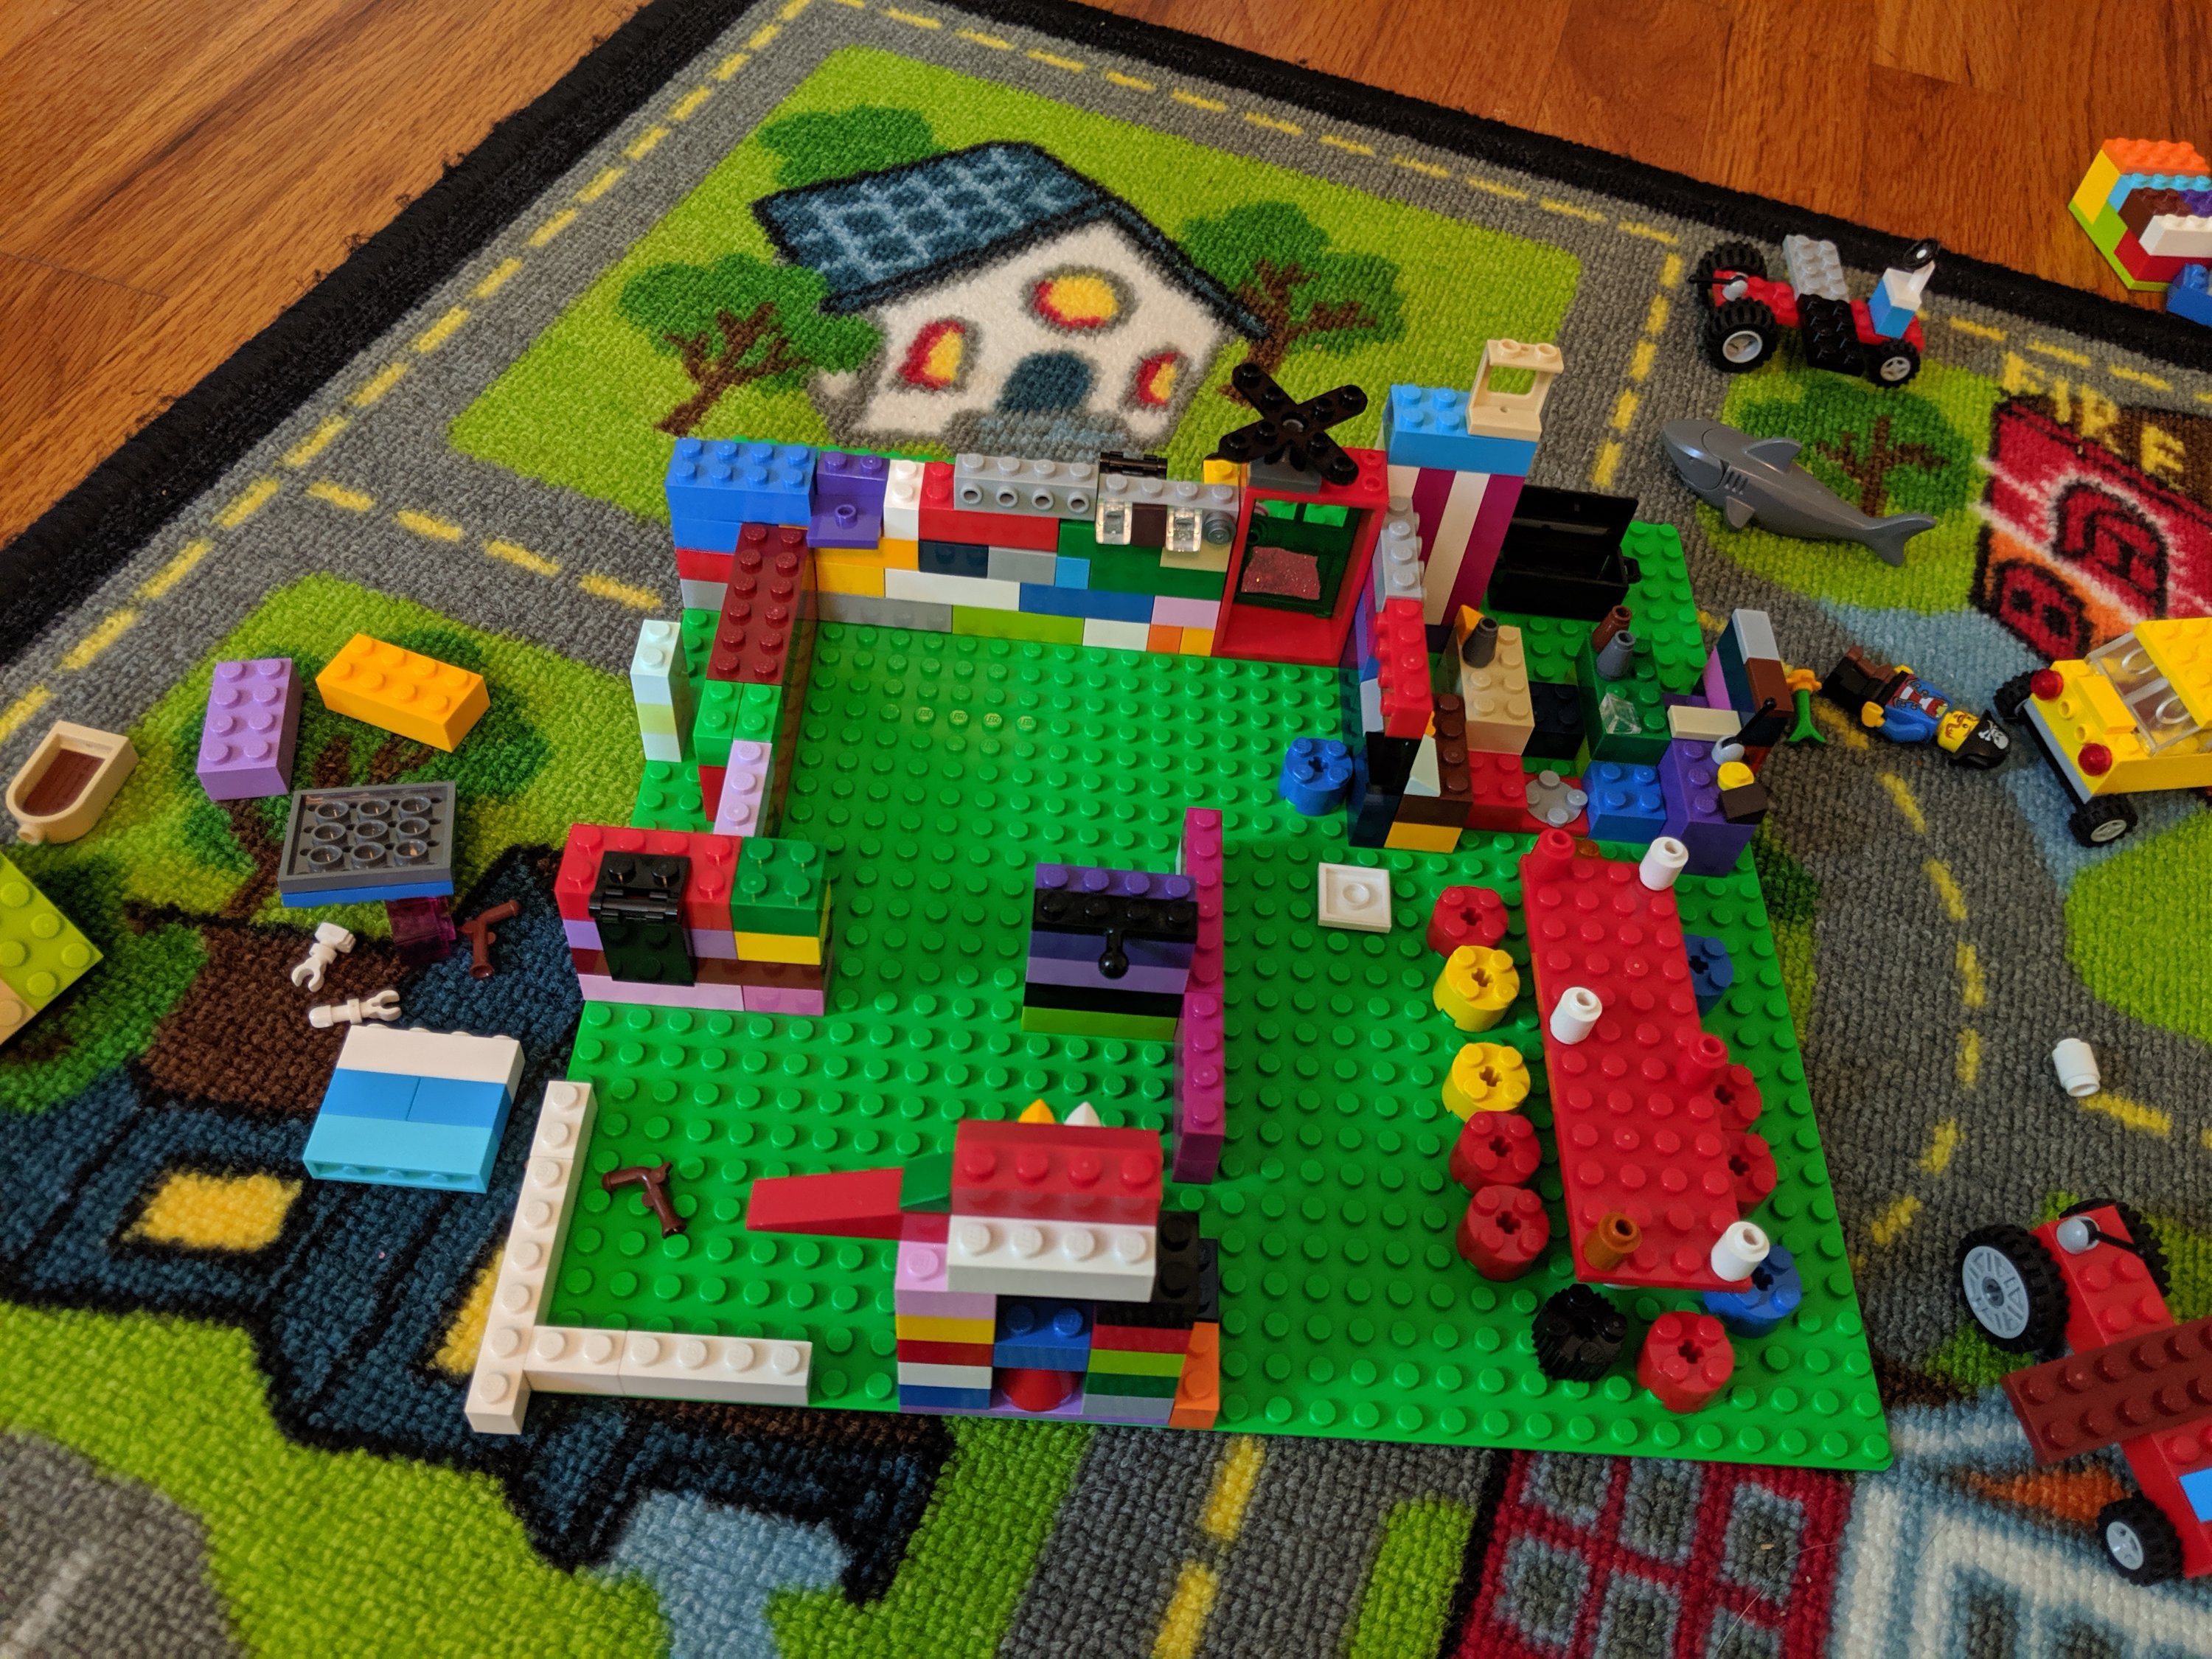
Elaborate Lego imaginative play made by my daughter.
I have been reading a fascinating book called, How Children Make Art: Lessons in Creativity from Home to School by George Szekely. There is a fascinating section in the book about pre-service teachers making home visits to document and discuss their students’ collections in their bedrooms, as a way to help future teachers balance the study of adult and child art.
The author points out that all young children start off as artists and collectors, and that their bedrooms are the home to rich and varied, yet carefully curated collections. The author argues that children lose this passion and love of art when they come to school and find no connections between their home art and school art. So, as art educators, what do we do to encourage the connections? How do we as adults honor their playful and un-adult eye for design?
I started by looking at my own two children’s rooms for ideas on what I can do to encourage their collections.
Objects from my childhood treasures.
This book has been a timely read, as I recently helped to take apart a childhood collection site of my own – a glass case shelf where many priceless treasures were stored. I did not photograph this lovingly curated shelf, before taking it apart. Items had been in certain locations for so long that I can still close my eyes and see the arrangements.
My children sat with me, in absolute amazement, picking up each object one by one, treating each thing as sacred and precious. They asked question after question, cataloging my responses as insights to my own childhood experiences, making connections that their adult mother was once just as imaginative as they are are now. Revelations to my little humans!
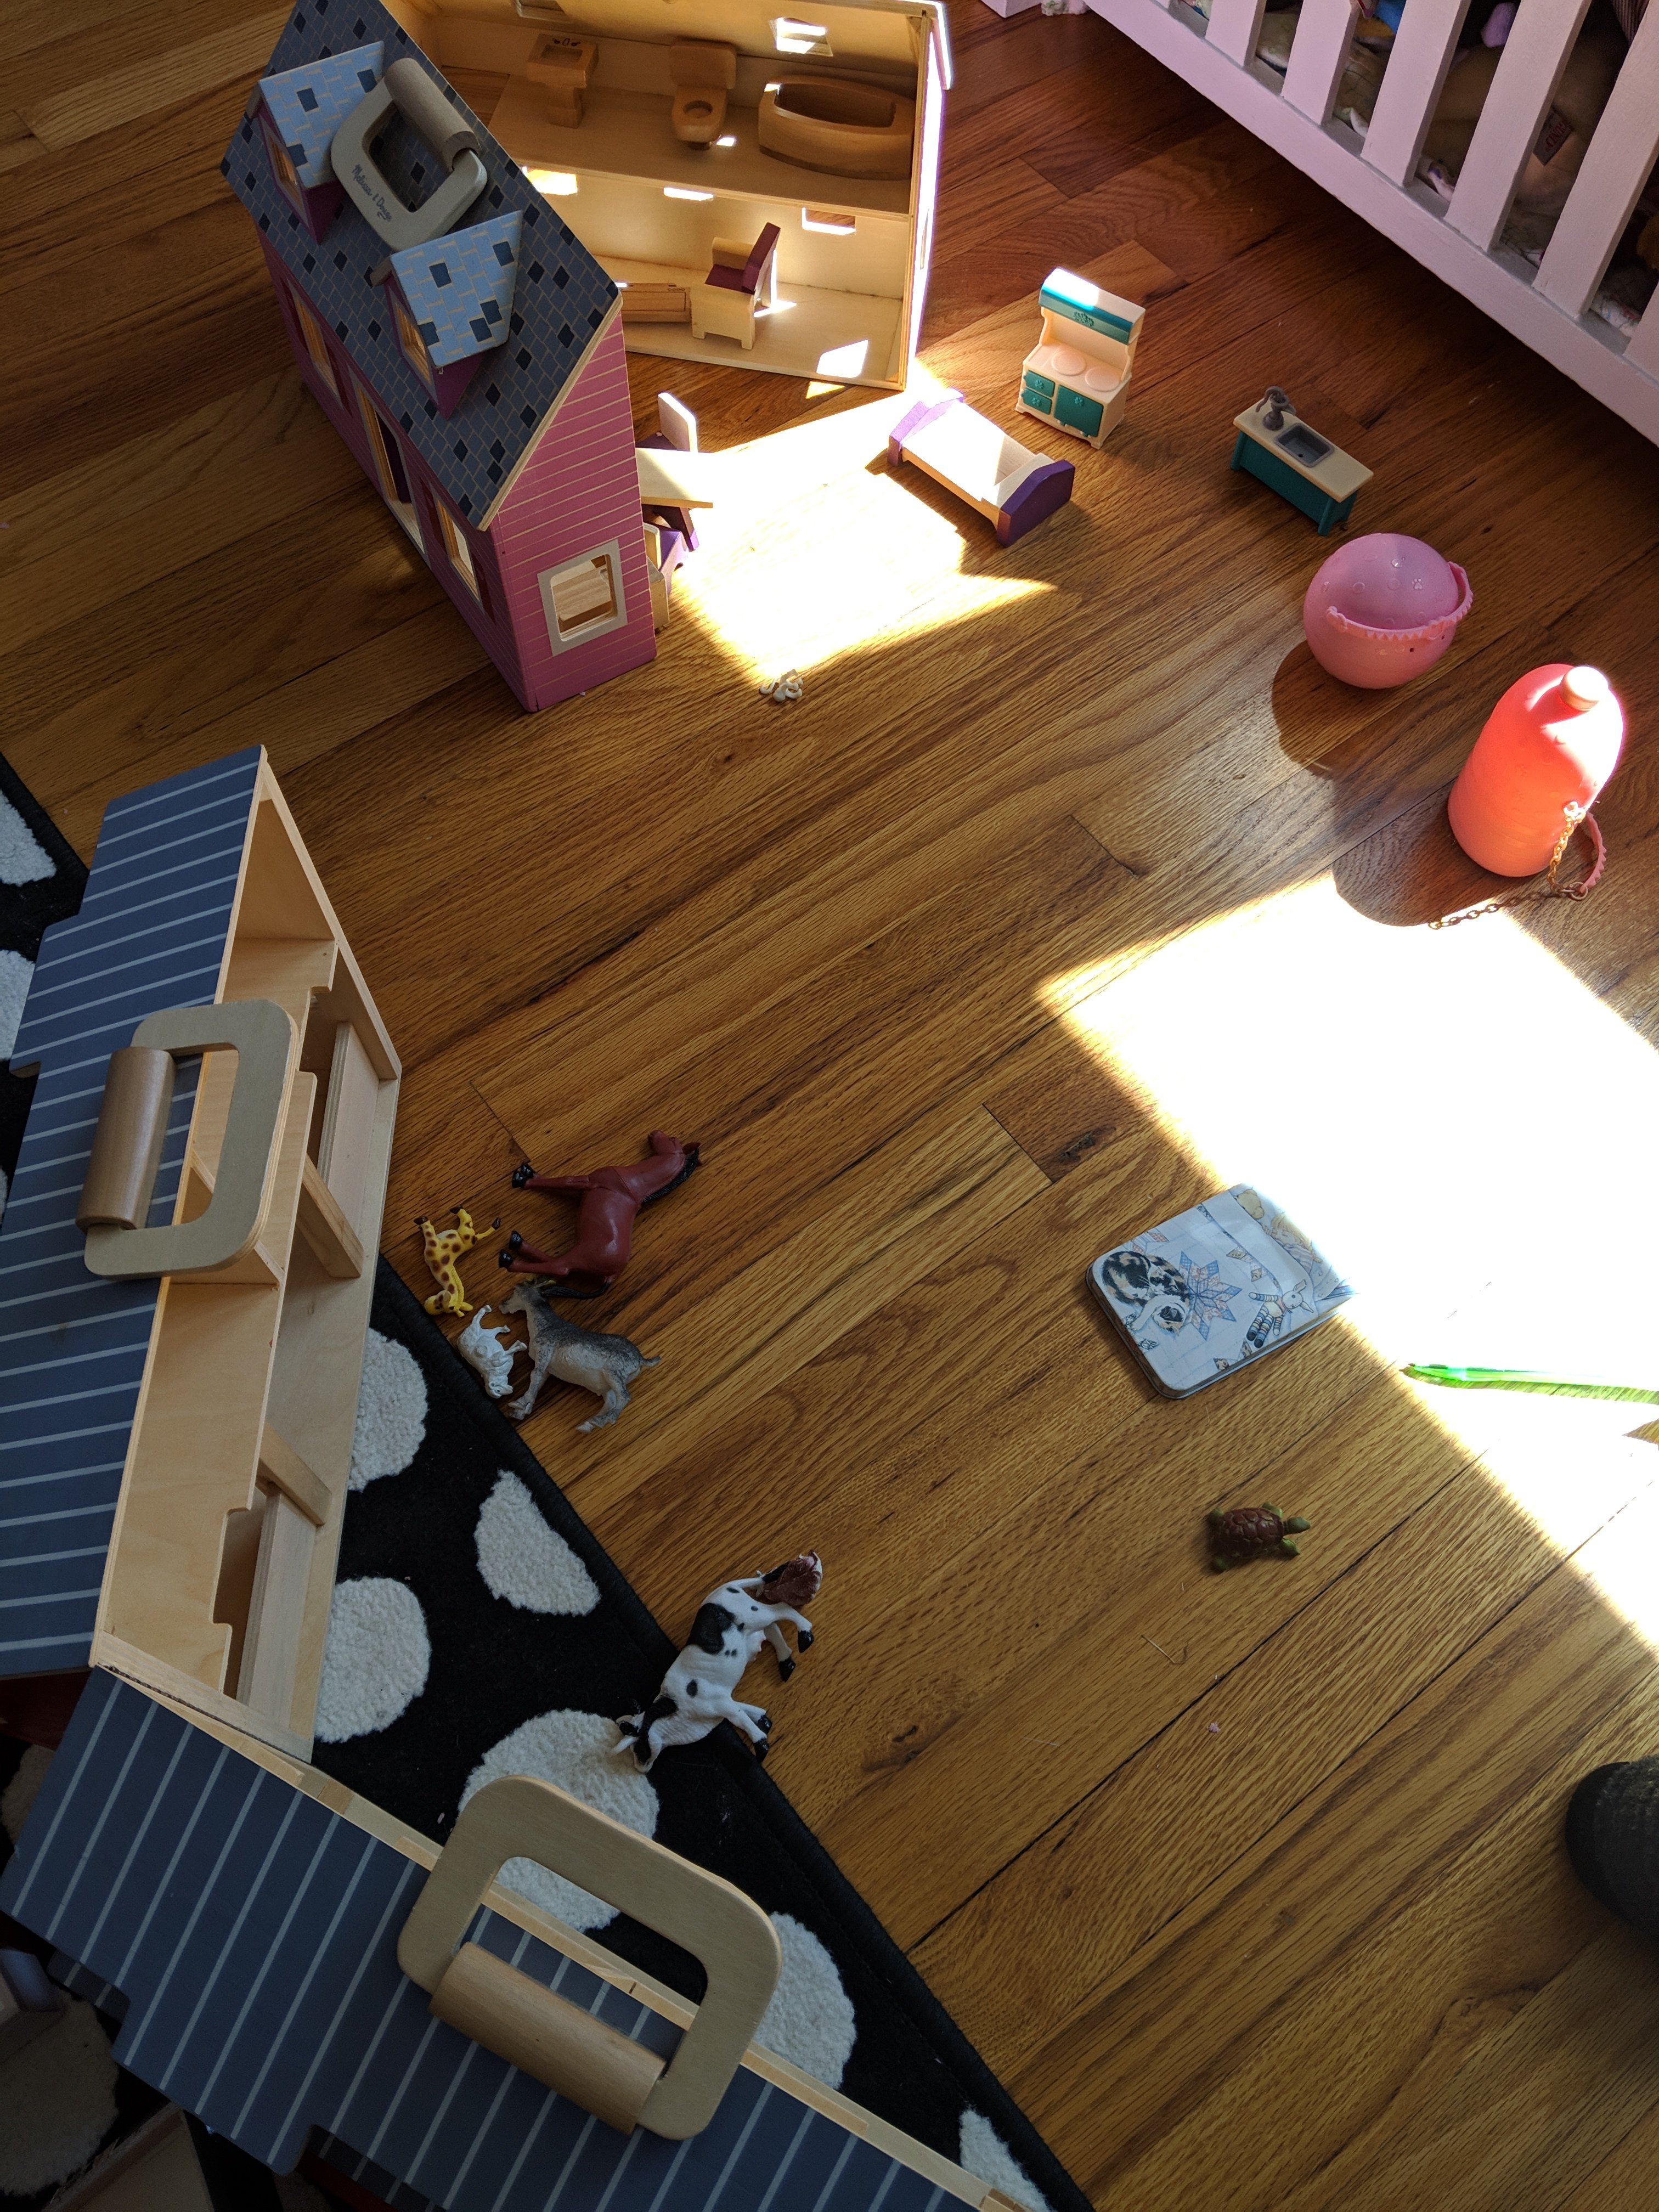
My 8-year old daughter has a more elaborate system of set-ups, comprised of animal figurines, dolls, dollhouses linked together, scarves, washi tape, rocks, glass beads, shells, wrappers, and prize bin items. There are constantly items all over the floor, which at first appearance may seem random and messy, but upon closer inspection, they are set up in a deliberate and playful manner. She HATES the weekly floor clean up, in order to avoid her precious collection from being vacuumed up.
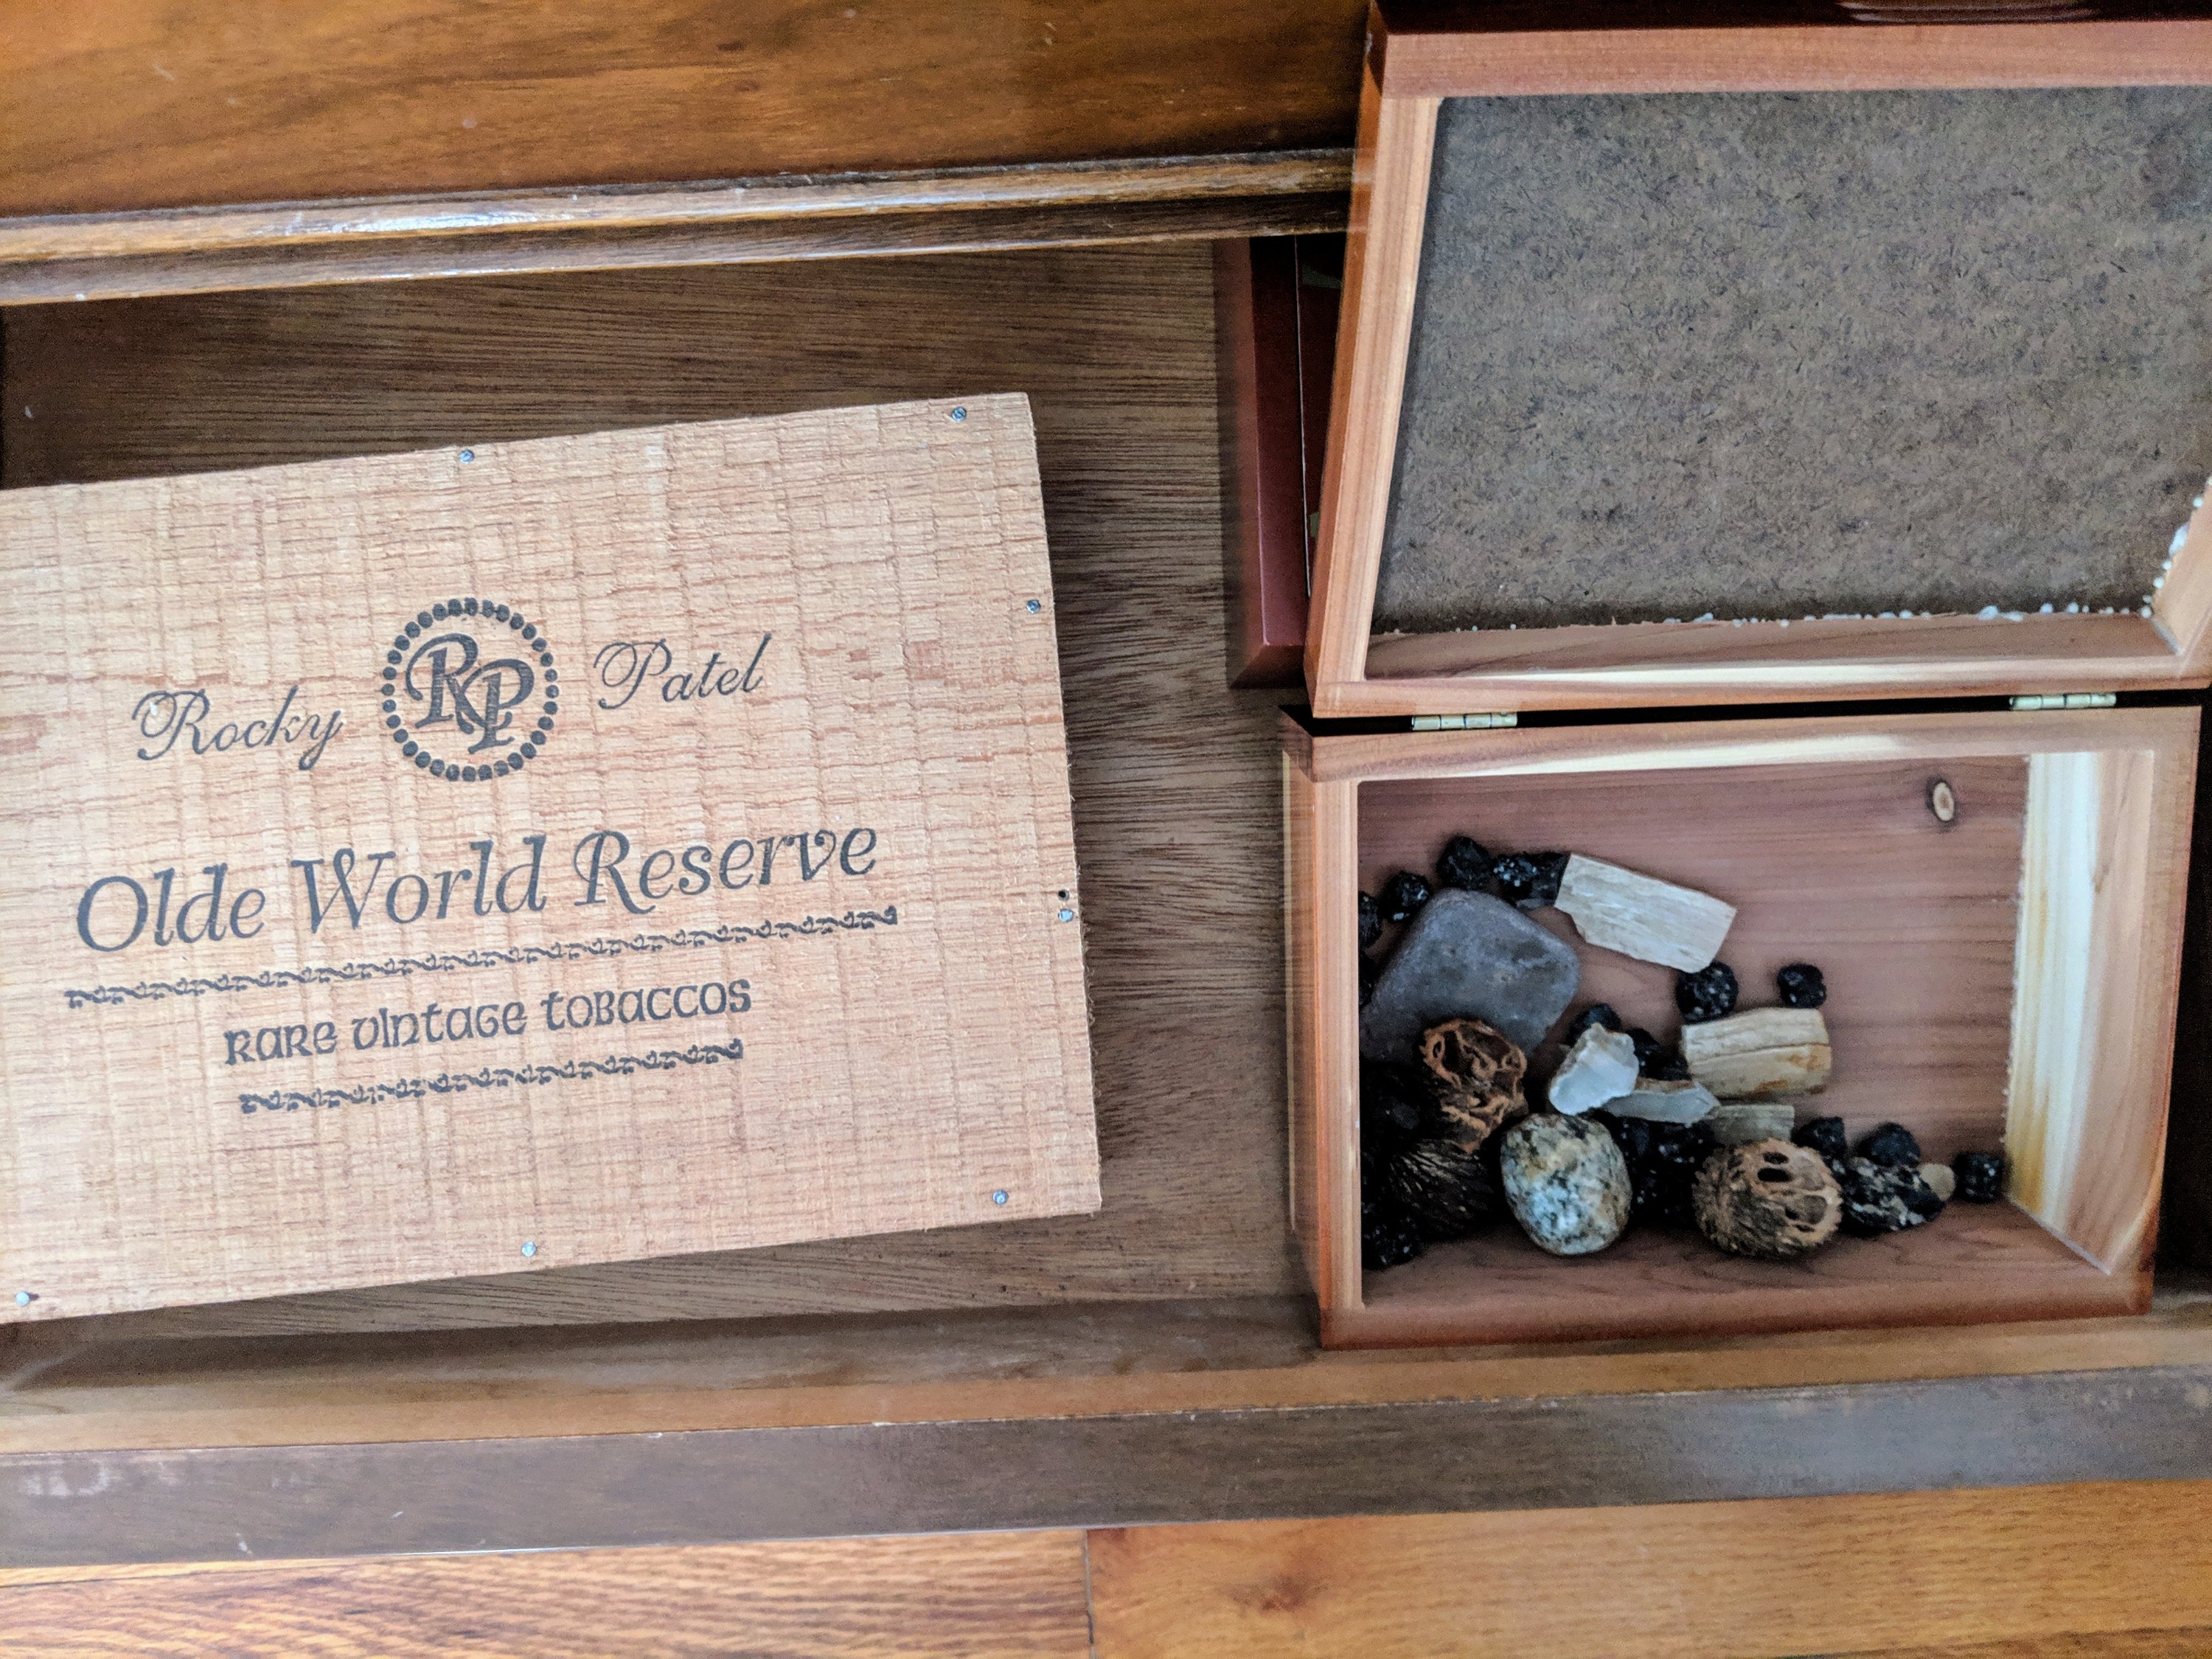
My son’s collections are housed in old cigar boxes.
My 5-year old son, on the other hand, likes to keep his collections stored in a series of boxes, which are then in turn put inside his nightstand drawers and on his book shelf. If given the opportunity, he will pass on letting friends play in his room, because he likes the floor clean and free of items.
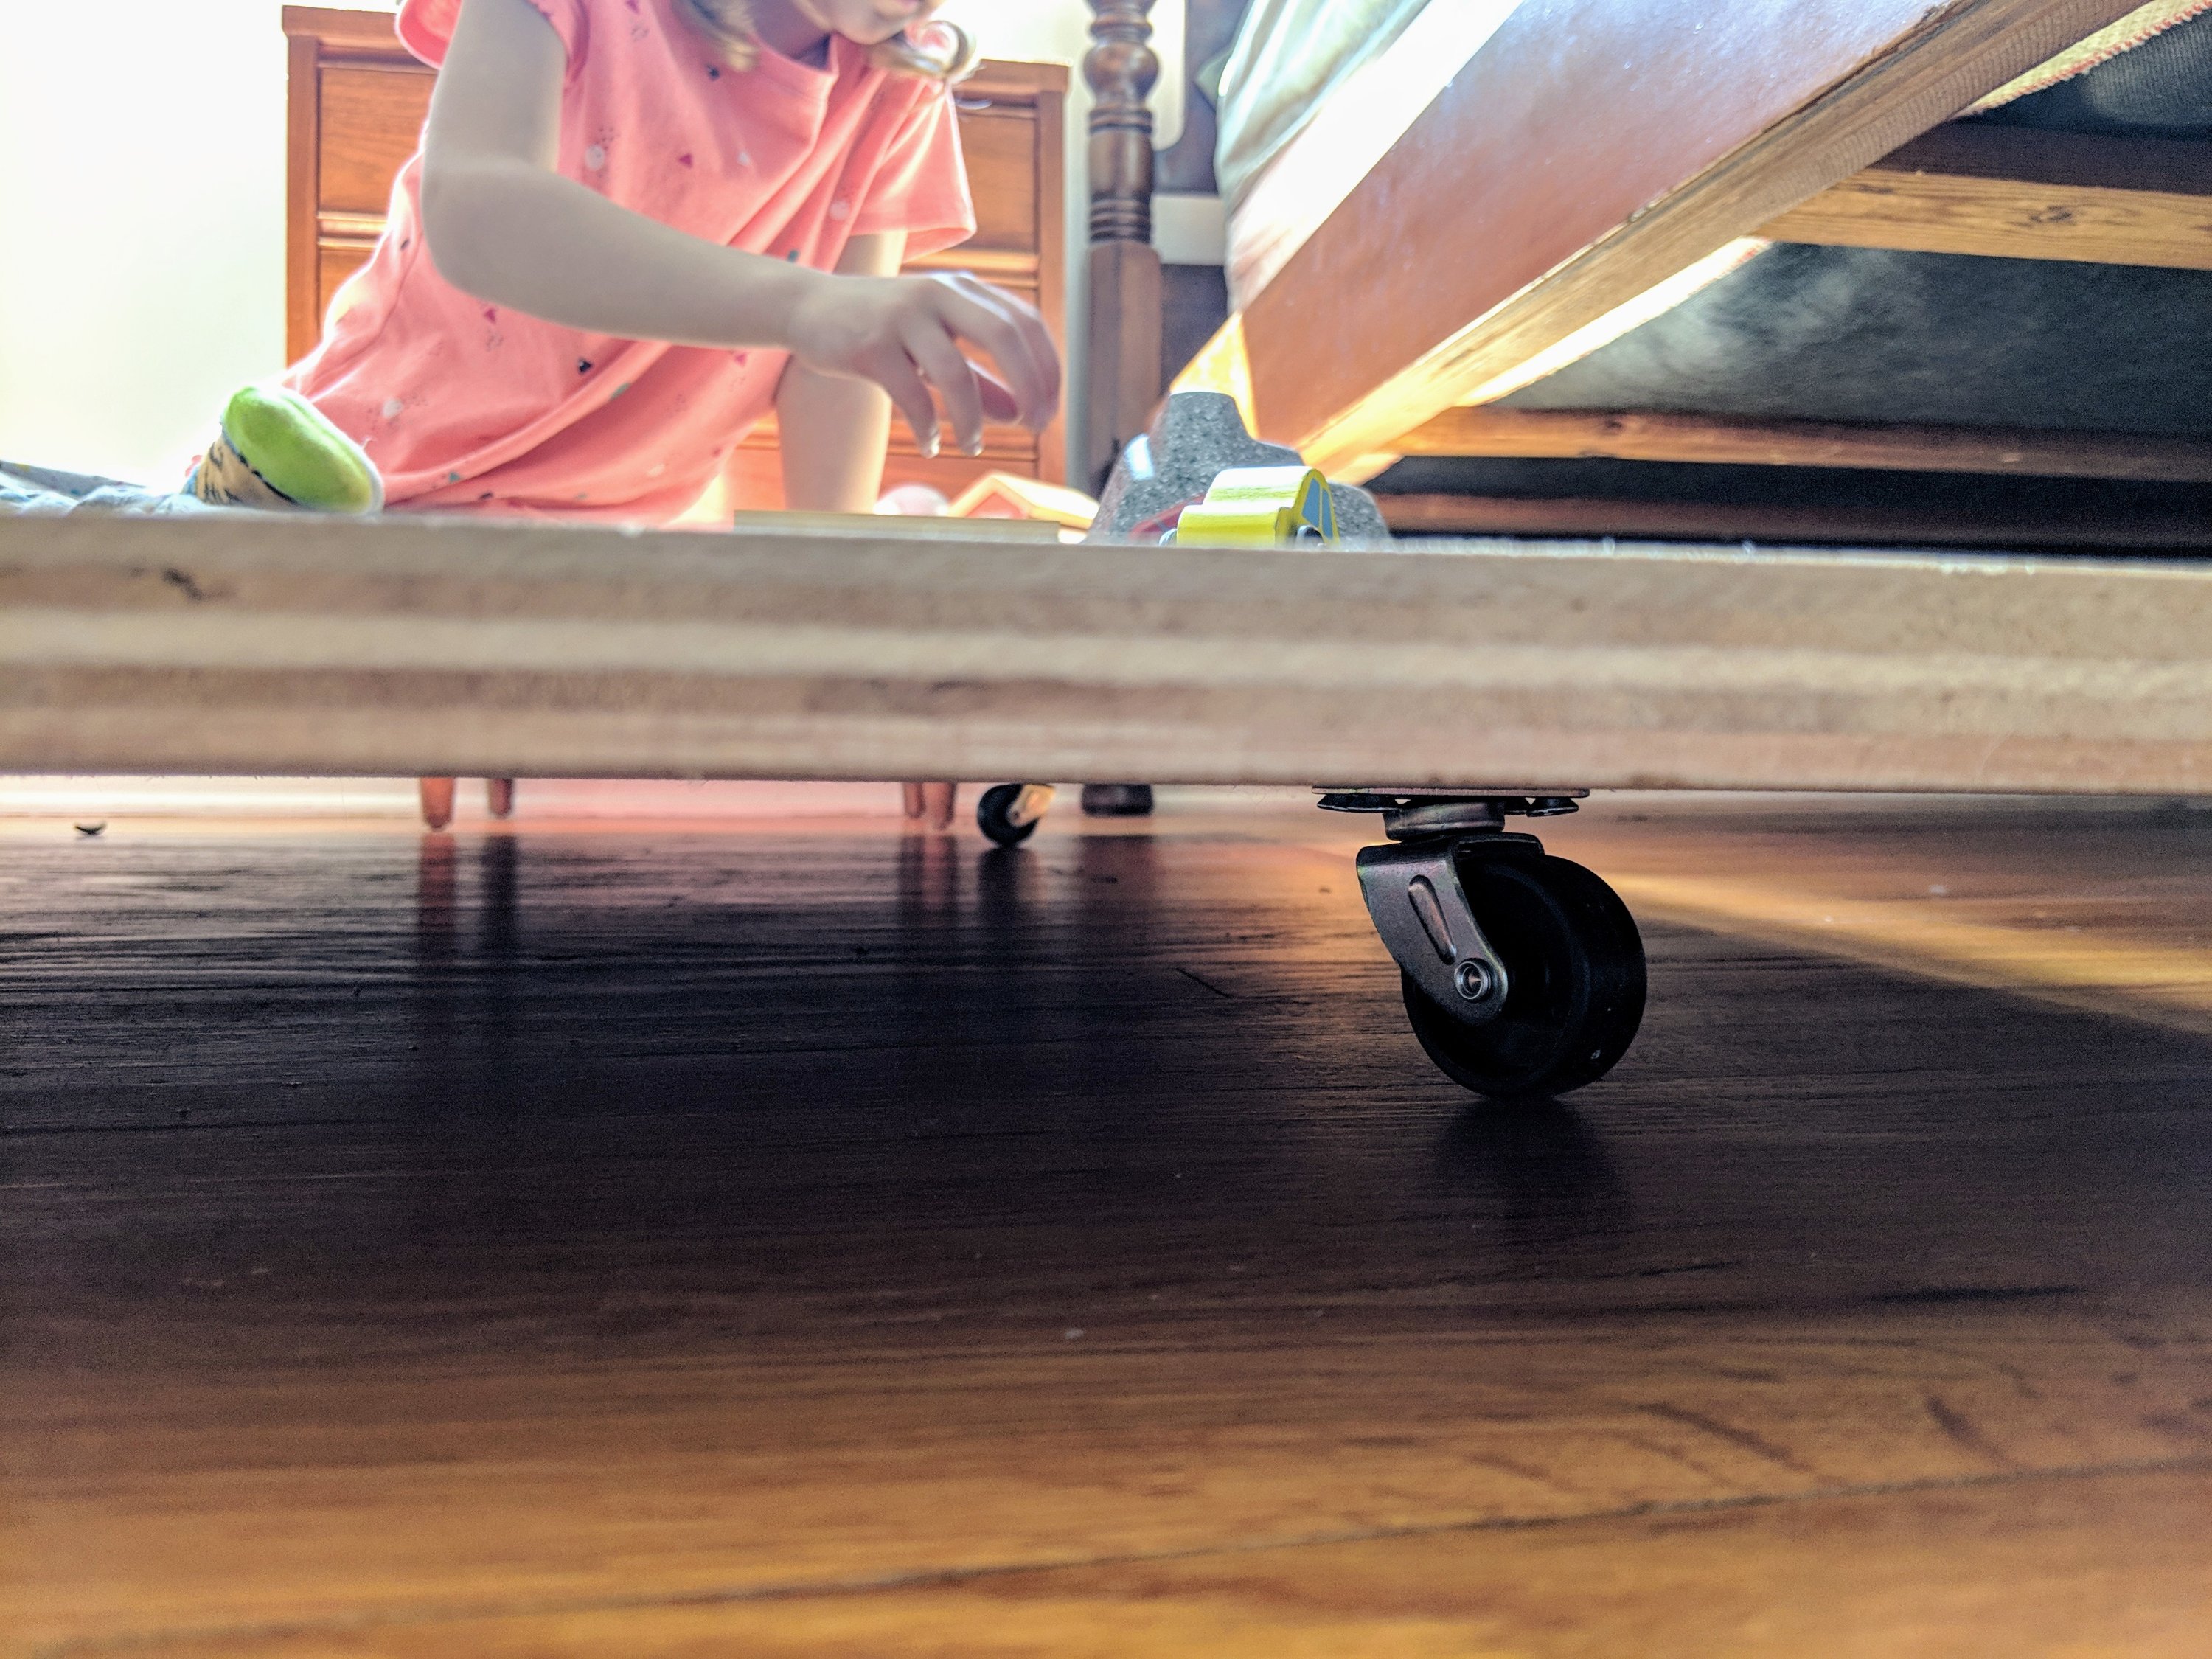
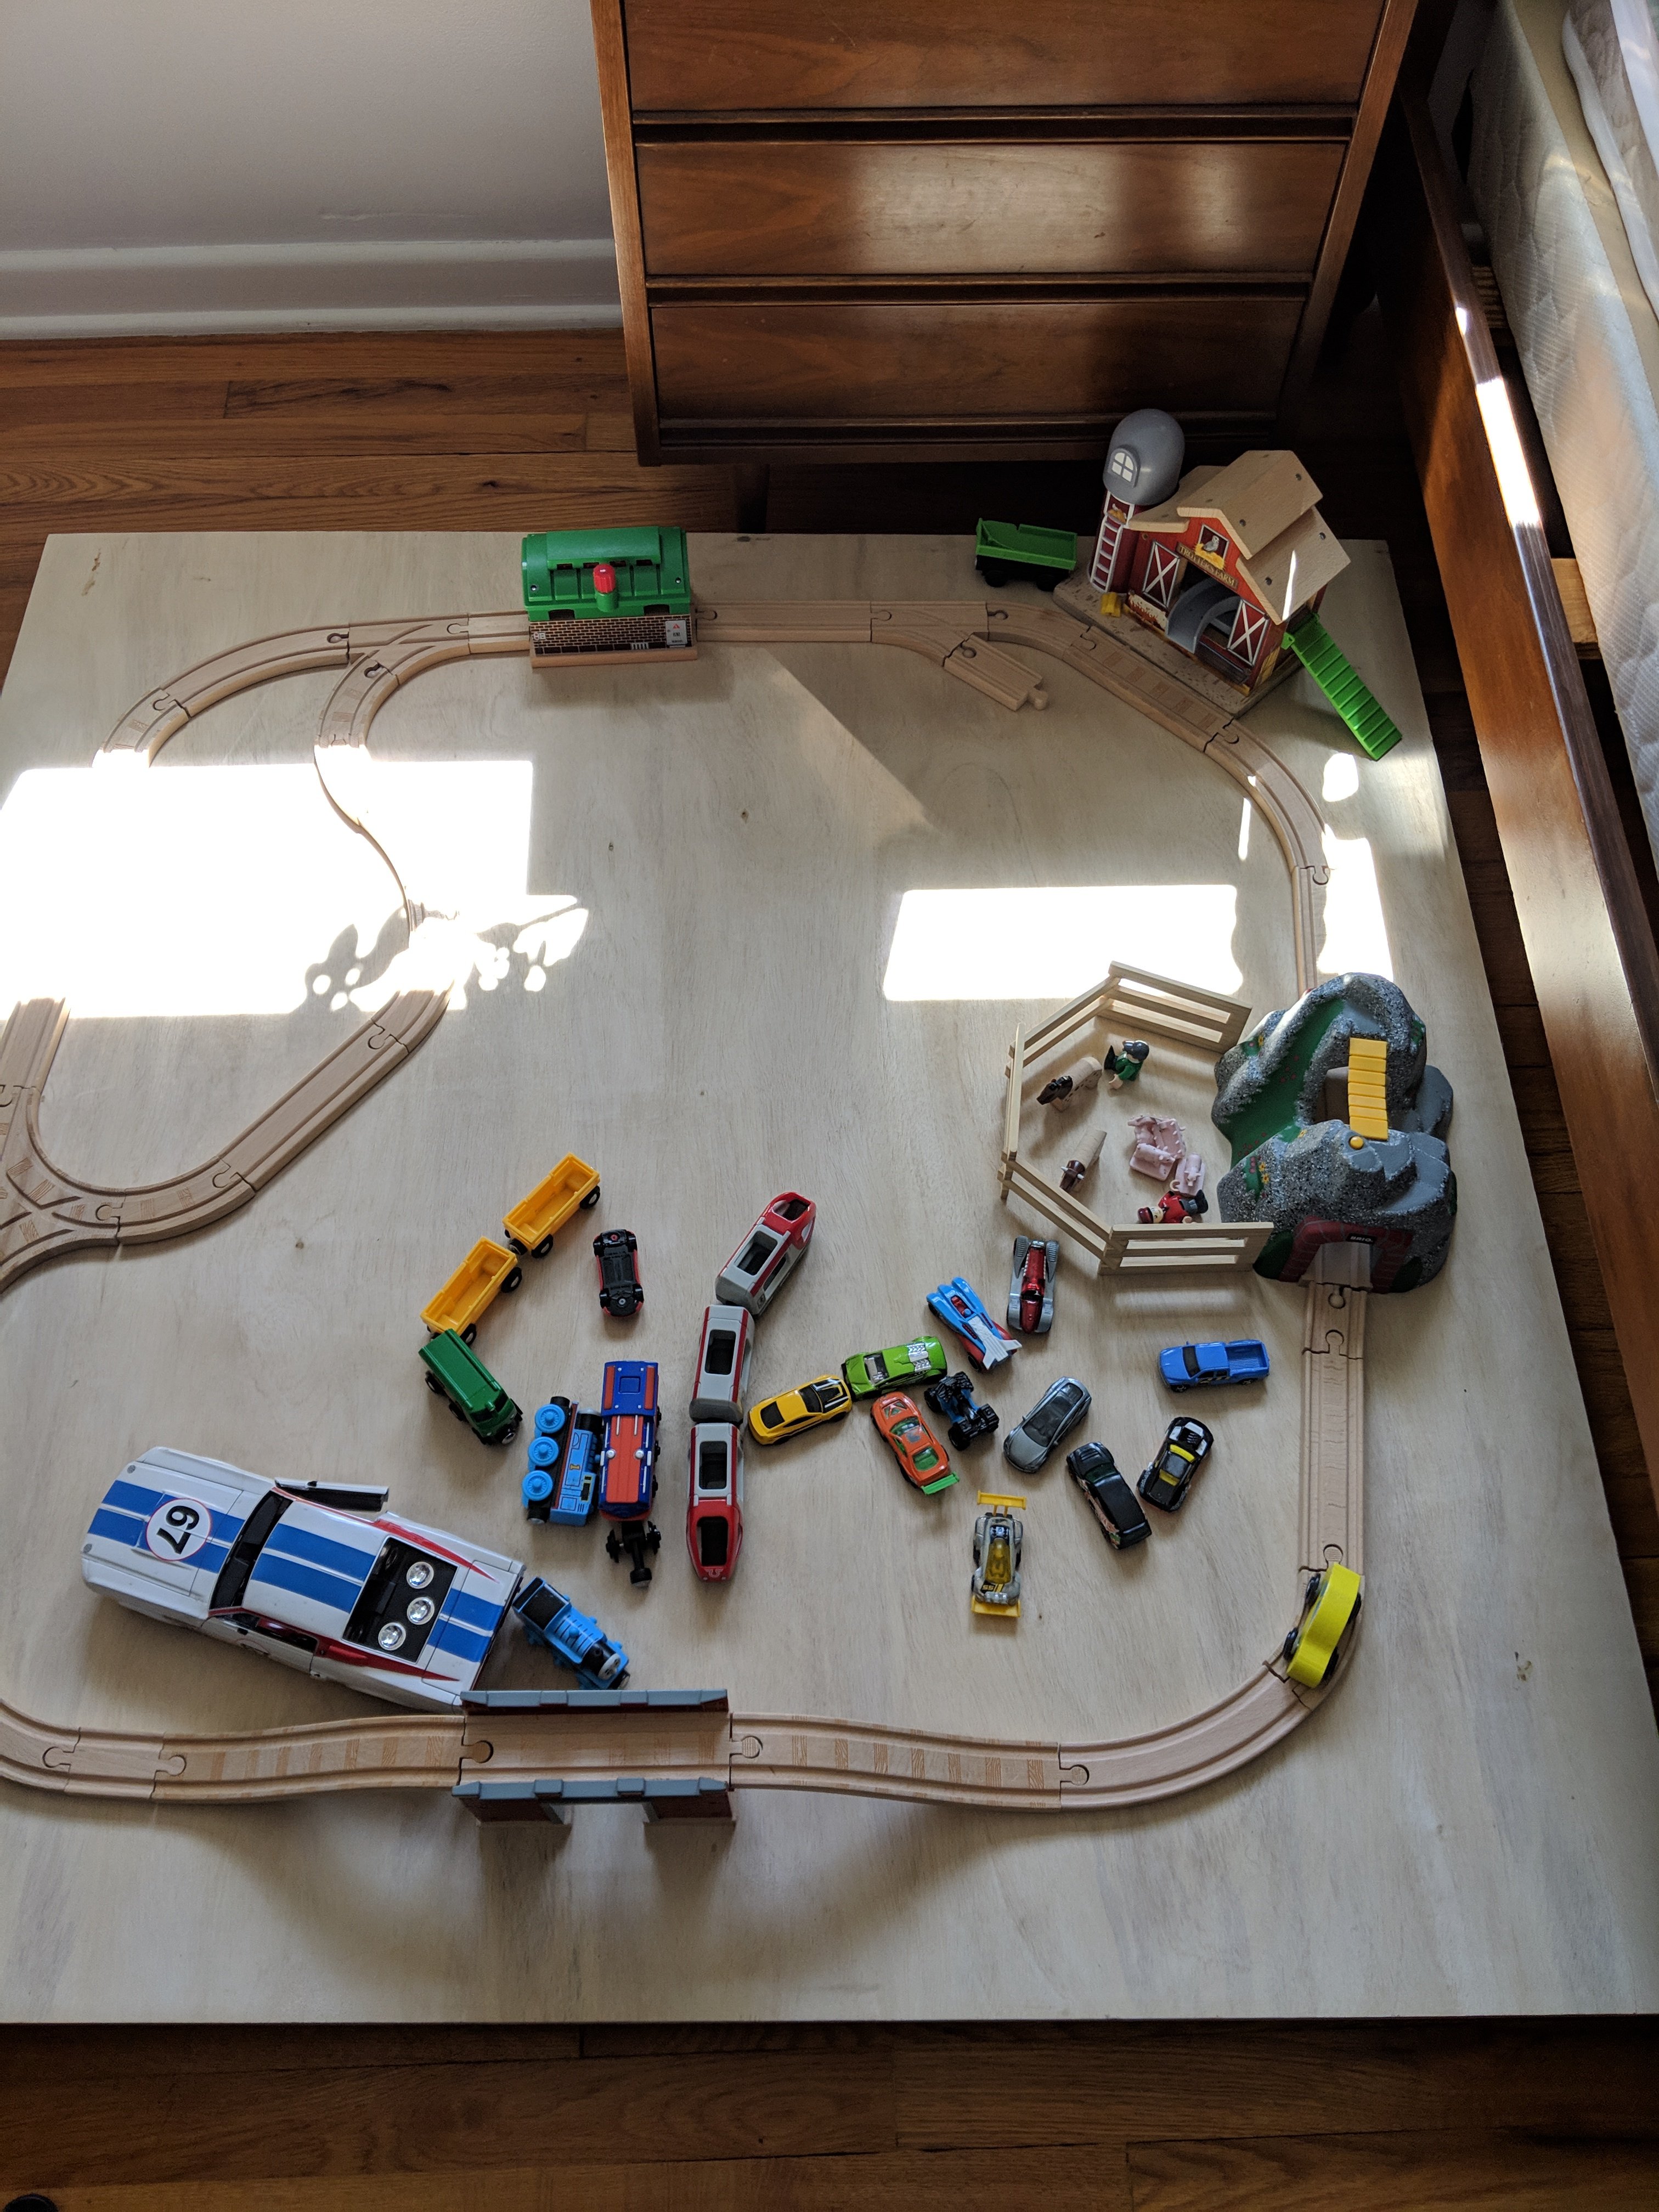
Enter a solution that comes from my hybrid roles of mother and art teacher – under bed platforms for each child’s room. They can hold train tracks, cars, Legos, fairies, ponies, dolls, furniture, or whatever is being curated at the time.
We just so happened to have two nice pieces of plywood in the garage, casters in the basement, and kids who wanted to help in this process.
Eric had both kids help him to measure, mark, and screw in caster wheels to the bottom. We left the wood natural, knowing that at some point they may paint them, tape paper on, or layer their own playful surfaces. Now their curated collections can be safely stowed away to be returned to again and again.
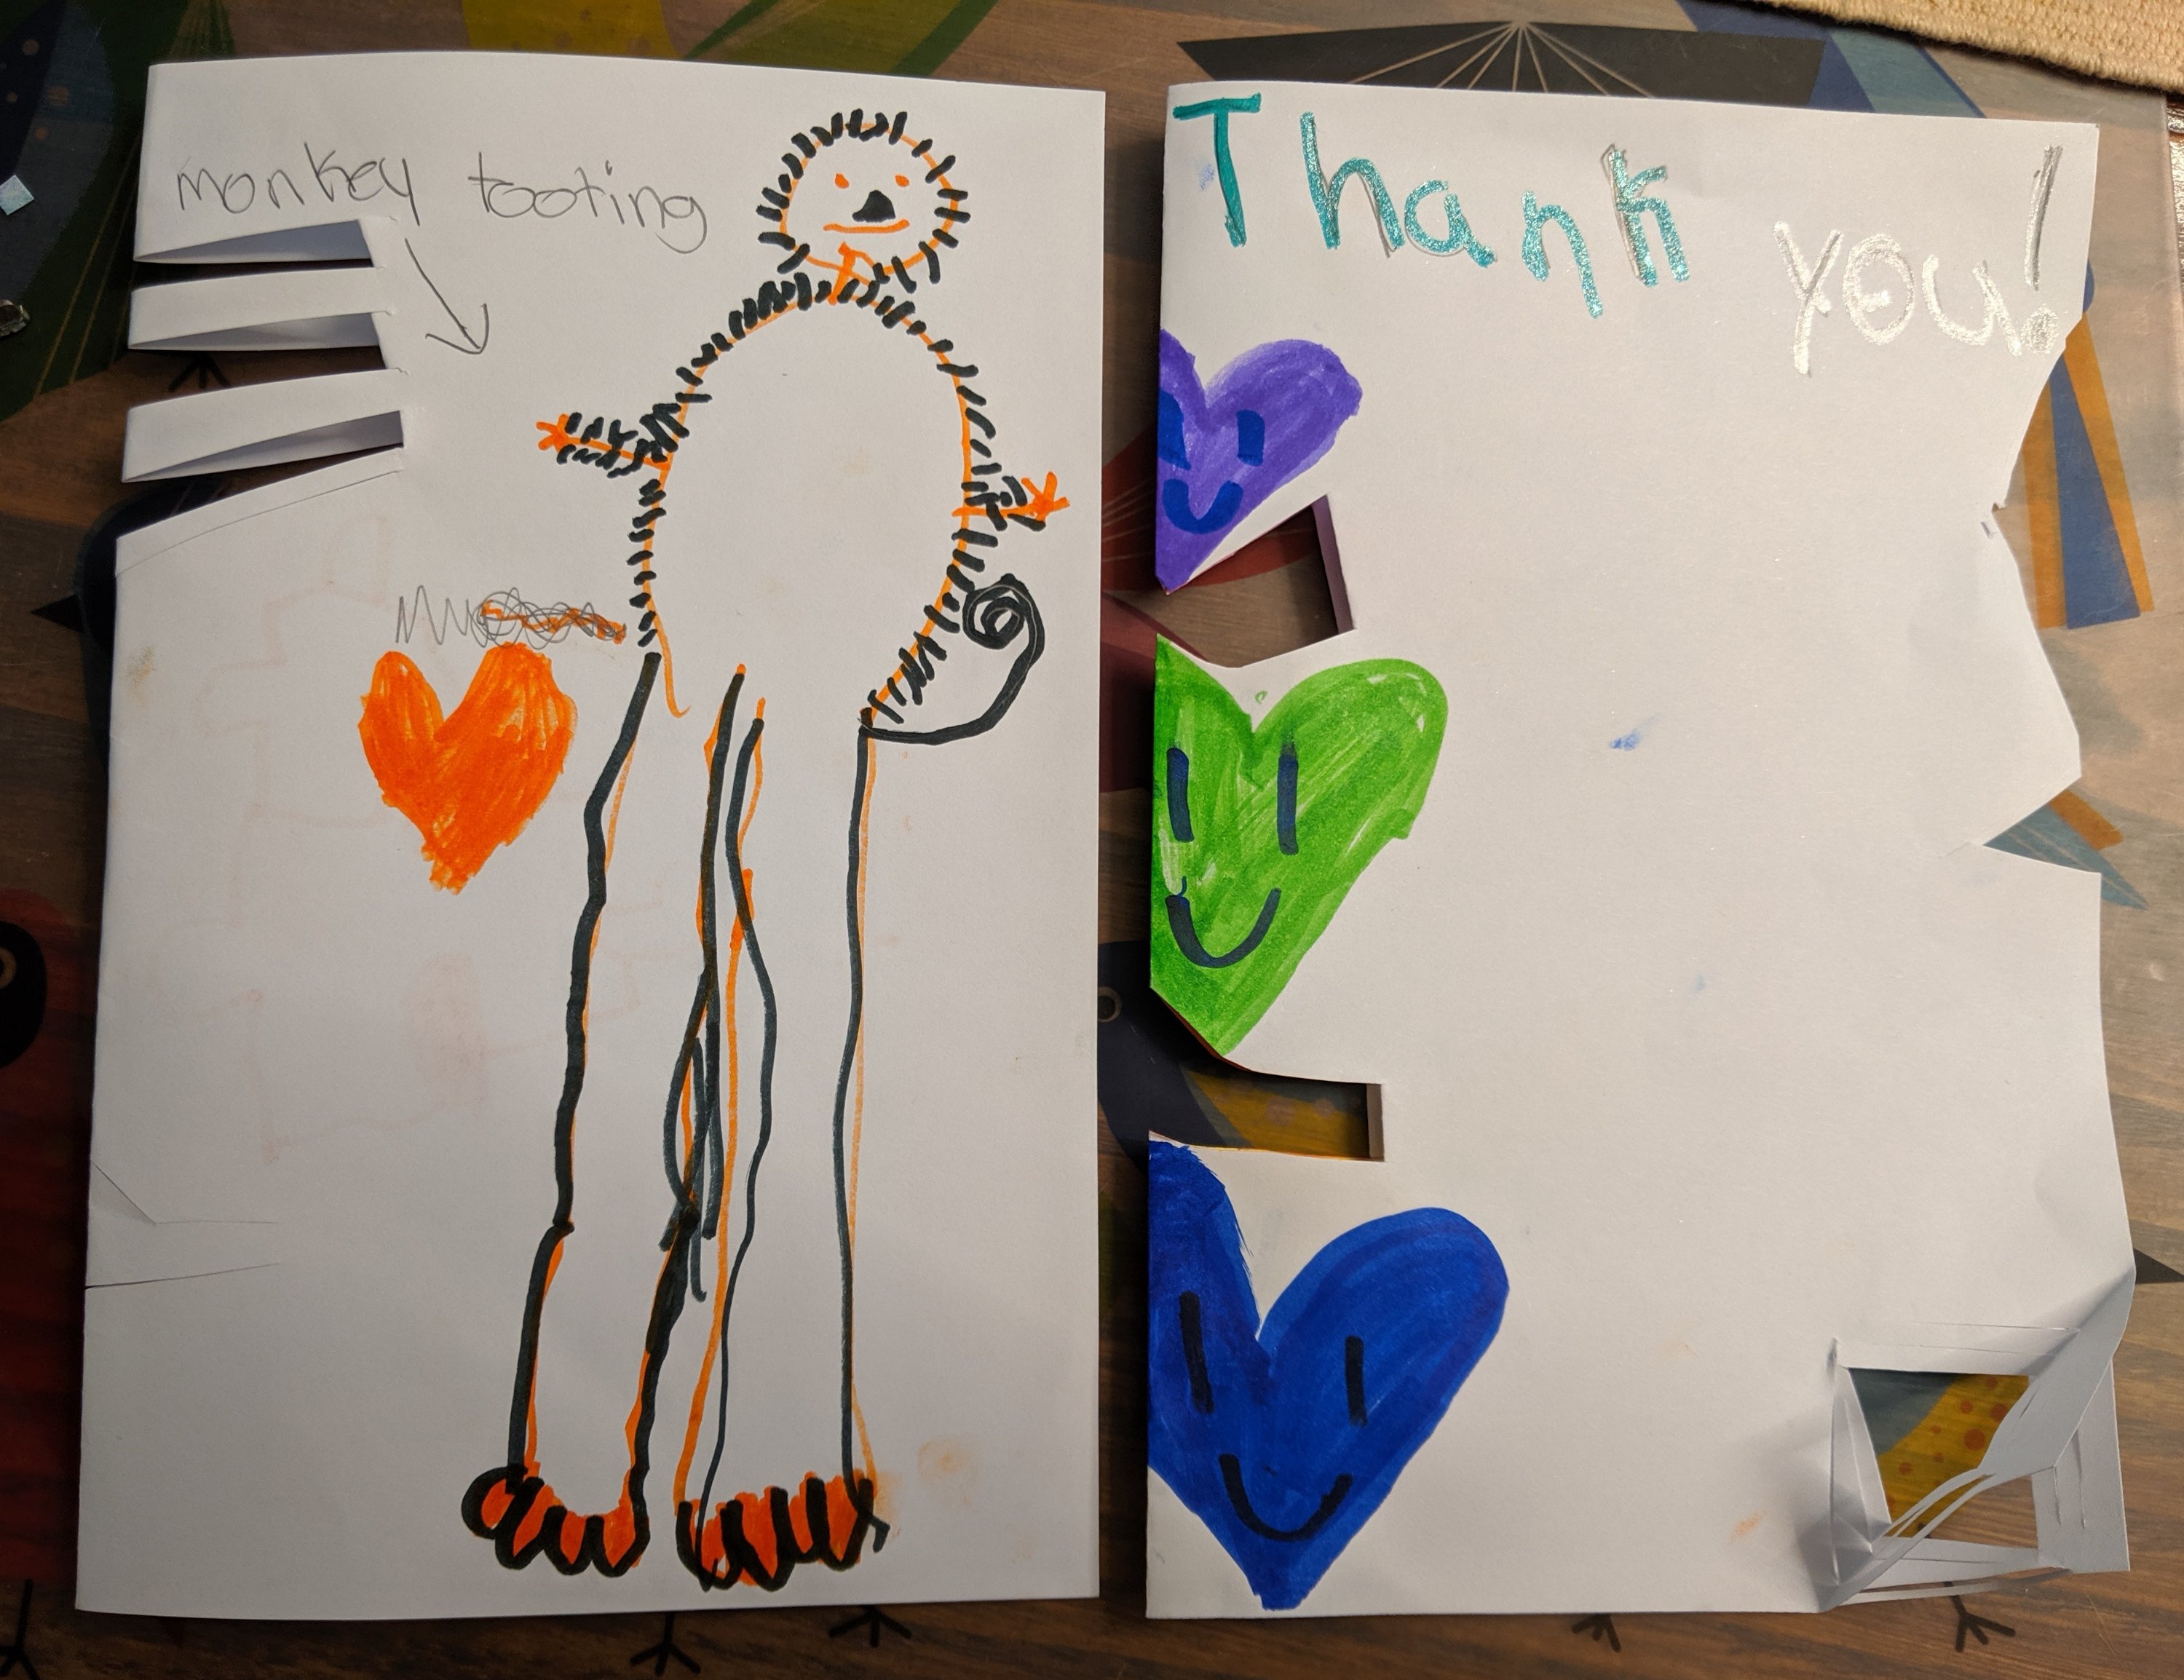
Two recent thank you notes made by my children.
This book has been an on-going source of ah-has for me and has helped me to honor the creative ideas and art making of my own two children. My next step is to find more authentic ways to bridge the home art and school art of my students.