Collage is one of those art forms that kids naturally understand. As adults, I think it is best if we give them access to materials and then get out of the way. However, as children spend more time practicing with collage, their work will become more sophisticated and they will need additional supports with materials, composition, and next possible steps. In this post, I will introduce the basics, along with some student examples. Future posts will dive into more detailed collage techniques. Collage truly is my favorite media to work with, as an artist.
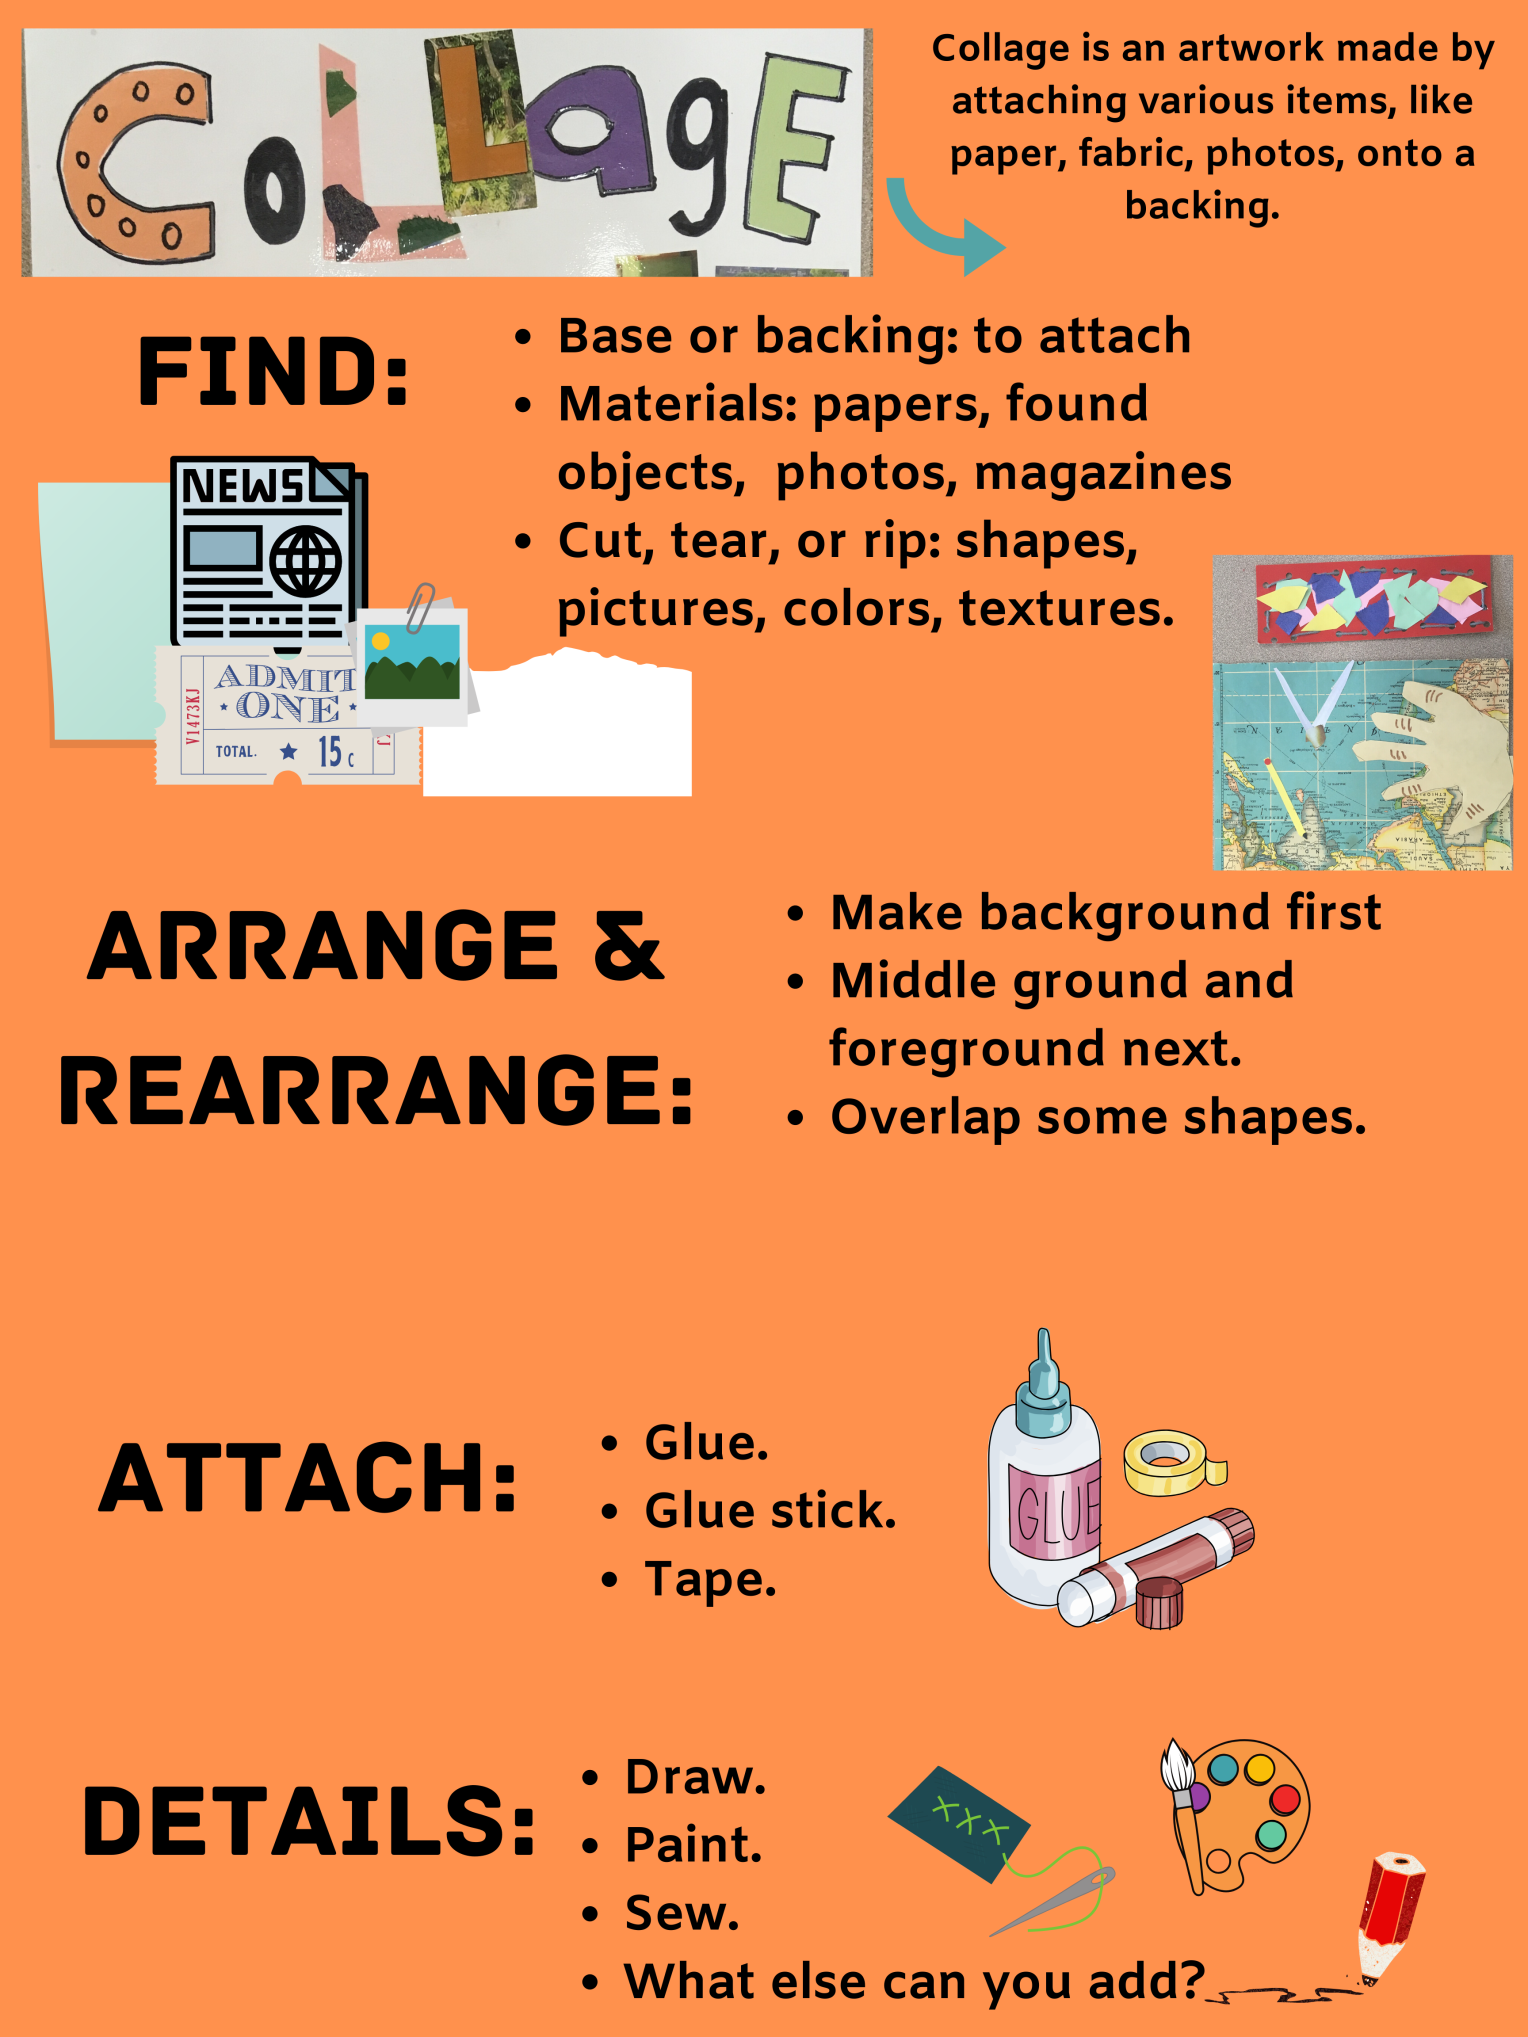
Here is a basic how-to poster I created for my classroom on collage.
Some of my favorite collage materials are:
- magazines
- aluminum foil
- doilies
- lace
- string
- wax paper
- tissue paper
- tape
- old photographs
- tickets
- receipts
- junk mail
- old book pages
- found objects: paper clips, twist ties, playing cards, pop tabs, toothpicks, things in your junk drawer
- fabric
- plastic bags, fused or not
- wallpaper
- wrapping paper
- newspaper
- cardboard
- old greeting cards
- maps
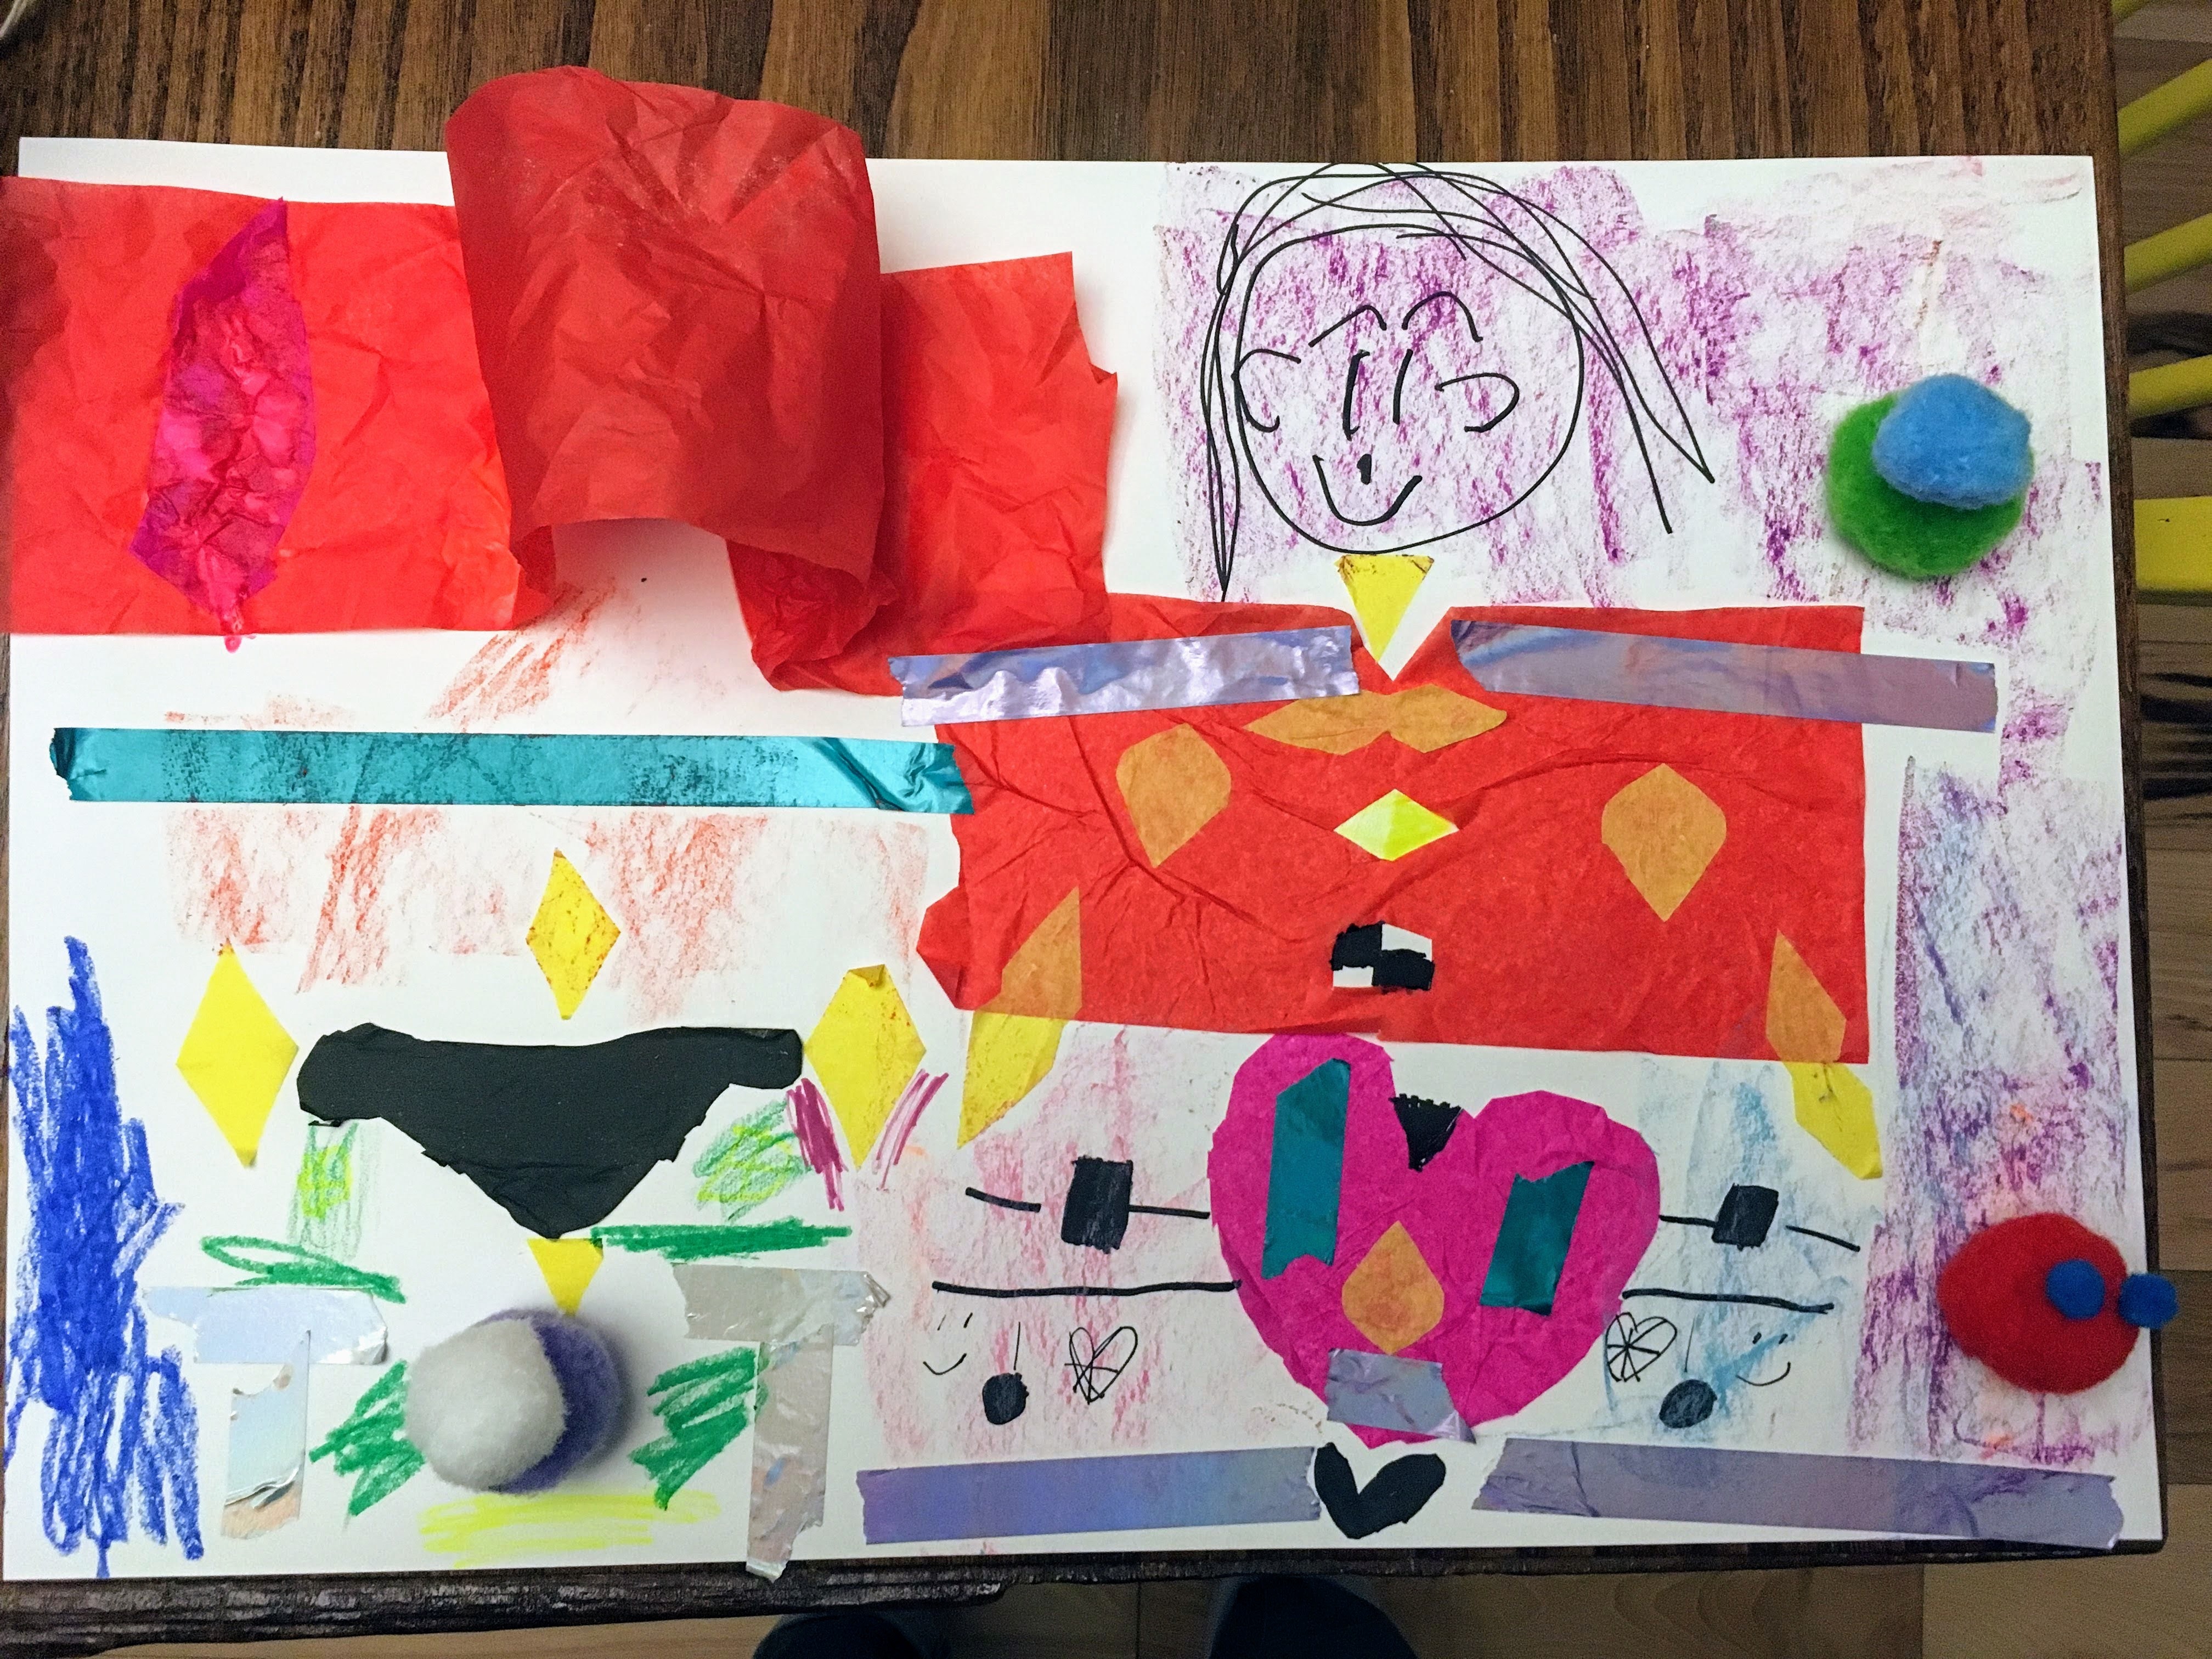
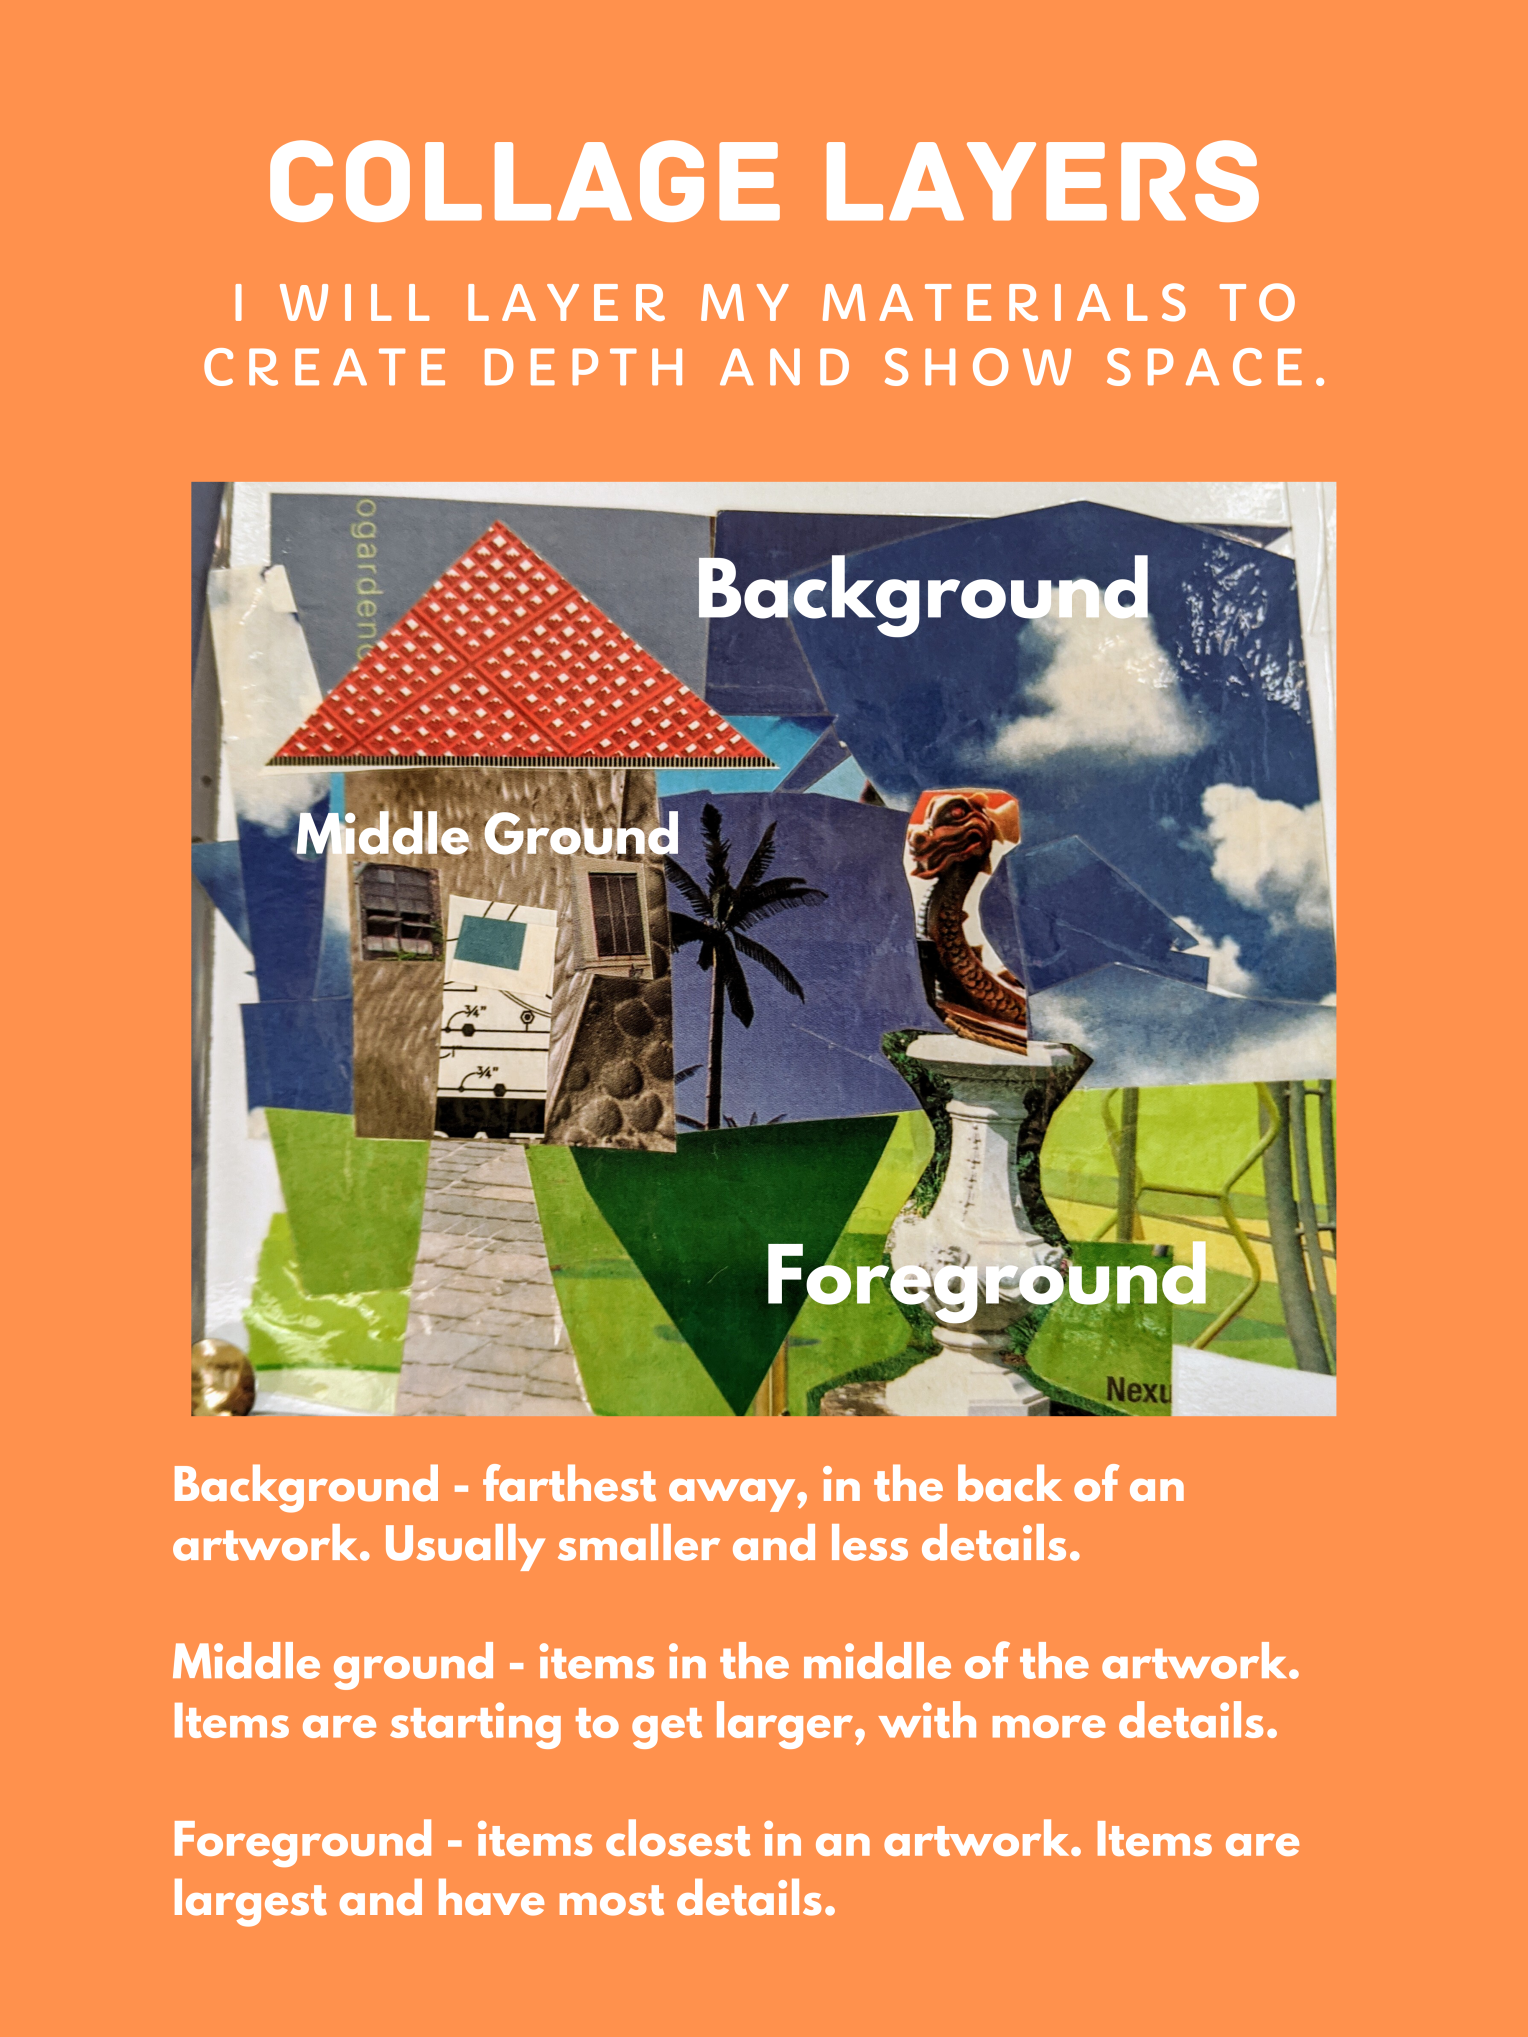
Collage is really all about layers. Helping students to see that there is potential in their stacking of shapes, objects, papers, and even with their layering of paint or drawing will help broaden students’ ideas of what a collage is.
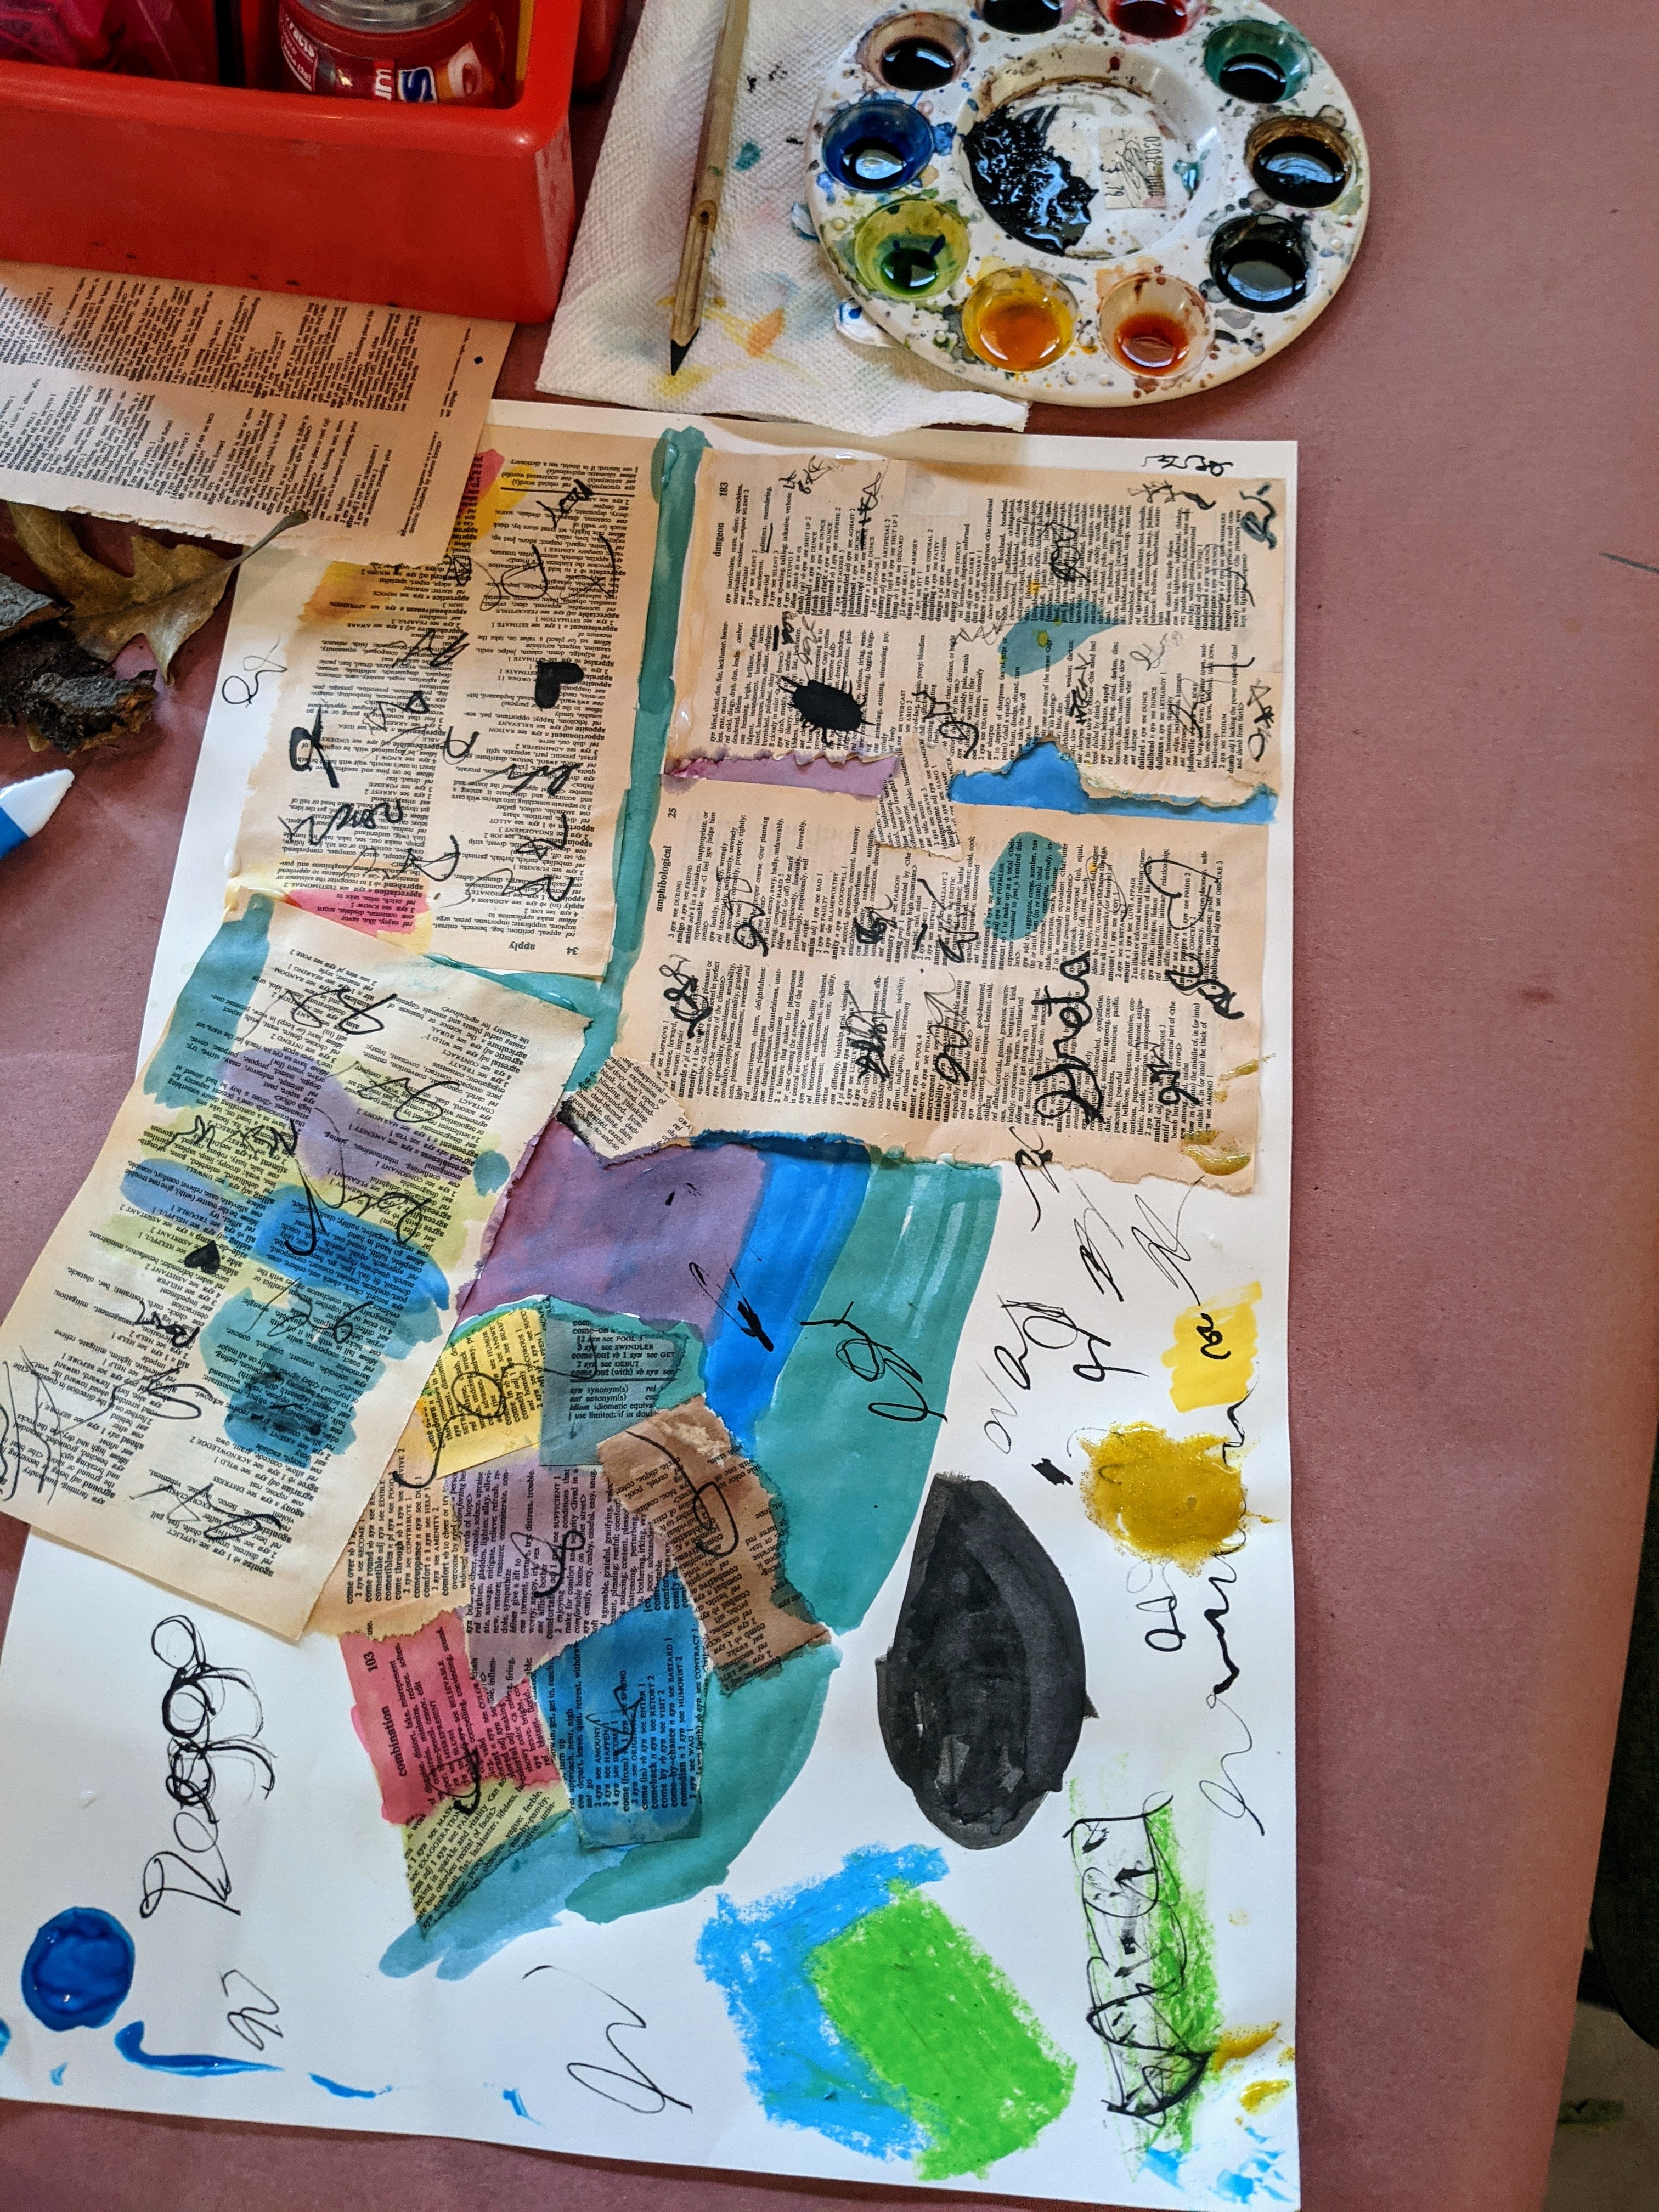
Sometimes the sandwich or pizza analogy is helpful when planning for a collage. Students should ask themselves: What is my first layer? What is my next layer? What will be my top layer?
There are so many terrific different types of collage to explore. More coming soonish on: photo montage, dioramas, tissue paper collage, and torn paper collage.
