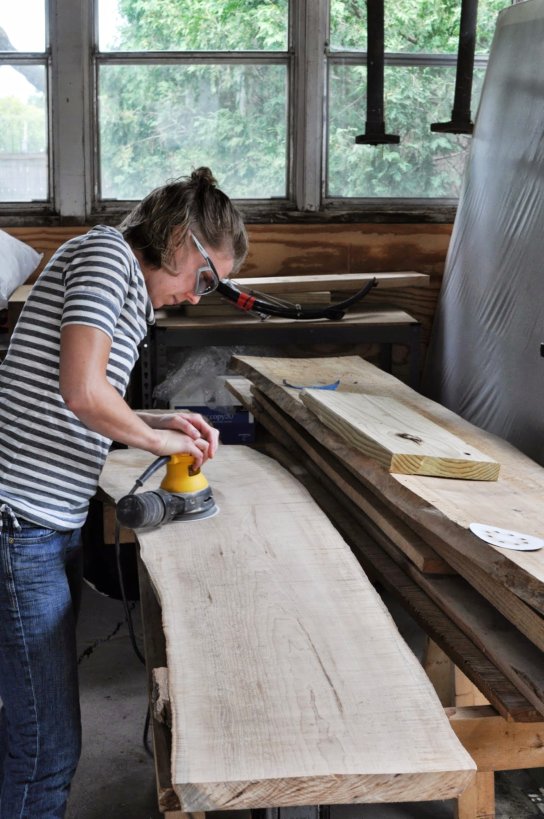
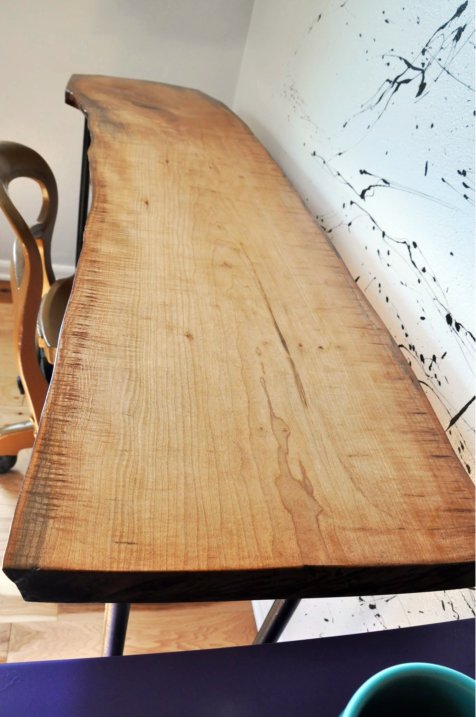
In an earlier post, I told you one of our current past times was sanding. This table required quite a bit of sanding, as we chose a rough section of a tree. Eric inherited quite the collection of wood from his grandfather’s shop and we have been debating on how to use this wood ever since. Eric and I took turns sanding this section over a span of days – usually working during nap time or after G. went to bed.
The sandpaper we used was 60, 120 and 220 grit on the orbital sander. Between coats of the polyurethane we used 600. This will be my next orbit sander – Bosch Orbit Sander Kit.

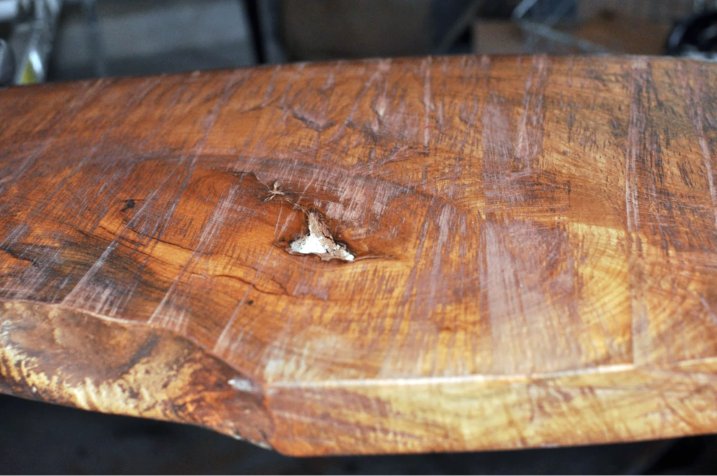
After sanding until an almost glass-like smoothness, the walnut stain went on next. This is the underside of the table, which we stained first to ensure we liked the color. It did not get the same sanding as the top.
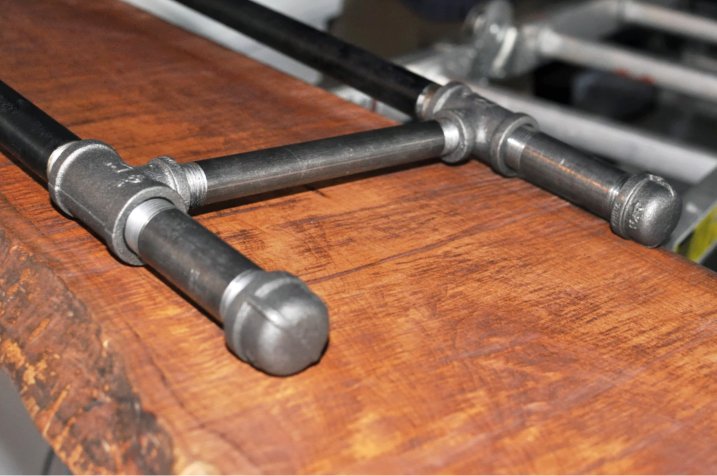
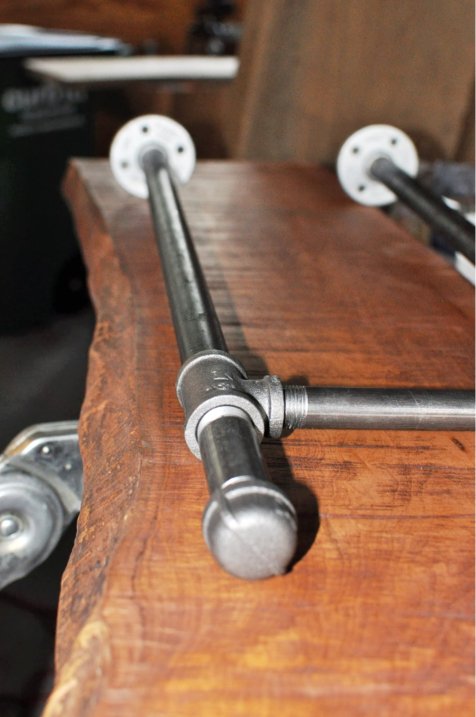
Eric picked out black pipe to fashion into legs, from the hardware store and assembled them. The pipe parts list was comprised of:
4 of the following:
24″x ¾
4″x ¾ (You could increase this length for a bar height table.)
¾ x ½ x ¾ reducer
¾ end cap
¾ flange (On this table, these are galvanized instead of black, but it was all that was available.)
2 of the following:
½ x 8 (Or whatever size you determine to use between the legs.)
The total cost for the legs was about $100.
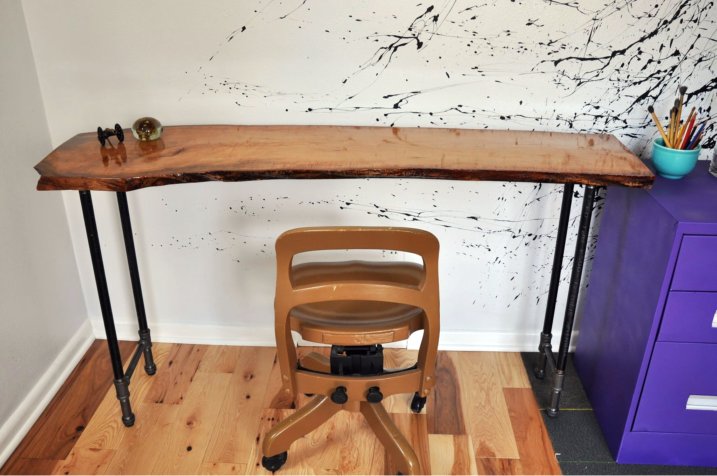
Quite sharp looking, no? We also added foam rubber pads to the feet to protect the floor.
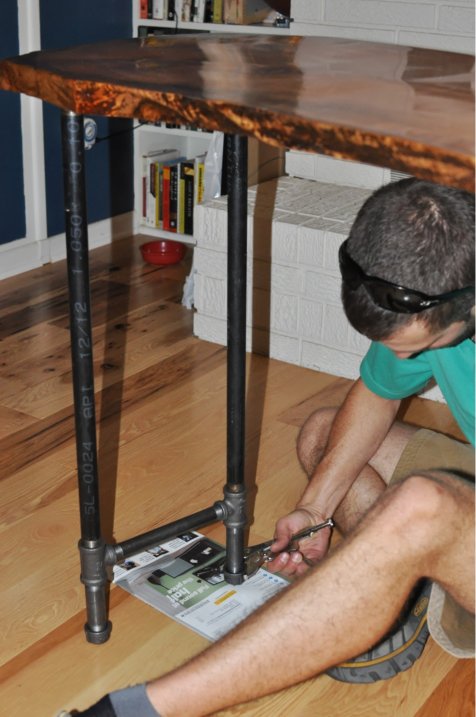
Eric screwed them into the bottom side of the table, righted the table, and then got to work leveling the table. The legs started out level but the wood was not perfectly square. As he said about this photo, “That’s a who man needs a pipe wrench!”
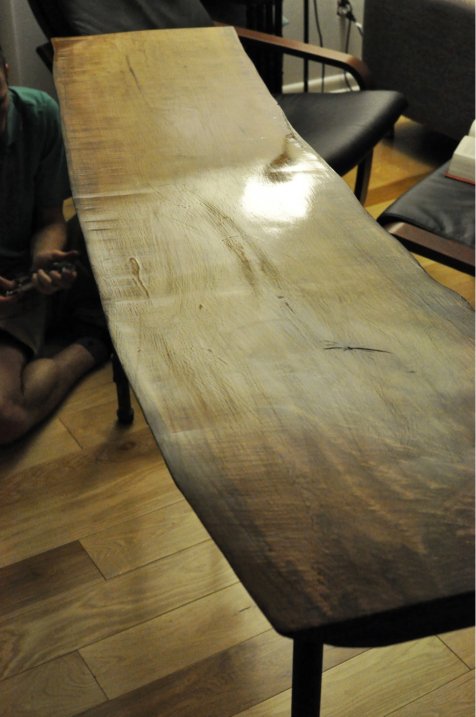
Although this photo is dark, it does a nice job showing off the glossy finish of this table. The finish is a Ace Hardware brand Polyurethane, the oil stain color is walnut.
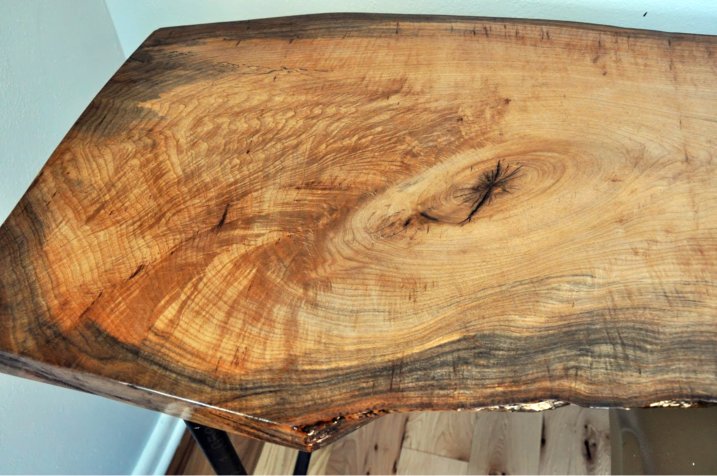
This is my favorite part of this table – this whorl in the wood. It was quite uneven and filled with saw marks at the beginning. Nothing a little intensive sanding couldn’t fix though.
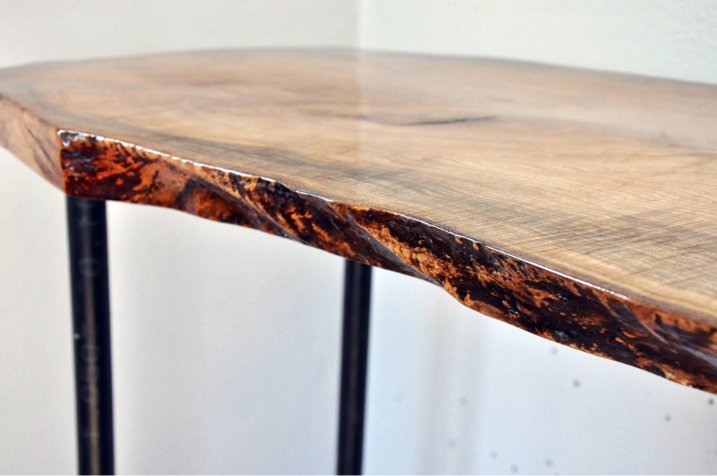
The edges are left raw on this table and the curve makes the perfect shape and fit for me in my retro office chair to belly up and blog away.
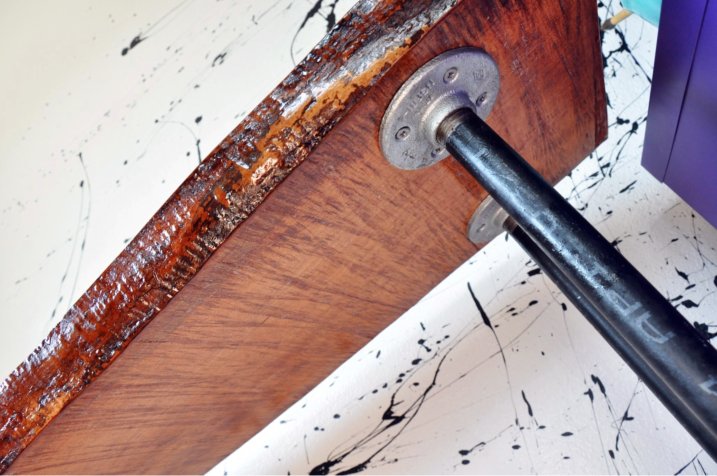
The flanges underneath are perfect – we debated whether or not to use them for the feet for added stability, however, at about $10 a piece, we will wait if the table seems at all wobbly before opting for additional feet.
Oh how glorious it will look once everything else is set up. Next on the agenda is to set up the rest of my organizational items and the computer.

2 thoughts on “DIY Office Table w/ Pipe Legs”