I have lost a great deal of art & sewing time this week, due to Greta cutting back on her naps drastically. She used to take at least two 1-hour naps, sometimes 2-hour naps per day. The increased wake time has increased her interest in everything. It has been so much fun to spend time with her this summer and watch her learning taking place every hour.
The good news is that it is birthday week! Greta turns 1 this weekend. So, the next few posts will be kid birthday oriented…hope you’re ready, ’cause I don’t think I am. 🙂
I wanted flags to hang from the ceiling and chandelier for Greta’s birthday. I just wanted the typical triangular flag banners that you see everywhere. Here’s what I came up with.

Triangular Flag Banner How-to
Supplies needed:
- scissors
- cardboard (for stencil)
- glue
- pencil
- scrap booking paper
- string

I started by creating a cardboard stencil. I traced it around colorful scrap booking papers and cutting out the triangles. Once I had a stack of these I began attaching them to string.

A thin strip of glue along the top secures the string.

To make the flags double-sided, spread a small amount of glue on the other two sides and attach a second triangle.
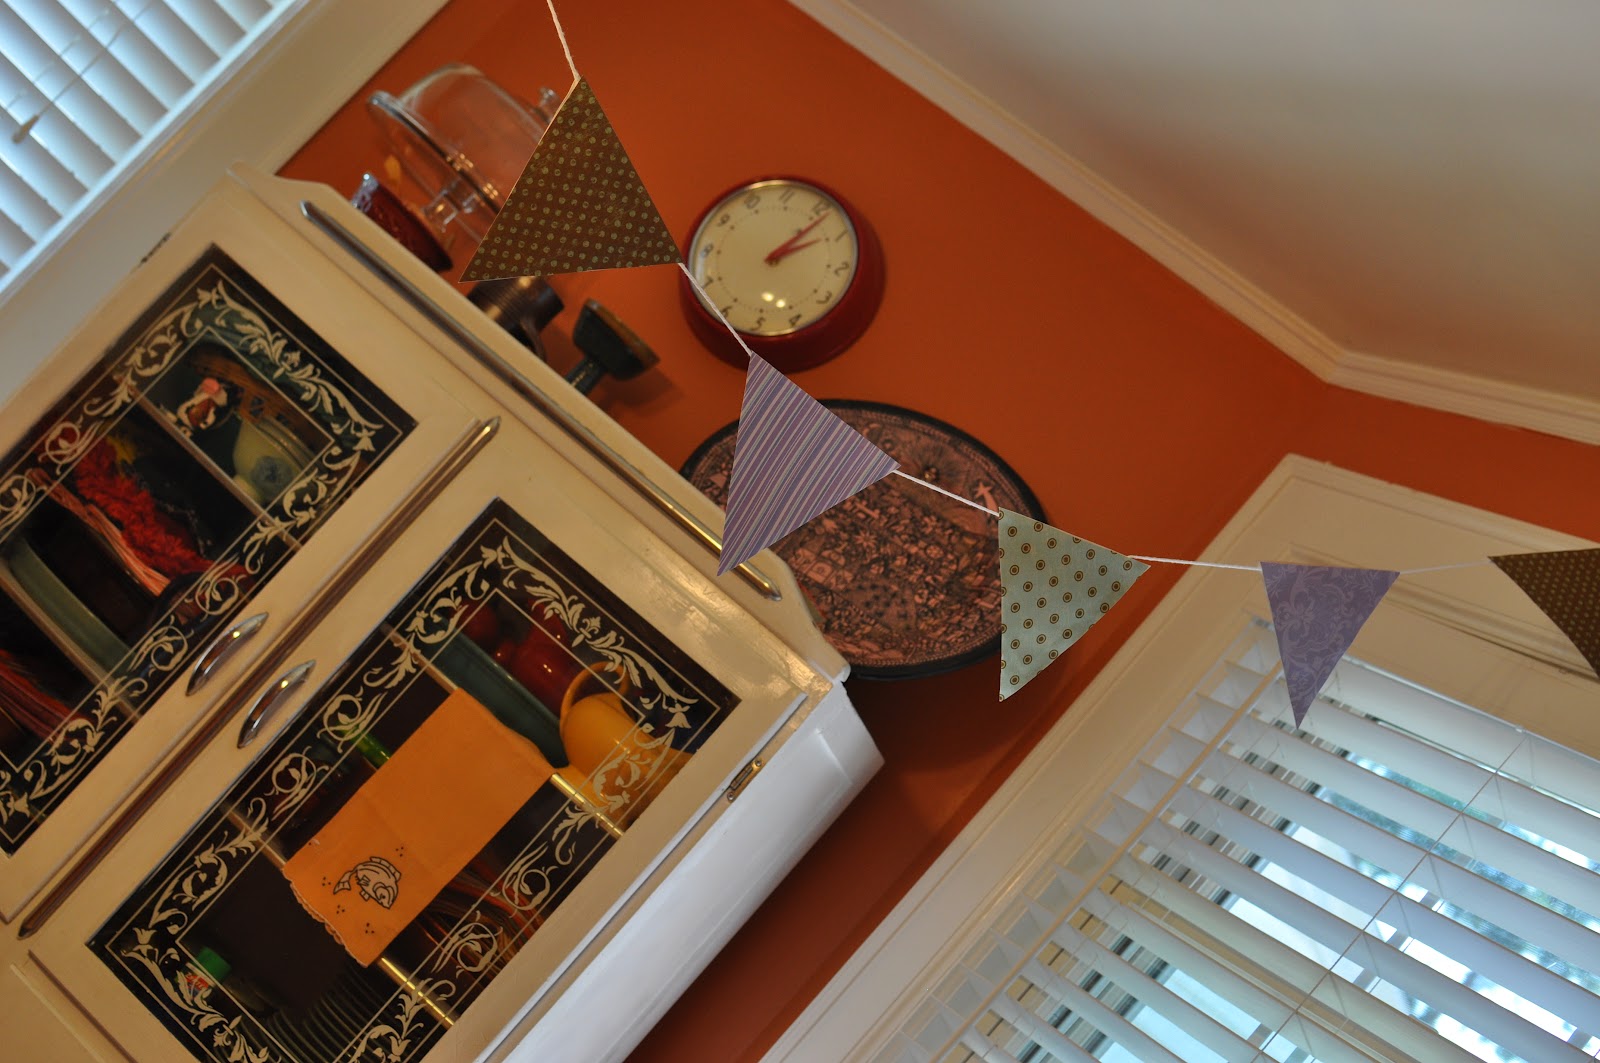
The finished banners look festive in the dining room. I stuck with a purple, green, and brown palette. The dried triangles have a few wrinkles due to the dried glue. This bothered me, so I began searching for other options for banner-like decorations.

Lo and behold, I found these! I found this on Pinterest, of course. The pin comes from Martha Stewart and was intended for weddings, but I knew it would work perfectly for my birthday girl.
Vellum Banner How-to
Supplies needed:
- vellum (translucent scrap booking paper)
- paper cutter or scissors, pencil, and ruler
- sewing machine
- thread
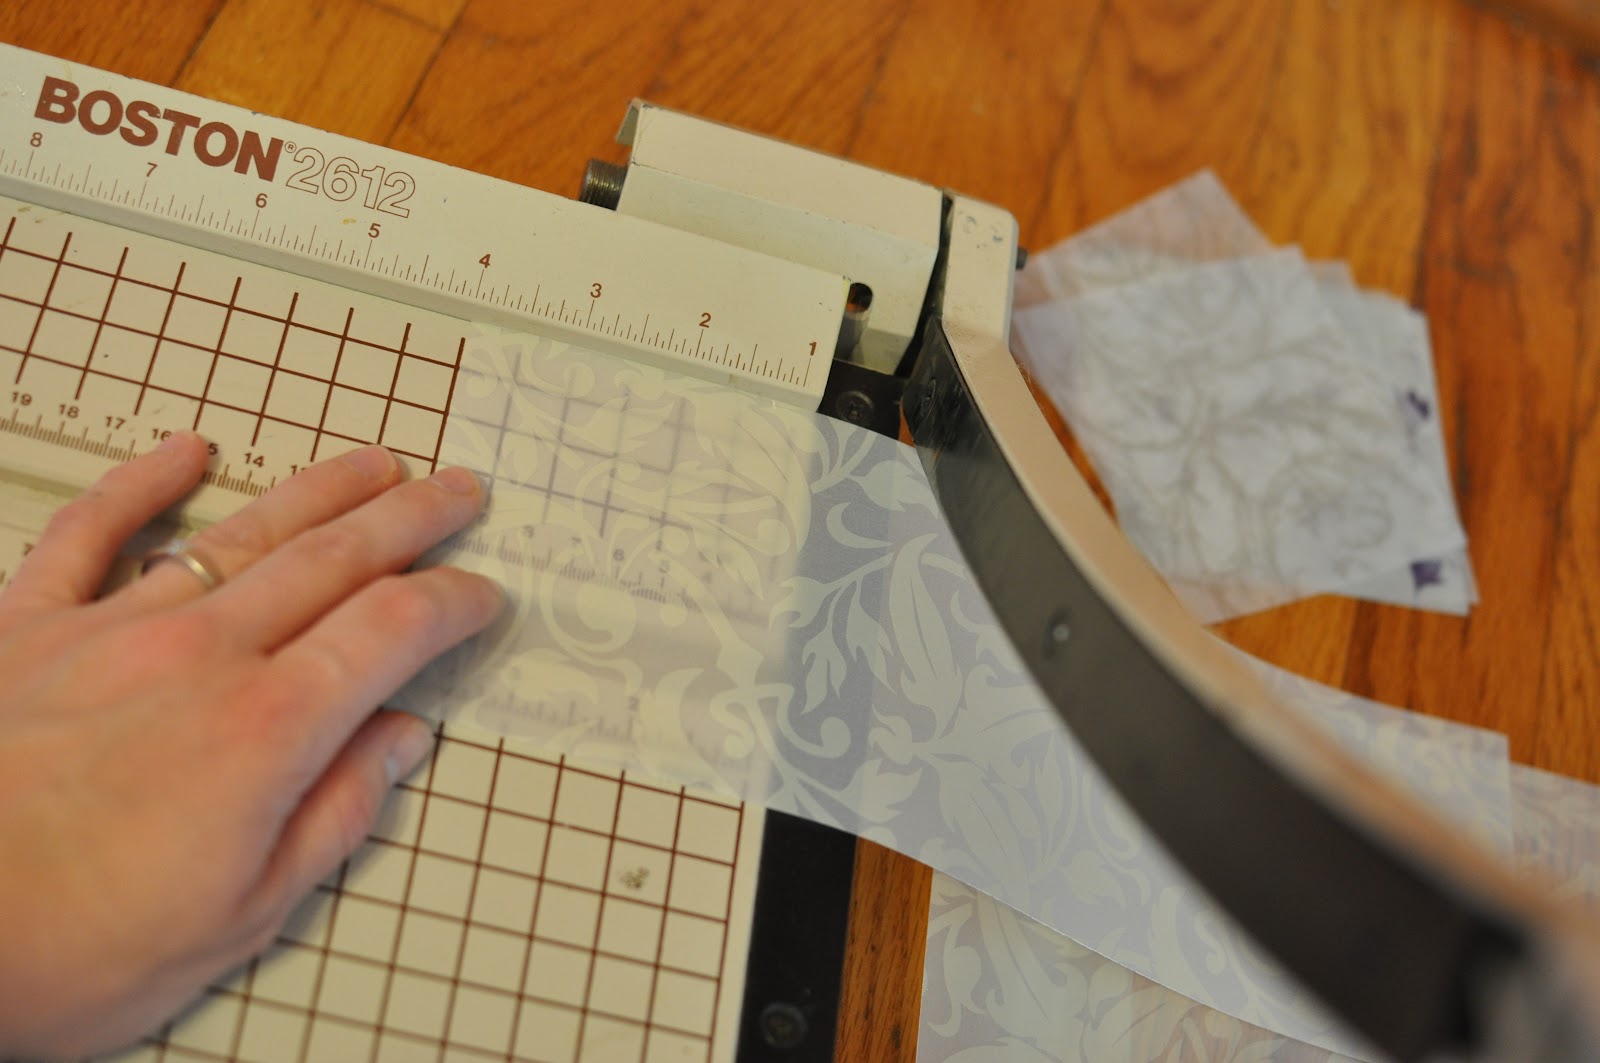
I cut my vellum into 4 x 4 inch squares using a paper cutter. A paper cutter is a must-have for the amount of paper cutting I do. I am simply too sloppy and rushed most of the time to cut things by hand.

After I cut all my squares it was time to sew. I started by pulling out extra length from the needle and bobbin. This would give me a little extra length to hang my banners.

Then I just simply started sewing. I used a straight stitch and as I finished one square, I fed in the second square. This created a little extra thread length in between each square. This will create the ability for the squares to spin and move in a breeze.

A close-up of one of the sewn square vellum pieces.

They turned out beautiful and this really only took mere minutes to complete. I wish I had done this before hand cutting and gluing the other banners. Oh well, the variety is interesting at least.

When Greta woke from her nap she was so interested in the banners hanging above her high chair. I am getting more and more excited for her birthday. The cake mold showed up today. 🙂
